首页 文章 精选 留言 我的

精选列表

搜索[个人博客],共10000篇文章
优秀的个人博客,低调大师

[雪峰磁针石博客]python GUI作业:使用tkinter的重要控件

python测试开发项目实战-目录 python工具书籍下载-持续更新 题目1:使用tkinter的重要控件 绘制如下菜单: 参考代码: #!/usr/bin/env python3 # -*- coding: utf-8 -*- # 技术支持:https://www.jianshu.com/u/69f40328d4f0 # 技术支持 https://china-testing.github.io/ # https://github.com/china-testing/python-api-tesing/blob/master/practices/tk/tk3.py # 项目实战讨论QQ群630011153 144081101 # CreateDate: 2018-11-29 import tkinter as tk root = tk.Tk() root.title('tkinter控件') #create a frame widget for placing menu my_menu_bar = tk.Frame(root, relief='raised', bd=2) my_menu_bar.pack(fill=tk.X) # Create Menu Widget 1 and Sub Menu 1 my_menu_button = tk.Menubutton( my_menu_bar, text='菜单1', ) my_menu_button.pack(side=tk.LEFT) #menu widget my_menu = tk.Menu(my_menu_button, tearoff=0) my_menu_button['menu'] = my_menu my_menu.add('command', label='子菜单1') #Add Sub Menu 1 # Create Menu2 and Submenu2 menu_button_2 = tk.Menubutton( my_menu_bar, text='菜单2', ) menu_button_2.pack(side=tk.LEFT) my_menu_2 = tk.Menu(menu_button_2, tearoff=0) menu_button_2['menu'] = my_menu_2 my_menu_2.add('command', label='子菜单2') # Add Sub Menu 2 # # # my_frame_1 and its contents # # creating a frame (my_frame_1) my_frame_1 = tk.Frame(root, bd=2, relief=tk.SUNKEN) my_frame_1.pack(side=tk.LEFT) # add label to to my_frame_1 tk.Label(my_frame_1, text='标签').pack() #add entry widget to my_frame_1 tv = tk.StringVar() #discussed later tk.Entry(my_frame_1, textvariable=tv).pack() tv.set('I am an entry widget') #add button widget to my_frame_1 tk.Button(my_frame_1, text='tk.Button widget').pack() #add check button widget to my_frame_1 tk.Checkbutton(my_frame_1, text='Checktk.Button Widget').pack() #add radio buttons to my_frame_1 tk.Radiobutton(my_frame_1, text='Radio tk.Button Un', value=1).pack() tk.Radiobutton(my_frame_1, text='Radio tk.Button Dos', value=2).pack() tk.Radiobutton(my_frame_1, text='Radio tk.Button Tres', value=3).pack() #tk.OptionMenu Widget tk.Label(my_frame_1, text='Example of tk.OptionMenu Widget:').pack() tk.OptionMenu(my_frame_1, '', "Option A", "Option B", "Option C").pack() #adding my_image image tk.Label(my_frame_1, text='Image Fun with Bitmap Class:').pack() my_image = tk.BitmapImage(file="gir.xbm") my_label = tk.Label(my_frame_1, image=my_image) my_label.image = my_image # keep a reference! my_label.pack() # # # frame2 and widgets it contains. # # #create another frame(my_frame_2) to hold a list box, Spinbox Widget,Scale Widget, : my_frame_2 = tk.Frame(root, bd=2, relief=tk.GROOVE) my_frame_2.pack(side=tk.RIGHT) #add Photimage Class Widget to my_frame_2 tk.Label( my_frame_2, text='Image displayed with \nPhotoImage class widget:').pack() dance_photo = tk.PhotoImage(file='dance.gif') dance_photo_label = tk.Label(my_frame_2, image=dance_photo) dance_photo_label.image = dance_photo dance_photo_label.pack() #add my_listbox widget to my_frame_2 tk.Label(my_frame_2, text='Below is an example of my_listbox widget:').pack() my_listbox = tk.Listbox(my_frame_2, height=4) for line in ['Listbox Choice 1', 'Choice 2', 'Choice 3', 'Choice 4']: my_listbox.insert(tk.END, line) my_listbox.pack() #spinbox widget tk.Label(my_frame_2, text='Below is an example of spinbox widget:').pack() tk.Spinbox(my_frame_2, values=(1, 2, 4, 8, 10)).pack() #scale widget tk.Scale( my_frame_2, from_=0.0, to=100.0, label='Scale widget', orient=tk.HORIZONTAL).pack() #LabelFrame label_frame = tk.LabelFrame( my_frame_2, text="LabelFrame Widget", padx=10, pady=10) label_frame.pack(padx=10, pady=10) tk.Entry(label_frame).pack() #message widget tk.Message(my_frame_2, text='I am a Message widget').pack() # # # tk.Frame 3 # # my_frame_3 = tk.Frame(root, bd=2, relief=tk.SUNKEN) #text widget and associated tk.Scrollbar widget my_text = tk.Text(my_frame_3, height=10, width=40) file_object = open('textcontent.txt', encoding='utf-8') file_content = file_object.read() file_object.close() my_text.insert(tk.END, file_content) my_text.pack(side=tk.LEFT, fill=tk.X, padx=5) #add scrollbar widget to the text widget my_scrollbar = tk.Scrollbar(my_frame_3, orient=tk.VERTICAL, command=my_text.yview) my_scrollbar.pack(side=tk.RIGHT, fill=tk.Y) my_text.configure(yscrollcommand=my_scrollbar.set) my_frame_3.pack() # # # tk.Frame 4 # # #create another frame(my_frame_4) my_frame_4 = tk.Frame(root) my_frame_4.pack() my_canvas = tk.Canvas(my_frame_4, bg='white', width=340, height=80) my_canvas.pack() my_canvas.create_oval(20, 15, 60, 60, fill='red') my_canvas.create_oval(40, 15, 60, 60, fill='grey') my_canvas.create_text( 130, 38, text='I am a tk.Canvas Widget', font=('arial', 8, 'bold')) # # # A paned window widget # # tk.Label(root, text='Below is an example of Paned window widget:').pack() tk.Label( root, text='Notice you can adjust the size of each pane by dragging it').pack() my_paned_window_1 = tk.PanedWindow() my_paned_window_1.pack(fill=tk.BOTH, expand=2) left_pane_text = tk.Text(my_paned_window_1, height=6, width=15) my_paned_window_1.add(left_pane_text) my_paned_window_2 = tk.PanedWindow(my_paned_window_1, orient=tk.VERTICAL) my_paned_window_1.add(my_paned_window_2) top_pane_text = tk.Text(my_paned_window_2, height=3, width=3) my_paned_window_2.add(top_pane_text) bottom_pane_text = tk.Text(my_paned_window_2, height=3, width=3) my_paned_window_2.add(bottom_pane_text) root.mainloop() 题目2:如何查看tkinter的tk版本? 参考答案: tkinter._test() GUI程序设计通常有哪几部分组成? tkinter的重要控件有哪些?

优秀的个人博客,低调大师

[雪峰磁针石博客]python库介绍-telnetlib:Telnet客户端

python测试开发项目实战-目录 python工具书籍下载-持续更新 python 3.7极速入门教程 - 目录 简介 telnetlib模块提供的Telnet类实现了Telnet协议(参见rfc854)。它为协议字符和telnet选项提供符号常量,符号常量来源于arpa/telnet.h,去掉了前缀TELOPT_。 telnet命令有: IAC, DONT, DO, WONT, WILL, SE (Subnegotiation End), NOP (No Operation), DM (Data Mark), BRK (Break), IP (Interrupt process), AO (Abort output), AYT (Are You There), EC (Erase Character), EL (Erase Line), GA (Go Ahead), SB (Subnegotiation Begin)。 class telnetlib.Telnet(host=None, port=0[, timeout]) 快速入门 #!/usr/bin/env python # -*- coding: utf-8 -*- # Author Rongzhong Xu 2016-08-25 wechat: pythontesting """ Name: telnet_demo.py Tesed in python3.5 """ import telnetlib HOST = "172.17.100.18" user = "test" password = "123456" def command(con, flag, str_=""): data = con.read_until(flag.encode()) print(data.decode(errors='ignore')) con.write(str_.encode() + b"\n") return data tn = telnetlib.Telnet(HOST) command(tn, "login: ", user) if password: command(tn, "Password: ", password) command(tn, "$", "ls") command(tn, "$", " exit") command(tn, "$", "") tn.close() 执行结果: $ python3 telnet_demo.py CentOS release 6.7 (Final) Kernel 2.6.32-573.18.1.el6.x86_64 on an x86_64 login: Password: Last login: Thu Aug 25 17:20:18 from 172.17.153.6 [test@public01 ~]$ ls [test@public01 ~]$ exit logout 参考资料 python测试等IT技术支持qq群: 144081101(后期会录制视频存在该群群文件) 591302926 567351477 本文最新版本地址 本文涉及的python测试开发库 谢谢点赞! 本文相关海量书籍下载 python官方文档:https://docs.python.org/3/library/telnetlib.html effbot: http://effbot.org/librarybook/telnetlib.htm rfc854: https://tools.ietf.org/html/rfc854.html 方法 Telnet.read_until(expected[, timeout]) 读取直到遇到了给定的字符串expected或超时秒数。 当找不到匹配时,返回读取内容。连接关闭或者没有数据时触发EOFError异常。 Telnet.read_all() 读取所有数据直到EOF,阻塞直到连接关闭。 Telnet.read_some() 读取至少一个字节的数据,除非EOF。 如果没有数据则阻塞。 Telnet.read_very_eager() 非阻塞地读取。连接关闭或者没有数据时触发EOFError异常。返回b''如果没有数据, Telnet.read_eager() 读取的已有数据。(快) 连接关闭或者没有数据时触发EOFError异常。返回b''如果没有数据, Telnet.read_lazy() 读取的已有数据(懒) 连接关闭或者没有数据时触发EOFError异常。返回b''如果没有数据, Telnet.read_very_lazy() 读取的已有数据(很懒) 连接关闭或者没有数据时触发EOFError异常。返回b''如果没有数据, Telnet.read_sb_data() 返回的SB/SE pair (suboption begin/end)之间的数据。此方法永远不会阻塞。 Telnet.open(host[, port[, timeout]]) 连接到主机。可选的第二个参数是默认为标准的 Telnet 端口 (23) 的端口号。可选的超时参数指定以秒计) 阻塞操作 (如连接尝试超时 (如果不指定,将使用全局默认超时设置)。 Telnet.msg(msg[, *args]) 当调试级别为> 0 打印调试消息。 Telnet.set_debuglevel(debuglevel) 设置调试级别。debuglevel越高信息越多。 Telnet.close() 关闭该连接。 Telnet.get_socket() 返回套接字供内部使用。 Telnet.fileno() 返回套接字对象内部使用的文件描述符。 Telnet.write(buffer) 写入字符串到套接字,加倍 IAC 的任何字符。连接关闭是可能触发OSError异常。 Telnet.interact() 交由用户控制。 Telnet.mt_interact() 多线程的版本的interact()。 Telnet.expect(list[, timeout]) 读取直到匹配正则表达式项列表中的一个。 list是一个正则表达式列表,包含编译(regex 对象)或未编译(字节字符串)。timeout以秒为单位, 默认值为无限期阻塞。 返回元组的三个项目: index为匹配正则表达式的位置;match 对象;此时读了的字节。 文件结尾或没有数据时触发EOFError异常,不匹配时返回(-1, None, data)。 如果正则表达式是贪婪模式或者如果多个表达式可以匹配相同的输入,结果是不确定的,可能取决于I/O定时。 Telnet.set_option_negotiation_callback(callback) 每次从输入流读取telnet选项时,调用callback(telnet socket, command (DO/DONT/WILL/WONT), option),后续步骤不会执行。

优秀的个人博客,低调大师

[雪峰磁针石博客]python绘图作业:使用pygame库画房子

python测试开发项目实战-目录 python工具书籍下载-持续更新 使用pygame库画如下房子 参考资料 本文最新版本地址 本文涉及的python测试开发库 谢谢点赞! 本文相关海量书籍下载 代码 #!/usr/bin/python3 # -*- coding: utf-8 -*- # 技术支持:https://www.jianshu.com/u/69f40328d4f0 # 技术支持 https://china-testing.github.io/ # https://github.com/china-testing/python-api-tesing/blob/master/practices/pygame_house.py # 项目实战讨论QQ群630011153 144081101 # CreateDate: 2018-12-01 import pygame pygame.init() screen = pygame.display.set_mode((640,480)) #used http://colorpicker.com/ to find RGB colors def draw_tree(x,y): #tree trunk (50 wide and 100 tall) pygame.draw.rect(screen,(117,90,0),(x,y-100,50,100)) #leaves are a circle pygame.draw.circle(screen,(27,117,0),(x+25,y-120),50) def draw_house(x,y): #pink house pygame.draw.rect(screen,(255,171,244),(x,y-180,200,180)) #brown door pygame.draw.rect(screen,(89,71,0),(x+80,y-60,40,60)) #yellow door knob pygame.draw.circle(screen,(255,204,0),(x+112,y-30),4) #triangle roof pygame.draw.polygon(screen, (125,125,125), ( (x,y-180),(x+100,y-250),(x+200,y-180) ) ) draw_window(x+20,y-90) draw_window(x+130,y-90) def draw_window(x,y): #glass pygame.draw.rect(screen,(207,229,255),(x,y-50,50,50)) #frame pygame.draw.rect(screen,(0,0,0),(x,y-50,50,50),5) pygame.draw.rect(screen,(0,0,0),(x+23,y-50,5,50)) pygame.draw.rect(screen,(0,0,0),(x,y-27,50,5)) #this function is able to draw clouds of different sizes def draw_cloud(x,y,size): #put int() around any multiplications by decimals to get rid of this warning: #DeprecationWarning: integer argument expected, got float pygame.draw.circle(screen,(255,255,255),(x,y),int(size*.5)) pygame.draw.circle(screen,(255,255,255),(int(x+size*.5),y),int(size*.6)) pygame.draw.circle(screen,(255,255,255),(x+size,int(y-size*.1)),int(size*.4)) #green ground pygame.draw.rect(screen,(0,160,3),(0,400,640,80)) #light blue sky pygame.draw.rect(screen,(135,255,255),(0,0,640,400)) draw_tree(60,400) #x and y location are the bottom left of tree trunk draw_tree(550,400) draw_house(225,400) draw_cloud(60,120,80) draw_cloud(200,50,40) draw_cloud(450,100,120) pygame.display.flip() running = True while running: for event in pygame.event.get(): if event.type == pygame.QUIT: running = False pygame.quit()

优秀的个人博客,低调大师

[雪峰磁针石博客]python GUI工具书籍下载-持续更新

python测试开发项目实战-目录 python工具书籍下载-持续更新 python 3.7极速入门教程 - 目录 Python GUI Programming Cookbook 2nd - 2017.pdf https://github.com/PacktPublishing/Python-GUI-Programming-Cookbook-Second-Edition 60星左右 WxPython_Application_Development_Cookbook - 2015.pdf https://github.com/driscollis/wxPython_recipes_book_code 20星左右 wxPython Recipes - 2017.pdf Tkinter GUI Programming By Example(conv) - 2018.pdf https://github.com/PacktPublishing/Tkinter-GUI-Programming-by-Example 不到10星 Tkinter GUI Application Development Cookbook - 2018.pdf https://github.com/PacktPublishing/Tkinter-GUI-Application-Development-Cookbook 不到10星 Tkinter GUI Application Development Blueprints 2nd - 2018.pdf https://github.com/PacktPublishing/Tkinter-GUI-Application-Development-Blueprints-Second-Edition 30星左右 参考资料 项目实战讨论QQ群630011153 144081101 本文最新版本地址 本文涉及的python测试开发库 谢谢点赞! 本文相关海量书籍下载 QT5 Python GUI Programming Cookbook - 2018.pdf https://github.com/PacktPublishing/Qt5-Python-GUI-Programming-Cookbook 20星左右 Python GUI programming with Tkinter - 2018.pdf https://github.com/PacktPublishing/Python-GUI-Programming-with-Tkinter/ 20星左右 Pyside GUI Application Development(2nd) - 2016.pdf

优秀的个人博客,低调大师

[雪峰磁针石博客]2018 最佳python编辑器和IDE

IDE没有统一的标准,自己习惯就是最好的。本文列出一些较常用的IDE,供大家参考。 一般而言,WingIDE、PyCharm、Spyder、Vim是比较常用的IDE。 Spyder Spyder是Python(x,y)的作者为它开发的一个简单的集成开发环境。和其他的Python开发环境相比,它最大的优点就是模仿MATLAB的"工作空间"的功能,可以很方便地观察和修改数组的值。 最出名的python数据科学发行版本Anaconda自带了Spyder。 https://github.com/spyder-ide/spyder . WingIDE WingIDE是Python编写的python专用IDE。 WingIDE提供诸如强大的代码完成,出色的调试器等功能,并且它还可以在Python中编写脚本和扩展。 为什么选择最好的Python IDE? 内置强大的调试器 智能编辑器 您可以轻松快速地查找和修复错误 轻松导航代码 您可以使用自己喜欢的键绑定进行编辑并自定义工作区 配置简单 运行速度比Pycharm等java类的编辑快很多,占用资源少。 有社区版免费使用,专业版的破解 https://wingware.com/ Vim IDE Vim是一个高度可配置的文本编辑器,用于创建和更改任何类型的文本非常有效。 它是Vi的超集 - 是一个非常可靠和强大的文本编辑器,可用于各种平台。 Vim是一个命令行编辑器,因此可用于远程开发。 替换100MB +文件中的所有字符串出现是快速而简。 vim是基于键盘的,因此更容易理解。 Vimscript提供了丰富的脚本功能 据说高手大多用vim。 https://www.vim.org/download.php Eric Python IDE Python编写,基于跨平台的Qt GUI工具包,集成了高度灵活的Scintilla编辑器控件。 大括号匹配,错误突出显示和可配置语法突出显示。 拼写检查库的集成 内置Python调试器,包括支持调试多线程和多处理应用程序。 分析和代码覆盖支持 https://eric-ide.python-projects.org/eric-download.html 免费 参考资料 讨论 钉钉群21745728 qq群144081101 567351477 本文最新版本地址 本文涉及的python测试开发库 谢谢点赞! 本文相关海量书籍下载 python工具书籍下载-持续更新 PyCharm Pycharm IDE可实现智能代码完成,动态错误检查和快速修复,简单的项目导航等等。 它提供了高效Python开发所需的所有工具。 为何选择最佳Python Ide 数以千计的插件和集成终端以进行版本控制。 在您编码时向您显示PEP-8建议 它支持大量的Python库。 与virtualenv,Docker和Vagrant轻松集成。 它还与Git集成。 惊人的重构支持。 https://www.jetbrains.com/pycharm/download/ 运行比较消耗资源,配置复杂。初学者时常出现命令行能执行,但是pycharm不能使用的情况。对于老手,是个相当不错的IDE. 有社区版免费使用 PyDev PyDev是Eclipse的插件,它是开源IDE,可用于Python,Jython和IronPython开发。 此外,它还具有许多功能,如Django集成,自动导入代码完成,类型提示,代码分析,转到定义,重构,调试器,远程调试器。 悬停代码弹出窗口功能。 集成pyunit,pep8,pylint等有助于提高代码质量。 一个非常值得尊敬的python IDE解决方案,特别是如果你已经习惯了java中的eclipse。 http://www.pydev.org/index.html Visual Studio Code Microsoft的代码编辑器,易用性好。有语法和错误突出显示以及自动构建等功能。 visual studio代码支持使用IntelliSense进行语法突出显示和自动完成。 提供基于变量类型,函数定义和导入模块的智能完成。 您可以轻松安装扩展以添加新语言,主题,调试程序以及连接到其他服务。 扩展程序在不同的进程中运行,确保它们不会减慢编辑器的速度。 https://code.visualstudio.com/docs/languages/python 在Windows平台表现不错,其他平台中文字体等支持不太好。 Netbeans https://netbeans.org/ 免费 开源 IDLE windows python和anaconda等自带安装,开箱即用,功能一般。 https://docs.python.org/3/library/idle.html Atom https://atom.io/ 最流行的文本编辑器。 Emacs https://www.emacswiki.org/ Sublime Text Sublime Text是一个用于代码,变迁和散文的复杂文本编辑器。 有光滑的用户界面,非凡的功能和惊人的性能。 https://www.sublimetext.com/3 Geany https://www.geany.org/ 免费 开源,跨平台https://github.com/geany/ notepad++ https://notepad-plus-plus.org/ 支持Windows Codenvy https://codenvy.com/ 收费软件 CodeMix CodeMix将VS Code的强大功能带入Eclipse。 使用CodeMix,您可以轻松地在Eclipse中开发Python应用程序。 使用CodeMix,您可以添加Microsoft的流行VS Code Python扩展,以便在Eclipse中编写Python编码的一流支持。 CodeMix在调试和构建我们的Reactjs应用程序的代码完成和可视化帮助方面成为无与伦比的盟友。 CodeMix将轻松配置工作环境,从而提高工作效率。 https://www.genuitec.com/products/codemix/?utm_source=dunebook&utm_medium=organic&utm_campaign=codemix 收费软件

优秀的个人博客,低调大师

[雪峰磁针石博客]python 3.7极速入门教程4函数

本文教程目录 4函数 菲波那契序列: >>> # Fibonacci series: ... # the sum of two elements defines the next ... a, b = 0, 1 >>> while b < 10: ... print(b) ... a, b = b, a+b ... 1 1 2 3 5 8 本例的新特性。 第一行和最后一行有多赋值:第一行变量a和b同时获得了新的值0和1。最后一行右边首先完成计算,右边的表达式从左到右计算。 条件(b < 10)为true时while循环执行。这里Python类似C ,任何非零整数都为true;0为 false。判断条件也可以是字符串或列表等序列;所有长度不为零的为true ,空序列为false。示例中的测试是一个简单的比较。标准比较操作符与C相同: <(小于), >(大于), ==(等于),<=(小于等于),>=(大于等于)和!=(不等于)。 循环体需要缩进:缩进是Python组织语句的方法。在命令行下,缩进行需要插入空格或者tab。建议使用文本编辑 或者IDE,一般都提供自动缩进。命令行输入复合语句时,必须用空行来标识结束(因为解释器没办法猜识别最后一行),注意同一级的语句需要缩进同样数量的空白。建议使用空格而不是tab缩进。 print语句输出表达式的值。字符串打印时没有引号,每两个项目之间有空格。 >>> i = 256*256 >>> print('The value of i is', i) The value of i is 65536 逗号结尾就可以避免输出换行: >>> a, b = 0, 1 >>> while b < 1000: ... print(b, end=',') ... a, b = b, a+b ... 1,1,2,3,5,8,13,21,34,55,89,144,233,377,610,987, 定义函数 菲波那契数列的函数: >>> def fib(n): # write Fibonacci series up to n ... """Print a Fibonacci series up to n.""" ... a, b = 0, 1 ... while a < n: ... print(a, end=' ') ... a, b = b, a+b ... print() ... >>> # Now call the function we just defined: ... fib(2000) 0 1 1 2 3 5 8 13 21 34 55 89 144 233 377 610 987 1597 关键字def引入函数定义,其后有函数名和包含在圆括号中的形式参数。函数体语句从下一行开始,必须缩进的。 函数体的第一行语句可以是可选的字符串文本,即文档字符串。有些工具通过docstrings 自动生成文档,或者让用户通过代码交互浏览;添加文档字符串是个很好的习惯。 函数执行时生成符号表用来存储局部变量。 确切地说,所有函数的变量赋值都存储在局部符号表。 变量查找的顺序,先局部,然后逐级向上,再到全局变量,最后内置名。全局变量可在局部直接引用,但不能直接赋值(除非用global声明),尽管他们可以被引用, 因为python在局部赋值会重新定义一个本地变量。 函数的实际参数在调用时引入局部符号表,也就是说是传值调用(值总是对象引用, 而不是该对象的值)。 函数定义会在当前符号表内引入函数名。 函数名的值为用户自定义函数的类型,这个值可以赋值给其他变量当做函数别名使用。 >>> fib <function fib at 10042ed0> >>> f = fib >>> f(100) 0 1 1 2 3 5 8 13 21 34 55 89 没有return语句的函数也会返回None。 解释器一般不会显示None,除非用print打印。 >>> fib <function fib at 10042ed0> >>> f = fib >>> f(100) 0 1 1 2 3 5 8 13 21 34 55 89 从函数中返回 >>> def fib2(n): # return Fibonacci series up to n ... """Return a list containing the Fibonacci series up to n.""" ... result = [] ... a, b = 0, 1 ... while a < n: ... result.append(a) # see below ... a, b = b, a+b ... return result ... >>> f100 = fib2(100) # call it >>> f100 # write the result [0, 1, 1, 2, 3, 5, 8, 13, 21, 34, 55, 89] return语句从函数中返回值,不带表达式的return返回None。过程结束后也会返回 None 。 语句result.append(b)称为调用了列表的方法。方法是属于对象的函数,如obj.methodename,obj 是个对象(可能是一个表达式),methodname是对象的方法名。不同类型有不同的方法。不同类型可能有同名的方法。append()向链表尾部附加元素,等同于 result = result + [b] ,不过更有效。 调用turtle库的函数 代码: # -*- coding: utf-8 -*- # Author: xurongzhong#126.com wechat:pythontesting qq:37391319 # 技术支持 钉钉群:21745728(可以加钉钉pythontesting邀请加入) # qq群:144081101 591302926 567351477 # CreateDate: 2018-6-12 # bowtie.py # Draw a bowtie from turtle import * pensize(7) penup() goto(-200, -100) pendown() fillcolor("red") begin_fill() goto(-200, 100) goto(200, -100) goto(200, 100) goto(-200, -100) end_fill() exitonclick() 方法 功能 fgoto(x, y) 移到位置(x,y)。 pensize(width) 将笔绘制的线的粗细设置为width或返回当前值。 pencolor(color) 将笔颜色设置为color或返回当前值。 fillcolor(color) 将填充颜色设置为color或返回当前值。 color(color) 将笔和填充颜色设置为color或返回当前值。 begin_fill() 开始填充 end_fill() 结束填充 turtlesize(factor) 以factor拉伸。 showturtle() 开始显示。 hideturtle() 停止显示 自己写画圆的函数 代码: # -*- coding: utf-8 -*- # Author: xurongzhong#126.com wechat:pythontesting qq:37391319 # 技术支持 钉钉群:21745728(可以加钉钉pythontesting邀请加入) # qq群:144081101 591302926 567351477 # CreateDate: 2018-6-12 # bowtie.py # Draw a bowtie from turtle import * def circle_at(x, y, r): """Draw circle with center (x, y) radius r.""" penup() goto(x, y - r) pendown() setheading(0) circle(r) circle_at(-200, 0, 20) begin_fill() circle_at(0, 0, 100) end_fill() circle_at(200, 0, 20) hideturtle() exitonclick() 深入Python函数定义 python的函数参数有三种方式。 默认参数 最常用的方式是给参数指定默认值,调用时就可以少传参数: def ask_ok(prompt, retries=4, reminder='Please try again!'): while True: ok = input(prompt) if ok in ('y', 'ye', 'yes'): return True if ok in ('n', 'no', 'nop', 'nope'): return False retries = retries - 1 if retries < 0: raise ValueError('invalid user response') print(reminder) 调用方式: 只给出必选参数: ask_ok('Do you really want to quit?') 给出一个可选的参数: ask_ok('OK to overwrite the file?', 2) 给出所有的参数: ask_ok('OK to overwrite the file?', 2, 'Come on, only yes or no!') in关键字测定序列是否包含指定值。 默认值在函数定义时传入,如下所示: i = 5 def f(arg=i): print(arg) i = 6 f() 上例显示5。 注意: 默认值只赋值一次。当默认值是可变对象(比如列表、字典或者大多数类的实例)时结果会不同。实例: def f(a, L=[]): L.append(a) return L print f(1) print f(2) print f(3) # 执行结果: [1] [1, 2] [1, 2, 3] 规避方式: def f(a, L=None): if L is None: L = [] L.append(a) return L 关键字参数 关键字参数 的形式: keyword = value。 def parrot(voltage, state='a stiff', action='voom', type='Norwegian Blue'): print("-- This parrot wouldn't", action, end=' ') print("if you put", voltage, "volts through it.") print("-- Lovely plumage, the", type) print("-- It's", state, "!") 有效调用: parrot(1000) # 1 positional argument parrot(voltage=1000) # 1 keyword argument parrot(voltage=1000000, action='VOOOOOM') # 2 keyword arguments parrot(action='VOOOOOM', voltage=1000000) # 2 keyword arguments parrot('a million', 'bereft of life', 'jump') # 3 positional arguments parrot('a thousand', state='pushing up the daisies') # 1 positional, 1 keyword 无效调用 parrot() # 没有必选参数 parrot(voltage=5.0, 'dead') # 关键参数后面有非关键字参数 parrot(110, voltage=220) # 同一参数重复指定值 parrot(actor='John Cleese') # 不正确的关键字参数名 关键字参数在位置参数之后,多个关键字参数的顺序先后无关,一个参数只能指定一次值,报错实例: >>> def function(a): ... pass ... >>> function(0, a=0) Traceback (most recent call last): File "<stdin>", line 1, in ? TypeError: function() got multiple values for keyword argument 'a' 最后一个如果前有两个星号(比如name)接收一个字典,存储形式参数没有定义的参数名和值。类似的单个星号比如*name表示接受一个元组。 def cheeseshop(kind, *arguments, **keywords): print("-- Do you have any", kind, "?") print("-- I'm sorry, we're all out of", kind) for arg in arguments: print(arg) print("-" * 40) for kw in keywords: print(kw, ":", keywords[kw]) 调用 cheeseshop("Limburger", "It's very runny, sir.", "It's really very, VERY runny, sir.", shopkeeper='Michael Palin', client="John Cleese", sketch="Cheese Shop Sketch") 执行: -- Do you have any Limburger ? -- I'm sorry, we're all out of Limburger It's very runny, sir. It's really very, VERY runny, sir. ---------------------------------------- client : John Cleese shopkeeper : Michael Palin sketch : Cheese Shop Sketch 注意参数顺序是随机的,可以使用sort排序。 任意参数列表 def write_multiple_items(file, separator, *args): file.write(separator.join(args)) 参数列表解包 把列表或元组拆分成多个并列的参数。 >>> range(3, 6) # normal call with separate arguments [3, 4, 5] >>> args = [3, 6] >>> range(*args) # call with arguments unpacked from a list [3, 4, 5] 同样的字典可以用两个星号解包: >>> def parrot(voltage, state='a stiff', action='voom'): ... print("-- This parrot wouldn't", action, end=' ') ... print("if you put", voltage, "volts through it.", end=' ') ... print("E's", state, "!") ... >>> d = {"voltage": "four million", "state": "bleedin' demised", "action": "VOOM"} >>> parrot(**d) -- This parrot wouldn't VOOM if you put four million volts through it. E's bleedin' demised ! Lambda表达式 lambda关键字可创建短小的匿名函数,函数体只有一行,创建时就可使用。比如求和:lambda a, b: a+b。通常不建议使用,不过在pandas等数据分析库广泛使用。 >>> def make_incrementor(n): ... return lambda x: x + n ... >>> f = make_incrementor(42) >>> f(0) 42 >>> f(1) 43 除了返回表达式,lambda还可以用作函数参数。 >>> pairs = [(1, 'one'), (2, 'two'), (3, 'three'), (4, 'four')] >>> pairs.sort(key=lambda pair: pair[1]) >>> pairs [(4, 'four'), (1, 'one'), (3, 'three'), (2, 'two')](1) 文档字符串 文档字符串的内容和格式建议如下。 第一简短介绍对象的目的。不能描述对象名和类型等其他地方能找到的信息,首字母要大写。 如果文档字符串有多行,第二行为空行以分隔概述和其他描述。描述介绍调用约定、边界效应等。 Python解释器不会从多行文档字符串中去除缩进,要用工具来处理。约定如下:第一行后的第一个非空行决定了整个文档的缩进。实例: >>> def my_function(): ... """Do nothing, but document it. ... ... No, really, it doesn't do anything. ... """ ... pass ... >>> print(my_function.__doc__) Do nothing, but document it. No, really, it doesn't do anything. 绘制人脸 代码: # -*- coding: utf-8 -*- # Author: xurongzhong#126.com wechat:pythontesting qq:37391319 # 技术支持 钉钉群:21745728(可以加钉钉pythontesting邀请加入) # qq群:144081101 591302926 567351477 # CreateDate: 2018-6-12 from turtle import * def circle_at(x, y, r): """Draw circle with center (x, y) radius r.""" penup() goto(x, y - r) pendown() setheading(0) circle(r) def eye(x, y, radius): """Draw an eye centered at (x, y) of given radius.""" circle_at(x, y, radius) def face(x, y, width): """Draw face centered at (x, y) of given width.""" circle_at(x, y, width/2) eye(x - width/6, y + width/5, width/12) eye(x + width/6, y + width/5, width/12) def main(): face(0, 0, 100) face(-140, 160, 200) exitonclick() main() 递归 factorial.py #!/usr/bin/env python3 # -*- coding: utf-8 -*- # Author: xurongzhong#126.com wechat:pythontesting qq:37391319 # qq群:144081101 591302926 567351477 # CreateDate: 2018-6-25 # factorial.py def factorial(n): """Return n! = 1*2*3*...*n.""" if n <= 1: return 1 return n * factorial(n - 1) def main(): for n in range(20): print(n, factorial(n)) print(factorial(2000)) main() 执行结果 $ python3 factorial.py 0 1 1 1 2 2 3 6 4 24 5 120 6 720 7 5040 8 40320 9 362880 10 3628800 11 39916800 12 479001600 13 6227020800 14 87178291200 15 1307674368000 16 20922789888000 17 355687428096000 18 6402373705728000 19 121645100408832000 Traceback (most recent call last): File "factorial.py", line 19, in <module> main() File "factorial.py", line 17, in main print(factorial(2000)) File "factorial.py", line 12, in factorial return n * factorial(n - 1) File "factorial.py", line 12, in factorial return n * factorial(n - 1) File "factorial.py", line 12, in factorial return n * factorial(n - 1) [Previous line repeated 993 more times] File "factorial.py", line 10, in factorial if n <= 1: 参考资料 本文最新版本地址 本文涉及的python测试开发库 谢谢点赞! 本文相关海量书籍下载 本文源码地址 习题 1,画出如下图形:

优秀的个人博客,低调大师

[雪峰磁针石博客]python 3.7极速入门教程5循环

本文教程目录 5循环 语法基础 for语句 Python的for语句针对序列(列表或字符串等)中的子项进行循环,按它们在序列中的顺序来进行迭代。 >>> # Measure some strings: ... words = ['cat', 'window', 'defenestrate'] >>> for w in words: ... print(w, len(w)) ... cat 3 window 6 defenestrate 12 在迭代过程中修改迭代序列不安全,可能导致部分元素重复两次,建议先拷贝: >>> for w in words[:]: # Loop over a slice copy of the entire list. ... if len(w) > 6: ... words.insert(0, w) ... >>> words ['defenestrate', 'cat', 'window', 'defenestrate'] range()函数 内置函数 range()生成等差数值序列: >>> range(10) [0, 1, 2, 3, 4, 5, 6, 7, 8, 9] range(10) 生成了一个包含10个值的链表,但是不包含最右边的值。默认从0开始,也可以让range 从其他值开始,或者指定不同的增量值(甚至是负数,有时也称"步长"): >>> range(5, 10) [5, 6, 7, 8, 9] >>> range(0, 10, 3) [0, 3, 6, 9] >>> range(-10, -100, -30) [-10, -40, -70] >>> range(-10, -100, 30) [] 如果迭代时需要索引和值可结合使用range()和len(): >>> a = ['Mary', 'had', 'a', 'little', 'lamb'] >>> for i in range(len(a)): ... print(i, a[i]) ... 0 Mary 1 had 2 a 3 little 4 lamb 不过使用enumerate()更方便,参见后面的介绍。 break和continue语句及循环中的else子句 break语句和C中的类似,用于终止当前的for或while循环。 循环可能有else 子句;它在循环迭代完整个列表(对于 for)后或执行条件为false(对于 while)时执行,但循环break时不会执行。这点和try...else而不是if...else相近。请看查找素数的程序: >>> for n in range(2, 10): ... for x in range(2, n): ... if n % x == 0: ... print(n, 'equals', x, '*', n//x) ... break ... else: ... # loop fell through without finding a factor ... print(n, 'is a prime number') ... 2 is a prime number 3 is a prime number 4 equals 2 * 2 5 is a prime number 6 equals 2 * 3 7 is a prime number 8 equals 2 * 4 9 equals 3 * 3 continue语句也是从C而来,它表示退出当次循环,继续执行下次迭代。通常可以用if...else替代,请看查找偶数的实例: >>> for n in range(2, 10): ... for x in range(2, n): ... if n % x == 0: ... print(n, 'equals', x, '*', n//x) ... break ... else: ... # loop fell through without finding a factor ... print(n, 'is a prime number') ... 2 is a prime number 3 is a prime number 4 equals 2 * 2 5 is a prime number 6 equals 2 * 3 7 is a prime number 8 equals 2 * 4 9 equals 3 * 3 pass pass语句什么也不做。它语法上需要,但是实际什么也不做场合,也常用语以后预留以后扩展。例如: >>> while True: ... pass # Busy-wait for keyboard interrupt (Ctrl+C) ... >>> class MyEmptyClass: ... pass ... >>> def initlog(*args): ... pass # Remember to implement this! ... 循环技巧 在字典中循环时,关键字和对应的值可以使用 items() 方法同时获取: >>> knights = {'gallahad': 'the pure', 'robin': 'the brave'} >>> for k, v in knights.items(): ... print(k, v) ... gallahad the pure robin the brave 在序列中循环时 enumerate() 函数同时得到索引位置和对应值: >>> for i, v in enumerate(['tic', 'tac', 'toe']): ... print(i, v) ... 0 tic 1 tac 2 toe 同时循环两个或更多的序列,可以使用 zip() 打包: >>> questions = ['name', 'quest', 'favorite color'] >>> answers = ['lancelot', 'the holy grail', 'blue'] >>> for q, a in zip(questions, answers): ... print('What is your {0}? It is {1}.'.format(q, a)) ... What is your name? It is lancelot. What is your quest? It is the holy grail. What is your favorite color? It is blue. 需要逆向循环序列的话,调用 reversed() 函数即可: >>> for i in reversed(xrange(1, 10, 2)): ... print(i) ... 9 7 5 3 1 使用 sorted() 函数可排序序列,它不改动原序列,而是生成新的已排序的序列: >>> basket = ['apple', 'orange', 'apple', 'pear', 'orange', 'banana'] >>> for f in sorted(set(basket)): ... print f ... apple banana orange pear 若要在循环时修改迭代的序列,建议先复制。 >>> import math >>> raw_data = [56.2, float('NaN'), 51.7, 55.3, 52.5, float('NaN'), 47.8] >>> filtered_data = [] >>> for value in raw_data: ... if not math.isnan(value): ... filtered_data.append(value) ... >>> filtered_data [56.2, 51.7, 55.3, 52.5, 47.8] 循环 代码: # -*- coding: utf-8 -*- # Author: xurongzhong#126.com wechat:pythontesting qq:37391319 # 技术支持 钉钉群:21745728(可以加钉钉pythontesting邀请加入) # qq群:144081101 591302926 567351477 # CreateDate: 2018-6-12 # bowtie.py # Draw a bowtie from turtle import * def polygon(n, length): """Draw n-sided polygon with given side length.""" for _ in range(n): forward(length) left(360/n) def main(): """Draw polygons with 3-9 sides.""" for n in range(3, 10): polygon(n, 80) exitonclick() main() 参考资料 讨论qq群144081101 591302926 567351477 钉钉免费群21745728 本文最新版本地址 本文涉及的python测试开发库 谢谢点赞! 本文相关海量书籍下载 本文源码地址 条件循环while 代码: # -*- coding: utf-8 -*- # Author: xurongzhong#126.com wechat:pythontesting qq:37391319 # 技术支持 钉钉群:21745728(可以加钉钉pythontesting邀请加入) # qq群:144081101 591302926 567351477 # CreateDate: 2018-6-12 # spiral.py # Draw spiral shapes from turtle import * def spiral(firststep, angle, gap): """Move turtle on a spiral path.""" step = firststep while step > 0: forward(step) left(angle) step -= gap def main(): spiral(100, 71, 2) exitonclick() main()

优秀的个人博客,低调大师

[雪峰磁针石博客]python机器学习、web开发等书籍汇总

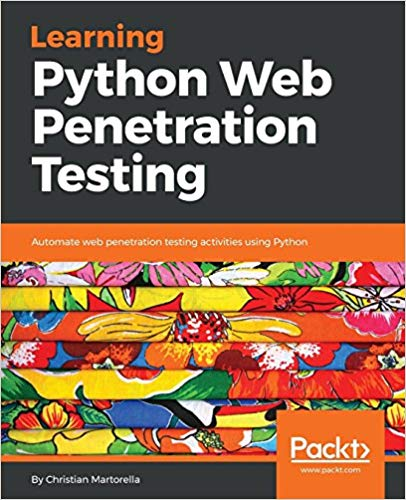
Learning Python Web Penetration - Christian Martorella - 2018.pdf 下载地址 Leverage the simplicity of Python and available libraries to build web security testing tools for your application Key Features Understand the web application penetration testing methodology and toolkit using Python Write a web crawler/spider with the Scrapy library Detect and exploit SQL injection vulnerabilities by creating a script all by yourself Book Description Web penetration testing is the use of tools and code to attack a website or web app in order to assess its vulnerability to external threats. While there are an increasing number of sophisticated, ready-made tools to scan systems for vulnerabilities, the use of Python allows you to write system-specific scripts, or alter and extend existing testing tools to find, exploit, and record as many security weaknesses as possible. Learning Python Web Penetration Testing will walk you through the web application penetration testing methodology, showing you how to write your own tools with Python for each activity throughout the process. The book begins by emphasizing the importance of knowing how to write your own tools with Python for web application penetration testing. You will then learn to interact with a web application using Python, understand the anatomy of an HTTP request, URL, headers and message body, and later create a script to perform a request, and interpret the response and its headers. As you make your way through the book, you will write a web crawler using Python and the Scrappy library. The book will also help you to develop a tool to perform brute force attacks in different parts of the web application. You will then discover more on detecting and exploiting SQL injection vulnerabilities. By the end of this book, you will have successfully created an HTTP proxy based on the mitmproxy tool. What you will learn Interact with a web application using the Python and Requests libraries Create a basic web application crawler and make it recursive Develop a brute force tool to discover and enumerate resources such as files and directories Explore different authentication methods commonly used in web applications Enumerate table names from a database using SQL injection Understand the web application penetration testing methodology and toolkit Who this book is for Learning Python Web Penetration Testing is for web developers who want to step into the world of web application security testing. Basic knowledge of Python is necessary. Table of Contents Introduction to Web Application Penetration Testing Interacting with Web Applications Web Crawling with Scrapy – Mapping the Application Discovering resources Password Testing Detecting and Exploiting SQL Injection Vulnerabilities Intercepting HTTP Requests Python For Offensive PenTest(conv) - 2018.pdf 下载地址 Key Features Comprehensive information on building a web application penetration testing framework using Python Master web application penetration testing using the multi-paradigm programming language Python Detect vulnerabilities in a system or application by writing your own Python scripts Book Description Python is an easy-to-learn and cross-platform programming language that has unlimited third-party libraries. Plenty of open source hacking tools are written in Python, which can be easily integrated within your script. This book is packed with step-by-step instructions and working examples to make you a skilled penetration tester. It is divided into clear bite-sized chunks, so you can learn at your own pace and focus on the areas of most interest to you. This book will teach you how to code a reverse shell and build an anonymous shell. You will also learn how to hack passwords and perform a privilege escalation on Windows with practical examples. You will set up your own virtual hacking environment in VirtualBox, which will help you run multiple operating systems for your testing environment. By the end of this book, you will have learned how to code your own scripts and mastered ethical hacking from scratch. What you will learn Code your own reverse shell (TCP and HTTP) Create your own anonymous shell by interacting with Twitter, Google Forms, and SourceForge Replicate Metasploit features and build an advanced shell Hack passwords using multiple techniques (API hooking, keyloggers, and clipboard hijacking) Exfiltrate data from your target Add encryption (AES, RSA, and XOR) to your shell to learn how cryptography is being abused by malware Discover privilege escalation on Windows with practical examples Countermeasures against most attacks Who This Book Is For This book is for ethical hackers; penetration testers; students preparing for OSCP, OSCE, GPEN, GXPN, and CEH; information security professionals; cybersecurity consultants; system and network security administrators; and programmers who are keen on learning all about penetration testing. Table of Contents Warming up - Your First Anti-Virus Free Persistence Shell Advanced Scriptable Shell Passwords Hacking Catch Me If You Can! Miscellaneous Fun in Windows Abuse of cryptography by malware Cracking Codes with Python - 2018.epub 下载地址 Introduction Chapter 1 - Making Paper Cryptography Tools Chapter 2 -Programming in the Interactive Shell Chapter 3 - Strings and Writing Programs Chapter 4 - The Reverse Cipher Chapter 5 - The Caesar Cipher Chapter 6 - Hacking the Caesar Cipher with Brute-Force Chapter 7 - Encrypting with the Transposition Cipher Chapter 8 - Decrypting with the Transposition Cipher Chapter 9 - Programming a Program to Test Your Program Chapter 10 - Encrypting and Decrypting Files Chapter 11 - Detecting English Programmatically Chapter 12 - Hacking the Transposition Cipher Chapter 13 - A Modular Arithmetic Module for the Affine Cipher Chapter 14 - Programming the Affine Cipher Chapter 15 - Hacking the Affine Cipher Chapter 16 - Programming the Simple Substitution Cipher Chapter 17 - Hacking the Simple Substitution Cipher Chapter 18 - Programming the Vigenere Cipher Chapter 19 - Frequency Analysis Chapter 20 - Hacking the Vigenere Cipher Chapter 21 - The One-Time Pad Cipher Chapter 22 - Finding and Generating Prime Numbers Chapter 23 - Generating Keys for the Public Key Cipher Chapter 24 - Programming the Public Key Cipher Pandas for Everyone Python Data Analysis -2018.pdf 下载地址 Copyright 2018 Dimensions: 7" x 9-1/8" Pages: 416 Edition: 1st Book ISBN-10: 0-13-454693-8 ISBN-13: 978-0-13-454693-3 The Hands-On, Example-Rich Introduction to Pandas Data Analysis in Python Today, analysts must manage data characterized by extraordinary variety, velocity, and volume. Using the open source Pandas library, you can use Python to rapidly automate and perform virtually any data analysis task, no matter how large or complex. Pandas can help you ensure the veracity of your data, visualize it for effective decision-making, and reliably reproduce analyses across multiple datasets. Pandas for Everyone brings together practical knowledge and insight for solving real problems with Pandas, even if you’re new to Python data analysis. Daniel Y. Chen introduces key concepts through simple but practical examples, incrementally building on them to solve more difficult, real-world problems. Chen gives you a jumpstart on using Pandas with a realistic dataset and covers combining datasets, handling missing data, and structuring datasets for easier analysis and visualization. He demonstrates powerful data cleaning techniques, from basic string manipulation to applying functions simultaneously across dataframes. Once your data is ready, Chen guides you through fitting models for prediction, clustering, inference, and exploration. He provides tips on performance and scalability, and introduces you to the wider Python data analysis ecosystem. Work with DataFrames and Series, and import or export data Create plots with matplotlib, seaborn, and pandas Combine datasets and handle missing data Reshape, tidy, and clean datasets so they’re easier to work with Convert data types and manipulate text strings Apply functions to scale data manipulations Aggregate, transform, and filter large datasets with groupby Leverage Pandas’ advanced date and time capabilities Fit linear models using statsmodels and scikit-learn libraries Use generalized linear modeling to fit models with different response variables Compare multiple models to select the “best” Regularize to overcome overfitting and improve performance Use clustering in unsupervised machine learning Building Machine Learning Systems with Python Third Edition - 2018.pdf 下载地址 Get more from your data by creating practical machine learning systems with Python Key Features Develop your own Python-based machine learning system Discover how Python offers multiple algorithms for modern machine learning systems Explore key Python machine learning libraries to implement in your projects Book Description Machine learning allows systems to learn things without being explicitly programmed to do so. Python is one of the most popular languages used to develop machine learning applications, which take advantage of its extensive library support. This third edition of Building Machine Learning Systems with Python addresses recent developments in the field by covering the most-used datasets and libraries to help you build practical machine learning systems. Using machine learning to gain deeper insights from data is a key skill required by modern application developers and analysts alike. Python, being a dynamic language, allows for fast exploration and experimentation. This book shows you exactly how to find patterns in your raw data. You will start by brushing up on your Python machine learning knowledge and being introduced to libraries. You'll quickly get to grips with serious, real-world projects on datasets, using modeling and creating recommendation systems. With Building Machine Learning Systems with Python, you'll gain the tools and understanding required to build your own systems, all tailored to solve real-world data analysis problems. By the end of this book, you will be able to build machine learning systems using techniques and methodologies such as classification, sentiment analysis, computer vision, reinforcement learning, and neural networks. What you will learn Build a classification system that can be applied to text, images, and sound Employ Amazon Web Services (AWS) to run analysis on the cloud Solve problems related to regression using scikit-learn and TensorFlow Recommend products to users based on their past purchases Understand different ways to apply deep neural networks on structured data Address recent developments in the field of computer vision and reinforcement learning Who this book is for Building Machine Learning Systems with Python is for data scientists, machine learning developers, and Python developers who want to learn how to build increasingly complex machine learning systems. You will use Python's machine learning capabilities to develop effective solutions. Prior knowledge of Python programming is expected. MicroPython for BBC micro:bit Technical Workshop - 2018 pdf 下载地址 BBC micro:bit is a development board to learn embedded system easily. This book is designed to help you to get started with BBC micro:bit development using MicroPython platform. The following is a list of highlight content in this book. * Development environment preparation * Set up MicroPython on BBC micro:bit Board * Display Programming * BBC micro:bit GPIO * Reading Analog Input and PWM * Working with SPI * Working with I2C * Working with Accelerator and Compass Sensors Django - The Easy Way pdf - 2017 PDF 下载地址 Django is a very powerful Python Web Framework. You can use it to build everything from simple websites to big high traffic systems. But starting with Django can be a daunting experience for beginners. The purpose of this book is to guide you through the essential concepts with pragmatic step-by-step examples. You will learn how to build a complete website and deploy it in a real world production environment. The focus is on Django basic concepts so covering other technologies is kept at minimum. It’s helpful to know some Python, HTML, and CSS but you don’t need to have any previous experience with those or web development in general to be able to follow the book. You will learn things like: How to setup PyCharm for Django (you can use any editor). How to organize the project and add a base app to hold common assets. How template inheritance works. How to reuse common template items like grids and pagination. How to work with models, views and urls. How to use GIT and Bitbucket to version control and deploy your code. How to style all features with SASS (or CSS) and Gulp. How to create a responsive design. How to generate thumbnails. How to use relationships (ManyToMany, OneToMany and Foreignkey) in practical contexts. How to create custom forms to add and edit content. How to create and extend class based views. How to create a custom search. How to create an authentication system (sign-in, login, logout and reset password). How to restrict access with groups, permissions and decorators. How to add a user profile page. How to add inline fields to the admin area. How to do test driven development (TDD). How to translate the website. How to create custom error pages. How to setup a production environment with Digitalocean, PostgreSQL, Nginx and Gunicorn. How to use fixtures to apply initial data. How to setup domain, HTTPS, Email and Caching with Memcached. … and a lot more.

资源下载

更多资源
腾讯云软件源

腾讯云软件源

为解决软件依赖安装时官方源访问速度慢的问题,腾讯云为一些软件搭建了缓存服务。您可以通过使用腾讯云软件源站来提升依赖包的安装速度。为了方便用户自由搭建服务架构,目前腾讯云软件源站支持公网访问和内网访问。

Nacos

Nacos

Nacos /nɑ:kəʊs/ 是 Dynamic Naming and Configuration Service 的首字母简称,一个易于构建 AI Agent 应用的动态服务发现、配置管理和AI智能体管理平台。Nacos 致力于帮助您发现、配置和管理微服务及AI智能体应用。Nacos 提供了一组简单易用的特性集,帮助您快速实现动态服务发现、服务配置、服务元数据、流量管理。Nacos 帮助您更敏捷和容易地构建、交付和管理微服务平台。

Spring

Spring

Spring框架(Spring Framework)是由Rod Johnson于2002年提出的开源Java企业级应用框架,旨在通过使用JavaBean替代传统EJB实现方式降低企业级编程开发的复杂性。该框架基于简单性、可测试性和松耦合性设计理念,提供核心容器、应用上下文、数据访问集成等模块,支持整合Hibernate、Struts等第三方框架,其适用范围不仅限于服务器端开发,绝大多数Java应用均可从中受益。

WebStorm

WebStorm

WebStorm 是jetbrains公司旗下一款JavaScript 开发工具。目前已经被广大中国JS开发者誉为“Web前端开发神器”、“最强大的HTML5编辑器”、“最智能的JavaScript IDE”等。与IntelliJ IDEA同源,继承了IntelliJ IDEA强大的JS部分的功能。

用户登录
用户注册