Linux下Azkaban安装
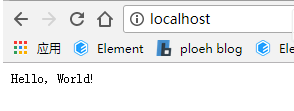
说明: CentOS 7JDK 1.8Azkaban版本:3.59.0官方文档:https://azkaban.readthedocs.io/en/latest/getStarted.html#building-from-source 安装步骤 Clone the repo: git clone https://github.com/azkaban/azkaban.git Build Azkaban and create an installation package: cd azkaban; ./gradlew build installDist 这个编译项目需要一定的时间,可能出现的问题如下: 1:连接maven超时,则需要检查超时的网址和端口是否正常 2:JCE报错 testV1_1 FAILED java.lang.RuntimeException: java.lang.RuntimeException: org.jasypt.exceptions.EncryptionOperationNotPossibleException: Encryption raised an exception. A possible cause is you are using strong encryption algorithms and you have not installed the Java Cryptography Extension (JCE) Unlimited Strength Jurisdiction Policy Files in this Java Virtual Machine at azkaban.crypto.Crypto.decrypt(Crypto.java:76) at azkaban.crypto.DecryptionTest.testV1_1(DecryptionTest.java:35) Caused by: java.lang.RuntimeException: org.jasypt.exceptions.EncryptionOperationNotPossibleException: Encryption raised an exception. A possible cause is you are using strong encryption algorithms and you have not installed the Java Cryptography Extension (JCE) Unlimited Strength Jurisdiction Policy Files in this Java Virtual Machine at azkaban.crypto.CryptoV1_1.decrypt(CryptoV1_1.java:57) at azkaban.crypto.Crypto.decrypt(Crypto.java:74) ... 1 more Caused by: org.jasypt.exceptions.EncryptionOperationNotPossibleException: Encryption raised an exception. A possible cause is you are using strong encryption algorithms and you have not installed the Java Cryptography Extension (JCE) Unlimited Strength Jurisdiction Policy Files in this Java Virtual Machine at org.jasypt.encryption.pbe.StandardPBEByteEncryptor.handleInvalidKeyException(StandardPBEByteEncryptor.java:1073) at org.jasypt.encryption.pbe.StandardPBEByteEncryptor.decrypt(StandardPBEByteEncryptor.java:1050) at org.jasypt.encryption.pbe.StandardPBEStringEncryptor.decrypt(StandardPBEStringEncryptor.java:725) at azkaban.crypto.CryptoV1_1.decrypt(CryptoV1_1.java:55) ... 2 more azkaban.crypto.EncryptionTest > testEncryption FAILED org.jasypt.exceptions.EncryptionOperationNotPossibleException: Encryption raised an exception. A possible cause is you are using strong encryption algorithms and you have not installed the Java Cryptography Extension (JCE) Unlimited Strength Jurisdiction Policy Files in this Java Virtual Machine at org.jasypt.encryption.pbe.StandardPBEByteEncryptor.handleInvalidKeyException(StandardPBEByteEncryptor.java:1073) at org.jasypt.encryption.pbe.StandardPBEByteEncryptor.encrypt(StandardPBEByteEncryptor.java:924) at org.jasypt.encryption.pbe.StandardPBEStringEncryptor.encrypt(StandardPBEStringEncryptor.java:642) at azkaban.crypto.CryptoV1_1.encrypt(CryptoV1_1.java:42) at azkaban.crypto.Crypto.encrypt(Crypto.java:58) at azkaban.crypto.EncryptionTest.testEncryption(EncryptionTest.java:28) 5 tests completed, 2 failed > Task :azkaban-common:compileJava 注: 某些输入文件使用或覆盖了已过时的 API。 注: 有关详细信息, 请使用 -Xlint:deprecation 重新编译。 注: 某些输入文件使用了未经检查或不安全的操作。 注: 有关详细信息, 请使用 -Xlint:unchecked 重新编译。 FAILURE: Build failed with an exception. * What went wrong: Execution failed for task ':az-crypto:test'. > There were failing tests. See the report at: file:///opt/azkaban/az-crypto/build/reports/tests/test/index.html * Try: Run with --stacktrace option to get the stack trace. Run with --info or --debug option to get more log output. Run with --scan to get full insights. * Get more help at https://help.gradle.org 解决方法:下载JCEhttps://www.oracle.com/technetwork/cn/java/javase/downloads/jce8-download-2133166-zhs.html我这边使用的JDK8,包含了JCE所需要的jre8解压搜下载好的文件,放置到以下目录:放置到jdk所在目录下的: cp UnlimitedJCEPolicyJDK8/* /usr/local/jdk1.8.0_74/jre/lib/security 对原有的文件进行覆盖 然后在进行重新编译 Start the solo server: 启动单机版的服务 cd azkaban-solo-server/build/install/azkaban-solo-server; bin/start-solo.sh Azkaban solo server should be all set, by listening to 8081 port at default to accept incoming network request. So, open a web browser and check out http://localhost:8081/ 打开页面 Stop server: bin/shutdown-solo.sh azkaban-solo-server 目录说明 目录名称 | 描述 | ------- | ------- | bin | 用于启动/停止Azkaban solo服务器的脚本conf | Azkaban solo服务器的配置文件lib | Azkaban的jar依赖项extlib | 添加到extlib的其他jar将添加到Azkaban的类路径中plugins | 可以安装插件的目录web | Azkaban Web服务器的Web(css,javascript,image)文件 数据库设置 为Azkaban创建数据库: #示例数据库创建命令,尽管db名称不需要是'azkaban' mysql> CREATE DATABASE azkaban; Query OK, 1 row affected (0.00 sec) 为Azkaban创建一个mysql用户。 例如,: # Example database creation command. The user name doesn't need to be 'azkaban' mysql> CREATE USER 'azka'@'%' IDENTIFIED BY '111111'; # give the user INSERT, SELECT, UPDATE, DELETE permission on all tables in the Azkaban db. mysql> GRANT SELECT,INSERT,UPDATE,DELETE ON azkaban.* to 'azka'@'%' WITH GRANT OPTION; 在/etc/my.cnf中配置Mysql Packet Size的大小 [mysqld] ... max_allowed_packet=1024M 重启mysql /sbin/service mysqld restart 创建Azkaban表 Installing Azkaban Executor Server 使用Gradle命令指令对源码进行编译注意:如果之前在安装solo模式的时候已经编译完成,则不需再进行编译 # Build Azkaban ./gradlew build # Clean the build ./gradlew clean # Build and install distributions ./gradlew installDist # Run tests ./gradlew test # Build without running tests ./gradlew build -x test 修改azkaban.properties中的mysql用户和密码,同时配置发送邮箱的配置信息 then run cd azkaban-exec-server/build/install/azkaban-exec-server ./bin/start-exec.sh 之后,请记住通过调用以下方法激活执行程序: cd azkaban-exec-server/build/install/azkaban-exec-server curl -G "localhost:$(<./executor.port)/executor?action=activate" && echo 激活成功 然后,一个执行器就可以使用了。用户可以通过分发和部署多个执行程序安装分发来设置多个执行程序。 安装Azkaban Web服务器 Azkaban Web Server处理项目管理,身份验证,调度和执行触发器。您可以从主分支构建最新版本 为了快速入门,我们可以直接使用gradle生成的安装目录azkaban / azkaban-web-server / build / install / azkaban-web-server。 更改账户名和密码 我们只需要在里面更改mysql用户名和密码azkaban.properties: Then run cd azkaban-web-server/build/install/azkaban-web-server ./bin/start-web.sh 默认的账户名和密码: azkaban azkaban 注意 如果修改azkaban.properties的配置信息,则需要重启进程才能生效 配置的文件都是修改install下的azkaban.properties文件 Could not find Linker 'g++' in system path 解决方法: sudo yum install g++ sudo yum install -y gcc-c++* 启动脚本是只能在bin目录外面提 solo是单机版使用的进程web和exec是和mql配置使用,分布式的服务模式 添加和修改配置的时候,修改的是如下位置的配置文件: /opt/azkaban/azkaban-web-server/build/install/azkaban-web-server/conf 然后重启web服务,配置生效 部署阿里云注意事项: 因为阿里云不能使用默认的25端口,所以需要事情ssl的465端口,但是3.59.0的版本是不支持ssl的,所以需要添加如下代码 import java.security.Security; final String SSL_FACTORY = "javax.net.ssl.SSLSocketFactory"; props.setProperty("mail.smtp.socketFactory.class", SSL_FACTORY); props.setProperty("mail.smtp.socketFactory.fallback", "false"); props.setProperty("mail.smtp.socketFactory.port", "465");