ActiveMQ 与spring 整合的实例
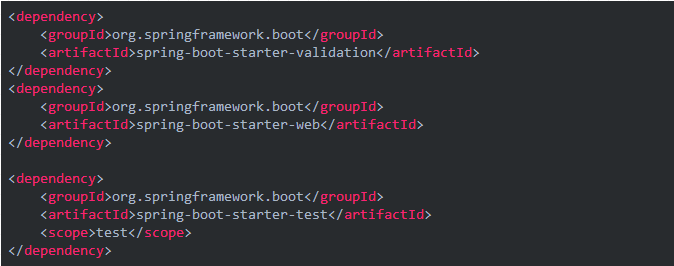
该整合实例是在maven项目中整合,先要构建一个maven项目 第一步在maven项目的pom.xml文件中导入依赖 <!--这些依赖都是activemq和spring整合需要的依赖--> <dependency> <groupId>org.springframework</groupId> <artifactId>spring-jms</artifactId> </dependency> <!--xbean如<amq:connectionFactory/>--> <dependency> <groupId>org.apache.xbean</groupId> <artifactId>xbean-spring</artifactId> <version>3.16</version> </dependency> <!--activemq--> <dependency> <groupId>org.apache.activemq</groupId> <artifactId>activemq-core</artifactId> <version>5.7.0</version> </dependency> <dependency> <groupId>org.apache.activemq</groupId> <artifactId>activemq-pool</artifactId> </dependency> 第二步,在spring的core配置文件中配置 <!--接收和发送的配置是一样的--> <?xmlversion="1.0"encoding="UTF-8"?> <beansxmlns="http://www.springframework.org/schema/beans"xmlns:mvc="http://www.springframework.org/schema/mvc"xmlns:context="http://www.springframework.org/schema/context"xmlns:tx="http://www.springframework.org/schema/tx"xmlns:aop="http://www.springframework.org/schema/aop"xmlns:p="http://www.springframework.org/schema/p"xmlns:task="http://www.springframework.org/schema/task"xmlns:xsi="http://www.w3.org/2001/XMLSchema-instance"xmlns:amq="http://activemq.apache.org/schema/core"xmlns:jms="http://www.springframework.org/schema/jms" xsi:schemaLocation=" http://www.springframework.org/schema/beanshttp://www.springframework.org/schema/beans/spring-beans.xsd http://www.springframework.org/schema/mvchttp://www.springframework.org/schema/mvc/spring-mvc.xsd http://www.springframework.org/schema/contexthttp://www.springframework.org/schema/context/spring-context.xsd http://www.springframework.org/schema/txhttp://www.springframework.org/schema/tx/spring-tx.xsd http://www.springframework.org/schema/aophttp://www.springframework.org/schema/aop/spring-aop.xsd http://www.springframework.org/schema/taskhttp://www.springframework.org/schema/task/spring-task.xsd http://www.springframework.org/schema/jmshttp://www.springframework.org/schema/jms/spring-jms.xsd http://activemq.apache.org/schema/corehttp://activemq.apache.org/schema/core/activemq-core.xsd"> <!--配置连接工厂--> <amq:connectionFactoryid="activeConnectionFactory"brokerURL="tcp://127.0.0.1:61616"userName="admin"password="admin"/> <beanid="connectionFactory"class="org.springframework.jms.connection.CachingConnectionFactory"> <constructor-argref="activeConnectionFactory"/> <propertyname="sessionCacheSize"value="100"/> </bean> <!--配置目的地--> <beanid="queueDestination"class="org.apache.activemq.command.ActiveMQQueue"> <constructor-argindex="0"value="FirstQueue"/> </bean> <!--配置JmsTemplate--> <beanid="JmsTemplate"class="org.springframework.jms.core.JmsTemplate"> <propertyname="connectionFactory"ref="connectionFactory"/> <propertyname="defaultDestination"ref="queueDestination"/> <propertyname="receiveTimeout"value="10000"/> <!--true是topic,false是queue,默认是false,此处显示写出false--> <propertyname="pubSubDomain"value="false"/> </bean> </beans> 第三步、使用junit测试 //消息发送 @RunWith(SpringJUnit4ClassRunner.class) @ContextConfiguration(value="classpath:/spring/spring-core.xml") publicclassSender{ @Resource(name="JmsTemplate") privateJmsTemplatejmsTemplate; @Test publicvoidtest(){ System.out.println(jmsTemplate); System.out.println("向"+jmsTemplate.getDefaultDestination().toString()+"发送消息"); jmsTemplate.send(newMessageCreator(){ @Override publicMessagecreateMessage(Sessionsession)throwsJMSException{ returnsession.createTextMessage("发送消息"); } }); } } //消息接收 @RunWith(SpringJUnit4ClassRunner.class) @ContextConfiguration(value="classpath:/spring/spring-core.xml") publicclassConsumer{ @Resource(name="JmsTemplate") privateJmsTemplatejmsTemplate; @Resource(name="queueDestination") privateDestinationdestination; @Test publicvoidtest(){ System.out.println(jmsTemplate); TextMessagemessage=(TextMessage)jmsTemplate.receive(destination); try{ System.out.println("接受消息>>>>>>>>>>>"+message.getText()); }catch(JMSExceptione){ e.printStackTrace(); } } } 注意:使用MessageListener接收信息的配置 1、实现一个Message监听器 packagecom.web.consumer; importjavax.jms.JMSException; importjavax.jms.Message; importjavax.jms.MessageListener; importjavax.jms.TextMessage; publicclassdemoMessageListenerimplementsMessageListener{ @Override publicvoidonMessage(Messagemessage){ try{ System.out.println("接受到消息>>>>>>>>"+((TextMessage)message).getText()); }catch(JMSExceptione){ e.printStackTrace(); } } } 2、在配置文件中添加如下配置 <beanid="demoMessageListener"class="com.web.consumer.demoMessageListener"/> <beanclass="org.springframework.jms.listener.DefaultMessageListenerContainer"> <propertyname="connectionFactory"ref="connectionFactory"/> <propertyname="destination"ref="queueDestination"/> <propertyname="messageListener"ref="demoMessageListener"/> </bean>