iOS - 跑马灯、弹幕
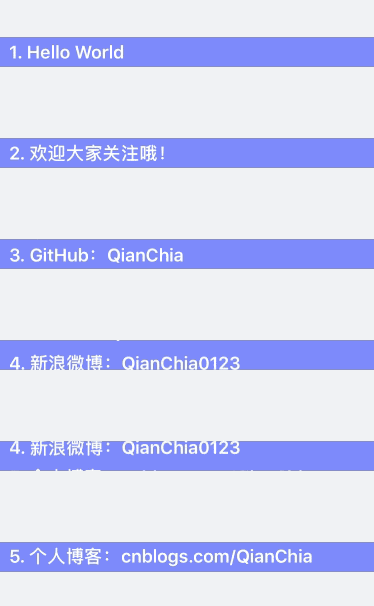
1、跑马灯 具体实现代码见 GitHub 源码 QExtension QMarqueeView.h #pragma mark - QMarqueeViewDelegate /// 跑马灯内容点击处理协议 @protocol QMarqueeViewDelegate <NSObject> - (void)didClickContentAtIndex:(NSInteger)index; @end #pragma mark - QMarqueeView /// 跑马灯滚动方向枚举 typedef NS_ENUM(NSUInteger, QMarqueeViewDirection) { QMarqueeViewDirectionUp, QMarqueeViewDirectionDown, QMarqueeViewDirectionLeft, QMarqueeViewDirectionRight }; @interface QMarqueeView : UIView /// 显示的文本内容 @property (nonatomic, strong) NSArray *contentTexts; /// 显示的文本内容颜色,default is redColor @property (nonatomic, strong) UIColor *contentTextColor; /// 显示的文本内容字体,default is 15.0 @property (nonatomic, strong) UIFont *contentTextFont; /// 显示的文本内容对齐方式,default is NSTextAlignmentLeft @property (nonatomic, assign) NSTextAlignment contentTextAlign; /// 显示的图标内容,可以为 nil 不显示图标 @property (nonatomic, strong) UIImage *contentIcon; /// 动画方向,default is QMarqueeViewDirectionUp @property (nonatomic, assign) QMarqueeViewDirection animationDirection; /// 动画时间,等于 0 时不滚动 @property (nonatomic, assign) NSTimeInterval animationDuration; /// 动画停顿时间,default is 1.0 秒 @property (nonatomic, assign) NSTimeInterval animationDelay; /// 代理 @property (nonatomic, weak) id<QMarqueeViewDelegate> delegate; /** * 开始动画 */ - (void)q_startAnimation; /** * 创建跑马灯视图控件,开始滚动 * * @param frame 跑马灯对象的 frame * @param texts 显示的文本内容 * @param color 显示的文本内容颜色,default is redColor * @param font 显示的文本内容字体,default is 15.0 * @param align 显示的文本内容对齐方式,default is NSTextAlignmentLeft * @param icon 显示的图片内容 * @param direction 动画方向,default is QMarqueeViewDirectionUp * @param duration 动画时间,等于 0 时不滚动 * @param delay 动画停顿时间,default is 1.0 秒 * @param target 代理 * * @return 跑马灯视图控件 */ + (instancetype)q_marqueeViewWithFrame:(CGRect)frame texts:(NSArray *)texts color:(nullable UIColor *)color font:(nullable UIFont *)font align:(NSTextAlignment)align icon:(nullable UIImage *)icon direction:(QMarqueeViewDirection)direction duration:(NSTimeInterval)duartion delay:(NSTimeInterval)delay target:(nullable id<QMarqueeViewDelegate>)target; @end QMarqueeView.m #define SELF_WIDTH self.frame.size.width #define SELF_HEIGHT self.frame.size.height @interface QMarqueeView () /// 两个 label 循环滚动 @property (nonatomic, strong) UILabel *firstContentLabel; @property (nonatomic, strong) UILabel *secondContentLabel; /// 显示图片的视图 @property (nonatomic, strong) UIImageView *imageView; /// 当前显示的行 @property (nonatomic, assign) NSInteger currentIndex; /// 文本内容的起始位置、宽度、高度 @property (nonatomic, assign) CGFloat contentX; @property (nonatomic, assign) CGFloat contentWidth; @property (nonatomic, assign) CGFloat contentHeight; @end @implementation QMarqueeView /// 创建跑马灯视图控件,开始滚动 + (instancetype)q_marqueeViewWithFrame:(CGRect)frame texts:(NSArray *)texts color:(nullable UIColor *)color font:(nullable UIFont *)font align:(NSTextAlignment)align icon:(nullable UIImage *)icon direction:(QMarqueeViewDirection)direction duration:(NSTimeInterval)duartion delay:(NSTimeInterval)delay target:(nullable id<QMarqueeViewDelegate>)target { QMarqueeView *marqueeView = [[self alloc] initWithFrame:frame]; marqueeView.contentTexts = texts; marqueeView.contentTextColor = color; marqueeView.contentTextFont = font; marqueeView.contentTextAlign = align; marqueeView.contentIcon = icon; marqueeView.animationDirection = direction; marqueeView.animationDuration = duartion; marqueeView.animationDelay = delay; marqueeView.delegate = target; [marqueeView q_startAnimation]; return marqueeView; } /// 创建视图控件 - (void)setupView { // 父视图裁剪 self.clipsToBounds = YES; // 控件之间的间隔值 CGFloat margin = 10; // 判断是否有图标 if (self.contentIcon) { // 添加 Icon 视图 CGRect iconBackFrame = CGRectMake(0, 0, margin + SELF_HEIGHT, SELF_HEIGHT); UIView *iconBackView = [[UIView alloc] initWithFrame:iconBackFrame]; iconBackView.backgroundColor = [UIColor clearColor]; [self addSubview:iconBackView]; CGRect iconFrame = CGRectMake(margin, 0, SELF_HEIGHT, SELF_HEIGHT); self.imageView = [[UIImageView alloc] initWithFrame:iconFrame]; self.imageView.backgroundColor = [UIColor clearColor]; self.imageView.image = self.contentIcon; [iconBackView addSubview:self.imageView]; // 计算 Texts 的 frame 值 self.contentX = margin + SELF_HEIGHT; self.contentWidth = SELF_WIDTH - self.contentX - margin; } else { // 计算 Texts 的 frame 值 self.contentX = margin; self.contentWidth = SELF_WIDTH - self.contentX - margin; } self.contentHeight = SELF_HEIGHT; // 创建第一个 label CGRect frame1 = CGRectMake(0, 0, self.contentWidth, self.contentHeight); self.firstContentLabel = [[UILabel alloc] initWithFrame:frame1]; [self setLabel:self.firstContentLabel]; // 创建第二个 label if (self.animationDirection <= 1) { CGRect frame2 = CGRectMake(0, SELF_HEIGHT, self.contentWidth, self.contentHeight); self.secondContentLabel = [[UILabel alloc] initWithFrame:frame2]; [self setLabel:self.secondContentLabel]; } } /// 设置 label 属性 - (void)setLabel:(UILabel *)label { // 设置 label 背景视图 CGRect frame; if (self.contentIcon == nil && self.animationDirection > 1) { frame = CGRectMake(0, 0, SELF_WIDTH, self.contentHeight); } else { frame = CGRectMake(self.contentX, 0, self.contentWidth, self.contentHeight); } UIView *textBackView = [[UIView alloc] initWithFrame:frame]; textBackView.backgroundColor = [UIColor clearColor]; textBackView.clipsToBounds = YES; [self addSubview:textBackView]; // 设置默认值 UIColor *textColor = self.contentTextColor ? : [UIColor redColor]; UIFont *textFont = self.contentTextFont ? : [UIFont systemFontOfSize:15.0f]; NSTextAlignment textAlign = self.contentTextAlign ? : NSTextAlignmentLeft; // 设置 label 属性 label.backgroundColor = [UIColor clearColor]; label.lineBreakMode = NSLineBreakByTruncatingTail; label.textColor = textColor; label.font = textFont; label.textAlignment = textAlign; label.userInteractionEnabled = YES; UITapGestureRecognizer *tap1 = [[UITapGestureRecognizer alloc] initWithTarget:self action:@selector(contentClick)]; [label addGestureRecognizer:tap1]; [textBackView addSubview:label]; } /// 开启滚动动画 - (void)startLoopAnimation { // 设置默认值 NSTimeInterval delay = 0; NSTimeInterval duration = 0; CGFloat currentContentWidth = self.contentWidth; // 设置第一个 label 显示的内容 self.firstContentLabel.text = self.contentTexts[self.currentIndex]; // 滚动时间为 0 时,停止滚动 if (0 == self.animationDuration) { return; } else { if (self.animationDirection > 1) { // 左右滚动 // 不停顿 delay = 0; // 计算文本内容长度 currentContentWidth = [self.firstContentLabel.text sizeWithAttributes:@{NSFontAttributeName:(self.contentTextFont ? : [UIFont systemFontOfSize:15.0f])}].width; duration = self.animationDuration * currentContentWidth / 150; } else { // 垂直滚动 // 动画停顿时间,默认为 1.0 秒 delay = self.animationDelay ? : 1.0f; duration = self.animationDuration; // 设置第二个 label 显示的内容 NSInteger secondCurrentIndex = self.currentIndex + 1; if (secondCurrentIndex > self.contentTexts.count - 1) { secondCurrentIndex = 0; } self.secondContentLabel.text = self.contentTexts[secondCurrentIndex]; } } CGFloat firstContentLastStartX = 0; CGFloat firstContentLastEndX = 0; CGFloat firstContentLastStartY = 0; CGFloat firstContentLastEndY = 0; CGFloat secondContentLastStartY = 0; CGFloat secondContentLastEndY = 0; // 判断滚动方向 switch (self.animationDirection) { case QMarqueeViewDirectionUp: { firstContentLastStartY = 0; firstContentLastEndY = -SELF_HEIGHT; secondContentLastStartY = firstContentLastStartY + SELF_HEIGHT; secondContentLastEndY = firstContentLastEndY + SELF_HEIGHT; break; } case QMarqueeViewDirectionDown: { firstContentLastStartY = 0; firstContentLastEndY = SELF_HEIGHT; secondContentLastStartY = firstContentLastStartY - SELF_HEIGHT; secondContentLastEndY = firstContentLastEndY - SELF_HEIGHT; break; } case QMarqueeViewDirectionLeft: { firstContentLastStartX = self.contentWidth; firstContentLastEndX = -currentContentWidth; break; } case QMarqueeViewDirectionRight: { firstContentLastStartX = -currentContentWidth; firstContentLastEndX = self.contentWidth; break; } default: break; } // 设置开始时的 frame CGRect frame1; CGRect frame2; if (self.animationDirection > 1) { frame1 = CGRectMake(firstContentLastStartX, 0, currentContentWidth, self.contentHeight); } else { frame1 = CGRectMake(0, firstContentLastStartY, self.contentWidth, self.contentHeight); frame2 = CGRectMake(0, secondContentLastStartY, self.contentWidth, self.contentHeight); } self.firstContentLabel.frame = frame1; self.secondContentLabel.frame = frame2; // 开始一次滚动动画 [UIView beginAnimations:@"" context:nil]; [UIView setAnimationCurve:UIViewAnimationCurveLinear]; [UIView setAnimationDuration:duration]; [UIView setAnimationDelay:delay]; [UIView setAnimationDelegate:self]; [UIView setAnimationDidStopSelector:@selector(loopAnimationDidStop:finished:context:)]; // 设置结束时的 frame CGRect frame3; CGRect frame4; if (self.animationDirection > 1) { frame3 = CGRectMake(firstContentLastEndX, 0, currentContentWidth, self.contentHeight); } else { frame3 = CGRectMake(0, firstContentLastEndY, self.contentWidth, self.contentHeight); frame4 = CGRectMake(0, secondContentLastEndY, self.contentWidth, self.contentHeight); } self.firstContentLabel.frame = frame3; self.secondContentLabel.frame = frame4; // 结束一次滚动动画 [UIView commitAnimations]; } /// 一次动画结束事件响应处理 - (void)loopAnimationDidStop:(NSString *)animationID finished:(NSNumber *)finished context:(void *)context { self.currentIndex++; if (self.currentIndex >= self.contentTexts.count) { self.currentIndex = 0; } // 重新开启滚动动画 [self startLoopAnimation]; } /// 开始滚动 - (void)q_startAnimation { // 创建视图 [self setupView]; // 开启动画默认第一条信息 self.currentIndex = 0; // 开始滚动动画 [self startLoopAnimation]; } /// 文本内容点击事件处理 - (void)contentClick { if ([self.delegate respondsToSelector:@selector(didClickContentAtIndex:)]) { [self.delegate didClickContentAtIndex:self.currentIndex]; } } @end 使用 1、初始化 QMarqueeView 继承自 UIView, 初始化和 UIView 一样 // 创建跑马灯视图控件 CGRect frame = CGRectMake(0, 50, self.view.bounds.size.width, 30); QMarqueeView *marqueeView = [[QMarqueeView alloc] initWithFrame:frame]; // 常规设置,QMarqueeView 继承自 UIView, 设置和 UIView 一样 marqueeView.layer.cornerRadius = 15; marqueeView.layer.masksToBounds = YES; marqueeView.backgroundColor = [[UIColor grayColor] colorWithAlphaComponent:0.5]; [self.view addSubview:marqueeView]; 也可以使用类方法一体式创建设置 // 创建滚动视图,开始滚动 CGRect frame = CGRectMake(30, 250, self.view.bounds.size.width - 100, 30); QMarqueeView *marqueeView = [QMarqueeView q_marqueeViewWithFrame:frame texts:showList color:[UIColor whiteColor] font:nil align:NSTextAlignmentLeft icon:[UIImage imageNamed:@"waring1"] direction:QMarqueeViewDirectionDown duration:1.0 delay:0 target:self]; [self.view addSubview:marqueeView]; 2、设置显示的文本内容 文本内容存放到数组中设置 // 设置显示的内容 NSArray *showList = @[@"1. Hello World", @"2. 欢迎大家关注哦!", @"3. GitHub:QianChia", @"4. 新浪微博:QianChia0123", @"5. 个人博客:cnblogs.com/QianChia"]; marqueeView.contentTexts = showList; 文本内容可选属性设置,可以设置文本内容的颜色、字体、及对齐方式 // 显示的文本内容颜色,default is redColor marqueeView.contentTextColor = [UIColor whiteColor]; // 显示的文本内容字体,default is 15.0 marqueeView.contentTextFont = [UIFont boldSystemFontOfSize:18]; // 显示的文本内容对齐方式,default is NSTextAlignmentLeft marqueeView.contentTextAlign = NSTextAlignmentCenter; 3、设置显示的图标内容 除显示文本内容外,还可以可选设置显示左侧图标 // 显示的图标内容,可以为 nil 不显示图标 marqueeView.contentIcon = [UIImage imageNamed:@"waring1"]; 4、设置动画时间 动画时间等于 0 时不进行滚动 // 设置动画时间 marqueeView.animationDuration = 5.0; 5、设置动画方向 不设置时默认向上滚动 // 设置动画方向,default is QMarqueeViewDirectionUp marqueeView.animationDirection = QMarqueeViewDirectionRight; 6、设置动画停顿时间 一次动画滚动完成后可以设置停顿时间,不设置时默认为 1.0 秒 // 设置动画停顿时间,default is 1.0 秒 marqueeView.animationDelay = 2.0; 7、设置点击回调代理 点击显示的内容时可以可选设置响应代理 // 设置代理,响应滚动视图点击 marqueeView.delegate = self; 8、开始滚动动画 添加设置完成后,开启动画 // 开始动画 [marqueeView q_startAnimation]; 1.1 垂直滚动 1、垂直滚动,左侧对齐 // 创建跑马灯视图控件 CGRect frame = CGRectMake(0, 50, self.view.bounds.size.width, 30); QMarqueeView *marqueeView = [[QMarqueeView alloc] initWithFrame:frame]; // 设置显示的内容 NSArray *showList = @[@"1. Hello World", @"2. 欢迎大家关注哦!", @"3. GitHub:QianChia", @"4. 新浪微博:QianChia0123", @"5. 个人博客:cnblogs.com/QianChia"]; marqueeView.contentTexts = showList; marqueeView.contentTextColor = [UIColor whiteColor]; marqueeView.contentTextFont = [UIFont boldSystemFontOfSize:18]; // 设置动画时间 marqueeView.animationDuration = 0.2; // 常规设置 marqueeView.backgroundColor = [UIColor colorWithRed:102/255.0f green:133/255.0f blue:253/255.0f alpha:1]; [self.view addSubview:marqueeView]; // 开始滚动 [marqueeView q_startAnimation]; 效果 2、垂直滚动,中间对齐 // 创建跑马灯视图控件 CGRect frame = CGRectMake(0, 50, self.view.bounds.size.width, 30); QMarqueeView *marqueeView = [[QMarqueeView alloc] initWithFrame:frame]; // 设置显示的内容 NSArray *showList = @[@"1. Hello World", @"2. 欢迎大家关注哦!", @"3. GitHub:QianChia", @"4. 新浪微博:QianChia0123", @"5. 个人博客:cnblogs.com/QianChia"]; marqueeView.contentTexts = showList; marqueeView.contentTextColor = [UIColor whiteColor]; marqueeView.contentTextFont = [UIFont boldSystemFontOfSize:18]; // 设置动画时间 marqueeView.animationDuration = 0.2; // 设置显示的内容对齐方式 marqueeView.contentTextAlign = NSTextAlignmentCenter; // 常规设置 marqueeView.backgroundColor = [UIColor colorWithRed:102/255.0f green:133/255.0f blue:253/255.0f alpha:1]; [self.view addSubview:marqueeView]; // 开始滚动 [marqueeView q_startAnimation]; 效果 3、垂直滚动,带图标 // 创建跑马灯视图控件 CGRect frame = CGRectMake(30, 150, self.view.bounds.size.width - 150, 30); QMarqueeView *marqueeView = [[QMarqueeView alloc] initWithFrame:frame]; // 设置显示的内容 NSArray *showList = @[@"GitHub:QianChia"]; marqueeView.contentTexts = showList; marqueeView.contentTextColor = [UIColor whiteColor]; // 设置显示的图标 marqueeView.contentIcon = [UIImage imageNamed:@"waring1"]; // 设置动画时间 marqueeView.animationDuration = 0.5; // 常规设置 marqueeView.layer.cornerRadius = 15; marqueeView.layer.masksToBounds = YES; marqueeView.backgroundColor = [UIColor colorWithRed:102/255.0f green:133/255.0f blue:253/255.0f alpha:1]; [self.view addSubview:marqueeView]; // 开始滚动 [marqueeView q_startAnimation]; 效果 4、垂直滚动,向下滚动 // 创建跑马灯视图控件 CGRect frame = CGRectMake(30, 200, self.view.bounds.size.width - 150, 30); QMarqueeView *marqueeView = [[QMarqueeView alloc] initWithFrame:frame]; // 设置显示的内容 NSArray *showList = @[@"GitHub:QianChia"]; marqueeView.contentTexts = showList; marqueeView.contentTextColor = [UIColor whiteColor]; marqueeView.contentIcon = [UIImage imageNamed:@"waring1"]; // 设置动画时间 marqueeView.animationDuration = 0.5; // 设置动画方向 marqueeView.animationDirection = QMarqueeViewDirectionDown; // 常规设置 marqueeView.layer.cornerRadius = 15; marqueeView.layer.masksToBounds = YES; marqueeView.backgroundColor = [UIColor colorWithRed:102/255.0f green:133/255.0f blue:253/255.0f alpha:1]; [self.view addSubview:marqueeView]; // 开始滚动 [marqueeView q_startAnimation]; 效果 5、垂直滚动,由类方法创建 // 设置显示的内容 NSArray *showList = @[@"1. Hello World", @"2. 欢迎大家关注哦!", @"3. GitHub:QianChia", @"4. 新浪微博:QianChia0123", @"5. 个人博客:cnblogs.com/QianChia"]; // 创建跑马灯视图控件,开始滚动 CGRect frame = CGRectMake(30, 250, self.view.bounds.size.width - 100, 30); QMarqueeView *marqueeView = [QMarqueeView q_marqueeViewWithFrame:frame texts:showList color:[UIColor whiteColor] font:nil align:NSTextAlignmentLeft icon:[UIImage imageNamed:@"waring1"] direction:QMarqueeViewDirectionDown duration:1.0 delay:0 target:self]; // 常规设置 marqueeView.layer.cornerRadius = 15; marqueeView.layer.masksToBounds = YES; marqueeView.backgroundColor = [[UIColor grayColor] colorWithAlphaComponent:0.5]; [self.view addSubview:marqueeView]; 效果 1.2 水平滚动 1、水平滚动,向左滚动 // 创建跑马灯视图控件 CGRect frame = CGRectMake(50, 350, self.view.bounds.size.width - 100, 30); QMarqueeView *marqueeView = [[QMarqueeView alloc] initWithFrame:frame]; // 设置显示的内容 NSArray *showList = @[@"1. Hello World", @"2. 欢迎大家关注哦!", @"3. GitHub:QianChia", @"4. 新浪微博:QianChia0123", @"5. 个人博客:cnblogs.com/QianChia"]; marqueeView.contentTexts = showList; marqueeView.contentTextColor = [UIColor whiteColor]; marqueeView.contentTextFont = [UIFont boldSystemFontOfSize:18]; marqueeView.contentIcon = [UIImage imageNamed:@"waring1"]; // 设置动画时间 marqueeView.animationDuration = 5.0; // 设置动画方向 marqueeView.animationDirection = QMarqueeViewDirectionLeft; // 常规设置 marqueeView.layer.cornerRadius = 15; marqueeView.layer.masksToBounds = YES; marqueeView.backgroundColor = [UIColor colorWithRed:102/255.0f green:133/255.0f blue:253/255.0f alpha:1]; [self.view addSubview:marqueeView]; // 开始滚动 [marqueeView q_startAnimation]; 效果 2、水平滚动,向右滚动 // 创建跑马灯视图控件 CGRect frame = CGRectMake(50, 400, self.view.bounds.size.width - 100, 30); QMarqueeView *marqueeView = [[QMarqueeView alloc] initWithFrame:frame]; // 设置显示的内容 NSArray *showList = @[@"1. Hello World", @"2. 欢迎大家关注哦!", @"3. GitHub:QianChia", @"4. 新浪微博:QianChia0123", @"5. 个人博客:cnblogs.com/QianChia"]; marqueeView.contentTexts = showList; marqueeView.contentTextColor = [UIColor whiteColor]; marqueeView.contentTextFont = [UIFont boldSystemFontOfSize:18]; marqueeView.contentIcon = [UIImage imageNamed:@"waring1"]; // 设置动画时间 marqueeView.animationDuration = 5.0; // 设置动画方向 marqueeView.animationDirection = QMarqueeViewDirectionRight; // 常规设置 marqueeView.layer.cornerRadius = 15; marqueeView.layer.masksToBounds = YES; marqueeView.backgroundColor = [UIColor colorWithRed:102/255.0f green:133/255.0f blue:253/255.0f alpha:1]; [self.view addSubview:marqueeView]; // 开始滚动 [marqueeView q_startAnimation]; 效果 3、水平滚动,由类方法创建 // 设置显示的内容 NSArray *showList = @[@"1. Hello World", @"2. 欢迎大家关注哦!", @"3. GitHub:QianChia", @"4. 新浪微博:QianChia0123", @"5. 个人博客:cnblogs.com/QianChia"]; // 创建跑马灯视图控件,开始滚动 CGRect frame = CGRectMake(30, 450, self.view.bounds.size.width - 60, 30); QMarqueeView *marqueeView = [QMarqueeView q_marqueeViewWithFrame:frame texts:showList color:nil font:nil align:0 icon:[UIImage imageNamed:@"waring2"] direction:QMarqueeViewDirectionLeft duration:4.0 delay:0 target:self]; // 常规设置 marqueeView.layer.cornerRadius = 15; marqueeView.layer.masksToBounds = YES; marqueeView.backgroundColor = [[UIColor grayColor] colorWithAlphaComponent:0.5]; [self.view addSubview:marqueeView]; 效果 2、弹幕 具体实现代码见 GitHub 源码 QExtension QBulletScreenView.h #pragma mark - QBulletScreenViewDelegate /// 跑马灯内容点击处理协议 @protocol QBulletScreenViewDelegate <NSObject> - (void)didClickContentAtIndex:(NSInteger)index; @end #pragma mark - QBulletScreenView /// 弹幕滚动方向枚举 typedef NS_ENUM(NSUInteger, QBulletScreenViewDirection) { QBulletScreenViewDirectionUp, QBulletScreenViewDirectionDown, QBulletScreenViewDirectionLeft, QBulletScreenViewDirectionRight }; @interface QBulletScreenView : UIView /// 显示的文本内容 @property (nonatomic, strong) NSArray *contentTexts; /// 显示的文本内容颜色,default is redColor @property (nonatomic, strong) UIColor *contentTextColor; /// 显示的文本内容字体,default is 15.0 @property (nonatomic, strong) UIFont *contentTextFont; /// 显示的图标内容,可以为 nil 不显示图标 @property (nonatomic, strong) UIImage *contentIcon; /// 动画方向,default is QBulletScreenViewDirectionLeft @property (nonatomic, assign) QBulletScreenViewDirection animationDirection; /// 动画时间,等于 0 时不滚动 @property (nonatomic, assign) NSTimeInterval animationDuration; /// 代理 @property (nonatomic, weak) id<QBulletScreenViewDelegate> delegate; /** * 开始动画 */ - (void)q_startAnimation; /** * 创建弹幕视图控件 * * @param frame 跑马灯对象的 frame * @param texts 显示的文本内容 * @param color 显示的文本内容颜色,default is redColor * @param font 显示的文本内容字体,default is 15.0 * @param icon 显示的图片内容 * @param direction 动画方向,default is QMarqueeViewDirectionUp * @param duration 动画时间,等于 0 时不滚动 * @param target 代理 * * @return 弹幕视图控件 */ + (instancetype)q_bulletScreenWithFrame:(CGRect)frame texts:(NSArray *)texts color:(nullable UIColor *)color font:(nullable UIFont *)font icon:(nullable UIImage *)icon direction:(QBulletScreenViewDirection)direction duration:(NSTimeInterval)duartion target:(nullable id<QBulletScreenViewDelegate>)target; @end QBulletScreenView.m #define SELF_WIDTH self.frame.size.width #define SELF_HEIGHT self.frame.size.height @interface QBulletScreenView () /// label @property (nonatomic, strong) UILabel *contentLabel; /// 显示图片的视图 @property (nonatomic, strong) UIImageView *imageView; /// 当前显示的行 @property (nonatomic, assign) NSInteger currentIndex; /// 文本内容的起始位置、宽度、高度 @property (nonatomic, assign) CGFloat contentX; @property (nonatomic, assign) CGFloat contentWidth; @property (nonatomic, assign) CGFloat contentHeight; /// 弹幕视图的位置、宽度、高度 @property (nonatomic, assign) CGFloat viewX; @property (nonatomic, assign) CGFloat viewY; @property (nonatomic, assign) CGFloat viewWidth; @property (nonatomic, assign) CGFloat viewHeight; @end @implementation QBulletScreenView /// 创建弹幕视图控件 + (instancetype)q_bulletScreenWithFrame:(CGRect)frame texts:(NSArray *)texts color:(nullable UIColor *)color font:(nullable UIFont *)font icon:(nullable UIImage *)icon direction:(QBulletScreenViewDirection)direction duration:(NSTimeInterval)duartion target:(nullable id<QBulletScreenViewDelegate>)target { QBulletScreenView *bulletScreenView = [[self alloc] initWithFrame:frame]; bulletScreenView.contentTexts = texts; bulletScreenView.contentTextColor = color; bulletScreenView.contentTextFont = font; bulletScreenView.contentIcon = icon; bulletScreenView.animationDirection = direction; bulletScreenView.animationDuration = duartion; bulletScreenView.delegate = target; return bulletScreenView; } /// 创建视图控件 - (void)setupView { // 父视图裁剪 self.clipsToBounds = YES; // 控件之间的间隔值 CGFloat margin = 10; // 判断是否有图标 if (self.contentIcon) { // 添加 Icon 视图 CGRect iconFrame = CGRectMake(margin, 0, SELF_HEIGHT, SELF_HEIGHT); self.imageView = [[UIImageView alloc] initWithFrame:iconFrame]; self.imageView.backgroundColor = [UIColor clearColor]; self.imageView.image = self.contentIcon; [self addSubview:self.imageView]; // 计算 Texts 的 frame 值 self.contentX = margin + SELF_HEIGHT; self.contentWidth = SELF_WIDTH - self.contentX - margin; } else { // 计算 Texts 的 frame 值 self.contentX = margin * 2; self.contentWidth = SELF_WIDTH - self.contentX - margin; } self.contentHeight = SELF_HEIGHT; self.viewHeight = SELF_HEIGHT; // 设置默认值 UIColor *textColor = self.contentTextColor ? : [UIColor redColor]; UIFont *textFont = self.contentTextFont ? : [UIFont systemFontOfSize:15.0f]; // 创建 label CGRect frame1 = CGRectMake(self.contentX, 0, self.contentWidth, self.contentHeight); self.contentLabel = [[UILabel alloc] initWithFrame:frame1]; self.contentLabel.backgroundColor = [UIColor clearColor]; self.contentLabel.lineBreakMode = NSLineBreakByTruncatingTail; self.contentLabel.textColor = textColor; self.contentLabel.font = textFont; self.contentLabel.userInteractionEnabled = YES; UITapGestureRecognizer *tap1 = [[UITapGestureRecognizer alloc] initWithTarget:self action:@selector(contentClick)]; [self.contentLabel addGestureRecognizer:tap1]; [self addSubview:self.contentLabel]; } /// 开启滚动动画 - (void)startLoopAnimation { // 控件之间的间隔值 CGFloat margin = 10; // 设置默认值 NSTimeInterval duration = 0; CGFloat currentContentWidth = self.contentWidth; // 设置第一个 label 显示的内容 self.contentLabel.text = self.contentTexts[self.currentIndex]; // 滚动时间为 0 时,停止滚动 if (0 == self.animationDuration) { return; } else { // 计算文本内容长度 currentContentWidth = [self.contentLabel.text sizeWithAttributes:@{NSFontAttributeName:(self.contentTextFont ? : [UIFont systemFontOfSize:15.0f])}].width; CGRect frame = CGRectMake(self.contentX, 0, currentContentWidth, self.contentHeight); self.contentLabel.frame = frame; self.viewWidth = self.contentX + currentContentWidth + margin * 2; if (self.animationDirection > 1) { // 左右滚动 duration = self.animationDuration * currentContentWidth / 150; } else { // 垂直滚动 duration = self.animationDuration; } } CGFloat viewLastStartX = 0; CGFloat viewLastEndX = 0; CGFloat viewLastStartY = 0; CGFloat viewLastEndY = 0; // 判断滚动方向 switch (self.animationDirection) { case QBulletScreenViewDirectionUp: { viewLastStartY = self.superview.bounds.size.height; viewLastEndY = -self.viewHeight; break; } case QBulletScreenViewDirectionDown: { viewLastStartY = -self.viewHeight; viewLastEndY = self.superview.bounds.size.height; break; } case QBulletScreenViewDirectionLeft: { viewLastStartX = self.superview.bounds.size.width; viewLastEndX = -self.viewWidth; break; } case QBulletScreenViewDirectionRight: { viewLastStartX = -self.viewWidth; viewLastEndX = self.superview.bounds.size.width; break; } default: break; } self.viewX = self.frame.origin.x; self.viewY = self.frame.origin.y; // 设置开始时的 frame CGRect frame1; if (self.animationDirection > 1) { frame1 = CGRectMake(viewLastStartX, self.viewY, self.viewWidth, self.contentHeight); } else { frame1 = CGRectMake(self.viewX, viewLastStartY, self.viewWidth, self.contentHeight); } self.frame = frame1; // 开始一次滚动动画 [UIView beginAnimations:@"" context:nil]; [UIView setAnimationCurve:UIViewAnimationCurveLinear]; [UIView setAnimationDuration:duration]; [UIView setAnimationDelay:0]; [UIView setAnimationDelegate:self]; [UIView setAnimationDidStopSelector:@selector(loopAnimationDidStop:finished:context:)]; // 设置结束时的 frame CGRect frame2; if (self.animationDirection > 1) { frame2 = CGRectMake(viewLastEndX, self.viewY, self.viewWidth, self.contentHeight); } else { frame2 = CGRectMake(self.viewX, viewLastEndY, self.viewWidth, self.contentHeight); } self.frame = frame2; // 结束一次滚动动画 [UIView commitAnimations]; } /// 一次动画结束事件响应处理 - (void)loopAnimationDidStop:(NSString *)animationID finished:(NSNumber *)finished context:(void *)context { self.currentIndex++; if (self.currentIndex >= self.contentTexts.count) { self.currentIndex = 0; } // 重新开启滚动动画 [self startLoopAnimation]; } /// 开始滚动 - (void)q_startAnimation { // 创建视图 [self setupView]; // 开启动画默认第一条信息 self.currentIndex = 0; // 开始滚动动画 [self startLoopAnimation]; } /// 文本内容点击事件处理 - (void)contentClick { if ([self.delegate respondsToSelector:@selector(didClickContentAtIndex:)]) { [self.delegate didClickContentAtIndex:self.currentIndex]; } } @end 使用 1、初始化 QBulletScreenView 继承自 UIView, 初始化和 UIView 一样 // 创建弹幕视图控件 CGRect frame = CGRectMake(0, 100, 0, 30); QBulletScreenView *bulletScreenView = [[QBulletScreenView alloc] initWithFrame:frame]; // 常规设置,QBulletScreenView 继承自 UIView, 设置和 UIView 一样 bulletScreenView.layer.cornerRadius = 15; bulletScreenView.layer.masksToBounds = YES; bulletScreenView.backgroundColor = [[UIColor grayColor] colorWithAlphaComponent:0.5]; [self.view addSubview:bulletScreenView]; 也可以使用类方法一体式创建设置 // 创建弹幕视图控件,开始滚动 CGRect frame = CGRectMake(0, 100, 0, 30); QBulletScreenView *bulletScreenView = [QBulletScreenView q_bulletScreenWithFrame:frame texts:showList color:[UIColor whiteColor] font:nil icon:[UIImage imageNamed:@"waring1"] direction:QBulletScreenViewDirectionLeft duration:5.0 target:nil]; [self.view addSubview:bulletScreenView]; 2、设置显示的文本内容 文本内容存放到数组中设置 // 设置显示的内容 NSArray *showList = @[@"1. Hello World", @"2. 欢迎大家关注哦!", @"3. GitHub:QianChia", @"4. 新浪微博:QianChia0123", @"5. 个人博客:cnblogs.com/QianChia"]; bulletScreenView.contentTexts = showList; 文本内容可选属性设置,可以设置文本内容的颜色、字体 // 显示的文本内容颜色,default is redColor bulletScreenView.contentTextColor = [UIColor whiteColor]; // 显示的文本内容字体,default is 15.0 bulletScreenView.contentTextFont = [UIFont boldSystemFontOfSize:18]; 3、设置显示的图标内容 除显示文本内容外,还可以可选设置显示左侧图标 // 显示的图标内容,可以为 nil 不显示图标 bulletScreenView.contentIcon = [UIImage imageNamed:@"waring1"]; 4、设置动画时间 动画时间等于 0 时不进行滚动 // 设置动画时间 bulletScreenView.animationDuration = 5.0; 5、设置动画方向 不设置时默认向上滚动 // 设置动画方向,default is QBulletScreenViewDirectionUp bulletScreenView.animationDirection = QBulletScreenViewDirectionLeft; 6、设置点击回调代理 点击显示的内容时可以可选设置响应代理 // 设置代理,响应滚动视图点击 bulletScreenView.delegate = self; 7、开始滚动动画 添加设置完成后,开启动画 // 开始动画 [bulletScreenView q_startAnimation]; 2.1 水平向左移动 水平向左移动 // 创建弹幕视图控件 CGRect frame = CGRectMake(0, 100, 0, 30); // x, width 设置无效 QBulletScreenView *bulletScreenView = [[QBulletScreenView alloc] initWithFrame:frame]; // 设置显示的内容 NSArray *showList = @[@"1. Hello World", @"2. 欢迎大家关注哦!", @"3. GitHub:QianChia", @"4. 新浪微博:QianChia0123", @"5. 个人博客:cnblogs.com/QianChia"]; bulletScreenView.contentTexts = showList; bulletScreenView.contentTextColor = [UIColor whiteColor]; bulletScreenView.contentTextFont = [UIFont boldSystemFontOfSize:18]; bulletScreenView.contentIcon = [UIImage imageNamed:@"waring1"]; // 设置动画时间 bulletScreenView.animationDuration = 5.0; // 设置动画方向 bulletScreenView.animationDirection = QBulletScreenViewDirectionLeft; // 常规设置 bulletScreenView.layer.cornerRadius = 15; bulletScreenView.layer.masksToBounds = YES; bulletScreenView.backgroundColor = [UIColor colorWithRed:102/255.0f green:133/255.0f blue:253/255.0f alpha:1]; [self.view addSubview:bulletScreenView]; // 开始滚动 [bulletScreenView q_startAnimation]; 效果 2.2 水平向右移动 水平向右移动 // 设置显示的内容 NSArray *showList = @[@"1. Hello World", @"2. 欢迎大家关注哦!", @"3. GitHub:QianChia", @"4. 新浪微博:QianChia0123", @"5. 个人博客:cnblogs.com/QianChia"]; // 创建弹幕视图控件 CGRect frame = CGRectMake(0, 200, 0, 30); // x, width 设置无效 QBulletScreenView *bulletScreenView = [QBulletScreenView q_bulletScreenWithFrame:frame texts:showList color:[UIColor whiteColor] font:nil icon:[UIImage imageNamed:@"waring1"] direction:QBulletScreenViewDirectionRight duration:5.0 target:nil]; // 常规设置 bulletScreenView.layer.cornerRadius = 15; bulletScreenView.layer.masksToBounds = YES; bulletScreenView.backgroundColor = [[UIColor blackColor] colorWithAlphaComponent:0.5]; [self.view addSubview:bulletScreenView]; // 开始滚动 [bulletScreenView q_startAnimation]; 效果 2.3 水平向上移动 水平向上移动 // 创建弹幕视图控件 CGRect frame = CGRectMake(10, 0, 0, 30); // y, width 设置无效 QBulletScreenView *bulletScreenView = [[QBulletScreenView alloc] initWithFrame:frame]; // 设置显示的内容 NSArray *showList = @[@"1. Hello World", @"2. 欢迎大家关注哦!", @"3. GitHub:QianChia", @"4. 新浪微博:QianChia0123", @"5. 个人博客:cnblogs.com/QianChia"]; bulletScreenView.contentTexts = showList; bulletScreenView.contentTextColor = [UIColor whiteColor]; bulletScreenView.contentTextFont = [UIFont boldSystemFontOfSize:18]; bulletScreenView.contentIcon = [UIImage imageNamed:@"waring1"]; // 设置动画时间 bulletScreenView.animationDuration = 2.0; // 设置动画方向 bulletScreenView.animationDirection = QBulletScreenViewDirectionUp; // 常规设置 bulletScreenView.layer.cornerRadius = 15; bulletScreenView.layer.masksToBounds = YES; bulletScreenView.backgroundColor = [UIColor colorWithRed:102/255.0f green:133/255.0f blue:253/255.0f alpha:1]; [backView addSubview:bulletScreenView]; // 开始滚动 [bulletScreenView q_startAnimation]; 效果 2.4 水平向下移动 水平向下移动 // 设置显示的内容 NSArray *showList = @[@"1. Hello World", @"2. 欢迎大家关注哦!", @"3. GitHub:QianChia", @"4. 新浪微博:QianChia0123", @"5. 个人博客:cnblogs.com/QianChia"]; // 创建弹幕视图控件 CGRect frame = CGRectMake(10, 0, 0, 30); // y, width 设置无效 QBulletScreenView *bulletScreenView = [QBulletScreenView q_bulletScreenWithFrame:frame texts:showList color:[UIColor whiteColor] font:[UIFont boldSystemFontOfSize:18] icon:[UIImage imageNamed:@"waring1"] direction:QBulletScreenViewDirectionDown duration:2.0 target:nil]; // 常规设置 bulletScreenView.layer.cornerRadius = 15; bulletScreenView.layer.masksToBounds = YES; bulletScreenView.backgroundColor = [UIColor colorWithRed:102/255.0f green:133/255.0f blue:253/255.0f alpha:1]; [backView addSubview:bulletScreenView]; // 开始滚动 [bulletScreenView q_startAnimation]; 效果