首页 文章 精选 留言 我的

精选列表

搜索[源码阅读],共10000篇文章
优秀的个人博客,低调大师

源码解读Dubbo分层设计思想

一、Dubbo分层整体设计概述 我们先从下图开始简单介绍Dubbo分层设计概念: (引用自Duboo开发指南-框架设计文档) 如图描述Dubbo实现的RPC整体分10层:service、config、proxy、registry、cluster、monitor、protocol、exchange、transport、serialize。 service:使用方定义的接口和实现类; config:负责解析Dubbo定义的配置,比如注解和xml配置,各种参数; proxy:主要负责生成消费者和提供者的代理对象,加载框架功能,比如提供者过滤器链,扩展点; registry:负责注册服务的定义和实现类的装载; cluster:只有消费者有这么一层,负责包装多个服务提供者成一个‘大提供者’,加载负载均衡、路有等扩展点; monitor:定义监控服务,加载监控实现提供者; protocol:封装RPC调用接口,管理调用实体的生命周期; exchange:封装请求响应模式,同步转异步; transport:抽象传输层模型,兼容netty、mina、grizzly等通讯框架; serialize:抽象序列化模型,兼容多种序列化框架,包括:fastjson、fst、hessian2、kryo、kryo2、protobuf等,通过序列化支持跨语言的方式,支持跨语言的rpc调用; Dubbo这么分层的目的在于实现层与层之间的解耦,每一层都定义了接口规范,也可以根据不同的业务需求定制、加载不同的实现,具有极高的扩展性。 1.1. RPC调用过程 接下来结合上图简单描述一次完整的rpc调用过程: 从Dubbo分层的角度看,详细时序图如下,蓝色部分是服务消费端,浅绿色部分是服务提供端,时序图从消费端一次Dubbo方法调用开始,到服务端本地方法执行结束。 从Dubbo核心领域对象的角度看,我们引用Dubbo官方文档说明,如下图所示。Dubbo核心领域对象是Invoker,消费端代理对象是proxy,包装了Invoker的调用;服务端代理对象是一个Invoker,他通过exporter包装,当服务端接收到调用请求后,通过exporter找到Invoker,Invoker去实际执行用户的业务逻辑。 (引用自Dubbo官方文档) 1.2 Dubbo服务的注册和发现流程 下图出自开发指南-框架设计-引用服务时序,主要流程是:从注册中心订阅服务提供者,然后启动tcp服务连接远端提供者,将多个服务提供者合并成一个Invoker,用这个Invoker创建代理对象。 下图出自开发指南-框架设计-暴露服务时序,主要流程是:创建本地服务的代理Invoker,启动tcp服务暴露服务,然后将服务注册到注册中心。 接下来我们结合Dubbo服务的注册和发现,从配置层开始解释每一层的作用和原理。 示例服务接口定义如下: public interface CouponServiceViewFacade { /** * 查询单张优惠券 */ CouponViewDTO query(String code); } 二、配置层 2.1. 做什么 配置层提供配置处理工具类,在容器启动的时候,通过ServiceConfig.export实例化服务提供者,ReferenceConfig.get实例化服务消费者对象。 Dubbo应用使用spring容器启动时,Dubbo服务提供者配置处理器通过ServiceConfig.export启动Dubbo远程服务暴露本地服务。Dubbo服务消费者配置处理器通过ReferenceConfig.get实例化一个代理对象,并通过注册中心服务发现,连接远端服务提供者。 Dubbo配置可以使用注解和xml两种形式,本文采用注解的形式进行说明。 2.2. 怎么做 2.2.1 服务消费端的解析 Spring容器启动过程中,填充bean属性时,对含有Dubbo引用注解的属性使用org.apache.dubbo.config.spring.beans.factory.annotation.ReferenceAnnotationBeanPostProcessor进行初始化。如下是ReferenceAnnotationBeanPostProcessor的构造方法,Dubbo服务消费者注解处理器处理以下三个注解:DubboReference.class、Reference.class、com.alibaba.dubbo.config.annotation.Reference.class修饰的类。 ReferenceAnnotationBeanPostProcessor类定义: public class ReferenceAnnotationBeanPostProcessor extends AbstractAnnotationBeanPostProcessor implements ApplicationContextAware { public ReferenceAnnotationBeanPostProcessor() { super(DubboReference.class, Reference.class, com.alibaba.dubbo.config.annotation.Reference.class); } } Dubbo服务发现到这一层,Dubbo即将开始构建服务消费者的代理对象,CouponServiceViewFacade接口的代理实现类。 2.2.2 服务提供端的解析 Spring容器启动的时候,加载注解@org.apache.dubbo.config.spring.context.annotation.DubboComponentScan指定范围的类,并初始化;初始化使用dubbo实现的扩展点org.apache.dubbo.config.spring.beans.factory.annotation.ServiceClassPostProcessor。 ServiceClassPostProcessor处理的注解类有DubboService.class,Service.class,com.alibaba.dubbo.config.annotation.Service.class。 如下是ServiceClassPostProcessor类定义: public class ServiceClassPostProcessor implements BeanDefinitionRegistryPostProcessor, EnvironmentAware, ResourceLoaderAware, BeanClassLoaderAware { private final static List<Class<? extends Annotation>> serviceAnnotationTypes = asList( DubboService.class,Service.class,com.alibaba.dubbo.config.annotation.Service.class ); 。。。 } 等待Spring容器ContextRefreshedEvent事件,启动Dubbo应用服务监听端口,暴露本地服务。 Dubbo服务注册到这一层,Dubbo即将开始构建服务提供者的代理对象,CouponServiceViewFacade实现类的反射代理类。 三、 代理层 3.1 做什么 为服务消费者生成代理实现实例,为服务提供者生成反射代理实例。 CouponServiceViewFacade的代理实现实例,消费端在调用query方法的时候,实际上是调用代理实现实例的query方法,通过他调用远程服务。 // // Source code recreated from a .class file by IntelliJ IDEA // (powered by Fernflower decompiler) // package org.apache.dubbo.common.bytecode; public class proxy1 implements DC, Destroyable, CouponServiceViewFacade, EchoService { public static Method[] methods; private InvocationHandler handler; public proxy1(InvocationHandler var1) { this.handler = var1; } public proxy1() { } public CouponViewDTO query(String var1) { Object[] var2 = new Object[]{var1}; Object var3 = this.handler.invoke(this, methods[0], var2); return (CouponViewDTO)var3; } } CouponServiceViewFacade的反射代理实例,服务端接收到请求后,通过该实例的Invoke方法最终执行本地方法query。 /** * InvokerWrapper */ public class AbstractProxyInvoker<CouponServiceViewFacade> implements Invoker<CouponServiceViewFacade> { // 。。。 public AbstractProxyInvoker(CouponServiceViewFacade proxy, Class<CouponServiceViewFacade> type, URL url) { //。。。 this.proxy = proxy; this.type = type; this.url = url; } @Override public Result invoke(Invocation invocation) throws RpcException { //。。。 Object value = doInvoke(proxy, invocation.getMethodName(), invocation.getParameterTypes(), invocation.getArguments()); //。。。 } protected Object doInvoke(CouponServiceViewFacade proxy, String methodName, Class<?>[] parameterTypes, Object[] arguments) throws Throwable{ //。。。 return wrapper.invokeMethod(proxy, methodName, parameterTypes, arguments); } } 3.2 怎么做 Dubbo代理工厂接口定义如下,定义了服务提供者和服务消费者的代理对象工厂方法。服务提供者代理对象和服务消费者代理对象都是通过工厂方法创建,工厂实现类可以通过SPI自定义扩展。 @SPI("javassist") public interface ProxyFactory { // 生成服务消费者代理对象 @Adaptive({PROXY_KEY}) <T> T getProxy(Invoker<T> invoker) throws RpcException; // 生成服务消费者代理对象 @Adaptive({PROXY_KEY}) <T> T getProxy(Invoker<T> invoker, boolean generic) throws RpcException; // 生成服务提供者代理对象 @Adaptive({PROXY_KEY}) <T> Invoker<T> getInvoker(T proxy, Class<T> type, URL url) throws RpcException; } 3.2.1 服务消费者 3.2.1.1 创建服务消费者代理类 默认采用Javaassist代理工厂实现,Proxy.getProxy(interfaces)创建代理工厂类,newInstance创建具体代理对象。 public class JavassistProxyFactory extends AbstractProxyFactory { @Override @SuppressWarnings("unchecked") public <T> T getProxy(Invoker<T> invoker, Class<?>[] interfaces) { return (T) Proxy.getProxy(interfaces).newInstance(new InvokerInvocationHandler(invoker)); } 。。。 } 3.2.1.2 服务消费者代理 Dubbo为每个服务消费者生成两个代理类:代理工厂类,接口代理类。 CouponServiceViewFacade代理工厂类: public class Proxy1 extends Proxy implements DC { public Proxy1() { } public Object newInstance(InvocationHandler var1) { return new proxy1(var1); } } 最终生成的CouponServiceViewFacade的代理对象如下,其中handler的实现类是InvokerInvocationHandler,this.handler.invoke方法发起Dubbo调用。 // // Source code recreated from a .class file by IntelliJ IDEA // (powered by Fernflower decompiler) // package org.apache.dubbo.common.bytecode; public class proxy1 implements DC, Destroyable, CouponServiceViewFacade, EchoService { public static Method[] methods; private InvocationHandler handler; public proxy1(InvocationHandler var1) { this.handler = var1; } public proxy1() { } public CouponViewDTO query(String var1) { Object[] var2 = new Object[]{var1}; Object var3 = this.handler.invoke(this, methods[0], var2); return (CouponViewDTO)var3; } } 3.2.2 服务提供者 3.2.2.1 创建服务提供者代理类 默认Javaassist代理工厂实现,使用Wrapper包装本地服务提供者。proxy是实际的服务提供者实例,即CouponServiceViewFacade的本地实现类,type是接口类定义,URL是injvm协议URL。 public class JavassistProxyFactory extends AbstractProxyFactory { 。。。 @Override public <T> Invoker<T> getInvoker(T proxy, Class<T> type, URL url) { // 代理包装类,包装了本地的服务提供者 final Wrapper wrapper = Wrapper.getWrapper(proxy.getClass().getName().indexOf('$') < 0 ? proxy.getClass() : type); // 代理类入口 return new AbstractProxyInvoker<T>(proxy, type, url) { @Override protected Object doInvoke(T proxy, String methodName, Class<?>[] parameterTypes, Object[] arguments) throws Throwable { return wrapper.invokeMethod(proxy, methodName, parameterTypes, arguments); } }; } } 3.2.2.2 Wrapper包装类 Dubbo为每个服务提供者的本地实现生成一个Wrapper代理类,抽象Wrapper类定义如下: public abstract class Wrapper { 。。。 abstract public Object invokeMethod(Object instance, String mn, Class<?>[] types, Object[] args) throws NoSuchMethodException, InvocationTargetException; } 具体Wrapper代理类使用字节码技术动态生成,本地服务CouponServiceViewFacade的代理包装类举例: // // Source code recreated from a .class file by IntelliJ IDEA // (powered by Fernflower decompiler) // package org.apache.dubbo.common.bytecode; import com.xxx.CouponServiceViewFacade; import java.lang.reflect.InvocationTargetException; import java.util.Map; import org.apache.dubbo.common.bytecode.ClassGenerator.DC; public class Wrapper25 extends Wrapper implements DC { 。。。 public Wrapper25() { } public Object invokeMethod(Object var1, String var2, Class[] var3, Object[] var4) throws InvocationTargetException { CouponServiceViewFacade var5; try { var5 = (CouponServiceViewFacade)var1; } catch (Throwable var8) { throw new IllegalArgumentException(var8); } try { if ("query".equals(var2) && var3.length == 1) { return var5.query((String)var4[0]); } } catch (Throwable var9) { throw new InvocationTargetException(var9); } throw new NoSuchMethodException("Not found method \"" + var2 + "\" in class com.xxx.CouponServiceViewFacade."); } 。。。 } 在服务初始化流程中,服务消费者代理对象生成后初始化就完成了,服务消费端的初始化顺序:ReferenceConfig.get->从注册中心订阅服务->启动客户端->创建DubboInvoker->构建ClusterInvoker→创建服务代理对象; 而服务提供端的初始化才刚开始,服务提供端的初始化顺序:ServiceConfig.export->创建AbstractProxyInvoker,通过Injvm协议关联本地服务->启动服务端→注册服务到注册中心。 接下来我们讲注册层。 四、注册层 4.1 做什么 封装服务地址的注册与发现,以服务 URL 为配置中心。服务提供者本地服务启动成功后,监听Dubbo端口成功后,通过注册协议发布到注册中心;服务消费者通过注册协议订阅服务,启动本地应用连接远程服务。 注册协议URL举例: zookeeper://xxx/org.apache.dubbo.registry.RegistryService?application=xxx&... 4.2 怎么做 注册服务工厂接口定义如下,注册服务实现通过SPI扩展,默认是zk作为注册中心。 @SPI("dubbo") public interface RegistryFactory { @Adaptive({"protocol"}) Registry getRegistry(URL url); } 注册服务接口定义; public interface RegistryService { void register(URL url); void unregister(URL url); void subscribe(URL url, NotifyListener listener); void unsubscribe(URL url, NotifyListener listener); List<URL> lookup(URL url); } 五、集群层 5.1 做什么 服务消费方从注册中心订阅服务提供者后,将多个提供者包装成一个提供者,并且封装路由及负载均衡策略;并桥接注册中心,以 Invoker 为中心,扩展接口为 Cluster, Directory, Router, LoadBalance; 服务提供端不存在集群层。 5.2 怎么做 5.2.1 Cluster 集群领域主要负责将多个服务提供者包装成一个ClusterInvoker,注入路由处理器链和负载均衡策略。主要策略有:failover、failfast、failsafe、failback、forking、available、mergeable、broadcast、zone-aware。 集群接口定义如下,只有一个方法:从服务目录中的多个服务提供者构建一个ClusterInvoker。 作用是对上层-代理层屏蔽集群层的逻辑;代理层调用服务方法只需执行Invoker.invoke,然后通过ClusterInvoker内部的路由策略和负载均衡策略计算具体执行哪个远端服务提供者。 @SPI(Cluster.DEFAULT) public interface Cluster { String DEFAULT = FailoverCluster.NAME; @Adaptive <T> Invoker<T> join(Directory<T> directory) throws RpcException; 。。。 } ClusterInvoker执行逻辑,先路由策略过滤,然后负载均衡策略选择最终的远端服务提供者。示例代理如下: public abstract class AbstractClusterInvoker<T> implements ClusterInvoker<T> { 。。。 @Override public Result invoke(final Invocation invocation) throws RpcException { checkWhetherDestroyed(); // binding attachments into invocation. Map<String, Object> contextAttachments = RpcContext.getContext().getObjectAttachments(); if (contextAttachments != null && contextAttachments.size() != 0) { ((RpcInvocation) invocation).addObjectAttachments(contextAttachments); } // 集群invoker执行时,先使用路由链过滤服务提供者 List<Invoker<T>> invokers = list(invocation); LoadBalance loadbalance = initLoadBalance(invokers, invocation); RpcUtils.attachInvocationIdIfAsync(getUrl(), invocation); return doInvoke(invocation, invokers, loadbalance); } 。。。 } 5.2.2 Directory 服务目录接口定义如下,Dubbo方法接口调用时,将方法信息包装成invocation,通过Directory.list过滤可执行的远端服务。 通过org.apache.dubbo.registry.integration.RegistryDirectory桥接注册中心,监听注册中心的路由配置修改、服务治理等事件。 public interface Directory<T> extends Node { Class<T> getInterface(); List<Invoker<T>> list(Invocation invocation) throws RpcException; List<Invoker<T>> getAllInvokers(); URL getConsumerUrl(); } 5.2.3 Router 从已知的所有服务提供者中根据路由规则刷选服务提供者。 服务订阅的时候初始化路由处理器链,调用远程服务的时候先使用路由链过滤服务提供者,再通过负载均衡选择具体的服务节点。 路由处理器链工具类,提供路由筛选服务,监听更新服务提供者。 public class RouterChain<T> { 。。。 public List<Invoker<T>> route(URL url, Invocation invocation) { List<Invoker<T>> finalInvokers = invokers; for (Router router : routers) { finalInvokers = router.route(finalInvokers, url, invocation); } return finalInvokers; } /** * Notify router chain of the initial addresses from registry at the first time. * Notify whenever addresses in registry change. */ public void setInvokers(List<Invoker<T>> invokers) { //路由链监听更新服务提供者 this.invokers = (invokers == null ? Collections.emptyList() : invokers); routers.forEach(router -> router.notify(this.invokers)); } } 订阅服务的时候,将路由链注入到RegistryDirectory中; public class RegistryProtocol implements Protocol { 。。。 private <T> Invoker<T> doRefer(Cluster cluster, Registry registry, Class<T> type, URL url) { 。。。 // 服务目录初始化路由链 directory.buildRouterChain(subscribeUrl); directory.subscribe(toSubscribeUrl(subscribeUrl)); 。。。 return registryInvokerWrapper; } 。。。 } 5.2.4 LoadBalance 根据不同的负载均衡策略从可使用的远端服务实例中选择一个,负责均衡接口定义如下: @SPI(RandomLoadBalance.NAME) public interface LoadBalance { @Adaptive("loadbalance") <T> Invoker<T> select(List<Invoker<T>> invokers, URL url, Invocation invocation) throws RpcException; } 六、监控层 6.1 做什么 监控RPC调用次数和调用时间,以Statistics为中心,扩展接口为 MonitorFactory, Monitor, MonitorService。 6.2 怎么做 监控工厂接口定义,通过SPI方式进行扩展; @SPI("dubbo") public interface MonitorFactory { @Adaptive("protocol") Monitor getMonitor(URL url); } @Adaptive("protocol") Monitor getMonitor(URL url); 监控服务接口定义如下,定义了一些默认的监控维度和指标项; public interface MonitorService { // 监控维度 String APPLICATION = "application"; String INTERFACE = "interface"; String METHOD = "method"; String GROUP = "group"; String VERSION = "version"; String CONSUMER = "consumer"; String PROVIDER = "provider"; String TIMESTAMP = "timestamp"; //监控指标项 String SUCCESS = "success"; String FAILURE = "failure"; String INPUT = INPUT_KEY; String OUTPUT = OUTPUT_KEY; String ELAPSED = "elapsed"; String CONCURRENT = "concurrent"; String MAX_INPUT = "max.input"; String MAX_OUTPUT = "max.output"; String MAX_ELAPSED = "max.elapsed"; String MAX_CONCURRENT = "max.concurrent"; void collect(URL statistics); List<URL> lookup(URL query); } 6.2.1 MonitorFilter 通过过滤器的方式收集服务的调用次数和调用时间,默认实现: org.apache.dubbo.monitor.dubbo.DubboMonitor。 七、协议层 7.1 做什么 封装 RPC 调用,以 Invocation, Result 为中心,扩展接口为 Protocol, Invoker, Exporter。 接下来介绍Dubbo RPC过程中的常用概念: 1)Invocation是请求会话领域模型,每次请求有相应的Invocation实例,负责包装dubbo方法信息为请求参数; 2)Result是请求结果领域模型,每次请求都有相应的Result实例,负责包装dubbo方法响应; 3)Invoker是实体域,代表一个可执行实体,有本地、远程、集群三类; 4)Exporter服务提供者Invoker管理实体; 5)Protocol是服务域,管理Invoker的生命周期,提供服务的暴露和引用入口; 服务初始化流程中,从这一层开始进行远程服务的暴露和连接引用。 对于CouponServiceViewFacade服务来说,服务提供端会监听Dubbo端口启动tcp服务;服务消费端通过注册中心发现服务提供者信息,启动tcp服务连接远端提供者。 7.2 怎么做 协议接口定义如下,统一抽象了不同协议的服务暴露和引用模型,比如InjvmProtocol只需将Exporter,Invoker关联本地实现。DubboProtocol暴露服务的时候,需要监控本地端口启动服务;引用服务的时候,需要连接远端服务。 @SPI("dubbo") public interface Protocol { int getDefaultPort(); @Adaptive <T> Exporter<T> export(Invoker<T> invoker) throws RpcException; @Adaptive <T> Invoker<T> refer(Class<T> type, URL url) throws RpcException; void destroy(); default List<ProtocolServer> getServers() { return Collections.emptyList(); } } Invoker接口定义 Invocation是RPC调用的会话对象,负责包装请求参数;Result是RPC调用的结果对象,负责包装RPC调用的结果对象,包括异常类信息; public interface Invoker<T> extends Node { Class<T> getInterface(); Result invoke(Invocation invocation) throws RpcException; } 7.2.1 服务的暴露和引用 服务暴露的时候,开启RPC服务端;引用服务的时候,开启RPC客户端。 public class DubboProtocol extends AbstractProtocol { 。。。 @Override public <T> Exporter<T> export(Invoker<T> invoker) throws RpcException { 。。。 // 开启rpc服务端 openServer(url); optimizeSerialization(url); return exporter; } @Override public <T> Invoker<T> protocolBindingRefer(Class<T> serviceType, URL url) throws RpcException { optimizeSerialization(url); // 创建dubbo invoker,开启rpc客户端 DubboInvoker<T> invoker = new DubboInvoker<T>(serviceType, url, getClients(url), invokers); invokers.add(invoker); return invoker; } 。。。 } 7.2.2 服务端响应请求 接收响应请求; private ExchangeHandler requestHandler = new ExchangeHandlerAdapter() { @Override public CompletableFuture<Object> reply(ExchangeChannel channel, Object message) throws RemotingException { 。。。 Invocation inv = (Invocation) message; Invoker<?> invoker = getInvoker(channel, inv); RpcContext.getContext().setRemoteAddress(channel.getRemoteAddress()); //调用本地服务 Result result = invoker.invoke(inv); return result.thenApply(Function.identity()); } 。。。 }; 7.2.3 客户端发送请求 调用远程服务; public class DubboInvoker<T> extends AbstractInvoker<T> { 。。。 @Override protected Result doInvoke(final Invocation invocation) throws Throwable { 。。。 boolean isOneway = RpcUtils.isOneway(getUrl(), invocation); int timeout = calculateTimeout(invocation, methodName); if (isOneway) { boolean isSent = getUrl().getMethodParameter(methodName, Constants.SENT_KEY, false); currentClient.send(inv, isSent); return AsyncRpcResult.newDefaultAsyncResult(invocation); } else { ExecutorService executor = getCallbackExecutor(getUrl(), inv); CompletableFuture<AppResponse> appResponseFuture = currentClient.request(inv, timeout, executor).thenApply(obj -> (AppResponse) obj); FutureContext.getContext().setCompatibleFuture(appResponseFuture); AsyncRpcResult result = new AsyncRpcResult(appResponseFuture, inv); result.setExecutor(executor); return result; } } } 八、交换层 8.1 做什么 封装请求响应模式,同步转异步,以 Request, Response 为中心,扩展接口为 Exchanger, ExchangeChannel, ExchangeClient, ExchangeServer。 使用request包装Invocation作为完整的请求对象,使用response包装result作为完整的响应对象;Request、Response相比Invocation、Result添加了Dubbo的协议头。 8.2 怎么做 交换器对象接口定义,定义了远程服务的绑定和连接,使用SPI方式进行扩展; @SPI(HeaderExchanger.NAME) public interface Exchanger { @Adaptive({Constants.EXCHANGER_KEY}) ExchangeServer bind(URL url, ExchangeHandler handler) throws RemotingException; @Adaptive({Constants.EXCHANGER_KEY}) ExchangeClient connect(URL url, ExchangeHandler handler) throws RemotingException; } @Adaptive({Constants.EXCHANGER_KEY}) ExchangeServer bind(URL url, ExchangeHandler handler) throws RemotingException; @Adaptive({Constants.EXCHANGER_KEY}) ExchangeClient connect(URL url, ExchangeHandler handler) throws RemotingException; 交换层模型类图: 8.2.1 服务提供者 服务提供端接收到请求后,本地执行,发送响应结果; public class HeaderExchangeHandler implements ChannelHandlerDelegate { 。。。 void handleRequest(final ExchangeChannel channel, Request req) throws RemotingException { //封装响应 Response res = new Response(req.getId(), req.getVersion()); 。。。 Object msg = req.getData(); try { CompletionStage<Object> future = handler.reply(channel, msg); future.whenComplete((appResult, t) -> { try { if (t == null) { res.setStatus(Response.OK); res.setResult(appResult); } else { res.setStatus(Response.SERVICE_ERROR); res.setErrorMessage(StringUtils.toString(t)); } channel.send(res); } catch (RemotingException e) { logger.warn("Send result to consumer failed, channel is " + channel + ", msg is " + e); } }); } catch (Throwable e) { res.setStatus(Response.SERVICE_ERROR); res.setErrorMessage(StringUtils.toString(e)); channel.send(res); } } 。。。 } 8.2.2 服务消费者 服务消费端发起请求的封装,方法执行成功后,返回一个future; final class HeaderExchangeChannel implements ExchangeChannel { 。。。 //封装请求实体 @Override public CompletableFuture<Object> request(Object request, int timeout, ExecutorService executor) throws RemotingException { 。。。 // create request. Request req = new Request(); req.setVersion(Version.getProtocolVersion()); req.setTwoWay(true); //RpcInvocation req.setData(request); DefaultFuture future = DefaultFuture.newFuture(channel, req, timeout, executor); try { channel.send(req); } catch (RemotingException e) { future.cancel(); throw e; } return future; } 。。。 } 九、传输层 9.1 做什么 抽象传输层模型,兼容netty、mina、grizzly等通讯框架。 9.2 怎么做 传输器接口定义如下,它与交换器Exchanger接口定义相似,区别在于Exchanger是围绕Dubbo的Request和Response封装的操作门面接口,而Transporter更加的底层,Exchanger用于隔离Dubbo协议层和通讯层。 @SPI("netty") public interface Transporter { @Adaptive({Constants.SERVER_KEY, Constants.TRANSPORTER_KEY}) RemotingServer bind(URL url, ChannelHandler handler) throws RemotingException; @Adaptive({Constants.CLIENT_KEY, Constants.TRANSPORTER_KEY}) Client connect(URL url, ChannelHandler handler) throws RemotingException; } 自定义传输层模型 通过SPI的方式,动态选择具体的传输框架,默认是netty; public class Transporters { 。。。 public static RemotingServer bind(URL url, ChannelHandler... handlers) throws RemotingException { 。。。 return getTransporter().bind(url, handler); } public static Client connect(URL url, ChannelHandler... handlers) throws RemotingException { 。。。 return getTransporter().connect(url, handler); } public static Transporter getTransporter() { return ExtensionLoader.getExtensionLoader(Transporter.class).getAdaptiveExtension(); } } netty框架的channel适配如下,采用装饰模式,使用netty框架的channel作为Dubbo自定义的channel做实现; final class NettyChannel extends AbstractChannel { private NettyChannel(Channel channel, URL url, ChannelHandler handler) { super(url, handler); if (channel == null) { throw new IllegalArgumentException("netty channel == null;"); } this.channel = channel; } } 十、序列化 10.1 做什么 抽象序列化模型,兼容多种序列化框架,包括:fastjson、fst、hessian2、kryo、kryo2、protobuf等,通过序列化支持跨语言的方式,支持跨语言的RPC调用。 10.2 怎么做 定义Serialization扩展点,默认hessian2,支持跨语言。Serialization接口实际是一个工厂接口,通过SPI扩展;实际序列化和反序列化工作由ObjectOutput,ObjectInput完成,通过装饰模式让hessian2完成实际工作。 @SPI("hessian2") public interface Serialization { byte getContentTypeId(); String getContentType(); @Adaptive ObjectOutput serialize(URL url, OutputStream output) throws IOException; @Adaptive ObjectInput deserialize(URL url, InputStream input) throws IOException; } 10.2.1 通讯协议设计 下图出自开发指南-实现细节-远程通讯细节,描述Dubbo协议头设计; 0-15bit表示Dubbo协议魔法数字,值:0xdabb; 16bit请求响应标记,Request - 1; Response - 0; 17bit请求模式标记,只有请求消息才会有,1表示需要服务端返回响应; 18bit是事件消息标记,1表示该消息是事件消息,比如心跳消息; 19-23bit是序列化类型标记,hessian序列化id是2,fastjson是6,详见org.apache.dubbo.common.serialize.Constants; 24-31bit表示状态,只有响应消息才有用; 32-64bit是RPC请求ID; 96-128bit是会话数据长度; 128是消息体字节序列; 十一、总结 Dubbo将RPC整个过程分成核心的代理层、注册层、集群层、协议层、传输层等,层与层之间的职责边界明确;核心层都通过接口定义,不依赖具体实现,这些接口串联起来形成了Dubbo的骨架;这个骨架也可以看作是Dubbo的内核,内核使用SPI 机制加载插件(扩展点),达到高度可扩展。 vivo互联网服务器团队-Wang Genfu

优秀的个人博客,低调大师

KubeSphere Helm 应用仓库源码分析

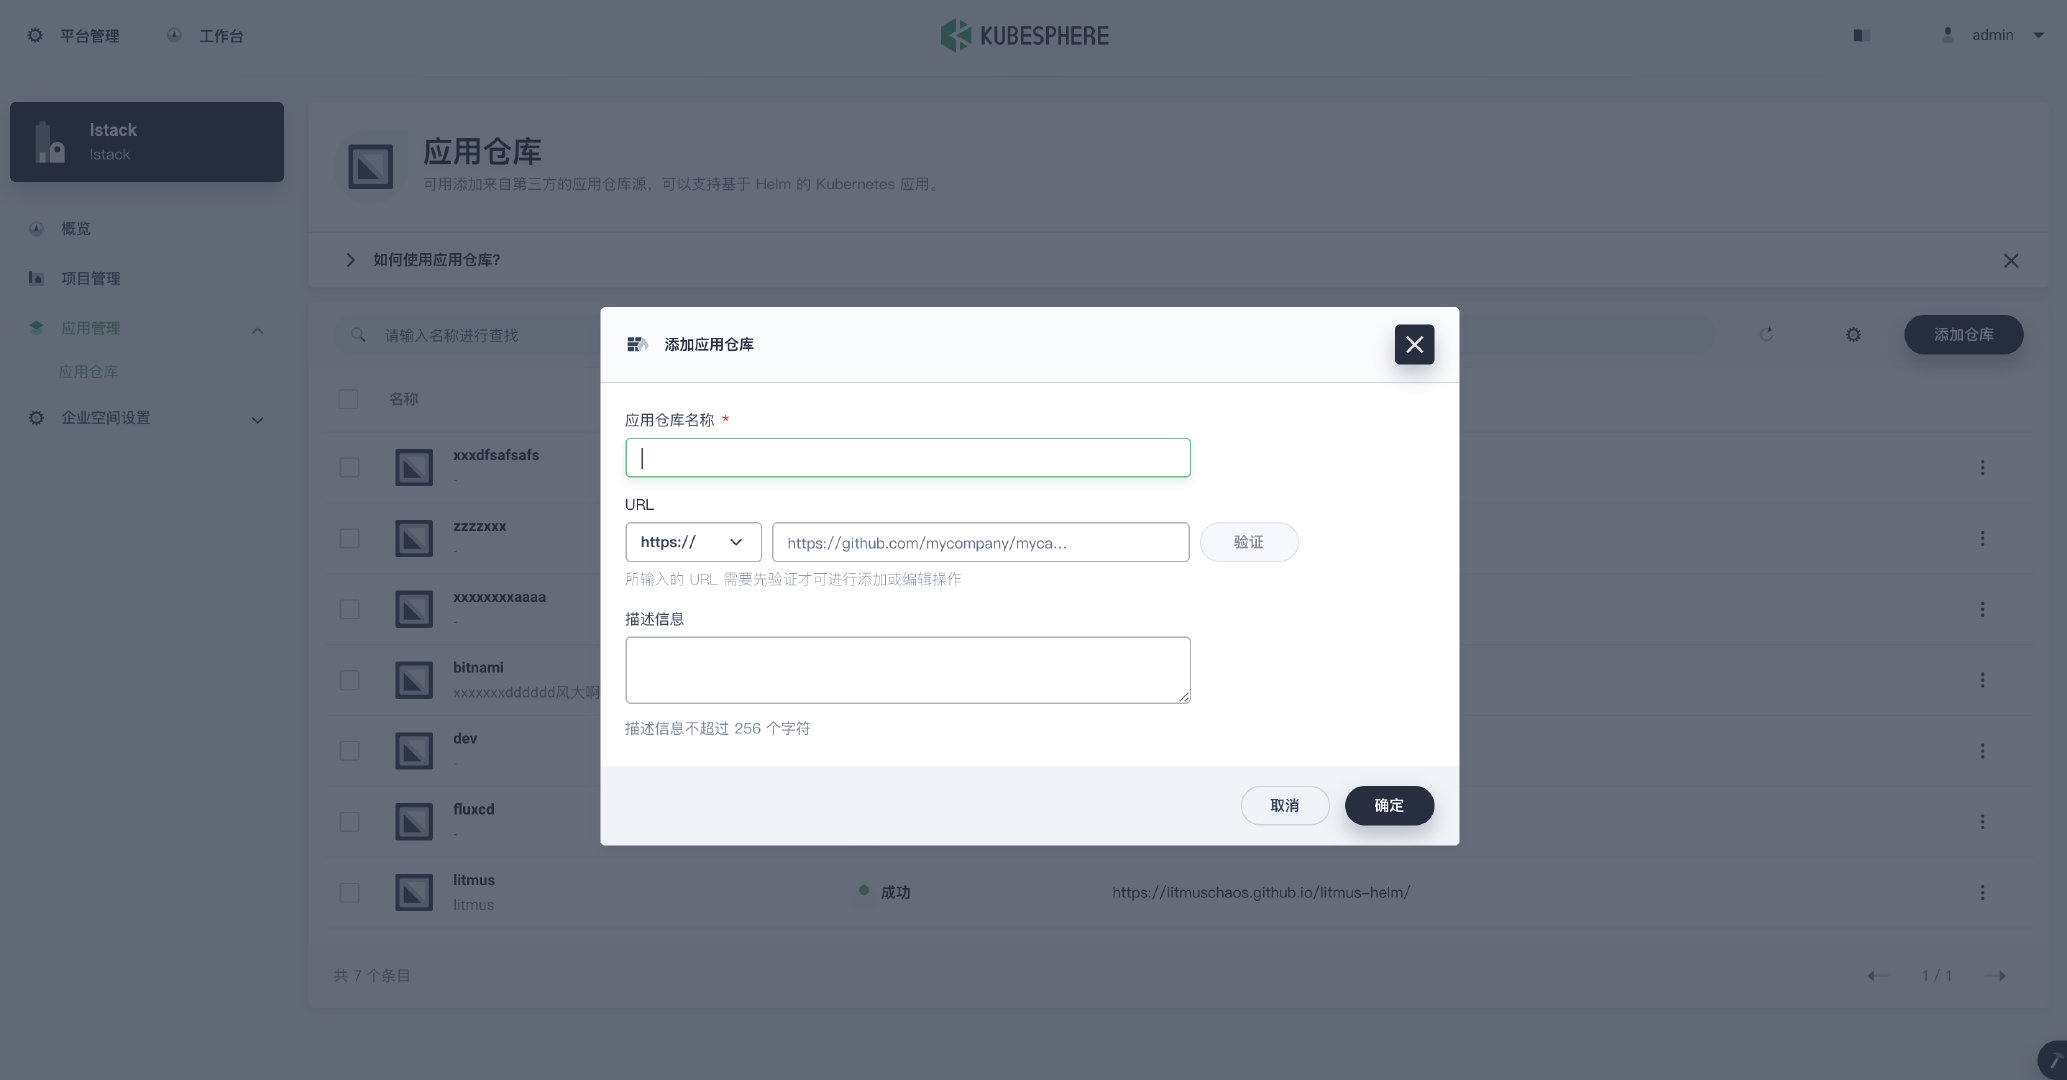
作者:蔡锡生,LStack 平台研发工程师,近期专注于基于 OAM 的应用托管平台落地。 背景介绍 KubeSphere 应用商店简介 作为一个开源的、以应用为中心的容器平台,KubeSphere 在 OpenPitrix 的基础上,为用户提供了一个基于 Helm 的应用商店,用于应用生命周期管理。OpenPitrix 是一个开源的 Web 平台,用于打包、部署和管理不同类型的应用。KubeSphere 应用商店让 ISV、开发者和用户能够在一站式服务中只需点击几下就可以上传、测试、部署和发布应用。 KubeSphere 中的 Helm 仓库功能 KubeSphere Helm 仓库添加 Helm repo list KubeSphere Helm 仓库中的应用模版查询 Helm 仓库简介 Helm charts 是存放 K8s 应用模版的仓库,该仓库由 index.yaml 文件和 .tgz 模版包组成。 [root@ningbo stable]# ls -al 总用量 400 drwxr-xr-x. 26 root root 4096 6月 22 17:01 . drwxr-xr-x. 4 root root 86 6月 22 16:37 .. -rw-r--r--. 1 root root 10114 6月 22 17:12 index.yaml -rw-r--r--. 1 root root 3803 6月 8 2020 lsh-cluster-csm-om-agent-0.1.0.tgz -rw-r--r--. 1 root root 4022 6月 8 2020 lsh-mcp-cc-alert-service-0.1.0.tgz -rw-r--r--. 1 root root 4340 6月 8 2020 lsh-mcp-cc-sms-service-0.1.0.tgz -rw-r--r--. 1 root root 4103 6月 8 2020 lsh-mcp-cpm-metrics-exchange-0.1.0.tgz -rw-r--r--. 1 root root 4263 6月 8 2020 lsh-mcp-cpm-om-service-0.1.0.tgz -rw-r--r--. 1 root root 4155 6月 8 2020 lsh-mcp-csm-om-service-0.1.0.tgz -rw-r--r--. 1 root root 3541 6月 8 2020 lsh-mcp-deploy-service-0.1.0.tgz -rw-r--r--. 1 root root 5549 6月 8 2020 lsh-mcp-iam-apigateway-service-0.1.0.tgz index.yaml 文件 apiVersion: v1 entries: aliyun-ccm: - apiVersion: v2 appVersion: addon created: "2021-06-21T08:59:58Z" description: A Helm chart for Kubernetes digest: 6bda563c86333475255e5edfedc200ae282544e2c6e22b519a59b3c7bdef9a32 name: aliyun-ccm type: application urls: - charts/aliyun-ccm-0.1.0.tgz version: 0.1.0 aliyun-csi-driver: - apiVersion: v2 appVersion: addon created: "2021-06-21T08:59:58Z" description: A Helm chart for Kubernetes digest: b49f128d7a49401d52173e6f58caedd3fabbe8e2827dc00e6a824ee38860fa51 name: aliyun-csi-driver type: application urls: - charts/aliyun-csi-driver-0.1.0.tgz version: 0.1.0 application-controller: - apiVersion: v1 appVersion: addon created: "2021-06-21T08:59:58Z" description: A Helm chart for application Controller digest: 546e72ce77f865683ce0ea75f6e0203537a40744f2eb34e36a5bd378f9452bc5 name: application-controller urls: - charts/application-controller-0.1.0.tgz version: 0.1.0 .tgz 解压缩后的文件目录 [root@ningbo stable]# cd mysql/ [root@ningbo mysql]# ls -al 总用量 20 drwxr-xr-x. 3 root root 97 5月 25 2020 . drwxr-xr-x. 26 root root 4096 6月 22 17:01 .. -rwxr-xr-x. 1 root root 106 5月 25 2020 Chart.yaml -rwxr-xr-x. 1 root root 364 5月 25 2020 .Helmignore -rwxr-xr-x. 1 root root 76 5月 25 2020 index.yaml drwxr-xr-x. 3 root root 146 5月 25 2020 templates -rwxr-xr-x. 1 root root 1735 5月 25 2020 values.yaml Chart.yaml [root@ningbo mysql]# cat Chart.yaml apiVersion: v1 appVersion: "1.0" description: A Helm chart for Kubernetes name: mysql version: 0.1.0 添加 Helm 仓库代码介绍 接口实现分析 路由注册 handler,参数解析,调用 models 方面 models ,调用 models 方法 crd client,调用 K8s api 存储 路由注册 webservice.Route(webservice.POST("/repos"). To(handler.CreateRepo). // 跟进 Doc("Create a global repository, which is used to store package of app"). Metadata(restfulspec.KeyOpenAPITags, []string{constants.OpenpitrixTag}). Param(webservice.QueryParameter("validate", "Validate repository")). Returns(http.StatusOK, api.StatusOK, openpitrix.CreateRepoResponse{}). Reads(openpitrix.CreateRepoRequest{})) 校验参数, 构建 models func (h *openpitrixHandler) CreateRepo(req *restful.Request, resp *restful.Response) { createRepoRequest := &openpitrix.CreateRepoRequest{} err := req.ReadEntity(createRepoRequest) if err != nil { klog.V(4).Infoln(err) api.HandleBadRequest(resp, nil, err) return } createRepoRequest.Workspace = new(string) *createRepoRequest.Workspace = req.PathParameter("workspace") user, _ := request.UserFrom(req.Request.Context()) creator := "" if user != nil { creator = user.GetName() } parsedUrl, err := url.Parse(createRepoRequest.URL) if err != nil { api.HandleBadRequest(resp, nil, err) return } userInfo := parsedUrl.User // trim credential from url parsedUrl.User = nil repo := v1alpha1.HelmRepo{ ObjectMeta: metav1.ObjectMeta{ Name: idutils.GetUuid36(v1alpha1.HelmRepoIdPrefix), Annotations: map[string]string{ constants.CreatorAnnotationKey: creator, }, Labels: map[string]string{ constants.WorkspaceLabelKey: *createRepoRequest.Workspace, }, }, Spec: v1alpha1.HelmRepoSpec{ Name: createRepoRequest.Name, Url: parsedUrl.String(), SyncPeriod: 0, Description: stringutils.ShortenString(createRepoRequest.Description, 512), }, } if strings.HasPrefix(createRepoRequest.URL, "https://") || strings.HasPrefix(createRepoRequest.URL, "http://") { if userInfo != nil { repo.Spec.Credential.Username = userInfo.Username() repo.Spec.Credential.Password, _ = userInfo.Password() } } else if strings.HasPrefix(createRepoRequest.URL, "s3://") { cfg := v1alpha1.S3Config{} err := json.Unmarshal([]byte(createRepoRequest.Credential), &cfg) if err != nil { api.HandleBadRequest(resp, nil, err) return } repo.Spec.Credential.S3Config = cfg } var result interface{} // 1. validate repo result, err = h.openpitrix.ValidateRepo(createRepoRequest.URL, &repo.Spec.Credential) if err != nil { klog.Errorf("validate repo failed, err: %s", err) api.HandleBadRequest(resp, nil, err) return } // 2. create repo validate, _ := strconv.ParseBool(req.QueryParameter("validate")) if !validate { if repo.GetTrueName() == "" { api.HandleBadRequest(resp, nil, fmt.Errorf("repo name is empty")) return } result, err = h.openpitrix.CreateRepo(&repo) //跟进 } if err != nil { klog.Errorln(err) handleOpenpitrixError(resp, err) return } resp.WriteEntity(result) } 调用 createRep 方法 func (c *repoOperator) CreateRepo(repo *v1alpha1.HelmRepo) (*CreateRepoResponse, error) { name := repo.GetTrueName() items, err := c.repoLister.List(labels.SelectorFromSet(map[string]string{constants.WorkspaceLabelKey: repo.GetWorkspace()})) if err != nil && !apierrors.IsNotFound(err) { klog.Errorf("list Helm repo failed: %s", err) return nil, err } for _, exists := range items { if exists.GetTrueName() == name { klog.Error(repoItemExists, "name: ", name) return nil, repoItemExists } } repo.Spec.Description = stringutils.ShortenString(repo.Spec.Description, DescriptionLen) _, err = c.repoClient.HelmRepos().Create(context.TODO(), repo, metav1.CreateOptions{}) // 跟进 if err != nil { klog.Errorf("create Helm repo failed, repo_id: %s, error: %s", repo.GetHelmRepoId(), err) return nil, err } else { klog.V(4).Infof("create Helm repo success, repo_id: %s", repo.GetHelmRepoId()) } return &CreateRepoResponse{repo.GetHelmRepoId()}, nil } 调用 K8s api, 创建 crd HelmRepo // Create takes the representation of a HelmRepo and creates it. Returns the server's representation of the HelmRepo, and an error, if there is any. func (c *HelmRepos) Create(ctx context.Context, HelmRepo *v1alpha1.HelmRepo, opts v1.CreateOptions) (result *v1alpha1.HelmRepo, err error) { result = &v1alpha1.HelmRepo{} err = c.client.Post(). Resource("Helmrepos"). VersionedParams(&opts, scheme.ParameterCodec). Body(HelmRepo). Do(ctx). Into(result) return } 查询Helm 仓库应用模版代码介绍 接口实现 路由注册 handler,参数解析,调用 models 方面 models ,调用 models 方法 crd client,调用 K8s api 存储 路由注册 webservice.Route(webservice.GET("/apps").LiHui, 6 months ago: • openpitrix crd Deprecate(). To(handler.ListApps). // 跟进 Doc("List app templates"). Param(webservice.QueryParameter(params.ConditionsParam, "query conditions,connect multiple conditions with commas, equal symbol for exact query, wave symbol for fuzzy query e.g. name~a"). Required(false). DataFormat("key=%s,key~%s")). Param(webservice.QueryParameter(params.PagingParam, "paging query, e.g. limit=100,page=1"). Required(false). DataFormat("limit=%d,page=%d"). DefaultValue("limit=10,page=1")). Param(webservice.QueryParameter(params.ReverseParam, "sort parameters, e.g. reverse=true")). Param(webservice.QueryParameter(params.OrderByParam, "sort parameters, e.g. orderBy=createTime")). Metadata(restfulspec.KeyOpenAPITags, []string{constants.OpenpitrixTag}). Returns(http.StatusOK, api.StatusOK, models.PageableResponse{})) 参数解析,调用 models 方面 func (h *openpitrixHandler) ListApps(req *restful.Request, resp *restful.Response) limit, offset := params.ParsePaging(req) orderBy := params.GetStringValueWithDefault(req, params.OrderByParam, openpitrix.CreateTime) reverse := params.GetBoolValueWithDefault(req, params.ReverseParam, false) conditions, err := params.ParseConditions(req) if err != nil { klog.V(4).Infoln(err) api.HandleBadRequest(resp, nil, err) return } if req.PathParameter("workspace") != "" { conditions.Match[openpitrix.WorkspaceLabel] = req.PathParameter("workspace") } result, err := h.openpitrix.ListApps(conditions, orderBy, reverse, limit, offset) // 跟进 if err != nil { klog.Errorln(err) handleOpenpitrixError(resp, err) return } resp.WriteEntity(result) } 从缓存中获取 applist func (c *applicationOperator) ListApps(conditions *params.Conditions, orderBy string, reverse bool, limit, offset int) (*models.PageableResponse, error) { apps, err := c.listApps(conditions) // 重点跟进 if err != nil { klog.Error(err) return nil, err } apps = filterApps(apps, conditions) if reverse { sort.Sort(sort.Reverse(HelmApplicationList(apps))) } else { sort.Sort(HelmApplicationList(apps)) } totalCount := len(apps) start, end := (&query.Pagination{Limit: limit, Offset: offset}).GetValidPagination(totalCount) apps = apps[start:end] items := make([]interface{}, 0, len(apps)) for i := range apps { versions, err := c.getAppVersionsByAppId(apps[i].GetHelmApplicationId()) if err != nil && !apierrors.IsNotFound(err) { return nil, err } ctg, _ := c.ctgLister.Get(apps[i].GetHelmCategoryId()) items = append(items, convertApp(apps[i], versions, ctg, 0)) } return &models.PageableResponse{Items: items, TotalCount: totalCount}, nil } // line 601 func (c *applicationOperator) listApps(conditions *params.Conditions) (ret []*v1alpha1.HelmApplication, err error) { repoId := conditions.Match[RepoId] if repoId != "" && repoId != v1alpha1.AppStoreRepoId { // get Helm application from Helm repo if ret, exists := c.cachedRepos.ListApplicationsByRepoId(repoId); !exists { klog.Warningf("load repo failed, repo id: %s", repoId) return nil, loadRepoInfoFailed } else { return ret, nil } } else { if c.backingStoreClient == nil { return []*v1alpha1.HelmApplication{}, nil } ret, err = c.appLister.List(labels.SelectorFromSet(buildLabelSelector(conditions))) } return } 缓存具体获取应用逻辑 func (c *cachedRepos) ListApplicationsByRepoId(repoId string) (ret []*v1alpha1.HelmApplication, exists bool) { c.RLock() defer c.RUnlock() if repo, exists := c.repos[repoId]; !exists { return nil, false } else { ret = make([]*v1alpha1.HelmApplication, 0, 10) for _, app := range c.apps { if app.GetHelmRepoId() == repo.Name { // 应用的仓库ID相同则追加 ret = append(ret, app) } } } return ret, true } 既然 app template 是从缓存中获取的,那么缓存中的数据又是什么时候录入的呢? 创建全局缓存变量 添加新 Helm 仓库,K8s 中已安装 crd 控制器 HelmRepoController 发现有新的 HelmRepo 创建,更新 .Status.Data 内容 informer 发现有更新,同时更新缓存 缓存更新的实现 创建全局变量,通过 init 函数初始化 通过 HelmRepo 的 informer 实现缓存同步更新 在每次调用接口的时候,hanlder 类中包换了缓存变量 创建接口类 openpitrix.Interface type openpitrixHandler struct { openpitrix openpitrix.Interface } func newOpenpitrixHandler(ksInformers informers.InformerFactory, ksClient versioned.Interface, option *openpitrixoptions.Options) *openpitrixHandler { var s3Client s3.Interface if option != nil && option.S3Options != nil && len(option.S3Options.Endpoint) != 0 { var err error s3Client, err = s3.NewS3Client(option.S3Options) if err != nil { klog.Errorf("failed to connect to storage, please check storage service status, error: %v", err) } } return &openpitrixHandler{ openpitrix.NewOpenpitrixOperator(ksInformers, ksClient, s3Client), } } NewOpenpitrixOperator 通过在 informer 中添加通知函数,执行缓存更新 once.Do 只执行一次 var cachedReposData reposcache.ReposCache var HelmReposInformer cache.SharedIndexInformer var once sync.Once func init() { cachedReposData = reposcache.NewReposCache() // 全局缓存 } func NewOpenpitrixOperator(ksInformers ks_informers.InformerFactory, ksClient versioned.Interface, s3Client s3.Interface) Interface { once.Do(func() { klog.Infof("start Helm repo informer") HelmReposInformer = ksInformers.KubeSphereSharedInformerFactory().Application().V1alpha1().HelmRepos().Informer() HelmReposInformer.AddEventHandler(cache.ResourceEventHandlerFuncs{ AddFunc: func(obj interface{}) { r := obj.(*v1alpha1.HelmRepo) cachedReposData.AddRepo(r) // 缓存更新, 点击跟进 }, UpdateFunc: func(oldObj, newObj interface{}) { oldR := oldObj.(*v1alpha1.HelmRepo) cachedReposData.DeleteRepo(oldR) r := newObj.(*v1alpha1.HelmRepo) cachedReposData.AddRepo(r) }, DeleteFunc: func(obj interface{}) { r := obj.(*v1alpha1.HelmRepo) cachedReposData.DeleteRepo(r) }, }) go HelmReposInformer.Run(wait.NeverStop) }) return &openpitrixOperator{ AttachmentInterface: newAttachmentOperator(s3Client), // cachedReposData used ApplicationInterface: newApplicationOperator(cachedReposData, ksInformers.KubeSphereSharedInformerFactory(), ksClient, s3Client), // cachedReposData used RepoInterface: newRepoOperator(cachedReposData, ksInformers.KubeSphereSharedInformerFactory(), ksClient), // cachedReposData used ReleaseInterface: newReleaseOperator(cachedReposData, ksInformers.KubernetesSharedInformerFactory(), ksInformers.KubeSphereSharedInformerFactory(), ksClient), CategoryInterface: newCategoryOperator(ksInformers.KubeSphereSharedInformerFactory(), ksClient), } } 缓存更新逻辑 // 缓存结构体 type cachedRepos struct { sync.RWMutex chartsInRepo map[workspace]map[string]int repoCtgCounts map[string]map[string]int repos map[string]*v1alpha1.HelmRepo apps map[string]*v1alpha1.HelmApplication versions map[string]*v1alpha1.HelmApplicationVersion } ByteArrayToSavedIndex:将 repo.Status.Data 转换为 SavedIndex 数组对象 遍历 SavedIndex.Applications 保存(app.ApplicationId:HelmApplication)到 cachedRepos.apps func (c *cachedRepos) AddRepo(repo *v1alpha1.HelmRepo) error { return c.addRepo(repo, false) } //Add new Repo to cachedRepos func (c *cachedRepos) addRepo(repo *v1alpha1.HelmRepo, builtin bool) error { if len(repo.Status.Data) == 0 { return nil } index, err := Helmrepoindex.ByteArrayToSavedIndex([]byte(repo.Status.Data)) if err != nil { klog.Errorf("json unmarshal repo %s failed, error: %s", repo.Name, err) return err } ... chartsCount := 0 for key, app := range index.Applications { if builtin { appName = v1alpha1.HelmApplicationIdPrefix + app.Name } else { appName = app.ApplicationId } HelmApp := v1alpha1.HelmApplication{ .... } c.apps[app.ApplicationId] = &HelmApp var ctg, appVerName string var chartData []byte for _, ver := range app.Charts { chartsCount += 1 if ver.Annotations != nil && ver.Annotations["category"] != "" { ctg = ver.Annotations["category"] } if builtin { appVerName = base64.StdEncoding.EncodeToString([]byte(ver.Name + ver.Version)) chartData, err = loadBuiltinChartData(ver.Name, ver.Version) if err != nil { return err } } else { appVerName = ver.ApplicationVersionId } version := &v1alpha1.HelmApplicationVersion{ .... } c.versions[ver.ApplicationVersionId] = version } .... } return nil } HelmRepo 协调器 HelmRepo.Status.Data 加载流程 LoadRepoIndex: convert index.yaml to IndexFile MergeRepoIndex: merge new and old IndexFile savedIndex.Bytes(): compress data with zlib.NewWriter 将 savedIndex 数据存入 CRD(HelmRepo.Status.Data) 关键结构体 // HelmRepo.Status.Data == SavedIndex 压缩后的数据 type SavedIndex struct { APIVersion string `json:"apiVersion"` Generated time.Time `json:"generated"` Applications map[string]*Application `json:"apps"` PublicKeys []string `json:"publicKeys,omitempty"` // Annotations are additional mappings uninterpreted by Helm. They are made available for // other applications to add information to the index file. Annotations map[string]string `json:"annotations,omitempty"` } // IndexFile represents the index file in a chart repository type IndexFile struct { APIVersion string `json:"apiVersion"` Generated time.Time `json:"generated"` Entries map[string]ChartVersions `json:"entries"` PublicKeys []string `json:"publicKeys,omitempty"` } 代码位置 func (r *ReconcileHelmRepo) syncRepo(instance *v1alpha1.HelmRepo) error { // 1. load index from Helm repo index, err := Helmrepoindex.LoadRepoIndex(context.TODO(), instance.Spec.Url, &instance.Spec.Credential) if err != nil { klog.Errorf("load index failed, repo: %s, url: %s, err: %s", instance.GetTrueName(), instance.Spec.Url, err) return err } existsSavedIndex := &Helmrepoindex.SavedIndex{} if len(instance.Status.Data) != 0 { existsSavedIndex, err = Helmrepoindex.ByteArrayToSavedIndex([]byte(instance.Status.Data)) if err != nil { klog.Errorf("json unmarshal failed, repo: %s, error: %s", instance.GetTrueName(), err) return err } } // 2. merge new index with old index which is stored in crd savedIndex := Helmrepoindex.MergeRepoIndex(index, existsSavedIndex) // 3. save index in crd data, err := savedIndex.Bytes() if err != nil { klog.Errorf("json marshal failed, error: %s", err) return err } instance.Status.Data = string(data) return nil } Question: Q1:Helm 仓库发包时如何进行 Helm release 版本控制 A:修改 Charts.yaml 中的字段 version,然后 Helm package, 等于新增一个 .tgz 包,老版本的不要删除,这时候执行 index 的时候会吧所有的 .tgz 包包含在内。 $ Helm repo index stable --url=xxx.xx.xx.xxx:8081/ $ cat index.yaml .... redis: - apiVersion: v1 appVersion: "1.0" created: "2021-06-22T16:34:58.286583012+08:00" description: A Helm chart for Kubernetes digest: fd7c0d962155330527c0a512a74bea33302fca940b810c43ee5f461b1013dbf5 name: redis urls: - xxx.xx.xx.xxx:8081/redis-0.1.1.tgz version: 0.1.1 - apiVersion: v1 appVersion: "1.0" created: "2021-06-22T16:34:58.286109049+08:00" description: A Helm chart for Kubernetes digest: 1a23bd6d5e45f9d323500bbe170011fb23bfccf2c1bd25814827eb8dc643d7f0 name: redis urls: - xxx.xx.xx.xxx:8081/redis-0.1.0.tgz version: 0.1.0 Q2:KuberSphere 版本同步功能有缺失?用户添加完 Helm 仓库后,如果有新的应用发布,查询不到 A:解决方案:使用 3 种同步策略 定时同步 Helm 仓库(HelmRepo 设置一个定时协调的事件) 企业仓库,用户可以设置 hook,发布新版本的时候主动触发更新 用户主动更新 charts Q3:index.yaml 缓存位置 A:某些仓库的index.yaml 比较大,如果1000个用户,1000个charts 会太吃内存。建议常用index.yaml的放在内存中,不常用的index.yaml存储在本地磁盘。 本文由博客一文多发平台 OpenWrite 发布!
优秀的个人博客,低调大师

组件 popup 设计和源码剖析

前言 NutUI 是一套京东风格的移动端 Vue 组件库,生态系统覆盖面广,支持按需加载、主题定制、多语言等,功能强大。目前 40+ 京东项目正在使用,设计精美,风格统一。在开发组件库的过程中,NutUI 是如何处理组件间的层级关系的呢?今天就给大家解析 NutUI 中具有处理层级关系的公共组件 popup。 1. 什么是 popup 它是一个公共组件,很多带有弹出层的组件都是基于这个组件开发的。封装这个组件首先是解决了重复造轮子的问题,避免多个组件都要开发这个公共功能,不过它的优势不仅仅于此,还有如下优势: 1.动态处理层级关系,保证后面触发的弹窗显示在最上面。 2.当多个弹窗组件同时显示时候,保持一个遮罩层,并动态处理遮罩层关系。 本文主要包含三方面的内容 动态处理层级关系 遮罩层管理 滚动穿透问题 2. 动态处理层级关系 2.1. 为什么要处理层级关系 大家在开发组件的时候或多或少都会遇到层级问题,如在当前页面最上方显示弹框,Toast 提示等等。那么该如何定义的它们的 zIndex 从而保证当前要显示的内容在页面最上方的呢? 平常开发的时候可能是根据业务做的具体调整 zIndex ,保证外层的组件 zindex 值最大。但是实际情况可能要复杂,随着不同开发者接手,各种业务需求迭代,在实际的开发过程中可能会出现各种的问题,很容易出现”牵一发而动全身“,改了一个 zIndex 引出了很多其他问题,甚至会出现设置 zIndex 无效的情况。下面我们来梳理下关于处理层级问题的多种解决方案。 2.2. 如何设置zIndex 2.2.1. PLAN A 有人说可以把所有组件的 zIndex 统一,这样遵循 “后来居上” 的法则,只要开发者在代码中调整组件的顺序就能保证层级关系。 层叠水平一致、层叠顺序相同的时候,在DOM流中处于后面的元素会覆盖前面的元素。 这样处理确实能解决一部分问题,但还是有很多隐患存在。比如哪个弹窗显示在最外层可能是由用户点击顺序决定的,并不是一成不变,并且每个人的开发习惯不同,有时候很难统一,基于这种情况我们可以采用统一动态生成 zIndex 的方式: 在组件库中,我们可以对组件库的zIndex值做一个统一的处理,每次调用都动态 + 1。 letzIndex=2000; functiongetZIndex(){ return++zIndex } 然后每次调用的时候都动态赋值 this.$el.style.zIndex=getZIndex(); 在组件库中可以用这种方式对 zIndex 变量统一管理,但是并不适用于所有开发情况,比如代码中充斥着各类型的组件,zIndex 没有进行统一管理。那么可以采用 PLAN B 动态去计算最大的 zIndex 。 2.2.2. PLAN B 这里介绍采用遍历 DOM 节点去动态计算最大 zIndex 值的方式。 getZIndex(){ return[...document.all].reduce((r,e)=>Math.max(r,+window.getComputedStyle(e).zIndex||0),0) } 这个方法可以让你获得当下最大的 zIndex ,然后你在这个基础上 +1 就可以了。 2.3. 层叠上下文(stacking context) 在实际开发中,光设置 zIndex 也许还不够,哪怕我们把 zIndex 设置成最大,也不一定会显示到最上面。因为 zIndex 的只在当前的层叠上下文中才会起作用。所以光设置 zIndex 是不全面的,还要考虑层叠上下文的因素。 我们先来看以下代码: 这时候图片会在遮罩层的上面,原因是他们属于一个层叠上下文中,所以 ”谁大谁上“ 。但是我们在 img 的父级别加一个 position:relative;z-index:1999;那么就完全不同了。 这时我们发现图片跑到了遮罩层的下面。因为 img 的父级开启了新的层叠上下文,跟 overlay 相比较的 zindex 不再是 img 的 2001 而是其父级的 1999。 为了避免父级元素的影响,我们可以把遮罩层和图片放到一个层级下。只要保持一个层叠上下文中,就能保证 ”谁大谁上“ 。回到我们的 popup 组件开发中,为了避免 zIndex 设置不生效的问题,我们也可以把遮罩层组件与弹窗组件并列放置,来避免上述问题。 解决了组件间层叠问题,那么多个层叠的组件均包含遮罩层的问题又显露出来,下面我们来看下关于遮罩层的管理。 3. 遮罩层管理 3.1. 为什么要进行管理 当多个带有遮罩层的组件同时显示的时候,我们需要对遮罩层进行统一管理,首先是避免多层遮罩层同时显示的情况,并且要动态调整遮罩层的 zIndex 。具体内容可以先看看下面的例子。 如上面的动态图所示,点击“展示弹出层” 可以看到显示一个遮罩层+弹窗,弹窗上面有两个单元格。这时候再次点击 “选择配送” 还是保持一个遮罩层,只不过它的层级发生了变化,提升到了两个单元格的之上,当选择完毕退出 “选择配送” 弹窗的时候遮罩层又还原了上一次的层级。下面我们来看下设计思路。 3.1.1. 设计思路 层级模块管理的设计思路如下图所示: 1.Overlay 组件负责显示遮罩层。 2.overlay-manager 负责动态生成 zIndex 和管理 Overlay 组件,控制 Overlay 保持一个实例,并动态更新 zIndex 等。 3.popup 调用 overlay-manager 的各种方法,获取最新的 zIndex ,控制遮罩层和弹窗的显示。 4.其他组件调用 popup 组件来完成具体业务组件。 下面我们先来说下 overlay-manager 的具体实现思路。 3.2. 利用 stack 储存组件内容 首先还是先说下什么是栈(stack),它是一种先进后出的数据结构,非常适合当下的场景。因为用户面对屏幕总是先去处理最上面弹出的内容,然后一层一层向下处理。 我们用一个数组实现这种方法。 letstack=[]; stack.push(obj); stack.pop() 下面我们用代码来实现功能(缩减版) letmodalStack=[]; let_zIndex=2000; constoverlayManager={ //获取最新的zIndex getzIndex(){ return++_zIndex; }, //获取最外层的弹窗组件实例 gettopStack(){ returnmodalStack[modalStack.length-1]; }, //打开遮罩层1.在modalStack加入最新的弹窗组件实例和配置2.调用更新遮罩层组件方法 openModal(vm,config){ modalStack.push({ vm, config }); //更新遮罩层内容 this.updateOverlay(); }, //关闭遮罩层1.在modalStack中移除最后加入的组件实例和配置2.调用更新遮罩层组件方法 closeOverlay(vm){ if(modalStack.length){ modalStack.pop(); } //更新遮罩层内容 this.updateOverlay(); }, } 整体思路如下图所示: 下面我们来看看,如何在 popup 使用 overlay-manager 的方法。 importoverlayManagerfrom"./overlay-manager.js"; exportdefault{ props:{ value:{ type:Boolean, default:false, } }, watch:{ value(val){ val?this.open():this.close(); } }, methods:{ open(){ constconfig={ zIndex:overlayManager.zIndex, }; //渲染遮罩层 this.renderOverlay(config); //为当前组件的zIndex赋值 this.$el.style.zIndex=overlayManager.zIndex; }, close(){ //... }, renderOverlay(){ overlayManager.openModal(this); }, } } 在 popup 中控制弹窗和遮罩层的显示,并赋值 zIndex ,下面我们来说下如何动态更新遮罩层。 3.3. 动态更新遮罩层 在上面小节中的最后在 open 和 close 的方法中都调用了 updateOverlay 函数,在说这个函数之前我们先要用 vue 实例化一个 overlay 组件,然后参数透传。 functionmount(Component){ constinstance=newVue({ props:Component.props, render(h){ returnh(Component,{ props:this.$props }); }, }).$mount(); returninstance; } 实例化之后需要保持单例,然后动态更新这个 vue 对象挂载的位置和 props 来控制遮罩层是否显示和显示层级。 updateOverlay(){ const{clickHandle,topStack}=overlayManager; if(!overlay){ overlay=mount(overlayComponent); } if(topStack){ const{vm,config}=topStack; constel=vm.$el; el&&el.parentNode&&el.parentNode.nodeType!==11 ?el.parentNode.appendChild(overlay.$el) :document.body.appendChild(overlay.$el); Object.assign(overlay,config,{ value:true, }); }else{ overlay.value=false; } }, 动态更新遮罩层的位置,这个功能我们采用了 appendChild 方法,方式实现自动移动节点到新的位置的功能,是利用了它以下特性: appendChild() 方法可向节点的子节点列表的末尾添加新的子节点,如果文档树中已经存在了 newchild,它将从文档树中删除,然后重新插入它的新位置。 遮罩层管理的基本设计思路就是这些,难道这样就大功告成了吗?本着好人做到底,送佛送到西的精神,我们再来看看还有哪些问题,譬如说——滚动穿透问题。 4. 滚动穿透问题 4.1. 问题描述 当遮罩层显示并且滚动页面,可以透过遮罩层影响到下面的内容,如下图所示: 从图中可以看出,向下滚动页面,后面的背景也会跟着滚动,那么问题来了,上面明明有遮罩层,为什么还会影响到层级排在下面的内容呢? 我觉得这个问题可以从 DOM 事件流中找到原因,因为 DOM 中的事件不会只停留在目前对象上,会经历捕获阶段、目标阶段和冒泡阶段,从而会影响到其他元素。下面我们来看下具体的解决方案。 4.2. PLAN A 最简单的解决方案,就是在body上加一个样式 .nut-overflow-hidden{ overflow:hidden; } 这种解决方式并不是禁止滚动穿透,而是让背景不能滚动了,穿透功能其实还在。经过我的测试,这种方式在 pc 和 Android 运行正常,但是在 ios 上失效。为了找到在 Android 和 ios 都管用的方法,我们继续探究。 4.3. PLAN B 我们还可以使用另一个方法禁止滚动,添加 position ;当弹窗时我们在 body 标签上加上如下 class。 .nut-fixed{ position:fixed; } 这个方法的原理跟 PLAN A 差不多,而且这个方法经过我测试,发现在 pc 、Android 和 ios 上同时都正常,不过马上就发现了一个很致命的副作用。 当点击弹窗时,页面会瞬间跳到顶部,为了更好的用户提体验,我们需要继续探究。 4.4. PLAN C 回到事件本身中来,换种思维方式,通过阻止 touchmove 事件来解决问题,下面我们来实践下,在遮罩层组件中加入 preventDefault: exportdefault{ name:"nut-popup-mask", methods:{ touchmove(e){ e.preventDefault(); } } } }; 经过测试发现在遮罩层滑动确实不会引起背景层的滚动,但是忽略的弹窗区域,在弹框区域滚动依旧会引起背景层的滚动,弹窗元素和遮罩元素在同一个父级下属于兄弟级别,所以遮罩元素的 preventDefault 自然也不会影响弹窗元素。 看到这里也许有人会说,直接弹窗元素中加入 preventDefault 就可以了跟遮罩层保持一样,但是弹窗输入主要展示区域,它本身就可能存在长文滚动的状态,如果把它滚动禁止,那么正常的功能就受到了影响。那么怎样在背景和弹窗都可滚动的状态下处理好这个问题呢? 经过一番研究,我发现了以下规律(纯个人见解,如果有误欢迎在评论区批评指正)。 在弹窗内滑动屏幕首先处理的是弹窗内的滚动,当滑动到尽头的时候,就会触发背景层的的滚动。根据这个现象我们做出以下解决方案。 当弹窗向某个方法上滚动且有滚动区间的时候允许滚动,如果没有滚动区间就禁止滚动。听起来也许有些拗口,换句说话就是保持弹窗正常滚动,禁止正在弹窗滚动之外的内容滚动。 下面我们来看下实现: 4.4.1. 判断手势方向 要判断用户是在上滑还是在下滑,首先是记录滑动开始的位置,然后在根据滚动的最后位置来确定滑动方向。 document.addEventListener('touchstart',this.touchStart); document.addEventListener('touchmove',this.touchMove); //... touchStart(event){ this.startY=event.touches[0].clientY; }, touchMove(event){ consttouch=event.touches[0]; this.deltaY=touch.clientY-this.startY; } 根据 deltaY 判断方向,如果大于 0 代表向上滑动,反之代表向下。 4.4.2. 获取弹窗内滚动元素 第二步我们要找到弹窗滚动元素,然后结合用户手势去判断是否当下是否已经滚动到了尽头。找到这个滚动元素以后。再通过该元素的滚动位置去判断什么时候应该禁止滚动。 getScroller(el){ letnode=el; while( node&& node.tagName!=='HTML'&& node.nodeType===1 ){ const{overflowY}=window.getComputedStyle(node); if(/scroll|auto/i.test(overflowY)){ returnnode; } node=node.parentNode; } } 4.4.3. 超出滚动区域外禁止滚动 constel=this.getScroller(event.target); const{scrollHeight,offsetHeight,scrollTop}=el?el:this.$el; 我们需要这三个值,scrollHeight, offsetHeight, scrollTop。 scrollHeight 这个只读属性是一个元素内容高度的度量,包括由于溢出导致的视图中不可见内容。 offsetHeight 是一个只读属性,它返回该元素的像素高度,高度包含该元素的垂直内边距和边框,且是一个整数。 scrollTop 属性可以获取或设置一个元素的内容垂直滚动的像素数。 我先来处理向上滑动手势的判断,判断方向 + 是否滑到顶部,当两个条件同时满足的时候禁止。 if((this.deltaY>0&&scrollTop===0) event.preventDefault(); } 接下来我们再判断向下滑动并且滑动到底部的时候。逻辑同上 if(this.deltaY<0&&scrollTop+offsetHeight>=scrollHeight){ event.preventDefault(); } 这样我们就在 ios 上完成了禁止滚动穿透功能。 5. 总结 本文从两个实现角度和一个常见问题的解决方案去说明 popup 公用组件实现原理,为了让大家能够能清晰的了解逻辑主干,在示例中缩减了很多的代码。在文章中包含了很多我个人学习思考的过程,希望能对大家有所帮助。最后,附上官网的地址,NutUI 组件库目前在持续的优化和迭代中,欢迎大家使用,并提出宝贵意见。

资源下载

更多资源
Mario

Mario

马里奥是站在游戏界顶峰的超人气多面角色。马里奥靠吃蘑菇成长,特征是大鼻子、头戴帽子、身穿背带裤,还留着胡子。与他的双胞胎兄弟路易基一起,长年担任任天堂的招牌角色。

Nacos

Nacos

Nacos /nɑ:kəʊs/ 是 Dynamic Naming and Configuration Service 的首字母简称,一个易于构建 AI Agent 应用的动态服务发现、配置管理和AI智能体管理平台。Nacos 致力于帮助您发现、配置和管理微服务及AI智能体应用。Nacos 提供了一组简单易用的特性集,帮助您快速实现动态服务发现、服务配置、服务元数据、流量管理。Nacos 帮助您更敏捷和容易地构建、交付和管理微服务平台。

Rocky Linux

Rocky Linux

Rocky Linux(中文名:洛基)是由Gregory Kurtzer于2020年12月发起的企业级Linux发行版,作为CentOS稳定版停止维护后与RHEL(Red Hat Enterprise Linux)完全兼容的开源替代方案,由社区拥有并管理,支持x86_64、aarch64等架构。其通过重新编译RHEL源代码提供长期稳定性,采用模块化包装和SELinux安全架构,默认包含GNOME桌面环境及XFS文件系统,支持十年生命周期更新。

Sublime Text

Sublime Text

Sublime Text具有漂亮的用户界面和强大的功能,例如代码缩略图,Python的插件,代码段等。还可自定义键绑定,菜单和工具栏。Sublime Text 的主要功能包括:拼写检查,书签,完整的 Python API , Goto 功能,即时项目切换,多选择,多窗口等等。Sublime Text 是一个跨平台的编辑器,同时支持Windows、Linux、Mac OS X等操作系统。

用户登录
用户注册