首页 文章 精选 留言 我的

精选列表

搜索[ios],共10000篇文章
优秀的个人博客,低调大师

ios25---图片拉伸

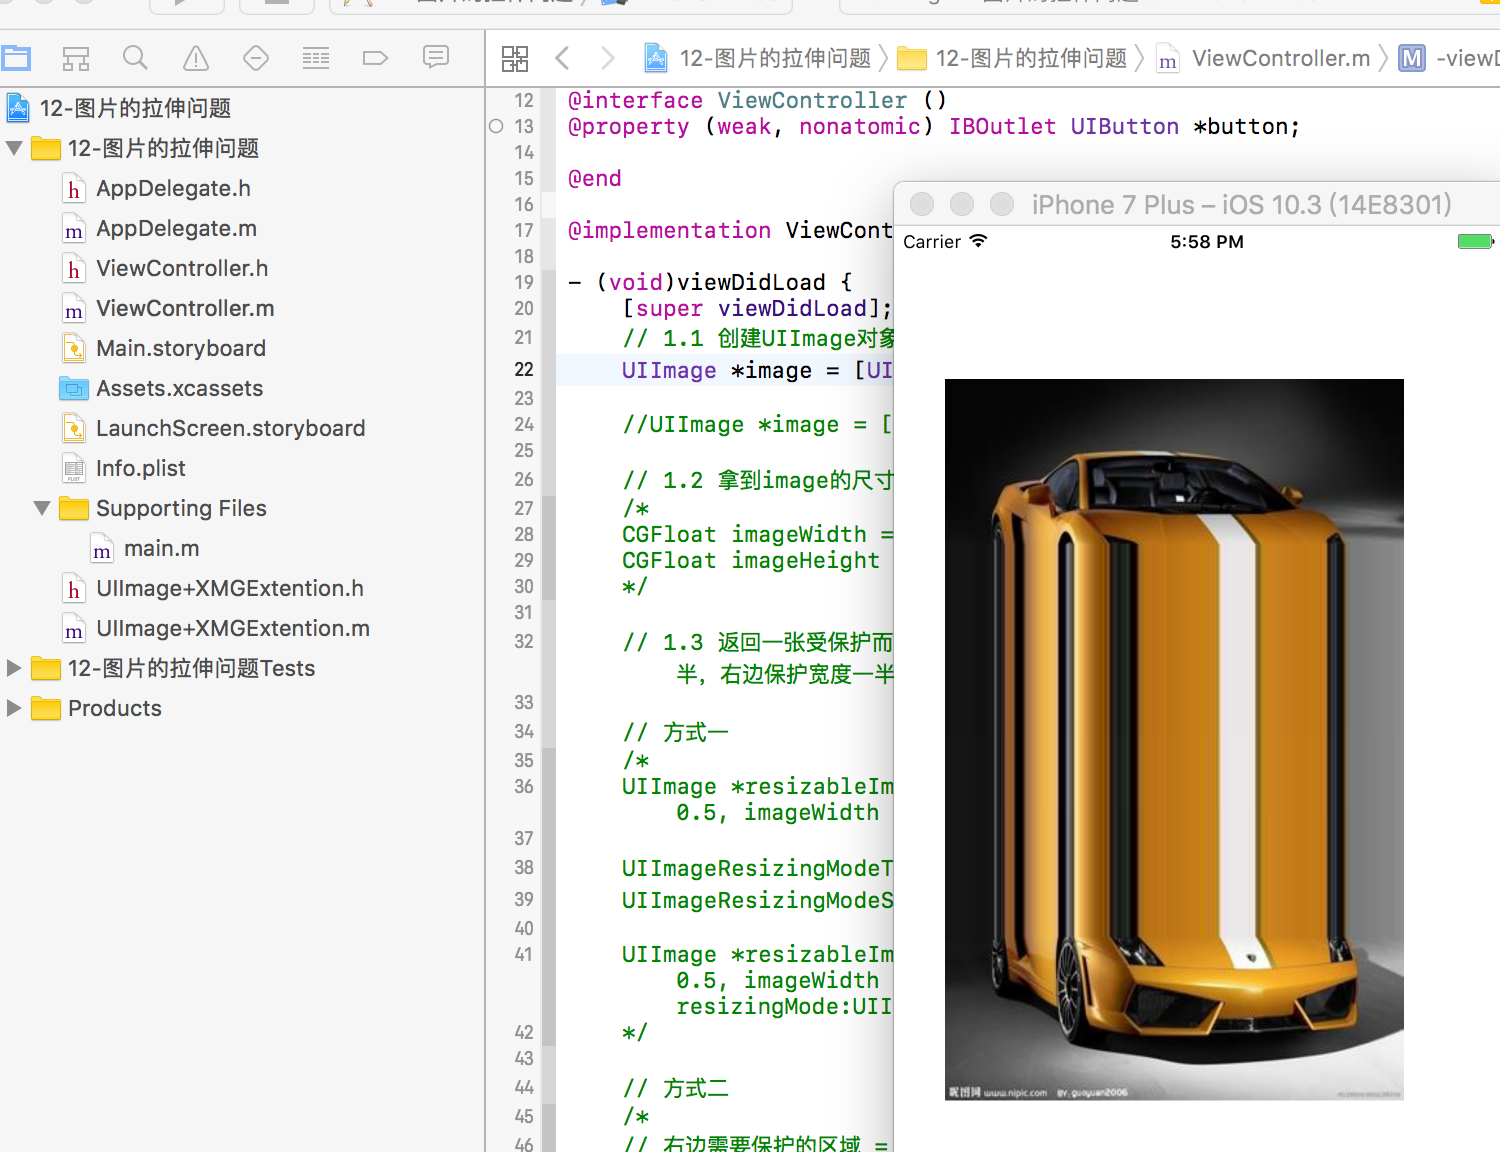
控制器: // // ViewController.m // 12-图片的拉伸问题 // // Created by xiaomage on 15/12/30. // Copyright © 2015年 小码哥. All rights reserved. // #import "ViewController.h" #import "UIImage+XMGExtention.h" @interface ViewController () @property (weak, nonatomic) IBOutlet UIButton *button; @end @implementation ViewController - (void)viewDidLoad { [super viewDidLoad]; // 1.1 创建UIImage对象 UIImage *image = [UIImage resizableImageWithLocalImageName:@"car"];//扩展了系统类的方法 //UIImage *image = [UIImage imageNamed:@"car"]; // 1.2 拿到image的尺寸 /* CGFloat imageWidth = image.size.width; CGFloat imageHeight = image.size.height; */ // 1.3 返回一张受保护而且拉伸的图片 --->CapInsets:哪些地方要保护:上面保护图片高度一半,左边保护图片宽度一半,右边保护宽度一半减一,下面保护高度一半减一。只有中间1*1的区域拉伸。 // 方式一 /* UIImage *resizableImage = [image resizableImageWithCapInsets:UIEdgeInsetsMake(imageHeight * 0.5, imageWidth * 0.5, imageHeight * 0.5 -1, imageWidth * 0.5 - 1)]; UIImageResizingModeTile, 平铺 UIImageResizingModeStretch, 拉伸(伸缩) UIImage *resizableImage = [image resizableImageWithCapInsets:UIEdgeInsetsMake(imageHeight * 0.5, imageWidth * 0.5, imageHeight * 0.5 -1, imageWidth * 0.5 - 1) resizingMode:UIImageResizingModeTile]; */ // 方式二 /* // 右边需要保护的区域 = 图片的width - leftCapWidth - 1 // bottom cap = height - topCapHeight - 1 UIImage *resizableImage = [image stretchableImageWithLeftCapWidth:imageWidth * 0.5 topCapHeight:imageHeight * 0.5]; */ //2.把图片设置到按钮上 [self.button setBackgroundImage:image forState:UIControlStateNormal]; } @end UIImage的扩展,分类: // // UIImage+XMGExtention.h // 12-图片的拉伸问题 // #import <UIKit/UIKit.h> @interface UIImage (XMGExtention) //分类 /** * 返回一张受保护的图片(被拉伸的) */ + (instancetype)resizableImageWithLocalImageName: (NSString *)localImageName; @end // // UIImage+XMGExtention.m // #import "UIImage+XMGExtention.h" @implementation UIImage (XMGExtention) + (instancetype)resizableImageWithLocalImageName:(NSString *)localImageName{ // 创建图片对象 UIImage *image = [UIImage imageNamed:localImageName]; // 获取图片的尺寸 CGFloat imageWidth = image.size.width; CGFloat imageHeiht = image.size.height; // 返回一张拉伸且受保护的图片 return [image stretchableImageWithLeftCapWidth:imageWidth * 0.5 topCapHeight:imageHeiht * 0.5 ]; } @end 本文转自农夫山泉别墅博客园博客,原文链接:http://www.cnblogs.com/yaowen/p/7470323.html,如需转载请自行联系原作者

优秀的个人博客,低调大师

ios20--xib2

故事板控制器: // // ViewController.m // 03-通过xib自定义商品的View #import "ViewController.h" #import "XMGShopView.h" @interface ViewController () @end @implementation ViewController - (void)viewDidLoad { [super viewDidLoad]; // 加载xib // XMGShopView *shopView = [[[NSBundle mainBundle] loadNibNamed:@"XMGShopView" owner:nil options:nil] firstObject]; // XMGShopView *shopView = [[XMGShopView alloc] initWithFrame: CGRectMake(100, 100, 80, 100)]; XMGShopView *shopView = [XMGShopView shopView]; shopView.frame = CGRectMake(100, 100, 80, 100); // 给子控件设置属性 /* UIImageView *imageView = [shopView viewWithTag:100]; UILabel *titleLabel = [shopView viewWithTag:200]; imageView.image = [UIImage imageNamed:@"danjianbao"]; titleLabel.text = @"单肩包"; */ [shopView setName:@"单肩包"]; [shopView setIcon:@"danjianbao"]; [self.view addSubview:shopView]; } @end xib对应的类: // // XMGShopView.h #import <UIKit/UIKit.h> @interface XMGShopView : UIView // 提供set方法 - (void)setIcon: (NSString *)icon; - (void)setName: (NSString *)name; // 提供快速创建方法 + (instancetype)shopView; @end // XMGShopView.m /** xib使用注意事项: 1> 如果一个view从xib中加载,就不能用[xxx alloc] init] 和 [xxx alloc] initWithFrame:]创建 2> 如果一个xib经常被使用,应该提供快速构造类方法 3> 如果一个view从xib中加载: 用代码添加一些子控件,得在 initWithCoder: 和 awakeFromNib 创建 4> 如果一个view从xib中加载,会调用initWithCoder: 和 awakeFromNib,不会调用init和initWithFrame:方法 */ #import "XMGShopView.h" @interface XMGShopView () @property (weak, nonatomic) IBOutlet UIImageView *iconView; @property (weak, nonatomic) IBOutlet UILabel *titleLabel; /** 测试label */ @property (nonatomic, weak) UILabel *label; /** 毛玻璃 */ @property (nonatomic, weak) UIToolbar *toolBar; @end @implementation XMGShopView /** * 如果View从xib中加载,就不会调用init和initWithFrame:方法 * */ /* - (instancetype)init{ if (self = [super init]) { NSLog(@"%s", __func__); } return self; } - (instancetype)initWithFrame:(CGRect)frame{ if (self = [super initWithFrame:frame]) { NSLog(@"%s", __func__); } return self; } */ /** * 如果View从xib中加载,就会调用initWithCoder:方法 * 创建子控件,... 注意: 如果子控件(UIImageView,UILabel)是从xib中创建,是处于未唤醒状态 */ - (instancetype)initWithCoder:(NSCoder *)aDecoder{ if (self = [super initWithCoder:aDecoder]) { /* UILabel *label = [[UILabel alloc] init]; label.backgroundColor = [UIColor grayColor]; label.text = @"哈哈哈哈哈哈"; [self addSubview:label]; self.label = label; */ NSLog(@"1"); } return self; } #pragma mark - xib的加载原理 - (UIView *)loadFormNib{//加载应该返回View。 XMGShopView *shopView = [[XMGShopView alloc] initWithCoder:nil]; shopView.frame = CGRectMake(0, 0, 80, 100); UIImageView *iconView = [[UIImageView alloc] initWithCoder:nil]; iconView.backgroundColor = [UIColor greenColor]; iconView.frame = CGRectMake(0, 0, 80, 80); iconView.tag = 100; [shopView addSubview:iconView]; self.iconView = iconView; UILabel *label = [[UILabel alloc] initWithCoder:nil]; label.backgroundColor = [UIColor orangeColor]; label.tag = 200; [shopView addSubview:label]; self.titleLabel = label; return shopView; } /** * 从xib中唤醒 添加 xib中创建的子控件 的子控件 */ - (void)awakeFromNib{ // 往imageView上加毛玻璃 UIToolbar *toolBar = [[UIToolbar alloc] init]; [self.iconView addSubview:toolBar]; self.toolBar = toolBar; NSLog(@"2"); } #pragma mark - 快速构造方法 + (instancetype)shopView{ return [[[NSBundle mainBundle] loadNibNamed:@"XMGShopView" owner:nil options:nil] firstObject]; } #pragma mark - 布局子控件 - (void)layoutSubviews{ [super layoutSubviews]; /* self.label.frame = self.bounds; */ self.toolBar.frame = self.iconView.bounds; } #pragma mark - 设置数据 - (void)setIcon:(NSString *)icon{ self.iconView.image = [UIImage imageNamed:icon]; } - (void)setName:(NSString *)name{ self.titleLabel.text = name; } @end 本文转自农夫山泉别墅博客园博客,原文链接:http://www.cnblogs.com/yaowen/p/7469490.html,如需转载请自行联系原作者

优秀的个人博客,低调大师

ios10--拳皇动画

/** 图片的两种加载方式: 1> imageNamed: a. 就算指向它的指针被销毁,该资源也不会被从内存中干掉, b. 放到Assets.xcassets的图片,默认就有缓存, c. 图片经常被使用,用这种方式加载, 2> imageWithContentsOfFile: a. 指向它的指针被销毁,该资源会被从内存中干掉, b. 放到项目中的图片就不带缓存, c. 不经常用,大批量的图片,使用这种方式, */ /** * 游戏结束 */ - (IBAction)gameOver { //没有强指针,就把图片释放了,即使是图片数组,只要把图片数组的首地址置位nil,数组就释放了,所以只要首地址置位nil就可以 self.standImages = nil; self.smallImages = nil; self.bigImages = nil; self.imageView.animationImages = nil; } // // ViewController.m // 07-拳皇动画(加载图片) // #import "ViewController.h" @interface ViewController () @property (weak, nonatomic) IBOutlet UIImageView *imageView; /** 站立 */ @property (nonatomic, strong) NSArray *standImages; //不是故事板上的东西,没有强引用指向,所以这里用strong, /** 小招 */ @property (nonatomic, strong) NSArray *smallImages; /** 大招 */ @property (nonatomic, strong) NSArray *bigImages; @end @implementation ViewController // 初始化一些数据 - (void)viewDidLoad { [super viewDidLoad]; // 1.加载所有的站立图片 self.standImages = [self loadAllImagesWithimagePrefix:@"stand" count:10]; // 2.加载所有的小招图片 self.smallImages = [self loadAllImagesWithimagePrefix:@"xiaozhao3" count:39]; // 3.加载所有的大招图片 self.bigImages = [self loadAllImagesWithimagePrefix:@"dazhao" count:87]; // 4.站立 [self stand]; } /** * 加载所有的图片 * * @param imagePrefix 名称前缀 * @param count 图片的总个数 */ - (NSArray *)loadAllImagesWithimagePrefix:(NSString *)imagePrefix count:(int)count{ NSMutableArray<UIImage *> *images = [NSMutableArray array]; for (int i=0; i<count; i++) { // 获取所有图片的名称 NSString *imageName = [NSString stringWithFormat:@"%@_%d",imagePrefix, i+1]; // 创建UIImage UIImage *image = [UIImage imageNamed:imageName]; // 装入数组 [images addObject:image]; } return images; } /** * 站立 */ - (IBAction)stand { // 2.设置动画图片 self.imageView.animationImages = self.standImages; // 3.设置播放次数 self.imageView.animationRepeatCount = 0; // 4.设置播放的时长 self.imageView.animationDuration = 0.6; // 5.播放 [self.imageView startAnimating]; } /** * 小招 */ - (IBAction)smallZhao { // 2.设置动画图片 self.imageView.animationImages = self.smallImages; // 3.设置动画次数 self.imageView.animationRepeatCount = 1; // 4.设置播放时长 self.imageView.animationDuration = 1.5; // 5.播放 [self.imageView startAnimating]; // 6.站立(延迟),执行一个方法,传入参数,延迟多长时间, // Selector 方法 // Object 参数 // afterDelay 时间 // NSSelectorFromString(NSString * _Nonnull aSelectorName) 效果一样 [self performSelector:@selector(stand) withObject:nil afterDelay:self.imageView.animationDuration]; } /** * 大招 */ - (IBAction)bigZhao { // 2.设置动画图片 self.imageView.animationImages = self.bigImages; // 3.设置动画次数 self.imageView.animationRepeatCount = 1; // 4.设置播放时长 self.imageView.animationDuration = 2.5; // 5.播放 [self.imageView startAnimating]; // 6.站立 [self performSelector:@selector(stand) withObject:nil afterDelay:self.imageView.animationDuration]; } @end // // ViewController.m // 07-拳皇动画(加载图片) // #import "ViewController.h" @interface ViewController () @property (weak, nonatomic) IBOutlet UIImageView *imageView; /** 站立 */ @property (nonatomic, strong) NSArray *standImages;//不是故事板上的东西,没有强引用指向,所以这里用strong, /** 小招 */ @property (nonatomic, strong) NSArray *smallImages; /** 大招 */ @property (nonatomic, strong) NSArray *bigImages; @end @implementation ViewController /** 图片的两种加载方式: 1> imageNamed: a. 就算指向它的指针被销毁,该资源也不会被从内存中干掉, b. 放到Assets.xcassets的图片,默认就有缓存, c. 图片经常被使用,用这种方式加载, 2> imageWithContentsOfFile: a. 指向它的指针被销毁,该资源会被从内存中干掉, b. 放到项目中的图片就不带缓存, c. 不经常用,大批量的图片,使用这种方式, */ // 初始化一些数据 - (void)viewDidLoad { [super viewDidLoad]; // 1.加载所有的站立图片 self.standImages = [self loadAllImagesWithimagePrefix:@"stand" count:10]; // 2.加载所有的小招图片 self.smallImages = [self loadAllImagesWithimagePrefix:@"xiaozhao3" count:39]; //不需要写外层文件夹的名字,只需要写图片文件的名字即可。 // 3.加载所有的大招图片 self.bigImages = [self loadAllImagesWithimagePrefix:@"dazhao" count:87]; // 4.站立 [self stand]; } /** * 加载所有的图片 * * @param imagePrefix 名称前缀 * @param count 图片的总个数 */ - (NSArray *)loadAllImagesWithimagePrefix:(NSString *)imagePrefix count:(int)count{ NSMutableArray<UIImage *> *images = [NSMutableArray array]; for (int i=0; i<count; i++) { // 获取所有图片的名称 NSString *imageName = [NSString stringWithFormat:@"%@_%d",imagePrefix, i+1]; // 创建UIImage // UIImage *image = [UIImage imageNamed:imageName]; NSString *imagePath = [[NSBundle mainBundle] pathForResource:imageName ofType:@"png"]; UIImage *image = [UIImage imageWithContentsOfFile:imagePath]; // 装入数组 [images addObject:image]; } return images; } /** * 站立 */ - (IBAction)stand { /* // 2.设置动画图片 self.imageView.animationImages = self.standImages; // 3.设置播放次数 self.imageView.animationRepeatCount = 0; // 4.设置播放的时长 self.imageView.animationDuration = 0.6; // 5.播放 [self.imageView startAnimating]; */ [self palyZhaoWithImages:self.standImages count:0 duration:0.6 isStand:YES]; } /** * 小招 */ - (IBAction)smallZhao { /* // 2.设置动画图片 self.imageView.animationImages = self.smallImages; // 3.设置动画次数 self.imageView.animationRepeatCount = 1; // 4.设置播放时长 self.imageView.animationDuration = 1.5; // 5.播放 [self.imageView startAnimating]; // 6.站立(延迟) [self performSelector:@selector(stand) withObject:nil afterDelay:self.imageView.animationDuration]; */ [self palyZhaoWithImages:self.smallImages count:1 duration:1.5 isStand:NO]; } /** * 大招 */ - (IBAction)bigZhao { /* // 2.设置动画图片 self.imageView.animationImages = self.bigImages; // 3.设置动画次数 self.imageView.animationRepeatCount = 1; // 4.设置播放时长 self.imageView.animationDuration = 2.5; // 5.播放 [self.imageView startAnimating]; // 6.站立 [self performSelector:@selector(stand) withObject:nil afterDelay:self.imageView.animationDuration]; */ [self palyZhaoWithImages:self.bigImages count:1 duration:2.5 isStand:NO]; } /** * 游戏结束 */ - (IBAction)gameOver { //没有强指针,就把图片释放了,即使是图片数组,只要把图片数组的首地址置位nil,数组就释放了,所以只要首地址置位nil就可以 self.standImages = nil; self.smallImages = nil; self.bigImages = nil; self.imageView.animationImages = nil; } /** * 放招 * * @param images 图片数组 * @param count 播放次数 * @param duration 播放时间 * @param isStand 是否站立 */ - (void)palyZhaoWithImages:(NSArray *)images count: (NSInteger)count duration:(NSTimeInterval)duration isStand:(BOOL)isStand{ // 1.设置动画图片 self.imageView.animationImages = images; // 2.设置动画次数 self.imageView.animationRepeatCount = count; // 3.设置播放时长 self.imageView.animationDuration = duration; // 4.播放 [self.imageView startAnimating]; // 5.站立 if (!isStand) { [self performSelector:@selector(stand) withObject:nil afterDelay:self.imageView.animationDuration]; } } @end /** 图片的两种加载方式: 1> imageNamed: a. 就算指向它的指针被销毁,该资源也不会被从内存中干掉, b. 放到Assets.xcassets的图片,默认就有缓存, c. 图片经常被使用,用这种方式加载, 2> imageWithContentsOfFile: a. 指向它的指针被销毁,该资源会被从内存中干掉, b. 放到项目中的图片就不带缓存, c. 不经常用,大批量的图片,使用这种方式, */ /** * 游戏结束 */ - (IBAction)gameOver { //没有强指针,就把图片释放了,即使是图片数组,只要把图片数组的首地址置位nil,数组就释放了,所以只要首地址置位nil就可以 self.standImages = nil; self.smallImages = nil; self.bigImages = nil; self.imageView.animationImages = nil; }

优秀的个人博客,低调大师

ios33--线程安全

// // ViewController.m // 05-掌握-线程安全 // // 多线程下载文件:每个线程下的部分可能是交错的,到时候就拼接不了。除非每个线程下载的不是交错的,而是从头到尾依次分开的,到时候就可以拼接了。 #import "ViewController.h" @interface ViewController () /** 售票员A */ @property (nonatomic, strong) NSThread *threadA; /** 售票员B */ @property (nonatomic, strong) NSThread *threadB; /** 售票员C */ @property (nonatomic, strong) NSThread *threadC; @property (nonatomic, assign) NSInteger totalCount; @end @implementation ViewController -(void)touchesBegan:(NSSet<UITouch *> *)touches withEvent:(UIEvent *)event { //设置中票数 self.totalCount = 100; self.threadA = [[NSThread alloc]initWithTarget:self selector:@selector(saleTicket) object:nil]; self.threadB = [[NSThread alloc]initWithTarget:self selector:@selector(saleTicket) object:nil]; self.threadC = [[NSThread alloc]initWithTarget:self selector:@selector(saleTicket) object:nil]; self.threadA.name = @"售票员A"; self.threadB.name = @"售票员B"; self.threadC.name = @"售票员C"; //启动线程 //@synchronized(self) { [self.threadA start]; [self.threadB start]; [self.threadC start]; //} } -(void)saleTicket { while (1) { //锁:必须是全局唯一的 //1.注意枷锁的位置 //2.注意枷锁的前提条件,多线程共享同一块资源 //3.注意加锁是需要代价的,需要耗费性能的 //4.加锁的结果:线程同步 //5.锁定1份代码只用1把锁,用多把锁是无效的 @synchronized(self) { //线程1 //线程2 //线程3 NSInteger count = self.totalCount; if (count >0) { for (NSInteger i = 0; i<1000000; i++) { } self.totalCount = count - 1; //卖出去一张票 NSLog(@"%@卖出去了一张票,还剩下%zd张票", [NSThread currentThread].name,self.totalCount); }else { NSLog(@"不要回公司上班了"); break; } } } } @end 本文转自农夫山泉别墅博客园博客,原文链接:http://www.cnblogs.com/yaowen/p/7491325.html,如需转载请自行联系原作者

优秀的个人博客,低调大师

ios 视图切换翻页效果

本文写的是视图切换,涉及到的内容有 1.实现代码添加Navigation Bar Toolbal; 2.实现在Navigation Bar和Toolbar上用代码添加Bar Button Item; 3.UIView层面的简单动画效果 先把实现结果功能截图贴出来,对应动画效果 开始界面 和第一次向上翻页 向上翻页 和向下翻页 从左向右翻页 和从右向左翻页 开始制作: 1.创建一个新工程叫NVDemo; File->New->Project ->single View Application -> next 2.在新建两个ViewController,分别为FirstViewController和SecondViewController,顺便把XIB一块生成好 3.首先在视图上添加导航栏和导航按钮,经测试导航栏上只能添加两个导航按钮,和设置一个title标题; 我们还需要知道的一个常识是NavigationBar ToolBar Tab Bar 都是44像素,所以在设置他们宽度时候他们的高度设置成44 还有一个通知栏,显示电量信息信号的地方是20像素; - (void)viewDidLoad { [super viewDidLoad]; // Do any additional setup after loading the view, typically from a nib. // 创建导航栏,44像素 UINavigationBar *navigationBar = [[UINavigationBar alloc] initWithFrame:CGRectMake(0, 0, 320, 44)]; // 需要在导航栏上创建按钮,所以先创建一个导航栏集合 UINavigationItem *navagationItem = [[UINavigationItem alloc] initWithTitle:@"导航栏"]; UIBarButtonItem *leftButton = [[UIBarButtonItem alloc] initWithBarButtonSystemItem:UIBarButtonSystemItemAction target:self action:@selector(pageDown:)]; UIBarButtonItem *rightButton = [[UIBarButtonItem alloc]initWithTitle:@"右测试" style:UIBarButtonItemStyleDone target:self action:@selector(leftpage:)]; [navigationBar pushNavigationItem:navagationItem animated:YES]; [navagationItem setLeftBarButtonItem:leftButton animated:YES]; [navagationItem setRightBarButtonItem:rightButton animated:YES]; [self.view addSubview:navigationBar]; UIToolbar *toolBar = [[UIToolbar alloc] initWithFrame:CGRectMake(0, 416, 320, 44)]; NSMutableArray *toolBarArray = [NSMutableArray array]; [toolBarArray addObject:[[UIBarButtonItem alloc] initWithBarButtonSystemItem:UIBarButtonSystemItemPageCurl target:self action:@selector(switchLoadView:)]]; [toolBarArray addObject:[[UIBarButtonItem alloc]initWithBarButtonSystemItem:UIBarButtonSystemItemSearch target:self action:@selector(rightpage:)]]; [toolBarArray addObject:[[UIBarButtonItem alloc]initWithTitle:@"MyTitle" style:UIBarButtonItemStylePlain target:self action:nil]]; //UIToolBar上添加图像 [toolBarArray addObject:[[UIBarButtonItem alloc]initWithImage:[UIImage imageNamed:@"myImage.png"] style:UIBarButtonItemStylePlain target:self action:nil]]; [toolBar setItems:toolBarArray animated:YES]; [self.view addSubview:toolBar]; } [navigationBarpushNavigationItem:navagationItemanimated:YES];涉及到一个压栈的操作,把navigationItem压到navigationBar里,导航栏上只能添加左右两个按钮;所以是setLeftBarButtonItem 和 setRightBarButtonItem,最后再将navigationBar添加到视图之上; 在Toolbar上添加可以添加各种按钮,创建一个可变数组,把添加的按钮全部放到数组上,[toolBarsetItems:toolBarArrayanimated:YES];将数组里按钮集合添加到了toolBar上面,选取图片的时候素材没选好,所以显示出来的图片那个按钮效果不是太好 4.接下来说的是按钮事件,因为需要用到FirstViewController和SecondViewController,在RootViewController.m添加上他们的头文件,为了区别确实是两个视图的切换,在他们的ViewDidLoad函数中初始化视图的背景颜色, self.view.backgroundColor= [UIColoryellowColor]; 和self.view.backgroundColor= [UIColorredColor]; 按钮时间再次也不做过多解释,全部写在注释里了,其他几个都一样,只是修改了动画效果,变化不大,详情可下载源代码研究一下; -(void) switchLoadView:(id)sender { //开始一个动画 [UIView beginAnimations:@"Curl" context:nil]; // 设置动画方式,开始和结束时动画效果比较慢 [UIView setAnimationCurve:UIViewAnimationCurveEaseInOut]; // 动画持续时间 [UIView setAnimationDuration:1.25]; // 设置动画效果,向上翻页 [UIView setAnimationTransition:UIViewAnimationTransitionCurlUp forView:self.view cache:YES]; // 首先判断firstView视图父视图是否为空 if (firstView.view.superview == nil) { // 父视图为空,在判断他的子视图是否为空,如果为空在创建一个视图加载上面 if (firstView.view == nil) { FirstViewController *firstViewDemo = [[FirstViewController alloc] initWithNibName:@"FirstViewController" bundle:nil]; firstView = firstViewDemo; } // 把seconView视图从父视图中移除 [secondView.view removeFromSuperview]; // 在当前视图插入子视图firstView的视图 [self.view insertSubview:firstView.view atIndex:0]; } else { if (secondView.view == nil) { SecondViewController *secondViewDemo = [[SecondViewController alloc] initWithNibName:@"SecondViewController" bundle:nil]; secondView = secondViewDemo; } [firstView.view removeFromSuperview]; [self.view insertSubview:secondView.view atIndex:0]; } // 动画结束 [UIView commitAnimations]; } 附上代码: http://download.csdn.net/detail/duxinfeng2010/4407717 咱在这在研究一个问题,在RootAppDelegate.m中我们先看看系统生成的代码 - (BOOL)application:(UIApplication *)application didFinishLaunchingWithOptions:(NSDictionary *)launchOptions { self.window = [[UIWindow alloc] initWithFrame:[[UIScreen mainScreen] bounds]]; // Override point for customization after application launch. self.viewController = [[RootViewController alloc] initWithNibName:@"RootViewController" bundle:nil]; self.window.rootViewController = self.viewController; [self.window makeKeyAndVisible]; return YES; } 系统直接加载的就是的RootViewController的视图,也就是弹出第一个界面是RootViewController.xib,假如说我想第一个就显示的FirstViewController控制的视图怎么办? 我们就可以在这个函数中进行重写 在delegateApp.h中@classRootViewController后面添加@classFirstViewController;此处声明一个类,在这样当我们添加@property(strong,nonatomic)FirstViewController*fTestViewController;才不会报错; 只需修改两行代码,此处注释原先加载RootViewController视图的代码,可能是我命名的不够合理,RootViewController和rootViewController要区别开,一个工程建立的,一个是系统本身自动生成的 - (BOOL)application:(UIApplication *)application didFinishLaunchingWithOptions:(NSDictionary *)launchOptions { self.window = [[UIWindow alloc] initWithFrame:[[UIScreen mainScreen] bounds]]; // Override point for customization after application launch. // self.viewController = [[RootViewController alloc] initWithNibName:@"RootViewController" bundle:nil]; // self.window.rootViewController = self.viewController; self.fTestViewController = [[FirstViewController alloc] initWithNibName:@"FirstViewController" bundle:nil]; // 把根控制视图设置成fTestViewController self.window.rootViewController = self.fTestViewController; [self.window makeKeyAndVisible]; return YES; } 然后再到我们的FirstViewController.m的ViewDidLoad函数先添加几行代码,以示区别 - (void)viewDidLoad { [super viewDidLoad]; // Do any additional setup after loading the view from its nib. self.view.backgroundColor = [UIColor yellowColor]; UIToolbar *toolBar = [[UIToolbar alloc]initWithFrame:CGRectMake(0, 0, 320, 44)]; NSMutableArray *toolBarArray = [NSMutableArray array]; [toolBarArray addObject:[[UIBarButtonItem alloc]initWithBarButtonSystemItem:UIBarButtonSystemItemAction target:self action:nil]]; UIBarButtonItem *title=[[UIBarButtonItem alloc] initWithTitle:@"My Test" style:UIBarButtonItemStylePlain target:self action:nil]; [toolBar setItems:[NSArray arrayWithObject:title]]; [toolBar setItems:toolBarArray]; [self.view addSubview:toolBar]; } 然后,当运行程序的时候,加载的就是FirstViewController的视图了 本文转自新风作浪 51CTO博客,原文链接:http://blog.51cto.com/duxinfeng/1208749,如需转载请自行联系原作者

优秀的个人博客,低调大师

ios 开发: pod 慢,替换

运行命令:pod repo 发现是github的源,如何替换呢? 网上给出的都是使用如下方法换掉repo的源: pod repo remove master pod repo add master https://git.coding.net/CocoaPods/Specs.git pod repo update 然而我试了好多次结果是: [!] To setup the master specs repo, please runpod setup. 最后继续查找,找到了如下的,方法: 执行: gitclonehttps://gitclub.cn/CocoaPods/Specs.git~/.cocoapods/repos/master 最后切记要: podrepoupdate 这样之后,,相信我们的pod install 和 pod update 等等都有快速好多了。 新建的podfile文件,第一行填写:source'https://gitclub.cn/CocoaPods/Specs.git' 参考文献:http://www.cnblogs.com/yfming/p/5965860.html 本文转自北京看看 51CTO博客,原文链接:http://blog.51cto.com/kankan/1919182,如需转载请自行联系原作者

优秀的个人博客,低调大师

IOS键盘响应及处理

一个简单的登录功能,遇到最大的问题就是怎么处理弹出的键盘,如何让它下去,这是一个首先要处理的问题。 ViewController.h: #import <UIKit/UIKit.h> @interface DXWViewController : UIViewController - (IBAction)OKClick:(id)sender; - (IBAction)cancleClick:(id)sender; @property (retain, nonatomic) IBOutlet UILabel *label; - (IBAction)end:(id)sender;//键盘退出方法 @property (retain, nonatomic) IBOutlet UITextField *name; @property (retain, nonatomic) IBOutlet UITextField *password; @end ViewController.m: #import "DXWViewController.h" @interface DXWViewController () @end @implementation DXWViewController - (void)viewDidLoad { [super viewDidLoad]; //view一加载就让输入框成为第一响应者 [self.name becomeFirstResponder]; } - (void)didReceiveMemoryWarning { [super didReceiveMemoryWarning]; } - (IBAction)OKClick:(id)sender { NSString *strName = self.name.text; NSString *strPwd = self.password.text; self.label.text = [NSString stringWithFormat:@"姓名:%@,密码:%@",strName,strPwd]; //根据字的长度来设置label的大小,而不是用autolayerout来实现 CGSize size = [self.label.text sizeWithFont:self.label.font]; CGRect frame = CGRectMake(self.label.frame.origin.x,self.label.frame.origin.y, size.width, self.label.frame.size.height); self.label.frame = frame; } - (IBAction)cancleClick:(id)sender { } - (void)dealloc { [_label release]; [_name release]; [_password release]; [super dealloc]; } - (IBAction)end:(id)sender { [self.name resignFirstResponder]; [self.password resignFirstResponder]; } @end 本文转蓬莱仙羽51CTO博客,原文链接:http://blog.51cto.com/dingxiaowei/1366438,如需转载请自行联系原作者

资源下载

更多资源
Mario

Mario

马里奥是站在游戏界顶峰的超人气多面角色。马里奥靠吃蘑菇成长,特征是大鼻子、头戴帽子、身穿背带裤,还留着胡子。与他的双胞胎兄弟路易基一起,长年担任任天堂的招牌角色。

腾讯云软件源

腾讯云软件源

为解决软件依赖安装时官方源访问速度慢的问题,腾讯云为一些软件搭建了缓存服务。您可以通过使用腾讯云软件源站来提升依赖包的安装速度。为了方便用户自由搭建服务架构,目前腾讯云软件源站支持公网访问和内网访问。

Rocky Linux

Rocky Linux

Rocky Linux(中文名:洛基)是由Gregory Kurtzer于2020年12月发起的企业级Linux发行版,作为CentOS稳定版停止维护后与RHEL(Red Hat Enterprise Linux)完全兼容的开源替代方案,由社区拥有并管理,支持x86_64、aarch64等架构。其通过重新编译RHEL源代码提供长期稳定性,采用模块化包装和SELinux安全架构,默认包含GNOME桌面环境及XFS文件系统,支持十年生命周期更新。

Sublime Text

Sublime Text

Sublime Text具有漂亮的用户界面和强大的功能,例如代码缩略图,Python的插件,代码段等。还可自定义键绑定,菜单和工具栏。Sublime Text 的主要功能包括:拼写检查,书签,完整的 Python API , Goto 功能,即时项目切换,多选择,多窗口等等。Sublime Text 是一个跨平台的编辑器,同时支持Windows、Linux、Mac OS X等操作系统。

用户登录
用户注册
修改密码
忘记密码