首页 文章 精选 留言 我的

精选列表

搜索[ios],共10000篇文章
优秀的个人博客,低调大师

iOS 线程

1. pthread 1). 执行不带参数的方法 import <pthread/pthread.h> - (void)touchesBegan:(NSSet<UITouch *> *)touches withEvent:(UIEvent *)event { // 创建子线程,线程编号 pthread_t pthread; // 第一个参数 线程编号的地址 // 第二个参数 线程的属性 // 第三个参数 线程的要执行的函数 // 第四个参数 要执行的函数的参数 // 返回值 int 0是成功 非0是失败 int result = pthread_create(&pthread, NULL, demo, NULL); NSLog(@"touchesBegan %@", [NSThread currentThread]); if (result) { NSLog(@"失败"); } else { NSLog(@"成功"); } } // 函数必须是C语言的 void *demo(void *param) { NSLog(@"hello %@", [NSThread currentThread]); return NULL; } 2). 执行带参数的方法 #import <pthread/pthread.h> - (void)touchesBegan:(NSSet<UITouch *> *)touches withEvent:(UIEvent *)event { // 创建子线程, 线程编号 pthread_t pthread; char *nameC = "mazaiting"; int result = pthread_create(&pthread, NULL, demo, (void *)nameC); if (result) { NSLog(@"失败"); } else { NSLog(@"成功"); } NSString *nameNS = @"zaitingma"; // 传参时要将OC中的对象传递给C语言的函数,要使用桥接, __bridge int result1 = pthread_create(&pthread, NULL, demo1, (__bridge void *)nameNS); if (result1) { NSLog(@"失败"); } else { NSLog(@"成功"); } } // C函数, 传递OC对象 void *demo1(void *param) { NSString *string = (__bridge NSString *)param; NSLog(@"%@", string); return NULL; } // C函数, 传递C字符串 void *demo(void *param) { char *string = param; NSLog(@"%s", string); return NULL; } 2. NSThread 1). 创建线程 - (void)touchesBegan:(NSSet<UITouch *> *)touches withEvent:(UIEvent *)event { [self createThread]; } - (void)createThread { // 方式一 // 创建线程 NSThread *thread = [[NSThread alloc] initWithTarget:self selector:@selector(demo) object:nil]; // 开启线程 [thread start]; // 方式二 [NSThread detachNewThreadSelector:@selector(demo) toTarget:self withObject:nil]; // 方式三 [self performSelectorInBackground:@selector(demo) withObject:nil]; // 方式4 带参数 NSThread *threadParam = [[NSThread alloc] initWithTarget:self selector:@selector(demo1:) object:@"mazaiting"]; [threadParam start]; } - (void)demo1:(NSString *)name { NSLog(@"%@", name); } - (void)demo { // 打印当前线程 NSLog(@"hello %@", [NSThread currentThread]); } 2). 线程状态 - (void)touchesBegan:(NSSet<UITouch *> *)touches withEvent:(UIEvent *)event { // 新建状态 NSThread *thread = [[NSThread alloc] initWithTarget:self selector:@selector(demo) object:nil]; // 线程名 thread.name=@"t1"; // 线程的优先级 thread.threadPriority=1.0; // 就绪状态 [thread start]; } - (void)demo { for (int i = 0; i < 20; i++) { NSLog(@"%d", i); if (i == 5) { // 阻塞状态 -- 睡眠3秒 [NSThread sleepForTimeInterval:3]; } if (i == 10) { // 线程退出 -- 死亡状态 [NSThread exit]; } // 判断是否是主线程 if([NSThread isMainThread]){ continue; } } } 3). 线程互斥锁 - (void)demo1 { // 互斥锁 @synchronized(self) { NSLog(@"%@",self); } } 4). 自旋锁 @property (nonatomic, copy) NSString *name; // 为属性生成对应的成员变量 @synthesize name = _name; 5). 三种Block //2 block 为什么要用copy //第一种 block 全局block __NSGlobalBlock__ // void (^demo)() = ^{ // NSLog(@"aaa"); // }; // NSLog(@"%@",demo); //第二种block 栈Block __NSStackBlock__ // int number = 5; // void (^demo)() = ^{ // NSLog(@"aaa %d",number); // }; // NSLog(@"%@",demo); //第三种block 堆block __NSMallocBlock__ // int number = 5; // void (^demo)() = ^{ // NSLog(@"aaa %d",number); // }; // NSLog(@"%@",[demo copy]); 6). 子线程消息循环 @implementation ViewController - (void)touchesBegan:(NSSet<UITouch *> *)touches withEvent:(UIEvent *)event { // 开启一个子线程 NSThread *thread = [[NSThread alloc] initWithTarget:self selector:@selector(demo) object:nil]; [thread start]; // 往子线程的消息循环中添加输入源 [self performSelector:@selector(demo1) onThread:thread withObject:nil waitUntilDone:NO]; } // 执行在子线程上的方法 - (void)demo { NSLog(@"I am running!"); // 开启子线程的消息循环,如果开启,消息循环一直运行 // 当子线程循环中没有添加输入事件,消息循环会立即结束 // [[NSRunLoop currentRunLoop] run]; // 2秒钟后消息循环结束 [[NSRunLoop currentRunLoop] runUntilDate:[NSDate dateWithTimeIntervalSinceNow:2]]; NSLog(@"end"); } // 执行在子线程的消息循环中 - (void)demo1 { NSLog(@"I'm running on runloop!"); } @end 3. GCD 1). 简单使用 @implementation ViewController - (void)touchesBegan:(NSSet<UITouch *> *)touches withEvent:(UIEvent *)event { // 1. 创建队列 dispatch_queue_t queue = dispatch_get_global_queue(0, 0); // 2. 创建任务 dispatch_block_t task = ^ { NSLog(@"hello %@",[NSThread currentThread]); }; // 3. 异步执行 dispatch_async(queue, task); // 简化用法 dispatch_async(dispatch_get_global_queue(0, 0), ^{ NSLog(@"mazaiting %@", [NSThread currentThread]); // 回到主线程 dispatch_sync(dispatch_get_main_queue(), ^{ NSLog(@"----%@", [NSThread mainThread]); }); }); } @end 2). 串行队列 @implementation ViewController - (void)touchesBegan:(NSSet<UITouch *> *)touches withEvent:(UIEvent *)event { [self sync]; [self async]; } // 串行队列,同步执行 不开新线程,任务是顺序执行的 - (void)sync { dispatch_queue_t queue = dispatch_queue_create("mazaiting", DISPATCH_QUEUE_SERIAL); for (int i = 0; i < 10; i++) { dispatch_sync(queue, ^{ NSLog(@"%d---%@", i, [NSThread currentThread]); }); } } // 串行队列,异步执行 开新线程(1个),任务是有序执行的 - (void)async { dispatch_queue_t queue = dispatch_queue_create("mazaiting", DISPATCH_QUEUE_SERIAL); for (int i = 0; i < 10; i++) { dispatch_async(queue, ^{ NSLog(@"%d---%@", i, [NSThread currentThread]); }); } } @end 3). 并行队列 @implementation ViewController - (void)touchesBegan:(NSSet<UITouch *> *)touches withEvent:(UIEvent *)event { [self sync]; [self async]; } // 并行队列,同步执行 --- 串行队列,同步执行,不开线程,顺序执行 - (void)sync { dispatch_queue_t queue = dispatch_queue_create("mazaiting", DISPATCH_QUEUE_CONCURRENT); for (int i = 0; i < 10; i++) { dispatch_sync(queue, ^{ NSLog(@"%d---%@", i, [NSThread currentThread]); }); } } // 并行队列,异步执行 --- 开多个线程,无序执行 - (void)async { dispatch_queue_t queue = dispatch_queue_create("mazaiting", DISPATCH_QUEUE_CONCURRENT); for (int i = 0; i < 10; i++) { dispatch_async(queue, ^{ NSLog(@"%d---%@", i, [NSThread currentThread]); }); } } @end 4). 主队列 @implementation ViewController - (void)touchesBegan:(NSSet<UITouch *> *)touches withEvent:(UIEvent *)event { // [self demo]; // [self demo1]; [self demo2]; } // 1. 主队列,异步执行 --- 主线程,顺序执行 // 主队列特点:先执行完主线程上的代码,才会执行主队列中的任务 - (void)demo { for (int i = 0; i < 10; i++) { dispatch_async(dispatch_get_main_queue(), ^{ NSLog(@"hello %d %@", i, [NSThread currentThread]); }); } } // 2. 主队列,同步执行 --- 主线程上执行才会死锁 // 同步执行: 会等着第一个任务执行完成后才会继续往后执行 - (void)demo1 { NSLog(@"开始"); for (int i = 0; i < 10; i++) { // 死锁 dispatch_sync(dispatch_get_main_queue(), ^{ NSLog(@"hello %d %@", i, [NSThread currentThread]); }); } NSLog(@"结束"); } // 3. 解决死锁 - (void)demo2 { NSLog(@"开始"); dispatch_async(dispatch_get_global_queue(0, 0), ^{ for (int i = 0; i < 10; i++) { // 死锁 dispatch_sync(dispatch_get_main_queue(), ^{ NSLog(@"hello %d %@", i, [NSThread currentThread]); }); } }); NSLog(@"结束"); } @end 5). 延迟执行和一次性执行 //1 延迟执行 // dispatch_time_t when, 延迟多长时间 精度到纳秒 // dispatch_queue_t queue, 队列 // dispatch_block_t block 任务 // dispatch_after(dispatch_time(DISPATCH_TIME_NOW, (int64_t)(2 * NSEC_PER_SEC)), dispatch_get_main_queue(), ^{ // // NSLog(@"task"); // }); //2 一次性执行 // for (int i = 0; i<20000; i++) { // static dispatch_once_t onceToken; // dispatch_once(&onceToken, ^{ // NSLog(@"hello %@",[NSThread currentThread]); // }); // } 6). 调度组 @implementation ViewController - (void)viewDidLoad { [super viewDidLoad]; // Do any additional setup after loading the view, typically from a nib. } //下载三首歌曲,当歌曲都下载完毕 通知用户 - (void)touchesBegan:(NSSet<UITouch *> *)touches withEvent:(UIEvent *)event { [self demo2]; } //调度组内部的原理 - (void)demo2 { //创建组 dispatch_group_t group = dispatch_group_create(); //创建队列 dispatch_queue_t queue = dispatch_queue_create("hm", DISPATCH_QUEUE_CONCURRENT); //任务1 dispatch_group_enter(group); dispatch_async(queue, ^{ NSLog(@"任务1"); dispatch_group_leave(group); }); //任务2 dispatch_group_enter(group); dispatch_async(queue, ^{ NSLog(@"任务2"); dispatch_group_leave(group); }); //任务3 dispatch_group_enter(group); dispatch_async(queue, ^{ [NSThread sleepForTimeInterval:2.0]; NSLog(@"任务3"); dispatch_group_leave(group); }); //等待组中的任务都执行完毕,才会执行 dispatch_group_notify(group, dispatch_get_main_queue(), ^{ NSLog(@"over"); }); //等待组中的任务都执行完毕,才会继续执行后续的代码 dispatch_group_wait(group, DISPATCH_TIME_FOREVER); NSLog(@"hello "); } //演示调度组的基本使用 - (void)demo1 { //创建组 dispatch_group_t group = dispatch_group_create(); //队列 dispatch_queue_t queue = dispatch_get_global_queue(0, 0); //下载第一首歌曲 dispatch_group_async(group, queue, ^{ NSLog(@"正在下载第一个歌曲"); }); //下载第二首歌曲 dispatch_group_async(group, queue, ^{ NSLog(@"正在下载第二个歌曲"); [NSThread sleepForTimeInterval:2.0]; }); //下载第三首歌曲 dispatch_group_async(group, queue, ^{ NSLog(@"正在下载第三个歌曲"); }); //当三个异步任务都执行完成,才执行 dispatch_group_notify(group, dispatch_get_main_queue(), ^{ NSLog(@"over %@",[NSThread currentThread]); }); } @end 4. NSOperation 1). 创建 @implementation ViewController - (void)touchesBegan:(NSSet<UITouch *> *)touches withEvent:(UIEvent *)event { // 1. 调用start执行, 不会开启新线程,start方法更新操作的状态,调用main方法 // 创建 NSInvocationOperation *op = [[NSInvocationOperation alloc] initWithTarget:self selector:@selector(demo) object:nil]; NSLog(@"--%d", op.isFinished); // 开始执行 [op start]; NSLog(@"--%d", op.isFinished); // 2. 添加到队列 // 创建操作 NSInvocationOperation *op1 = [[NSInvocationOperation alloc] initWithTarget:self selector:@selector(demo) object:nil]; // 添加到队列 NSOperationQueue *queue = [[NSOperationQueue alloc] init]; // 将操作添加到队列 [queue addOperation:op1]; } - (void)demo { NSLog(@"hello %@", [NSThread currentThread]); } @end 2). BlockOperation #import "ViewController.h" @interface ViewController () //全局队列 @property (nonatomic, strong) NSOperationQueue *queue; @end @implementation ViewController //懒加载 - (NSOperationQueue *)queue { if (_queue == nil) { _queue = [[NSOperationQueue alloc] init]; } return _queue; } - (void)viewDidLoad { [super viewDidLoad]; // Do any additional setup after loading the view, typically from a nib. } - (void)touchesBegan:(NSSet<UITouch *> *)touches withEvent:(UIEvent *)event { [self demo5]; } //演示start - (void)demo1 { //创建操作 NSBlockOperation *op = [NSBlockOperation blockOperationWithBlock:^{ NSLog(@"hello %@",[NSThread currentThread]); }]; //更新op的状态,执行main方法 [op start]; //不会开新线程 } //把操作添加到队列 - (void)demo2 { //创建队列 NSOperationQueue *queue = [[NSOperationQueue alloc] init]; //创建操作 NSBlockOperation *op = [NSBlockOperation blockOperationWithBlock:^{ NSLog(@"hello %@",[NSThread currentThread]); }]; //把操作添加到队列中 [queue addOperation:op]; } - (void)demo3 { NSOperationQueue *queue = [[NSOperationQueue alloc] init]; [queue addOperationWithBlock:^{ NSLog(@"hello %@",[NSThread currentThread]); }]; } //全局队列 - (void)demo4 { // //并发队列,异步执行 // for (int i = 0; i < 10; i++) { // [self.queue addOperationWithBlock:^{ // NSLog(@"hello %d %@",i,[NSThread currentThread]); // }]; // } } // 操作的 completionBlock - (void)demo5 { NSBlockOperation *op = [NSBlockOperation blockOperationWithBlock:^{ [NSThread sleepForTimeInterval:2]; NSLog(@"hello %@",[NSThread currentThread]); }]; //操作完成之后执行 [op setCompletionBlock:^{ NSLog(@"end %@",[NSThread currentThread]); }]; [self.queue addOperation:op]; } @end 3). 线程间通信 #import "ViewController.h" @interface ViewController () //全局队列 @property (nonatomic, strong) NSOperationQueue *queue; @end @implementation ViewController //懒加载 - (NSOperationQueue *)queue { if (_queue == nil) { _queue = [[NSOperationQueue alloc] init]; } return _queue; } - (void)viewDidLoad { [super viewDidLoad]; // Do any additional setup after loading the view, typically from a nib. [self.queue addOperationWithBlock:^{ //异步下载图片 NSLog(@"异步下载图片"); //获取当前队列 // [NSOperationQueue currentQueue] //线程间通信,回到主线程更新UI [[NSOperationQueue mainQueue] addOperationWithBlock:^{ NSLog(@"更新UI"); }]; }]; } @end 4). 操作的依赖 #import "ViewController.h" @interface ViewController () @property (nonatomic, strong) NSOperationQueue *queue; @end @implementation ViewController - (NSOperationQueue *)queue { if (_queue == nil) { _queue = [NSOperationQueue new]; } return _queue; } - (void)viewDidLoad { [super viewDidLoad]; // Do any additional setup after loading the view, typically from a nib. // 下载 - 解压 - 升级完成 NSBlockOperation *op1 = [NSBlockOperation blockOperationWithBlock:^{ NSLog(@"下载"); }]; NSBlockOperation *op2 = [NSBlockOperation blockOperationWithBlock:^{ [NSThread sleepForTimeInterval:2.0]; NSLog(@"解压"); }]; //设置优先级最高 op2.qualityOfService = NSQualityOfServiceUserInteractive; NSBlockOperation *op3 = [NSBlockOperation blockOperationWithBlock:^{ NSLog(@"升级完成"); }]; //设置操作间的依赖 [op2 addDependency:op1]; [op3 addDependency:op2]; //错误,会发生循环依赖,什么都不执行 // [op1 addDependency:op3]; //操作添加到队列中 [self.queue addOperations:@[op1,op2] waitUntilFinished:NO]; //依赖关系可以夸队列执行 [[NSOperationQueue mainQueue] addOperation:op3]; } @end 5). 自定义操作 步骤: 继承NSOperation类,并重写main方法 CustomOperation.h #import <Foundation/Foundation.h> @interface CustomOperation : NSOperation @end CustomOperation.m #import "CustomOperation.h" @implementation CustomOperation - (void)main { NSLog(@"mazaiting"); } @end ViewController.m #import "ViewController.h" #import "CustomOperation.h" @interface ViewController () @end @implementation ViewController - (void)touchesBegan:(NSSet<UITouch *> *)touches withEvent:(UIEvent *)event { CustomOperation *co = [[CustomOperation alloc] init]; NSOperationQueue *queue = [[NSOperationQueue alloc] init]; [queue addOperation:co]; } @end

优秀的个人博客,低调大师

ios: NSConditionLock

锁的相关介绍可以参照:http://blog.csdn.net/lifengzhong/article/details/7487505 看NSConditionLock类的属性方法: lock,unlock:加锁和解锁,是required method。 - (id)initWithCondition:(NSInteger)condition :初始化对象。有一个整形的conditon参数,表示条件。 - (void)lockWhenCondition:(NSInteger)condition :“The receiver’s condition must be equal to condition before the locking operation will succeed. This method blocks the thread’s execution until the lock can be acquired.” 进程会一直阻塞,一直到满足conditon并完成加锁。 - (void)unlockWithCondition:(NSInteger)condition :解锁并重新设定condition。 因为主线程不能被阻塞,所以你要把你整个逻辑发在一个异步的GCD中。 本文转自老Zhan博客园博客,原文链接:http://www.cnblogs.com/mybkn/archive/2012/11/07/2759296.html,如需转载请自行联系原作者

优秀的个人博客,低调大师

iOS - Xib

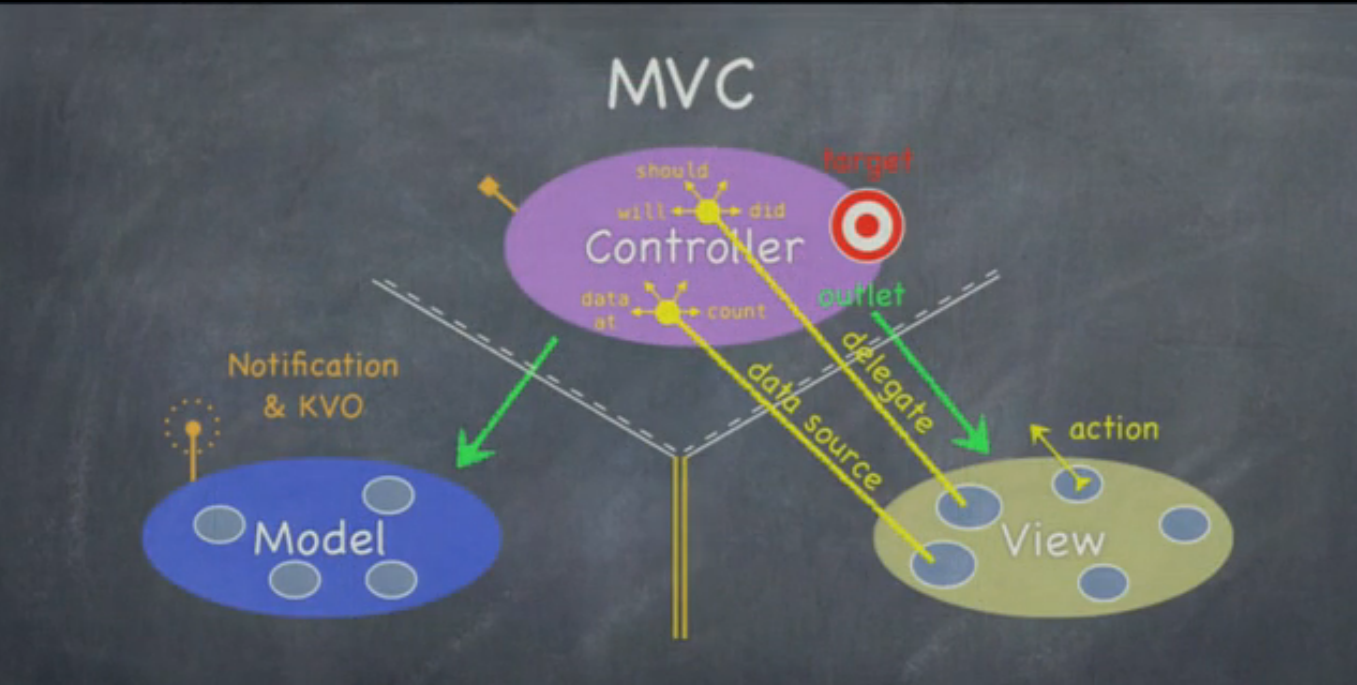
前言 xib 文件可以被 Xcode 编译成 nib 文件,xib 文件本质上是一个 xml 文件,而 nib 文件就是编译后的二进制文件,该文件将视图等控件对象封装了起来,而在程序运行起来后,这些对象会被激活。xib 可以用 vim 或 cat 命令查看。nib 文件可以在程序的 Build 目录下找到。 xib 文件有以下几个重要的属性,从哪里加载 xib,加载 xib 中的什么视图,都可以根据这几个属性得出。 xib 文件名 File’s Owner xib 文件中的视图的 Class xib 文件中的视图的 Outlet 指向 在写界面时同时混用 xib 和代码可以提高效率,而对 xib 的使用主要体现在其专用性和通用性上。 对于一些专门的界面,例如 App 中的设置界面,纯代码写难免会浪费时间,此时可以通过 xib 文件的拖控件方法来定制。这个 xib 是专用于某一个界面的,目的是提高效率。 对于一些通用的控件甚至界面,例如一个很漂亮但实现起来非常复杂的按钮,此时可以通过 load xib 文件中的视图来快速添加。这个 xib 对于所有视图是共用的,目的是提高可复用性。 对于通用的 xib: 如果 xib 只是单纯的界面展示,那么 File’s Owner 可以随意。 如果 xib 中包含了按钮、手势等用户输入事件,那么 File’s Owner 最好设置为 UIViewController 类的子类。 xib 中可以有多个视图控件,从 xib 中 load 出来的 views 数组中视图对象的排列顺序和 xib scene 中的对象排列顺序一致(其实就是 xml 文件中元素的排序而已)。 1、xib 文件加载 1)xib 文件加载方式 1> 方法 1 // Test 为 xib 文件名 NSArray *objs = [[NSBundle mainBundle] loadNibNamed:@"Test" owner:nil options:nil]; [self.view addSubview:objs[1]]; 2> 方法 2 // 一个 UINib 对象就代表一个 xib 文件 /* 一般情况下,bundle 参数传 nil,默认就是 mainBundle */ UINib *nib = [UINib nibWithNibName:@"Test" bundle:[NSBundle mainBundle]]; NSArray *objs = [nib instantiateWithOwner:nil options:nil]; [self.view addSubview:objs[1]]; 2)使用 xib 自定义 view 的步骤 新建自定义控件类 新建 xib 文件(文件名建议和自定义控件类的类名一致) 修改 xib 中控件绑定的类名 在类扩展中增加子控件的属性,关联 xib 中的子控件。封装 xib 的加载过程,增加模型属性,在模型属性 setter 方法中设置数据到子控件上。 1.1 加载 xib 中 File’s Owner 为 nil 的视图 Objective-C BlueView.xib 由于 BlueView 会放到其它 View 上作为 subview,所以这儿 size 是 Freeform, Status Bar 是 None。 MainViewController.m @property (strong, nonatomic) UIView *blueView; - (void)loadBlueViewFromXIB { // BlueView.xib 的 File's Owner 为 nil NSArray *views = [[NSBundle mainBundle] loadNibNamed:@"BlueView" owner:nil options:nil]; _blueView = views[0]; [self.view addSubview:_blueView]; // 从 xib 加载进来的 View 大小是确定的,但是该视图在父视图中的位置是不确定的。此外,视图中的子视图也是原封不动地 Load 进来的 CGRect frame = _blueView.frame; frame.origin.x += 50.0f; frame.origin.y += 80.0f; _blueView.frame = frame; } Swift BlueView.xib 同 Objective-C 设置 MainViewController.swift var blueView:UIView! func loadBlueViewFromXIB() { // BlueView.xib 的 File's Owner 为 nil let views = NSBundle.mainBundle().loadNibNamed("BlueView", owner: nil, options: nil) blueView = views[0] as! UIView self.view.addSubview(blueView) // 从 xib 加载进来的 View 大小是确定的,但是该视图在父视图中的位置是不确定的。此外,视图中的子视图也是原封不动地 Load 进来的 var frame = blueView.frame frame.origin.x += 50.0 frame.origin.y += 80.0 blueView.frame = frame } 结论: File’s Owner 为 nil 的 xib 文件中的视图属于通用视图,在工程中可以复用。 从 xib 加载进来的 View 大小是确定的,但是该视图在父视图中的位置是不确定的,因此需要开发者自行指定。 视图中的所有子视图会被原封不动地 Load 进来。 1.2 加载 xib 中 File’s Owner 为 self 的视图 Objective-C GreenView.xib MainViewController.m @property (strong, nonatomic) IBOutlet UIView *greenView; - (void)loadGreenViewFromXIB { // GreenView.xib 的 File's Owner 设为 self,并建立了一个从该 xib 的 View 到 self 的 IBOutlet greenView [[NSBundle mainBundle] loadNibNamed:@"GreenView" owner:self options:nil]; [self.view addSubview:_greenView]; // 只要 self 主动调用 Load XIB 的方法,self 持有的 IBOutlet 指向的视图就会被初始化。这里不需要通过 views[0] 的方式存取视图 CGRect frame = _greenView.frame; frame.origin.x = _blueView.frame.origin.x; frame.origin.y = _blueView.frame.origin.y + 80.0f; _greenView.frame = frame; } Swift GreenView.xib 同 Objective-C 设置 MainViewController.swift @IBOutlet var greenView: UIView! func loadGreenViewFromXIB() { // GreenView.xib 的 File's Owner 设为 self,并建立了一个从该 xib 的 View 到 self 的 IBOutlet greenView NSBundle.mainBundle().loadNibNamed("GreenView", owner: self, options: nil) self.view.addSubview(greenView) // 只要 self 主动调用 Load XIB 的方法,self 持有的 IBOutlet 指向的视图就会被初始化。这里不需要通过 views[0] 的方式存取视图 var frame = greenView.frame frame.origin.x = blueView.frame.origin.x frame.origin.y = blueView.frame.origin.y + 80.0 greenView.frame = frame } 结论: File’s Owner 不为 nil 的 xib 文件中的视图属于专用视图,在工程中不应该被复用。 只要 self 主动调用 loadNibNamed:owner:options: 方法,self 持有的 IBOutlet 指向的视图就会被初始化。 存取 xib 中的视图不用 views[0] 的方式,而是通过 IBOutlet 类型的 property 进行存取。 1.3 加载 xib 中 File’s Owner 为特定类的视图 Objective-C RedView.xib RedViewOwner.h @property (strong, nonatomic) IBOutlet UIView *redView; MainViewController.m @property (strong, nonatomic) RedViewOwner *redViewOwner; @property (strong, nonatomic) UIView *redView; - (void)loadRedViewFromXIB { // RedView.xib 的 File's Owner 是 RedViewOwner 类的实例,并建立了一个从该 xib 的 View 到 RedViewOwner 实例的 IBOutlet。 // 只要通过 _redViewOwner 主动调用 Load XIB 的方法,该 IBOutlet 指向的视图就会被初始化 _redViewOwner = [RedViewOwner new]; [[NSBundle mainBundle] loadNibNamed:@"RedView" owner:_redViewOwner options:nil]; _redView = _redViewOwner.redView; [self.view addSubview:_redView]; CGRect frame = _redView.frame; frame.origin.x = _greenView.frame.origin.x; frame.origin.y = _greenView.frame.origin.y + 80.0f; _redView.frame = frame; } Swift RedView.xib 同 Objective-C 设置 RedViewOwner.swift @IBOutlet var redView: UIView! MainViewController.swift var redViewOwner:RedViewOwner! var redView:UIView! func loadRedViewFromXIB() { // RedView.xib 的 File's Owner 是 RedViewOwner 类的实例,并建立了一个从该 xib 的 View 到 RedViewOwner 实例的 IBOutlet。 // 只要通过 _redViewOwner 主动调用 Load XIB 的方法,该 IBOutlet 指向的视图就会被初始化 redViewOwner = RedViewOwner() NSBundle.mainBundle().loadNibNamed("RedView", owner: redViewOwner, options: nil) redView = redViewOwner.redView self.view.addSubview(redView) var frame = redView.frame frame.origin.x = greenView.frame.origin.x frame.origin.y = greenView.frame.origin.y + 80.0 redView.frame = frame } 结论: File’s Owner 类可以封装视图中的各种逻辑,而不仅仅是提供视图内容。 只要通过 File’s Owner 类主动调用 loadNibNamed:owner:options: 方法,该 IBOutlet 指向的视图就会被初始化。 1.4 加载 xib 中文件名和视图类名一致的视图(File’s Owner 为 nil) Objective-C YellowView.xib File’s Owner 为 nil YellowView.h // Convenience Method + (instancetype)viewFromNIB; YellowView.m + (instancetype)viewFromNIB { // 加载 xib 中的视图,其中 xib 文件名和本类类名必须一致 // 这个 xib 文件的 File's Owner 必须为空 // 这个 xib 文件必须只拥有一个视图,并且该视图的 class 为本类 NSArray *views = [[NSBundle mainBundle] loadNibNamed:NSStringFromClass([self class]) owner:nil options:nil]; return views[0]; } - (void)awakeFromNib { // self 就是 xib 文件中的 View self.backgroundColor = [UIColor yellowColor]; } MainViewController.m @property (strong, nonatomic) YellowView *yellowView; - (void)loadYellowViewFromXIB { // 说明见 YellowView.m 的 viewFromNIB 方法 _yellowView = [YellowView viewFromNIB]; [self.view addSubview:_yellowView]; CGRect frame = _yellowView.frame; frame.origin.x = _redView.frame.origin.x; frame.origin.y = _redView.frame.origin.y + 80.0f; _yellowView.frame = frame; } Swift YellowView.xib 同 Objective-C 设置 YellowView.swift class func viewFromNIB() -> AnyObject { // 加载 xib 中的视图,其中 xib 文件名和本类类名必须一致 // 这个 xib 文件的 File's Owner 必须为空 // 这个 xib 文件必须只拥有一个视图,并且该视图的 class 为本类 let views = NSBundle.mainBundle().loadNibNamed("YellowView", owner: nil, options: nil) return views[0] } override func awakeFromNib() { // self 就是 xib 文件中的 View self.backgroundColor = UIColor.yellowColor() } MainViewController.swift var yellowView:YellowView! func loadYellowViewFromXIB() { // 说明见 YellowView.m 的 viewFromNIB 方法 yellowView = YellowView.viewFromNIB() as! YellowView self.view.addSubview(yellowView) var frame = yellowView.frame frame.origin.x = redView.frame.origin.x frame.origin.y = redView.frame.origin.y + 80.0 yellowView.frame = frame } 结论: 这里的 viewFromNib 方法只是对 loadNibNamed:owner:options: 方法的一个简单封装,要求的条件包括: xib 文件名和本类类名必须一致。 这个 xib 文件的 File’s Owner 必须为空。 这个 xib 文件必须只拥有一个视图,并且该视图的 class 为本类。 1.5 通过 UIViewController 的 initWithNibName:bundle: 方法加载 xib 文件中的视图 Objective-C BlackViewController.xib 如果 BlackViewController 类希望 self.view 就是 xib 文件中的 View,可以在 Connections 页中建立 view -> File’s Owner 的 Outlet。由 File’s Owner 右键拖动到 view 上。 BlackViewController.h // Conveniece Method + (instancetype)viewControllerFromNIB; BlackViewController.m + (instancetype)viewControllerFromNIB { return [[BlackViewController alloc] initWithNibName:NSStringFromClass([self class]) bundle:[NSBundle mainBundle]]; } - (void)viewDidLoad { [super viewDidLoad]; // self.view 就是 xib 文件中的 View self.view.backgroundColor = [UIColor blackColor]; } MainViewController.m @property (strong, nonatomic) BlackViewController *blackViewController; @property (strong, nonatomic) UIView *blackView; - (void)loadBlackViewFromXIB { _blackViewController = [[BlackViewController alloc] initWithNibName:@"BlackViewController" bundle:[NSBundle mainBundle]]; // 或使用 Conveniece Method,但要求 xib 文件名和 View Controller 类名一致 _blackViewController = [BlackViewController viewControllerFromNIB]; _blackView = _blackViewController.view; [self.view addSubview:_blackView]; CGRect frame = _blackView.frame; frame.origin.x = _yellowView.frame.origin.x; frame.origin.y = _yellowView.frame.origin.y + 80.0f; _blackView.frame = frame; } Swift BlackViewController.xib 同 Objective-C 设置 BlackViewController.swift class func viewControllerFromNIB() -> AnyObject { return BlackViewController(nibName: "BlackViewController", bundle: NSBundle.mainBundle()) } override func viewDidLoad() { super.viewDidLoad() self.view.backgroundColor = UIColor.blackColor() } MainViewController.swift var blackViewController:BlackViewController! var blackView:UIView! func loadBlackViewFromXIB() { blackViewController = BlackViewController(nibName: "BlackViewController", bundle: NSBundle.mainBundle()) // 或使用 Conveniece Method,但要求 xib 文件名和 View Controller 类名一致 blackViewController = BlackViewController.viewControllerFromNIB() as! BlackViewController blackView = blackViewController.view; self.view.addSubview(blackView) var frame = blackView.frame frame.origin.x = yellowView.frame.origin.x frame.origin.y = yellowView.frame.origin.y + 80.0 blackView.frame = frame } 结论: 将 xib 的 File’s Owner 设成一个 UIViewController 子类,可以将这个 xib 文件的视图展示和外部响应事件(例如点击一个按钮触发的点击事件,该视图的手势事件等)全部封装在一个 View Controller 中,如果把按钮的点击事件封装在一个 UIView 类中,貌似破坏了 MVC 模式,因此最好将 xib 的 File’s Owner 设成一个 UIViewController 子类,该类可以通过 addChildViewController 方法将其添加到现有的 View Controller 上。如果只是希望加载视图,可以通过 viewcontroller.view 存取。 如果希望 ViewControllerA 加载并响应 aXIBView 中的按钮点击事件,这时必须建立一个 aXIBView 到 ViewControllerA 的 IBAction,如果 ViewControllerA 需要拥有多个这样的 XIB,那么 ViewControllerA 会变得非常的庞大,此时可以通过为每一个 XIB 设置一个 ViewController,再让 ViewControllerA 加载这些 Child View Controllers,这样可以将这些事件的响应职责和视图的描绘工作分派给专门的 Child View Controller,在减小 ViewControllerA 体积的同时,也可以提高各个 xib 的可复用性。 这里的 viewControllerFromNIB 方法其实就是 initWithNibName:bundle: 方法的一个简单封装,要求:xib 的 File’s Owner 设为本类。 1.6 通过 UIViewController + NIB 加载 xib 文件中的 View Controller 类和其视图 Objective-C GrayViewController.xib UIViewController+NIB.h @interface UIViewController (NIB) // 要求 xib 文件名和 View Controller 类名一致 + (instancetype)loadFromNib; @end UIViewController+NIB.m @implementation UIViewController (NIB) + (instancetype)loadFromNib { // [self class] 会由调用的类决定 return [[[self class] alloc] initWithNibName:NSStringFromClass([self class]) bundle:[NSBundle mainBundle]]; } @end GrayViewController.h @property (weak, nonatomic) IBOutlet UIButton *actionButton; GrayViewController.m - (void)viewDidLoad { [super viewDidLoad]; self.view.backgroundColor = [UIColor grayColor]; } // 推荐从 xib 文件中加载 View Controller 的方法,这种方法可以将 xib 文件中的视图和其按钮响应事件全部封装在 GrayViewController // 如果 GrayViewController 的按钮响应事件由 MainViewController 作出响应,那么二者的耦合度就过高 // 建议: // 单纯的通用 View 展示,使用从 xib 文件加载视图的方法,File's Owner 设为 nil // 特定拥有者的 View 展示,从 xib 文件加载视图时,File's Owner 设为拥有者 // 如果视图中有按钮响应事件,或其它可以和用户交互的事件,建议采用从 xib 文件中加载 View Controller 的方法,这样可以封装 UI 展示和交互事件 - (IBAction)action:(UIButton *)sender { NSLog(@"action"); } MainViewController.m @property (strong, nonatomic) GrayViewController *grayViewController; @property (strong, nonatomic) UIView *grayView; - (void)loadGrayViewFromXIB { _grayViewController = [GrayViewController loadFromNib]; _grayView = _grayViewController.view; [self.view addSubview:_grayView]; CGRect frame = _grayView.frame; frame.origin.x = _blackView.frame.origin.x; frame.origin.y = _blackView.frame.origin.y + 80.0f; _grayView.frame = frame; } 结论: 这里我专门写了一个 UIViewController+NIB 的 category,只需要调用 loadFromNib 类方法就可以加载 xib 中的视图。要求: xib 文件的 File’s Owner 必须设置为对应的 View Controller 类。

资源下载

更多资源
腾讯云软件源

腾讯云软件源

为解决软件依赖安装时官方源访问速度慢的问题,腾讯云为一些软件搭建了缓存服务。您可以通过使用腾讯云软件源站来提升依赖包的安装速度。为了方便用户自由搭建服务架构,目前腾讯云软件源站支持公网访问和内网访问。

Nacos

Nacos

Nacos /nɑ:kəʊs/ 是 Dynamic Naming and Configuration Service 的首字母简称,一个易于构建 AI Agent 应用的动态服务发现、配置管理和AI智能体管理平台。Nacos 致力于帮助您发现、配置和管理微服务及AI智能体应用。Nacos 提供了一组简单易用的特性集,帮助您快速实现动态服务发现、服务配置、服务元数据、流量管理。Nacos 帮助您更敏捷和容易地构建、交付和管理微服务平台。

Spring

Spring

Spring框架(Spring Framework)是由Rod Johnson于2002年提出的开源Java企业级应用框架,旨在通过使用JavaBean替代传统EJB实现方式降低企业级编程开发的复杂性。该框架基于简单性、可测试性和松耦合性设计理念,提供核心容器、应用上下文、数据访问集成等模块,支持整合Hibernate、Struts等第三方框架,其适用范围不仅限于服务器端开发,绝大多数Java应用均可从中受益。

Rocky Linux

Rocky Linux

Rocky Linux(中文名:洛基)是由Gregory Kurtzer于2020年12月发起的企业级Linux发行版,作为CentOS稳定版停止维护后与RHEL(Red Hat Enterprise Linux)完全兼容的开源替代方案,由社区拥有并管理,支持x86_64、aarch64等架构。其通过重新编译RHEL源代码提供长期稳定性,采用模块化包装和SELinux安全架构,默认包含GNOME桌面环境及XFS文件系统,支持十年生命周期更新。

用户登录
用户注册