无人机之眼 | ROS图像RTMP协议推流到地面站,CPU表示软件解码
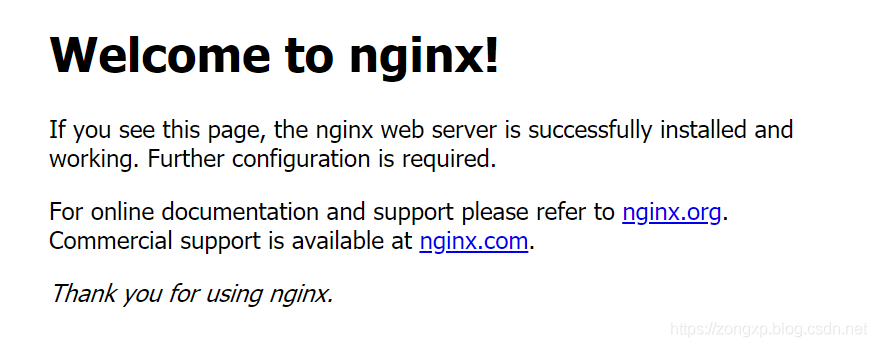
一、Nginx服务器搭建 因为要将处理过的图片串成rtmp码流,因此,需要搭建一个rtmp服务器,常用的方案是Nginx服务器。 1.1 安装依赖 sudo apt-get update sudo apt-get install -y openssl libssl-dev libpcre3 libpcre3-dev zlib1g-dev sudo apt-get install -y autoconf automake build-essential git libass-dev libfreetype6-dev libsdl2-dev libtheora-dev libtool libva-dev libvdpau-dev libvorbis-dev libxcb1-dev libxcb-shm0-dev libxcb-xfixes0-dev pkg-config texinfo wget zlib1g-dev sudo apt-get install -y ffmpeg 1.2 编译源码 在工作空间下,新建一个nginx文件夹,用来存放需要下载nginx和nginx-rtmp-module两个安装包源码。 nginx下载链接,nginx-rtmp-module下载链接。 解压文件,生成nginx-1.18.0文件夹,生成nginx-rtmp-module文件夹。 然后编译安装nginx,cd进nginx的目录。 cd nginx-1.18.0 ./configure --add-module=../nginx-rtmp-module make -j4 sudo make install 1.3 测试nginx 直接运行以下命令: sudo /usr/local/nginx/sbin/nginx 在浏览器中输入localhost:80(或者服务器的IP),看到如下画面,表示安装成功。 1.4 配置 编辑 /usr/local/nginx/conf/nginx.conf文件()。sudo gedit /usr/local/nginx/conf/nginx.conf #user nobody; worker_processes 1; #error_log logs/error.log; #error_log logs/error.log notice; #error_log logs/error.log info; #pid logs/nginx.pid; events { worker_connections 1024; } rtmp { server { listen 1935; # 服务端口--默认 chunk_size 4096; # 数据传输块的大小--默认 # 设置直播的application名称是live application live { live on; # live on表示开启直播模式 } } } http { include mime.types; default_type application/octet-stream; #log_format main '$remote_addr - $remote_user [$time_local] "$request" ' # '$status $body_bytes_sent "$http_referer" ' # '"$http_user_agent" "$http_x_forwarded_for"'; #access_log logs/access.log main; sendfile on; #tcp_nopush on; #keepalive_timeout 0; keepalive_timeout 65; #gzip on; server { listen 80; server_name localhost; #charset koi8-r; #access_log logs/host.access.log main; location / { root html; index index.html index.htm; } location /info { rtmp_stat all; rtmp_stat_stylesheet stat.xsl; } location /stat.xsl { root html; } #error_page 404 /404.html; # redirect server error pages to the static page /50x.html # error_page 500 502 503 504 /50x.html; location = /50x.html { root html; } } } 配置完之后,需要重启nginx: sudo cp nginx-rtmp-module/stat.xsl /usr/local/nginx/html/ sudo /usr/local/nginx/sbin/nginx -s reload 然后在浏览器中输入localhost:80/info可看到如下画面: 至此,完成了rtmp-nginx服务器的全部配置。 1.5 让系统启动时自动加载nginx服务 首先需要安装sysv-rc-conf: sudo apt-get update apt install sysv-rc-conf 设置nginx开机启动: 先为nginx在下创建一个启动脚本/etc/init.d/ gedit /etc/init.d/nginx 添加内容如下: #! /bin/sh # chkconfig: 2345 55 25 # Description: Startup script for nginx webserver on Debian. Place in /etc/init.d and # run 'update-rc.d -f nginx defaults', or use the appropriate command on your # distro. For CentOS/Redhat run: 'chkconfig --add nginx' ### BEGIN INIT INFO # Provides: nginx # Required-Start: $all # Required-Stop: $all# Default-Start: 2 3 4 5 # Default-Stop: 0 1 6 # Short-Description: starts the nginx web server # Description: starts nginx using start-stop-daemon ### END INIT INFO # Author: licess # website: http://lnmp.org PATH=/usr/local/sbin:/usr/local/bin:/sbin:/bin:/usr/sbin:/usr/bin NAME=nginx NGINX_BIN=/usr/local/nginx/sbin/$NAME CONFIGFILE=/usr/local/nginx/conf/$NAME.conf PIDFILE=/usr/local/nginx/logs/$NAME.pid case "$1" in start) echo -n "Starting $NAME... " if netstat -tnpl | grep -q nginx;then echo "$NAME (pid `pidof $NAME`) already running." exit 1 fi $NGINX_BIN -c $CONFIGFILE if [ "$?" != 0 ] ; then echo " failed" exit 1 else echo " done" fi ;; stop) echo -n "Stoping $NAME... " if ! netstat -tnpl | grep -q nginx; then echo "$NAME is not running." exit 1 fi $NGINX_BIN -s stop if [ "$?" != 0 ] ; then echo " failed. Use force-quit" exit 1 else echo " done" fi ;; status) if netstat -tnpl | grep -q nginx; then PID=`pidof nginx` echo "$NAME (pid $PID) is running..." else echo "$NAME is stopped" exit 0 fi ;; force-quit) echo -n "Terminating $NAME... " if ! netstat -tnpl | grep -q nginx; then echo "$NAME is not running." exit 1 fi kill `pidof $NAME` if [ "$?" != 0 ] ; then echo " failed" exit 1 else echo " done" fi ;; restart) $0 stop sleep 1 $0 start ;; reload) echo -n "Reload service $NAME... " if netstat -tnpl | grep -q nginx; then $NGINX_BIN -s reload echo " done" else echo "$NAME is not running, can't reload." exit 1 fi ;; configtest) echo -n "Test $NAME configure files... " $NGINX_BIN -t ;; *) echo "Usage: $0 {start|stop|force-quit|restart|reload|status|configtest}" exit 1 ;; esac 保存成功之后我们要对这个管理脚本设置一个权限: chmod +x /etc/init.d/nginx 接下来我们可以看看这个脚本能否正确执行: /etc/init.d/nginx restart 这个管理脚本支持的命令有start|stop|force-quit|restart|reload|status|configtest。 如果没有错误能正确执行,那我们可以开始把他加入启动项了: sysv-rc-conf --list # 我们先查看一下list中有没有我们刚刚加进去的这个nginx管理脚本 sysv-rc-conf nginx on # 然后用这个命令添加开机自启动 二、运行Prometheus推流示例程序(Python编写) 运行如下命令: roslaunch prometheus_detection web_cam0.launch # 打开一个usb摄像头0 roslaunch prometheus_detection rtmp_stream.launch # 开始推流 具体的Python推流代码如下(位置在): Prometheus/Modules/object_detection/py_nodes/rtmp_stream/ocv_rtmp_stream.py#!/usr/bin/env python # -*- coding: utf-8 -*- import rospy from sensor_msgs.msg import Image from geometry_msgs.msg import Pose, Point, Quaternion from cv_bridge import CvBridge from std_msgs.msg import String from std_msgs.msg import Bool import numpy as np import cv2 import subprocess import os import yaml import math rospy.init_node('rtmp_stream', anonymous=True) rtmp = r'rtmp://localhost:1935/live' size_str = str(640) + 'x' + str(400) command = ['ffmpeg', '-y', '-an', '-f', 'rawvideo', '-vcodec','rawvideo', '-pix_fmt', 'bgr24', '-s', size_str, '-r', '25', '-i', '-', '-c:v', 'libx264', '-pix_fmt', 'yuv420p', '-preset', 'ultrafast', '-f', 'flv', rtmp] pipe = subprocess.Popen( command, shell=False, stdin=subprocess.PIPE ) def image_callback(imgmsg): bridge = CvBridge() frame = bridge.imgmsg_to_cv2(imgmsg, "bgr8") # processing # end h, w = frame.shape[:2] img_resize = 400 if h > w: h = int(float(h) / w * img_resize) w = img_resize else: w = int(float(w) / h * img_resize) h = img_resize frame = cv2.resize(frame, (w, h)) frame = frame[:, :640, :] pipe.stdin.write(frame.tostring()) cv2.imshow("cap", frame) # cv2.imshow("area", area) cv2.waitKey(10) def rtmp_stream(topic_name): rospy.Subscriber(topic_name, Image, image_callback) rospy.spin() if __name__ == '__main__': subscriber = rospy.get_param('~camera_topic', '/prometheus/camera/rgb/image_raw') try: rtmp_stream(subscriber) except rospy.ROSInterruptException: pass pipe.terminate() 阿木实验室致力于为机器人研发提供开源软硬件工具和课程服务,让研发更高效! End - 技术发展的日新月异,阿木实验室将紧跟技术的脚步,不断把机器人行业最新的技术和硬件推荐给大家。看到经过我们培训的学员在技术上突飞猛进,是我们培训最大的价值。如果你在机器人行业,就请关注我们的公众号,我们将持续发布机器人行业最有价值的信息和技术。 阿木实验室致力于为机器人研发提供开源软硬件工具和课程服务,让研发更高效!