首页 文章 精选 留言 我的

精选列表

搜索[远程通讯],共10007篇文章
优秀的个人博客,低调大师

PJON 12.0 发布,Arduino 通讯总线方案

PJON 12.0已经发布,内容如下: 新规范: PJDLv4.0 包含响应初始化器,以避免多主模式下的漏洞 现在,pjdlr v3.0 能够使媒体在交换之间保持忙状态,并包括响应初始化程序,以避免多主模式下的漏洞 Changelog: Osprey 存储库中已经删除了动态寻址功能 SoftwareBitBang 现在实现了 PJDLv4.0,如果在多主模式中使用,它会更安全 OverSampling现在实现了 pjdlr v3.0,它更安全,并且支持多主模式,而不需要对所有设备进行公共配置 LocalFile 策略使用硬盘上的文件,允许多个进程在同一台机器上通信,可以用于进程间通信、仿真、测试应用程序和实时操作系统上的网络 ThrouLoRa 不再支持同步确认和重传 Interactive 路由器同步确认传输 增加对 Android 的支持 增加了对 STM 32-Duino 安装的支持 Linux 口函数声明的可选分离 PJON 数据缓冲区类型为 char PJON 发送函数 payload 参数现在类型为 Const void* SendString 和 ReceiveString 方法名更改为 SendFrame 和 ReceiveFrame 修复: 修复 Arduino 1.8.6+ 的 ESP 32 编译错误 将完整的缓冲区处理添加到 ThrouSerialand和 ThareSerialAsync 中 请见更改日志。

优秀的个人博客,低调大师

iframe父子页面通讯解决方案

有两点要注意 onload加载完成再进行操作 子页面延时获取 场景是这样的,父级页面嵌套了多个iframe,report_six.html子级页面按需加载数量,且每个子页面渲染不同的数据。 父页面for循环加载子页面数量,动态生成id,根据对应的id,传值给对应的子级页面元素,一定要写在onload里面 下面是父页面 <body> <iframe src="report_one.html" frameborder="0" width="630" height="891"></iframe> <iframe src="report_two.html" frameborder="0" width="630" height="891"></iframe> <iframe src="report_three.html" frameborder="0" width="630" height="891"></iframe> <iframe src="report_four.html" frameborder="0" width="630" height="891"></iframe> <iframe src="report_five.html" frameborder="0" width="630" height="891"></iframe> <iframe id="a_0" src="report_six.html" frameborder="0" width="630" height="891"></iframe> <iframe id="a_1" src="report_six.html" frameborder="0" width="630" height="891"></iframe> <iframe id="a_2" src="report_six.html" frameborder="0" width="630" height="891"></iframe> <iframe id="a_3" src="report_six.html" frameborder="0" width="630" height="891"></iframe> <iframe id="a_4" src="report_six.html" frameborder="0" width="630" height="891"></iframe> <iframe id="report_ten" src="report_ten.html" frameborder="0" width="630" height="891"></iframe> <iframe id="report_eleven" src="report_eleven.html" frameborder="0" width="630" height="891"></iframe> <iframe id="report_nine" src="report_nine.html" frameborder="0" width="630" height="891"></iframe> </body> <script src="./js/jquery-2.1.4.js"></script> <script> if(obj.type == 3){ $('<iframe src="report_one.html" frameborder="0" width="630" height="891"></iframe>').appendTo('body'); $('<iframe src="report_two.html" frameborder="0" width="630" height="891"></iframe>').appendTo('body'); $('<iframe src="report_three.html" frameborder="0" width="630" height="891"></iframe>').appendTo('body'); $('<iframe src="report_four.html" frameborder="0" width="630" height="891"></iframe>').appendTo('body'); $('<iframe src="report_five.html" frameborder="0" width="630" height="891"></iframe>').appendTo('body'); var rank_a = obj.k.length; for(var i = 0;i < rank_a;i++){ $('<iframe id="a_' + i + '" src="report_six.html" frameborder="0" width="630" height="891"></iframe>').appendTo('body'); } $('<iframe id="report_ten" src="report_ten.html" frameborder="0" width="630" height="891"></iframe>').appendTo('body'); $('<iframe id="report_eleven" src="report_eleven.html" frameborder="0" width="630" height="891"></iframe>').appendTo('body'); var cancer = obj.c.length; if(cancer > 0){ $('<iframe id="report_nine" src="report_nine.html" frameborder="0" width="630" height="891"></iframe>').appendTo('body'); } window.onload = function(){ var rank_a = obj.m07.dis_risk.length; for(var i = 0;i < rank_a;i++){ $('#a_' + i).contents().find('#rank').val(i); } $('#report_ten').contents().find('#change').html('四'); $('#report_eleven').contents().find('#change').html('五'); $('#report_nine').contents().find('#change').html('六'); } } </script> 子级页面带有默认值的元素input#rank接收数据,为了确定接收到参数,设置一个定时器,不等于默认值的情况下就表示接收成功,接收成功之后清除定时器执行业务代码 下面是子页面 <body> <section> <div id="mainChart" class="chart"></div> </section> <input type="hidden" id="rank" value="a"/> <script src="./js/echarts-all-3.js"></script> <script> var timer = setInterval(function(){ var rank_value = document.getElementById("rank").value; if(rank_value != 'a'){ clearInterval(timer); //执行代码 } },2000); </script> </body>

优秀的个人博客,低调大师

Android:ANR、线程间通讯、Handler、Message

场景:点击按钮1进行下载,显示进度条进度变化,10秒后下载完成,进度条消失;点击按钮2完成更新,出现转动进度条,5秒后更新完毕进度条消失。 1 2 3 4 5 6 7 8 9 10 11 12 13 14 15 16 17 18 19 20 21 22 23 24 25 26 27 28 29 30 31 32 33 34 35 36 37 38 39 40 41 42 43 44 45 46 47 48 49 50 51 52 53 54 55 56 57 58 59 60 61 62 63 64 65 66 67 68 69 70 71 72 73 74 75 76 77 78 79 80 81 82 83 84 85 86 87 88 89 90 91 92 93 94 95 96 97 98 99 100 101 102 103 104 105 106 107 108 109 110 111 112 113 114 115 116 117 118 119 120 121 122 123 124 125 126 127 128 129 130 131 132 133 134 135 136 137 138 139 140 141 142 143 144 145 146 147 148 149 150 151 152 153 154 155 156 157 158 159 160 161 162 163 164 165 166 167 public class MainActivity extends Activity implements OnClickListener { TextView textView = null ; private ProgressBar mProgress_yuan; private ProgressBar mProgress_jindu; private final int MSG_WHAT_DOWNLOAD = 1 ; private final int MSG_WHAT_UPDATE = 2 ; private final int MSG_WHAT_PROGRESS = 3 ; private Handler mHandler = new Handler() // Handler运行于main线程,在main线程接收消息 { @Override public void handleMessage(Message msg) // 重写handleMessage方法 { switch (msg.what) { case MSG_WHAT_DOWNLOAD: Data data = (Data) msg.obj; textView.setText(data.toString()); mProgress_jindu.setVisibility(View.GONE); // 下载完成后,进度条消失 break ; case MSG_WHAT_UPDATE: String str = (String) msg.obj; textView.setText(str); mProgress_yuan.setVisibility(View.GONE); // 更新完毕后,圆形进度框消失 break ; case MSG_WHAT_PROGRESS: int arg = msg.arg1; mProgress_jindu.setProgress(arg); // 每次接收消息,更新进度条 break ; default : break ; } } }; @Override protected void onCreate(Bundle savedInstanceState) { super .onCreate(savedInstanceState); setContentView(R.layout.activity_main); findViewById(R.id.button1).setOnClickListener( this ); findViewById(R.id.button2).setOnClickListener( this ); textView = (TextView) findViewById(R.id.textView1); mProgress_yuan = (ProgressBar) findViewById(R.id.progressBar1); mProgress_jindu = (ProgressBar) findViewById(R.id.progressBar2); } @Override public boolean onCreateOptionsMenu(Menu menu) { getMenuInflater().inflate(R.menu.activity_main, menu); return true ; } @Override public void onClick(View v) { switch (v.getId()) { case R.id.button1: btn1Click(); break ; case R.id.button2: btn2Click(); break ; default : break ; } } private void btn1Click() // 点击下载,10秒后下载完成,进度条消失 { mProgress_jindu.setVisibility(View.VISIBLE); // 点击时进度条显示(xml设置默认隐藏) new Thread() { @Override public void run() { Message message = new Message(); message.what = MSG_WHAT_DOWNLOAD; // 设置标识 message.obj = download(); // 将返回结果赋给msg,调用下载方法时同时发消息更新进度条 mHandler.sendMessage(message); // 通过Handler传递msg } }.start(); } private void btn2Click() // 点击更新,圆形进度条转动,3秒后更新完成,进度条消失 { mProgress_yuan.setVisibility(View.VISIBLE); new Thread() { @Override public void run() { try { Thread.sleep( 3000 ); String str = update(); //Message msg = mHandler.obtainMessage(what, obj) //下面部分可以采用上面的方法优化 Message msg = new Message(); msg.what = MSG_WHAT_UPDATE; msg.obj = str; mHandler.sendMessage(msg); } catch (InterruptedException e) { e.printStackTrace(); } } }.start(); } private Data download() { for ( int i = 0 ; i < 10 ; i++) // 模拟下载进度过程 { //Message msg = new Message(); Message msg = mHandler.obtainMessage(); //从系统的资源池获取复用msg,避免重复创建msg对象 msg.what = MSG_WHAT_PROGRESS; msg.arg1 = i * 10 ; mHandler.sendMessage(msg); // 每次进度发消息给main线程更新进度条 try { Thread.sleep( 1000 ); // 10秒后下载完成 } catch (InterruptedException e) { e.printStackTrace(); } } Data data = new Data( "下载完成!" , 12 ); return data; } private String update() { return "更新完成!" ; } class Data { String name; int num; public Data(String name, int num) { super (); this .name = name; this .num = num; } @Override public String toString() { return "data [name=" + name + ", num=" + num + "]" ; } } } 本文转自 glblong 51CTO博客,原文链接:http://blog.51cto.com/glblong/1206262,如需转载请自行联系原作者


优秀的个人博客,低调大师

android组件通讯 Intent-ComponnentName属性

ComponnentName属性应用实例 /Chapter06_Intent_ComponentName/src/com/amaker/ch06/app/MainActivity.java 代码 packagecom.amaker.ch06.app; importandroid.app.Activity; importandroid.content.ComponentName; importandroid.content.Intent; importandroid.os.Bundle; importandroid.view.View; importandroid.view.View.OnClickListener; importandroid.widget.Button; /** *测试Intent的ComponentName属性 */ publicclassMainActivityextendsActivity{ privateButtonbtn; @Override publicvoidonCreate(BundlesavedInstanceState){ super.onCreate(savedInstanceState); //设置视图布局 setContentView(R.layout.main); //实例化Button btn=(Button)findViewById(R.id.myButton01); //添加单击监听器 btn.setOnClickListener(newOnClickListener(){ @Override publicvoidonClick(Viewv){ //实例化组件名称 ComponentNamecn=newComponentName(MainActivity.this,"com.amaker.ch06.app1.MyActivity"); //实例化Intent Intentintent=newIntent(); //为Intent设置组件名称属性 intent.setComponent(cn); //启动Activity startActivity(intent); } }); } } /Chapter06_Intent_ComponentName/src/com/amaker/ch06/app1/MyActivity.java 代码 packagecom.amaker.ch06.app1; importandroid.app.Activity; importandroid.content.ComponentName; importandroid.content.Intent; importandroid.os.Bundle; importandroid.widget.TextView; importcom.amaker.ch06.app.R; /** *测试Intent的ComponentName属性 */ publicclassMyActivityextendsActivity{ //声明TextView privateTextViewtv; @Override publicvoidonCreate(BundlesavedInstanceState){ //设置视图布局 super.onCreate(savedInstanceState); setContentView(R.layout.my_layout); //获得Intent Intentintent=this.getIntent(); //获得组件名称对象 ComponentNamecn=intent.getComponent(); //获得包名称 StringpackageName=cn.getPackageName(); //获得类名称 StringclassName=cn.getClassName(); //实例化TextView tv=(TextView)findViewById(R.id.TextView01); //显示 tv.setText("组件包名称:"+packageName+"\n"+"组件类名称:"+className); } } /Chapter06_Intent_ComponentName/res/layout/main.xml 代码 <?xmlversion="1.0"encoding="utf-8"?> <LinearLayoutxmlns:android="http://schemas.android.com/apk/res/android" android:orientation="vertical" android:layout_width="fill_parent" android:layout_height="fill_parent" > <Button android:text="测试Intent的组件名称属性" android:id="@+id/myButton01" android:layout_width="wrap_content" android:layout_height="wrap_content"></Button> </LinearLayout> /Chapter06_Intent_ComponentName/res/layout/my_layout.xml 代码 <?xmlversion="1.0"encoding="utf-8"?> <LinearLayoutxmlns:android="http://schemas.android.com/apk/res/android" android:orientation="vertical" android:layout_width="fill_parent" android:layout_height="fill_parent" > <TextView android:text="@+id/TextView01" android:id="@+id/TextView01" android:layout_width="wrap_content" android:layout_height="wrap_content"></TextView> </LinearLayout> 本文转自linzheng 51CTO博客,原文链接:http://blog.51cto.com/linzheng/1080676

优秀的个人博客,低调大师

android组件通讯 Intent-Action属性

Action属性应用实例 1、自定义Action属性 程序文件 /Chapter06_Intent_TestAction/src/com/amaker/ch06/app/MainActivity.java 代码 packagecom.amaker.ch06.app; importandroid.app.Activity; importandroid.content.Intent; importandroid.os.Bundle; importandroid.view.View; importandroid.view.View.OnClickListener; importandroid.widget.Button; /** * *测试IntentAction属性 */ publicclassMainActivityextendsActivity{ //定义Action属性常量 publicstaticfinalStringMY_ACTION="com.amaker.ch07.app.MY_ACTION"; //声明Button privateButtonbtn; @Override publicvoidonCreate(BundlesavedInstanceState){ super.onCreate(savedInstanceState); //设置布局视图 setContentView(R.layout.main); //实例化Button btn=(Button)findViewById(R.id.Button01); btn.setOnClickListener(newOnClickListener(){ @Override publicvoidonClick(Viewv){ //实例化Intent Intentintent=newIntent(); //为Intent设置Action属性 intent.setAction(MY_ACTION); //启动Activity startActivity(intent); } }); } } /Chapter06_Intent_TestAction/src/com/amaker/ch06/app/MyActivity.java 代码 packagecom.amaker.ch06.app; importandroid.app.Activity; importandroid.content.Intent; importandroid.os.Bundle; importandroid.widget.TextView; /** *测试IntentAction属性 */ publicclassMyActivityextendsActivity{ //声明TextView privateTextViewtv; @Override publicvoidonCreate(BundlesavedInstanceState){ super.onCreate(savedInstanceState); //设置视图布局 setContentView(R.layout.my_layout); //获得Intent对象 Intentintent=getIntent(); //获得Action Stringaction=intent.getAction(); //获得TextView tv=(TextView)findViewById(R.id.TextView01); //设置内容 tv.setText(action); } } 布局文件 /Chapter06_Intent_TestAction/res/layout/main.xml 代码 <?xmlversion="1.0"encoding="utf-8"?> <LinearLayoutxmlns:android="http://schemas.android.com/apk/res/android" android:orientation="vertical" android:layout_width="fill_parent" android:layout_height="fill_parent" > <Button android:text="测试Intent的Action属性" android:id="@+id/Button01" android:layout_width="wrap_content" android:layout_height="wrap_content"></Button> </LinearLayout> /Chapter06_Intent_TestAction/res/layout/my_layout.xml 代码 <?xmlversion="1.0"encoding="utf-8"?> <LinearLayoutxmlns:android="http://schemas.android.com/apk/res/android" android:orientation="vertical" android:layout_width="fill_parent" android:layout_height="fill_parent" > <TextView android:text="@+id/TextView01" android:id="@+id/TextView01" android:layout_width="wrap_content" android:layout_height="wrap_content"></TextView> </LinearLayout> 清单文件 /Chapter06_Intent_TestAction/AndroidManifest.xml 代码 <?xmlversion="1.0"encoding="utf-8"?> <manifestxmlns:android="http://schemas.android.com/apk/res/android" package="com.amaker.ch06.app" android:versionCode="1" android:versionName="1.0"> <applicationandroid:icon="@drawable/icon"android:label="@string/app_name"> <activityandroid:name=".MainActivity" android:label="@string/app_name"> <intent-filter> <actionandroid:name="android.intent.action.MAIN"/> <categoryandroid:name="android.intent.category.LAUNCHER"/> </intent-filter> </activity> <activityandroid:name="MyActivity"> <intent-filter> <actionandroid:name="com.amaker.ch06.app.MY_ACTION"/> <categoryandroid:name="android.intent.category.DEFAULT"/> </intent-filter> </activity> </application> <uses-sdkandroid:minSdkVersion="3"/> </manifest> 2、访问系统的Action属性 程序文件 /Chapter06_Intent_TestAction2/src/com/amaker/ch06/app/MainActivity.java 代码 packagecom.amaker.ch06.app; importandroid.app.Activity; importandroid.content.Intent; importandroid.os.Bundle; importandroid.view.View; importandroid.view.View.OnClickListener; importandroid.widget.Button; /** * *测试IntentAction属性 */ publicclassMainActivityextendsActivity{ //声明Button privateButtonbtn; @Override publicvoidonCreate(BundlesavedInstanceState){ super.onCreate(savedInstanceState); //设置当前布局视图 setContentView(R.layout.main); //实例化Button btn=(Button)findViewById(R.id.Button01); btn.setOnClickListener(newOnClickListener(){ @Override publicvoidonClick(Viewv){ //创建Intent Intentintent=newIntent(); //设置IntentAction属性 intent.setAction(Intent.ACTION_GET_CONTENT); //设置IntentType属性 intent.setType("vnd.android.cursor.item/phone"); //启动Activity startActivity(intent); } }); } } 布局文件 /Chapter06_Intent_TestAction2/res/layout/main.xml 代码 <?xmlversion="1.0"encoding="utf-8"?> <LinearLayoutxmlns:android="http://schemas.android.com/apk/res/android" android:orientation="vertical" android:layout_width="fill_parent" android:layout_height="fill_parent" > <Button android:text="测试Intent的Action属性" android:id="@+id/Button01" android:layout_width="wrap_content" android:layout_height="wrap_content"></Button> </LinearLayout> 清单文件 /Chapter06_Intent_TestAction2/AndroidManifest.xml 代码 <?xmlversion="1.0"encoding="utf-8"?> <manifestxmlns:android="http://schemas.android.com/apk/res/android" package="com.amaker.ch06.app" android:versionCode="1" android:versionName="1.0"> <applicationandroid:icon="@drawable/icon"android:label="@string/app_name"> <activityandroid:name=".MainActivity" android:label="@string/app_name"> <intent-filter> <actionandroid:name="android.intent.action.MAIN"/> <categoryandroid:name="android.intent.category.LAUNCHER"/> </intent-filter> </activity> </application> <uses-sdkandroid:minSdkVersion="3"/> </manifest> 本文转自linzheng 51CTO博客,原文链接:http://blog.51cto.com/linzheng/1080670

优秀的个人博客,低调大师

android组件通讯 Intent-Category属性

程序文件 /Chapter06_Intent_Category/src/com/amaker/test/MainActivity.java 代码 packagecom.amaker.test; importandroid.app.Activity; importandroid.content.Intent; importandroid.os.Bundle; importandroid.view.View; importandroid.view.View.OnClickListener; importandroid.widget.Button; /** *测试Intent的Category属性 */ publicclassMainActivityextendsActivity{ //声明Button privateButtonb1; @Override publicvoidonCreate(BundlesavedInstanceState){ super.onCreate(savedInstanceState); //设置当前布局 setContentView(R.layout.main); //实例化Button b1=(Button)findViewById(R.id.Button01); //为Button添加监听器 b1.setOnClickListener(newOnClickListener(){ @Override publicvoidonClick(Viewv){ //实例化Intent Intenti=newIntent(); //添加Action属性 i.setAction(Intent.ACTION_MAIN); //添加Category属性 i.addCategory(Intent.CATEGORY_HOME); //启动Activity startActivity(i); } }); } } 布局文件 /Chapter06_Intent_Category/res/layout/main.xml 代码 <?xmlversion="1.0"encoding="utf-8"?> <LinearLayoutxmlns:android="http://schemas.android.com/apk/res/android" android:orientation="vertical"android:layout_width="fill_parent" android:layout_height="fill_parent"> <TextView android:layout_width="fill_parent" android:layout_height="wrap_content" android:text="IntentCategory测试"/> <Button android:id="@+id/Button01" android:layout_width="wrap_content" android:layout_height="wrap_content" android:text="回到Home"></Button> </LinearLayout> 本文转自linzheng 51CTO博客,原文链接:http://blog.51cto.com/linzheng/1080666

优秀的个人博客,低调大师

Web 即时通讯项目 webtim 发布

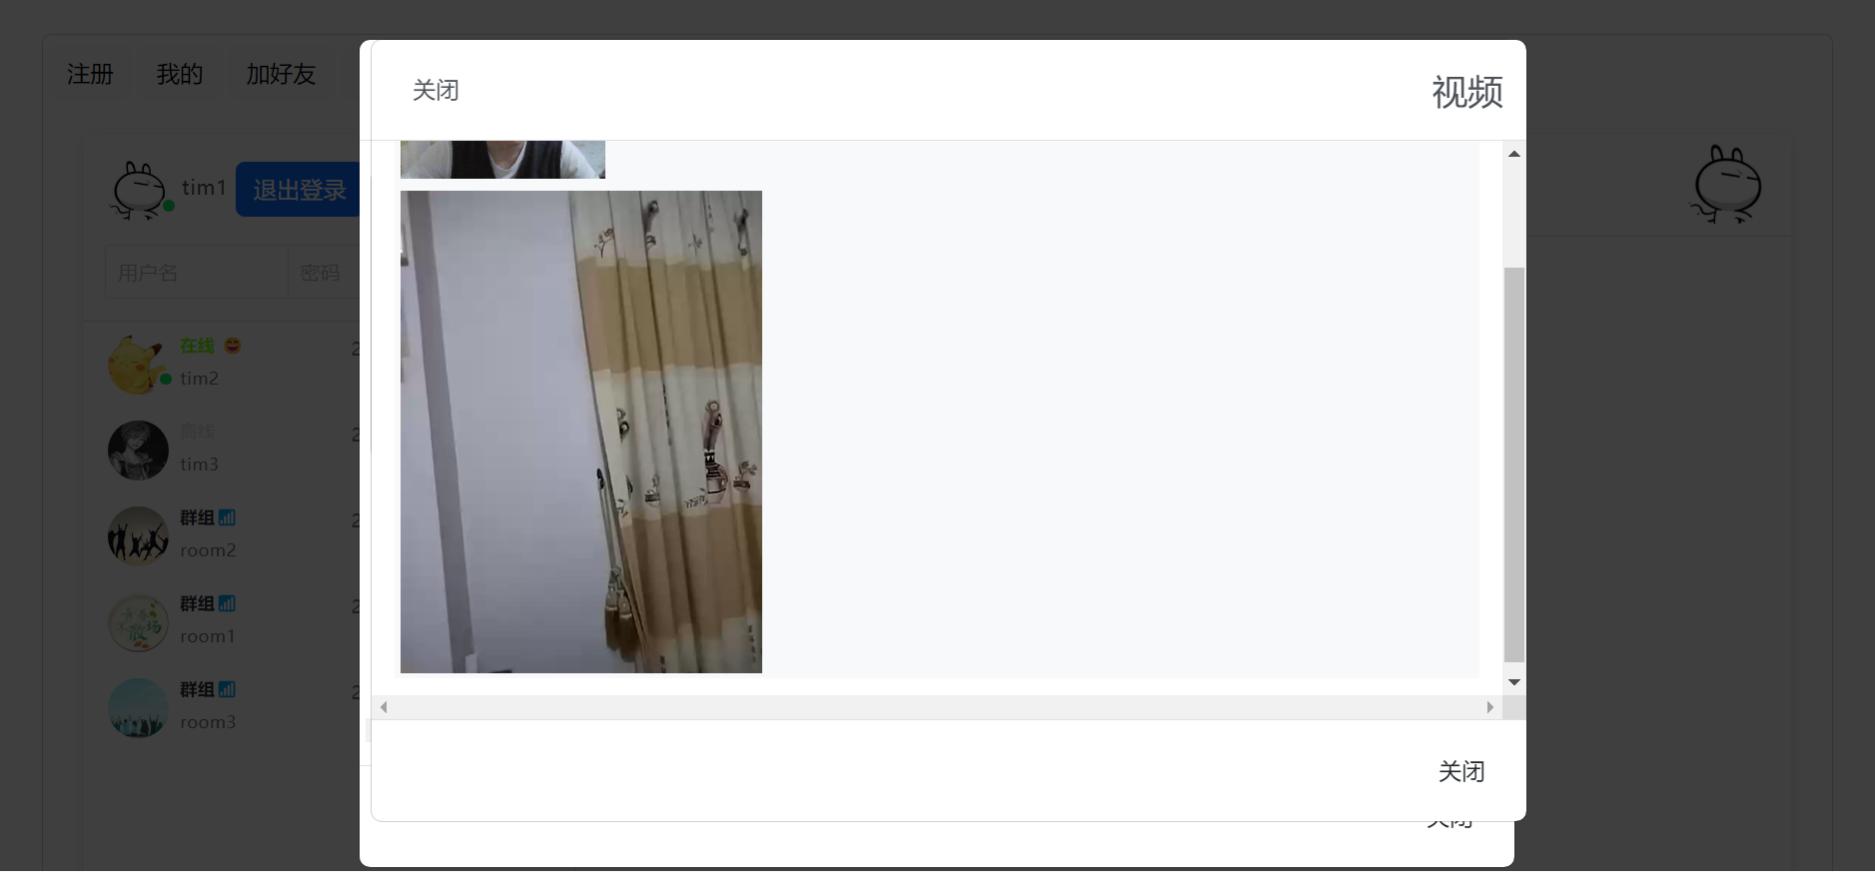
webtim 是使用 tim 客户端 timjs 实现的 web 版本 IM 项目,主要是展示 tim 接口的功能 webtim 源码地址 webtim 在线访问地址 webtim 主要展示的功能有用户注册,登录,加好友,删除好友,发信,在线状态,建群,加入群,退群,踢出群,实时音视频 等; webtim 项目会持续更新,把 tim 的接口功能充分展示。 说明: webtim 视频电话功能 webtim 是使用 tim v2.0.1 的 bigBinary 接口 实现 视频电话 的功能 可以在 PC 端或在 移动端 使用 webtim 视频电话功能 该功能是 实时音视频功能的展示,如果需要更好的音视频效果,可以调整 js 代码 可以通过https://tim.tlnet.top体验 视频电话功能和其他 im 功能 不同浏览器流畅度不同 其他功能截图

资源下载

更多资源
Mario

Mario

马里奥是站在游戏界顶峰的超人气多面角色。马里奥靠吃蘑菇成长,特征是大鼻子、头戴帽子、身穿背带裤,还留着胡子。与他的双胞胎兄弟路易基一起,长年担任任天堂的招牌角色。

Nacos

Nacos

Nacos /nɑ:kəʊs/ 是 Dynamic Naming and Configuration Service 的首字母简称,一个易于构建 AI Agent 应用的动态服务发现、配置管理和AI智能体管理平台。Nacos 致力于帮助您发现、配置和管理微服务及AI智能体应用。Nacos 提供了一组简单易用的特性集,帮助您快速实现动态服务发现、服务配置、服务元数据、流量管理。Nacos 帮助您更敏捷和容易地构建、交付和管理微服务平台。

Sublime Text

Sublime Text

Sublime Text具有漂亮的用户界面和强大的功能,例如代码缩略图,Python的插件,代码段等。还可自定义键绑定,菜单和工具栏。Sublime Text 的主要功能包括:拼写检查,书签,完整的 Python API , Goto 功能,即时项目切换,多选择,多窗口等等。Sublime Text 是一个跨平台的编辑器,同时支持Windows、Linux、Mac OS X等操作系统。

WebStorm

WebStorm

WebStorm 是jetbrains公司旗下一款JavaScript 开发工具。目前已经被广大中国JS开发者誉为“Web前端开发神器”、“最强大的HTML5编辑器”、“最智能的JavaScript IDE”等。与IntelliJ IDEA同源,继承了IntelliJ IDEA强大的JS部分的功能。

用户登录
用户注册