首页 文章 精选 留言 我的

精选列表

搜索[表单设计器],共10024篇文章
优秀的个人博客,低调大师

CentOS7,8上快速安装Gitea,搭建Git服务器

安装准备 1.安装Git环境 sh 复制代码 yum -y install git 2.下载Gitea运行程序 下载地址:https://dl.gitea.io/gitea/ 注:下载gitea-[版本号]-linux-amd64的运行程序 安装 1.将安装包上传至指定目录 如:/data0/gitea/gitea-linux-amd64 2.重命名安装包 sh 复制代码 mv /data0/gitea/gitea-linux-amd64 /data0/gitea/gitea 3.修改运行权限 sh 复制代码 chmod +x /data0/gitea/gitea 4.直接运行 sh 复制代码 /data0/gitea/gitea web 5.访问 http//:ip:3000 6.创建启动脚本 新建启动脚本并编辑 sh 复制代码 touch /usr/lib/systemd/system/gitea.service && vi /usr/lib/systemd/system/gitea.service 输入 sh 复制代码 [Unit] Description=XuJun-Git-Repositories After=syslog.target After=network.target [Service] RestartSec=2s Type=simple # 运行的用户 User=xujun # 运行的组 Group=xujun # gitea目录 ExecStart=/data0/gitea/gitea web Restart=always [Install] WantedBy=multi-user.target 赋予运行权限 sh 复制代码 chmod a+x /usr/lib/systemd/system/gitea.service 重载daemon,让新的服务文件生效 sh 复制代码 systemctl daemon-reload 7.常用命令 sh 复制代码 # 设置开机启动 systemctl enable gitea # 启动 systemctl start gitea # 停止 systemctl stop gitea # 查看状态 systemctl status gitea

优秀的个人博客,低调大师

CentOS7设置SWAP分区,小内存服务器的救世主

前言 Swap分区在系统的物理内存(这里应该是运行内存)不够用的时候,把物理内存中的一部分空间释放出来,以供当前运行的程序使用。那些被释放的空间可能来自一些很长时间没有什么操作的程序,这些被释放的空间被临时保存到Swap分区中,等到那些程序要运行时,再从Swap分区中恢复保存的数据到内存中。 设置 1.添加SWAP分区 sh 复制代码 cd / && dd if=/dev/zero of=swapfile bs=1024 count=4194304 chmod 600 /swapfile && mkswap /swapfile swapon /swapfile && swapon -s echo "/swapfile swap swap defaults 0 0" >> /etc/fstab 注: count=4194304中4194304为交换分区大小 4194304=102410244大小为4G 交换区大小设置有个参考依据,物理内存小于4G则SWAP设置为物理内存的两倍、物理内存等于4G则SWAP设置为4G、物理内存大于4G则SWAP设置为物理内存的1/2。 2.重启系统 sh 复制代码 shutdown -r now 3.查看分区结果 sh 复制代码 free -m 4.关闭交换空间 sh 复制代码 cd / && swapoff swapfile && rm -rf swapfile

优秀的个人博客,低调大师

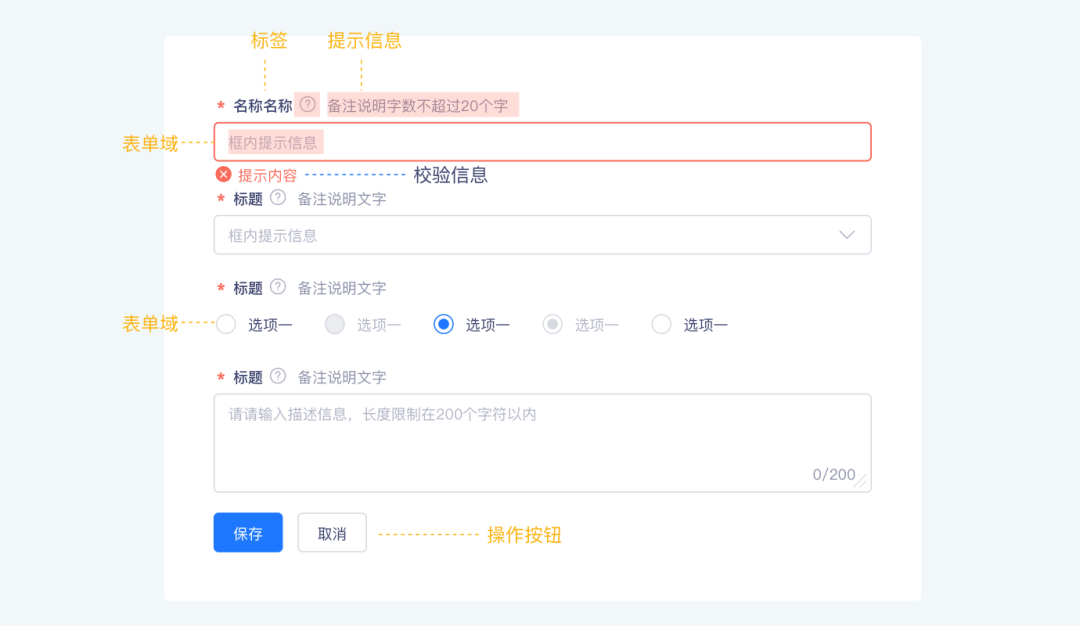
Java开发物业管理系统:数据库表单设计

按照功能分为: 用户表 费用表 投诉建议表 第一步创建数据库: CREATE DATABASE yellowstar; 用户表 创建用户表 表名:yw_users CREATE TABLE IF NOT EXISTS yw_users ( uid INT UNSIGNED NOT NULL AUTO_INCREMENT KEY COMMENT 'UID', username VARCHAR(20) NOT NULL UNIQUE comment '用户名', password CHAR(32) NOT NULL COMMENT '密码:md5加密', user_type TINYINT UNSIGNED NOT NULL COMMENT '用户类型', create_time DATE NOT NULL COMMENT '创建时间' ); type字段说明: 1:超级管理员 2:物业 3:业主 插入测试数据 INSERT INTO yw_users (username,password,user_type,create_time) VALUES ('user1',123456,1,20181101), ('user2',123456,2,20181201), ('user3',123456,3,20181230); 业主房产信息表 房产信息表 表名:yw_houses CREATE TABLE IF NOT EXISTS yw_houses ( hid INT UNSIGNED NOT NULL AUTO_INCREMENT KEY COMMENT '房产号', username VARCHAR(20) NOT NULL comment '房产持有人', house_type VARCHAR(20) NOT NULL comment '房产类型', area DOUBLE UNSIGNED NOT NULL COMMENT '住房面积', buy_date DATE NOT NULL COMMENT '购房时间', building_no VARCHAR(20) NOT NULL comment '楼号', unit VARCHAR(10) NOT NULL comment '小区单元', card_id INT UNSIGNED NOT NULL COMMENT '门牌号', phone VARCHAR(11) NOT NULL comment '手机号码', ); 插入测试数据 INSERT INTO yw_houses (username,house_type,area,buy_date,building_no,unit,card_id,phone) VALUES ('张三','三室一厅',100,'2019-01-01','1号楼','一单元',902,'158****9177'), ('李四','三室二厅二卫',130,'2017-01-01','8号楼','二单元',102,'152****9127'), ('冠希','一室一厅',50,'2018-01-01','9号楼','一单元',401,'151****9147'); 费用表 费用单价表 表名:yw_perprice CREATE TABLE IF NOT EXISTS yw_perprice ( id INT UNSIGNED NOT NULL AUTO_INCREMENT KEY COMMENT '单价编号', p_type INT UNSIGNED NOT NULL comment '单价类型', price DECIMAL(18,2) UNSIGNED NOT NULL comment '单价', p_date DATETIME DEFAULT CURRENT_TIMESTAMP NOT NULL COMMENT '定价时间' ); p_type说明: 1:水费 2:电费 3:燃气费 4:停车费 5:物业费 插入测试数据 INSERT INTO yw_perprice (p_type,price) VALUES (1,3.45), (2,0.5), (3,1.64), (4,5), (5,50); 水费、电费、燃气费、物业费表 表名:yw_totalprice CREATE TABLE IF NOT EXISTS yw_totalprice ( id INT UNSIGNED NOT NULL AUTO_INCREMENT KEY COMMENT '编号', hid INT UNSIGNED NOT NULL COMMENT '外键房产id', p_type INT UNSIGNED NOT NULL comment '单价类型', price DECIMAL(18,2) UNSIGNED NOT NULL comment '单价', amount DECIMAL(18,2) UNSIGNED NOT NULL comment '用量', money DECIMAL(18,2) UNSIGNED NOT NULL comment '总额', buy_date DATETIME DEFAULT CURRENT_TIMESTAMP NOT NULL COMMENT '消费时间', FOREIGN KEY(hid) REFERENCES yw_houses(hid) ); 注意:这里使用了外键 插入测试数据 INSERT INTO yw_totalprice (hid,p_type,amount,price,money) VALUES (1,1,30,(SELECT price FROM yw_perprice WHERE p_type=1 LIMIT 1),30*(SELECT price FROM yw_perprice WHERE p_type=1 LIMIT 1)), (1,1,21,(SELECT price FROM yw_perprice WHERE p_type=1 LIMIT 1),21*(SELECT price FROM yw_perprice WHERE p_type=1 LIMIT 1)), (1,2,40,(SELECT price FROM yw_perprice WHERE p_type=2 LIMIT 1),40*(SELECT price FROM yw_perprice WHERE p_type=1 LIMIT 1)), (1,2,34,(SELECT price FROM yw_perprice WHERE p_type=2 LIMIT 1),34*(SELECT price FROM yw_perprice WHERE p_type=1 LIMIT 1)), (1,3,23,(SELECT price FROM yw_perprice WHERE p_type=3 LIMIT 1),23*(SELECT price FROM yw_perprice WHERE p_type=1 LIMIT 1)), (1,4,22,(SELECT price FROM yw_perprice WHERE p_type=4 LIMIT 1),22*(SELECT price FROM yw_perprice WHERE p_type=1 LIMIT 1)), (1,4,12,(SELECT price FROM yw_perprice WHERE p_type=4 LIMIT 1),12*(SELECT price FROM yw_perprice WHERE p_type=1 LIMIT 1)), (1,5,12,(SELECT price FROM yw_perprice WHERE p_type=5 LIMIT 1),12*(SELECT price FROM yw_perprice WHERE p_type=1 LIMIT 1)), (1,5,12,(SELECT price FROM yw_perprice WHERE p_type=5 LIMIT 1),12*(SELECT price FROM yw_perprice WHERE p_type=1 LIMIT 1)), (2,1,23,(SELECT price FROM yw_perprice WHERE p_type=1 LIMIT 1),23*(SELECT price FROM yw_perprice WHERE p_type=1 LIMIT 1)), (2,1,56,(SELECT price FROM yw_perprice WHERE p_type=1 LIMIT 1),56*(SELECT price FROM yw_perprice WHERE p_type=1 LIMIT 1)), (2,2,16,(SELECT price FROM yw_perprice WHERE p_type=2 LIMIT 1),16*(SELECT price FROM yw_perprice WHERE p_type=1 LIMIT 1)), (2,3,15,(SELECT price FROM yw_perprice WHERE p_type=3 LIMIT 1),15*(SELECT price FROM yw_perprice WHERE p_type=1 LIMIT 1)), (2,3,90,(SELECT price FROM yw_perprice WHERE p_type=3 LIMIT 1),90*(SELECT price FROM yw_perprice WHERE p_type=1 LIMIT 1)), (2,4,44,(SELECT price FROM yw_perprice WHERE p_type=4 LIMIT 1),44*(SELECT price FROM yw_perprice WHERE p_type=1 LIMIT 1)), (2,4,46,(SELECT price FROM yw_perprice WHERE p_type=4 LIMIT 1),46*(SELECT price FROM yw_perprice WHERE p_type=1 LIMIT 1)) ; 注意:这里插入数据使用了子查询 查询讲解:查询所有业主电费: SELECT hid as '业主物业ID',price as '单价',amount as '用量',money as '金额',buy_date as '时间' FROM yw_totalprice WHERE p_type = 1; 查询所有业主电费(增加显示业主姓名): SELECT username as '业主物业姓名',price as '单价',amount as '用量',money as '金额',a.buy_date as '时间' FROM yw_totalprice AS A JOIN yw_houses AS b ON a.hid = b.hid WHERE p_type = 1; 知识点:这里使用了表连接 查询某业主的电费:在where里增加一个限定条件就可以了 SELECT username as '业主物业姓名',price as '单价',amount as '用量',money as '金额',a.buy_date as '时间' FROM yw_totalprice AS A JOIN yw_houses AS b ON a.hid = b.hid WHERE p_type = 1 AND a.hid = 1; 其他费用类推,基本就是改改p_type类型,需要什么数据传什么值就可以了。 投诉建议表(待添加)

优秀的个人博客,低调大师

Spring 表单处理

1. SimpleFormController vs @Controller In XML-based Spring MVC web application, you create a form controller by extending theSimpleFormControllerclass. In annotation-based, you can use@Controllerinstead. SimpleFormController public class CustomerController extends SimpleFormController{ //... } Annotation @Controller @RequestMapping("/customer.htm") public class CustomerController{ //... } 2. formBackingObject() vs RequestMethod.GET In SimpleFormController, you can initialize the command object for binding in theformBackingObject()method. In annotation-based, you can do the same by annotated the method name with@RequestMapping(method = RequestMethod.GET). SimpleFormController @Override protected Object formBackingObject(HttpServletRequest request) throws Exception { Customer cust = new Customer(); //Make "Spring MVC" as default checked value cust.setFavFramework(new String []{"Spring MVC"}); return cust; } Annotation @RequestMapping(method = RequestMethod.GET) public String initForm(ModelMap model){ Customer cust = new Customer(); //Make "Spring MVC" as default checked value cust.setFavFramework(new String []{"Spring MVC"}); //command object model.addAttribute("customer", cust); //return form view return "CustomerForm"; } 3. onSubmit() vs RequestMethod.POST In SimpleFormController, the form submission is handle by theonSubmit()method. In annotation-based, you can do the same by annotated the method name with@RequestMapping(method = RequestMethod.POST). SimpleFormController @Override protected ModelAndView onSubmit(HttpServletRequest request, HttpServletResponse response, Object command, BindException errors) throws Exception { Customer customer = (Customer)command; return new ModelAndView("CustomerSuccess"); } Annotation @RequestMapping(method = RequestMethod.POST) public String processSubmit( @ModelAttribute("customer") Customer customer, BindingResult result, SessionStatus status) { //clear the command object from the session status.setComplete(); //return form success view return "CustomerSuccess"; } 4. referenceData() vs @ModelAttribute In SimpleFormController, usually you put the reference data in model viareferenceData()method, so that the form view can access it. In annotation-based, you can do the same by annotated the method name with@ModelAttribute. SimpleFormController @Override protected Map referenceData(HttpServletRequest request) throws Exception { Map referenceData = new HashMap(); //Data referencing for web framework checkboxes List<String> webFrameworkList = new ArrayList<String>(); webFrameworkList.add("Spring MVC"); webFrameworkList.add("Struts 1"); webFrameworkList.add("Struts 2"); webFrameworkList.add("JSF"); webFrameworkList.add("Apache Wicket"); referenceData.put("webFrameworkList", webFrameworkList); return referenceData; } Spring’s form <form:checkboxes items="${webFrameworkList}" path="favFramework" /> Annotation @ModelAttribute("webFrameworkList") public List<String> populateWebFrameworkList() { //Data referencing for web framework checkboxes List<String> webFrameworkList = new ArrayList<String>(); webFrameworkList.add("Spring MVC"); webFrameworkList.add("Struts 1"); webFrameworkList.add("Struts 2"); webFrameworkList.add("JSF"); webFrameworkList.add("Apache Wicket"); return webFrameworkList; } Spring’s form <form:checkboxes items="${webFrameworkList}" path="favFramework" /> 5. initBinder() vs @InitBinder In SimpleFormController, you define the binding or register the custom property editor viainitBinder()method. In annotation-based, you can do the same by annotated the method name with@InitBinder. SimpleFormController protected void initBinder(HttpServletRequest request, ServletRequestDataBinder binder) throws Exception { SimpleDateFormat dateFormat = new SimpleDateFormat("yyyy-MM-dd"); binder.registerCustomEditor(Date.class, new CustomDateEditor(dateFormat, true)); } Annotation @InitBinder public void initBinder(WebDataBinder binder) { SimpleDateFormat dateFormat = new SimpleDateFormat("yyyy-MM-dd"); binder.registerCustomEditor(Date.class, new CustomDateEditor(dateFormat, true)); } From Validation In SimpleFormController, you have to register and map the validator class to the controller class via XML bean configuration file, and the validation checking and work flows will be executed automatically. In annotation-based, you have to explicitly execute the validator and define the validation flow in the@Controllerclass manually. See the different : SimpleFormController <bean class="com.mkyong.customer.controller.CustomerController"> <property name="formView" value="CustomerForm" /> <property name="successView" value="CustomerSuccess" /> <!-- Map a validator --> <property name="validator"> <bean class="com.mkyong.customer.validator.CustomerValidator" /> </property> </bean> Annotation @Controller @RequestMapping("/customer.htm") public class CustomerController{ CustomerValidator customerValidator; @Autowired public CustomerController(CustomerValidator customerValidator){ this.customerValidator = customerValidator; } @RequestMapping(method = RequestMethod.POST) public String processSubmit( @ModelAttribute("customer") Customer customer, BindingResult result, SessionStatus status) { customerValidator.validate(customer, result); if (result.hasErrors()) { //if validator failed return "CustomerForm"; } else { status.setComplete(); //form success return "CustomerSuccess"; } } //... Full Example See a complete @Controller example. package com.mkyong.customer.controller; import java.sql.Date; import java.text.SimpleDateFormat; import java.util.ArrayList; import java.util.LinkedHashMap; import java.util.List; import java.util.Map; import org.springframework.beans.factory.annotation.Autowired; import org.springframework.beans.propertyeditors.CustomDateEditor; import org.springframework.stereotype.Controller; import org.springframework.ui.ModelMap; import org.springframework.validation.BindingResult; import org.springframework.web.bind.WebDataBinder; import org.springframework.web.bind.annotation.InitBinder; import org.springframework.web.bind.annotation.ModelAttribute; import org.springframework.web.bind.annotation.RequestMapping; import org.springframework.web.bind.annotation.RequestMethod; import org.springframework.web.bind.support.SessionStatus; import com.mkyong.customer.model.Customer; import com.mkyong.customer.validator.CustomerValidator; @Controller @RequestMapping("/customer.htm") public class CustomerController{ CustomerValidator customerValidator; @Autowired public CustomerController(CustomerValidator customerValidator){ this.customerValidator = customerValidator; } @RequestMapping(method = RequestMethod.POST) public String processSubmit( @ModelAttribute("customer") Customer customer, BindingResult result, SessionStatus status) { customerValidator.validate(customer, result); if (result.hasErrors()) { //if validator failed return "CustomerForm"; } else { status.setComplete(); //form success return "CustomerSuccess"; } } @RequestMapping(method = RequestMethod.GET) public String initForm(ModelMap model){ Customer cust = new Customer(); //Make "Spring MVC" as default checked value cust.setFavFramework(new String []{"Spring MVC"}); //Make "Make" as default radio button selected value cust.setSex("M"); //make "Hibernate" as the default java skills selection cust.setJavaSkills("Hibernate"); //initilize a hidden value cust.setSecretValue("I'm hidden value"); //command object model.addAttribute("customer", cust); //return form view return "CustomerForm"; } @ModelAttribute("webFrameworkList") public List<String> populateWebFrameworkList() { //Data referencing for web framework checkboxes List<String> webFrameworkList = new ArrayList<String>(); webFrameworkList.add("Spring MVC"); webFrameworkList.add("Struts 1"); webFrameworkList.add("Struts 2"); webFrameworkList.add("JSF"); webFrameworkList.add("Apache Wicket"); return webFrameworkList; } @InitBinder public void initBinder(WebDataBinder binder) { SimpleDateFormat dateFormat = new SimpleDateFormat("yyyy-MM-dd"); binder.registerCustomEditor(Date.class, new CustomDateEditor(dateFormat, true)); } @ModelAttribute("numberList") public List<String> populateNumberList() { //Data referencing for number radiobuttons List<String> numberList = new ArrayList<String>(); numberList.add("Number 1"); numberList.add("Number 2"); numberList.add("Number 3"); numberList.add("Number 4"); numberList.add("Number 5"); return numberList; } @ModelAttribute("javaSkillsList") public Map<String,String> populateJavaSkillList() { //Data referencing for java skills list box Map<String,String> javaSkill = new LinkedHashMap<String,String>(); javaSkill.put("Hibernate", "Hibernate"); javaSkill.put("Spring", "Spring"); javaSkill.put("Apache Wicket", "Apache Wicket"); javaSkill.put("Struts", "Struts"); return javaSkill; } @ModelAttribute("countryList") public Map<String,String> populateCountryList() { //Data referencing for java skills list box Map<String,String> country = new LinkedHashMap<String,String>(); country.put("US", "United Stated"); country.put("CHINA", "China"); country.put("SG", "Singapore"); country.put("MY", "Malaysia"); return country; } } To make annotation work, you have to enable the component auto scanning feature in Spring. <beans xmlns="http://www.springframework.org/schema/beans" xmlns:xsi="http://www.w3.org/2001/XMLSchema-instance" xmlns:context="http://www.springframework.org/schema/context" xsi:schemaLocation="http://www.springframework.org/schema/beans http://www.springframework.org/schema/beans/spring-beans-2.5.xsd http://www.springframework.org/schema/context http://www.springframework.org/schema/context/spring-context-2.5.xsd"> <context:component-scan base-package="com.mkyong.customer.controller" /> <bean class="com.mkyong.customer.validator.CustomerValidator" /> <!-- Register the Customer.properties --> <bean id="messageSource" class="org.springframework.context.support.ResourceBundleMessageSource"> <property name="basename" value="com/mkyong/customer/properties/Customer" /> </bean> <bean id="viewResolver" class="org.springframework.web.servlet.view.InternalResourceViewResolver" > <property name="prefix"> <value>/WEB-INF/pages/</value> </property> <property name="suffix"> <value>.jsp</value> </property> </bean> </beans> Download Source Code Download it – SpringMVC-Form-Handling-Annotation-Example.zip(12KB) ============================================================================== 本文转自被遗忘的博客园博客,原文链接:http://www.cnblogs.com/rollenholt/archive/2012/12/27/2836249.html,如需转载请自行联系原作者

资源下载

更多资源
Mario

Mario

马里奥是站在游戏界顶峰的超人气多面角色。马里奥靠吃蘑菇成长,特征是大鼻子、头戴帽子、身穿背带裤,还留着胡子。与他的双胞胎兄弟路易基一起,长年担任任天堂的招牌角色。

腾讯云软件源

腾讯云软件源

为解决软件依赖安装时官方源访问速度慢的问题,腾讯云为一些软件搭建了缓存服务。您可以通过使用腾讯云软件源站来提升依赖包的安装速度。为了方便用户自由搭建服务架构,目前腾讯云软件源站支持公网访问和内网访问。

Nacos

Nacos

Nacos /nɑ:kəʊs/ 是 Dynamic Naming and Configuration Service 的首字母简称,一个易于构建 AI Agent 应用的动态服务发现、配置管理和AI智能体管理平台。Nacos 致力于帮助您发现、配置和管理微服务及AI智能体应用。Nacos 提供了一组简单易用的特性集,帮助您快速实现动态服务发现、服务配置、服务元数据、流量管理。Nacos 帮助您更敏捷和容易地构建、交付和管理微服务平台。

Sublime Text

Sublime Text

Sublime Text具有漂亮的用户界面和强大的功能,例如代码缩略图,Python的插件,代码段等。还可自定义键绑定,菜单和工具栏。Sublime Text 的主要功能包括:拼写检查,书签,完整的 Python API , Goto 功能,即时项目切换,多选择,多窗口等等。Sublime Text 是一个跨平台的编辑器,同时支持Windows、Linux、Mac OS X等操作系统。

用户登录
用户注册