LVS+keepalived高性能集群应用实战
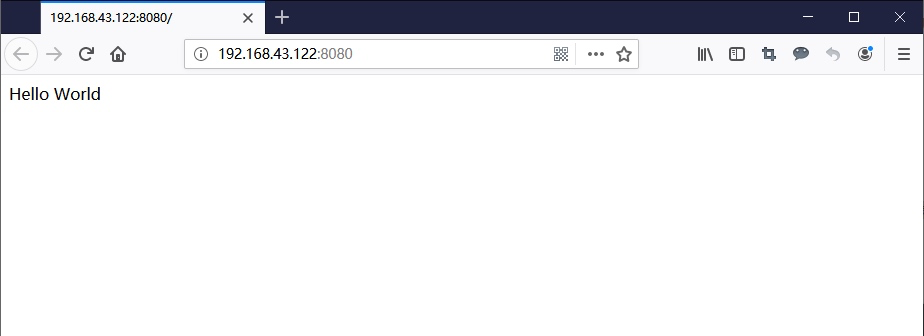
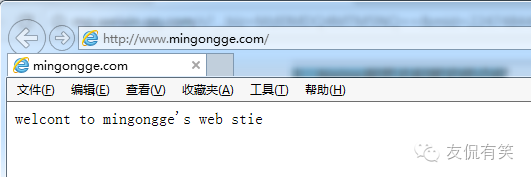
[root@example~]#yuminstallipvsadm-y安装ip_vs管理工具 理论部分我们在上篇文章中详细介绍了,这次进入实操阶段 [root@example~]#modprobeip_vs加载ip_vs模块 [root@example~]#modprobeip_vs_rr [root@example~]#lsmod|grepip_vs ip_vs_rr14200 ip_vs1265342ip_vs_rr libcrc32c12461ip_vs ipv6335589271ip_vs [root@example~]#ipaddradd192.168.189.200/24deveth0labeleth0:1手动加vip地址 [root@example~]#ipaddr 1:lo:<LOOPBACK,UP,LOWER_UP>mtu65536qdiscnoqueuestateUNKNOWN link/loopback00:00:00:00:00:00brd00:00:00:00:00:00 inet127.0.0.1/8scopehostlo inet6::1/128scopehost valid_lftforeverpreferred_lftforever 2:eth0:<BROADCAST,MULTICAST,UP,LOWER_UP>mtu1500qdiscpfifo_faststateUPqlen1000 link/ether00:0c:29:5a:e1:a3brdff:ff:ff:ff:ff:ff inet192.168.189.130/24brd192.168.189.255scopeglobaleth0 inet192.168.189.200/24scopeglobalsecondaryeth0:1 inet6fe80::20c:29ff:fe5a:e1a3/64scopelink valid_lftforeverpreferred_lftforever 本次环境规划如下 操作系统 centos6.7 [root@example~]#curl192.168.189.132 web01_192.168.189.132 [root@example~]#curl192.168.189.133 web02_192.168.189.133 手工执行配置lvs服务器并添加两台rs服务 查看相关的帮助命令 [root@example~]#ipvsadm--help ipvsadmv1.262008/5/15(compiledwithpoptandIPVSv1.2.1) Usage: ipvsadm-A|E-t|u|fservice-address[-sscheduler][-p[timeout]][-Mnetmask][--pepersistence_engine] ipvsadm-D-t|u|fservice-address ipvsadm-C ipvsadm-R ipvsadm-S[-n] ipvsadm-a|e-t|u|fservice-address-rserver-address[options] ipvsadm-d-t|u|fservice-address-rserver-address ipvsadm-L|l[options] ipvsadm-Z[-t|u|fservice-address] ipvsadm--settcptcpfinudp ipvsadm--start-daemonstate[--mcast-interfaceinterface][--syncidsid] ipvsadm--stop-daemonstate ipvsadm-h Commands: Eitherlongorshortoptionsareallowed. --add-service-Aaddvirtualservicewithoptions --edit-service-Eeditvirtualservicewithoptions --delete-service-Ddeletevirtualservice --clear-Cclearthewholetable --restore-Rrestorerulesfromstdin --save-Ssaverulestostdout --add-server-aaddrealserverwithoptions --edit-server-eeditrealserverwithoptions --delete-server-ddeleterealserver --list-L|-llistthetable --zero-Zzerocountersinaserviceorallservices --settcptcpfinudpsetconnectiontimeoutvalues --start-daemonstartconnectionsyncdaemon --stop-daemonstopconnectionsyncdaemon --help-hdisplaythishelpmessage [root@example~]#ipvsadm-C清空全部配置 [root@example~]#ipvsadm-A-t192.168.189.200:80-swrr指定vip并设定调度算法 [root@example~]#ipvsadm-a-t192.168.189.200:80-r192.168.189.132:80-g-w1添加rs [root@example~]#ipvsadm-a-t192.168.189.200:80-r192.168.189.133:80-g-w3 [root@example~]#ipvsadm-Ln IPVirtualServerversion1.2.1(size=4096) ProtLocalAddress:PortSchedulerFlags ->RemoteAddress:PortForwardWeightActiveConnInActConn TCP192.168.189.200:80wrr ->192.168.189.132:80Route100 ->192.168.189.133:80Route300 手工在rs服务器上面绑定操作 第一台 [root@example~]#ifconfiglo:132192.168.189.200netmask255.255.255.255up [root@example~]#routeadd-host192.168.189.200devlo [root@example~]#ipaddr 1:lo:<LOOPBACK,UP,LOWER_UP>mtu65536qdiscnoqueuestateUNKNOWN link/loopback00:00:00:00:00:00brd00:00:00:00:00:00 inet127.0.0.1/8scopehostlo inet192.168.189.200/32brd192.168.189.200scopegloballo:132 inet6::1/128scopehost valid_lftforeverpreferred_lftforever 2:eth0:<BROADCAST,MULTICAST,UP,LOWER_UP>mtu1500qdiscpfifo_faststateUPqlen1000 link/ether00:0c:29:66:66:33brdff:ff:ff:ff:ff:ff inet192.168.189.132/24brd192.168.189.255scopeglobaleth0 inet6fe80::20c:29ff:fe66:6633/64scopelink valid_lftforeverpreferred_lftforever 第二台 [root@example~]#ipaddradd192.168.189.200/32devlolabello:133 [root@example~]#routeadd-host192.168.189.200devlo [root@example~]#ipaddr 1:lo:<LOOPBACK,UP,LOWER_UP>mtu65536qdiscnoqueuestateUNKNOWN link/loopback00:00:00:00:00:00brd00:00:00:00:00:00 inet127.0.0.1/8scopehostlo inet192.168.189.200/32scopegloballo:133 inet6::1/128scopehost valid_lftforeverpreferred_lftforever 2:eth0:<BROADCAST,MULTICAST,UP,LOWER_UP>mtu1500qdiscpfifo_faststateUPqlen1000 link/ether00:0c:29:6c:a9:25brdff:ff:ff:ff:ff:ff inet192.168.189.133/24brd192.168.189.255scopeglobaleth0 inet6fe80::20c:29ff:fe6c:a925/64scopelink valid_lftforeverpreferred_lftforever 手工在rs端抑制arp响应 第一台 [root@example~]#echo"1">/proc/sys/net/ipv4/conf/lo/arp_ignore [root@example~]#echo"2">/proc/sys/net/ipv4/conf/lo/arp_announce [root@example~]#echo"1">/proc/sys/net/ipv4/conf/all/arp_ignore [root@example~]#echo"2">/proc/sys/net/ipv4/conf/all/arp_announce 第二台 [root@example~]#echo"1">/proc/sys/net/ipv4/conf/lo/arp_ignore [root@example~]#echo"2">/proc/sys/net/ipv4/conf/lo/arp_announce [root@example~]#echo"1">/proc/sys/net/ipv4/conf/all/arp_ignore [root@example~]#echo"2">/proc/sys/net/ipv4/conf/all/arp_announce 测试访问,不停的刷新,同时打开web服务器的log观察 web01_132日志 [root@example~]#tail-f/var/log/httpd/access_log 192.168.189.1--[13/Aug/2016:14:34:21+0800]"GET/HTTP/1.1"20022"-""Mozilla/5.0(WindowsNT6.1;WOW64)AppleWebKit/537.36(KHTML,likeGecko)Chrome/51.0.2704.106Safari/537.36" 192.168.189.1--[13/Aug/2016:14:34:24+0800]"GET/HTTP/1.1"20022"-""Mozilla/5.0(WindowsNT6.1;WOW64)AppleWebKit/537.36(KHTML,likeGecko)Chrome/51.0.2704.106Safari/537.36" 192.168.189.1--[13/Aug/2016:14:34:25+0800]"GET/HTTP/1.1"20022"-""Mozilla/5.0(WindowsNT6.1;WOW64)AppleWebKit/537.36(KHTML,likeGecko)Chrome/51.0.2704.106Safari/537.36" web01_133日志 [root@example~]#tail-f/var/log/httpd/access_log 192.168.189.1--[13/Aug/2016:14:33:54+0800]"GET/HTTP/1.1"20022"-""Mozilla/5.0(WindowsNT6.1;WOW64)AppleWebKit/537.36(KHTML,likeGecko)Chrome/51.0.2704.106Safari/537.36" 192.168.189.1--[13/Aug/2016:14:33:54+0800]"GET/favicon.icoHTTP/1.1"404290"http://192.168.189.200/""Mozilla/5.0(WindowsNT6.1;WOW64)AppleWebKit/537.36(KHTML,likeGecko)Chrome/51.0.2704.106Safari/537.36" 192.168.189.1--[13/Aug/2016:14:34:05+0800]"GET/HTTP/1.1"304-"-""Mozilla/5.0(WindowsNT6.1;WOW64)AppleWebKit/537.36(KHTML,likeGecko)Chrome/51.0.2704.106Safari/537.36" 192.168.189.1--[13/Aug/2016:14:34:17+0800]"GET/HTTP/1.1"304-"-""Mozilla/5.0(WindowsNT6.1;WOW64)AppleWebKit/537.36(KHTML,likeGecko)Chrome/51.0.2704.106Safari/537.36" 192.168.189.1--[13/Aug/2016:14:34:20+0800]"GET/HTTP/1.1"304-"-""Mozilla/5.0(WindowsNT6.1;WOW64)AppleWebKit/537.36(KHTML,likeGecko)Chrome/51.0.2704.106Safari/537.36" 192.168.189.1--[13/Aug/2016:14:34:22+0800]"GET/HTTP/1.1"20022"-""Mozilla/5.0(WindowsNT6.1;WOW64)AppleWebKit/537.36(KHTML,likeGecko)Chrome/51.0.2704.106Safari/537.36" 192.168.189.1--[13/Aug/2016:14:34:23+0800]"GET/HTTP/1.1"304-"-""Mozilla/5.0(WindowsNT6.1;WOW64)AppleWebKit/537.36(KHTML,likeGecko)Chrome/51.0.2704.106Safari/537.36" 192.168.189.1--[13/Aug/2016:14:34:23+0800]"GET/HTTP/1.1"304-"-""Mozilla/5.0(WindowsNT6.1;WOW64)AppleWebKit/537.36(KHTML,likeGecko)Chrome/51.0.2704.106Safari/537.36" 192.168.189.1--[13/Aug/2016:14:34:24+0800]"GET/HTTP/1.1"20022"-""Mozilla/5.0(WindowsNT6.1;WOW64)AppleWebKit/537.36(KHTML,likeGecko)Chrome/51.0.2704.106Safari/537.36" 192.168.189.1--[13/Aug/2016:14:34:25+0800]"GET/HTTP/1.1"304-"-""Mozilla/5.0(WindowsNT6.1;WOW64)AppleWebKit/537.36(KHTML,likeGecko)Chrome/51.0.2704.106Safari/537.36" 192.168.189.1--[13/Aug/2016:14:34:25+0800]"GET/HTTP/1.1"304-"-""Mozilla/5.0(WindowsNT6.1;WOW64)AppleWebKit/537.36(KHTML,likeGecko)Chrome/51.0.2704.106Safari/537.36" 192.168.189.1--[13/Aug/2016:14:34:26+0800]"GET/HTTP/1.1"20022"-""Mozilla/5.0(WindowsNT6.1;WOW64)AppleWebKit/537.36(KHTML,likeGecko)Chrome/51.0.2704.106Safari/537.36" 192.168.189.1--[13/Aug/2016:14:34:26+0800]"GET/HTTP/1.1"304-"-""Mozilla/5.0(WindowsNT6.1;WOW64)AppleWebKit/537.36(KHTML,likeGecko)Chrome/51.0.2704.106Safari/537.36" [root@example~]#ipvsadm-Ln--stats可以看到基本符合我们设定的权重1:3 IPVirtualServerversion1.2.1(size=4096) ProtLocalAddress:PortConnsInPktsOutPktsInBytesOutBytes ->RemoteAddress:Port TCP192.168.189.200:80663350444740 ->192.168.189.132:8016820109780 ->192.168.189.133:80502530334960 上面日志可能不够直观,最好再开一个客户端去执行for循环测试,这里就不在演示 以上手工创建只是为了让我更好的理解lvs的过程,好了下面开始我们的keepalived部分 安装keepalived [root@example~]#yuminstallkeepalived-y 配置keepalived 主节点上面 [root@example~]#cat/etc/keepalived/keepalived.conf global_defs{ notification_email{ 1335120568@qq.com } notification_email_fromAlexandre.Cassen@firewall.loc smtp_server192.168.200.1 smtp_connect_timeout30 router_idLVS_01 } vrrp_instanceweb{ stateMASTER interfaceeth0 virtual_router_id51 priority150 advert_int1 authentication{ auth_typePASS auth_pass1111 } virtual_ipaddress{ 192.168.189.200/24 } } virtual_server192.168.189.20080{ delay_loop6 lb_algowrr lb_kindDR nat_mask255.255.255.0 persistence_timeout50 protocolTCP real_server192.168.189.13280{ weight1 TCP_CHECK{ connect_timeout8 nb_get_retry3 delay_before_retry3 connect_port80 } } real_server192.168.189.13380{ weight1 TCP_CHECK{ connect_timeout8 nb_get_retry3 delay_before_retry3 connect_port80 } } } 备用节点上面keepalived配置 [root@example~]#cat/etc/keepalived/keepalived.conf global_defs{ notification_email{ 1335120568@qq.com } notification_email_fromAlexandre.Cassen@firewall.loc smtp_server192.168.200.1 smtp_connect_timeout30 router_idLVS_02 } vrrp_instanceweb{ stateBACKUP interfaceeth0 virtual_router_id51 priority100 advert_int1 authentication{ auth_typePASS auth_pass1111 } virtual_ipaddress{ 192.168.189.200/24 } } virtual_server192.168.189.20080{ delay_loop6 lb_algowrr lb_kindDR nat_mask255.255.255.0 persistence_timeout50 protocolTCP real_server192.168.189.13280{ weight1 TCP_CHECK{ connect_timeout8 nb_get_retry3 delay_before_retry3 connect_port80 } } real_server192.168.189.13380{ weight1 TCP_CHECK{ connect_timeout8 nb_get_retry3 delay_before_retry3 connect_port80 } } } 启动主备keepalived的观察log [root@example~]#/etc/init.d/keepalivedstart Startingkeepalived:[OK] 主节点上面 [root@examplekeepalived]#tail-f/var/log/messages Aug1315:11:10exampleKeepalived[45366]:StartingKeepalivedv1.2.13(03/19,2015) Aug1315:11:10exampleKeepalived[45367]:StartingHealthcheckchildprocess,pid=45369 Aug1315:11:10exampleKeepalived[45367]:StartingVRRPchildprocess,pid=45370 Aug1315:11:10exampleKeepalived_healthcheckers[45369]:NetlinkreflectorreportsIP192.168.189.130added Aug1315:11:10exampleKeepalived_vrrp[45370]:NetlinkreflectorreportsIP192.168.189.130added Aug1315:11:10exampleKeepalived_vrrp[45370]:NetlinkreflectorreportsIP192.168.189.200added Aug1315:11:10exampleKeepalived_vrrp[45370]:NetlinkreflectorreportsIPfe80::20c:29ff:fe5a:e1a3added Aug1315:11:10exampleKeepalived_vrrp[45370]:RegisteringKernelnetlinkreflector Aug1315:11:10exampleKeepalived_vrrp[45370]:RegisteringKernelnetlinkcommandchannel Aug1315:11:10exampleKeepalived_vrrp[45370]:RegisteringgratuitousARPsharedchannel Aug1315:11:10exampleKeepalived_healthcheckers[45369]:NetlinkreflectorreportsIP192.168.189.200added Aug1315:11:10exampleKeepalived_healthcheckers[45369]:NetlinkreflectorreportsIPfe80::20c:29ff:fe5a:e1a3added Aug1315:11:10exampleKeepalived_healthcheckers[45369]:RegisteringKernelnetlinkreflector Aug1315:11:10exampleKeepalived_healthcheckers[45369]:RegisteringKernelnetlinkcommandchannel Aug1315:11:10exampleKeepalived_vrrp[45370]:Openingfile'/etc/keepalived/keepalived.conf'. Aug1315:11:10exampleKeepalived_vrrp[45370]:Configurationisusing:63278Bytes Aug1315:11:10exampleKeepalived_vrrp[45370]:UsingLinkWatchkernelnetlinkreflector... Aug1315:11:10exampleKeepalived_healthcheckers[45369]:Openingfile'/etc/keepalived/keepalived.conf'. Aug1315:11:10exampleKeepalived_healthcheckers[45369]:Configurationisusing:14742Bytes Aug1315:11:10exampleKeepalived_vrrp[45370]:VRRPsockpool:[ifindex(2),proto(112),unicast(0),fd(10,11)] Aug1315:11:10exampleKeepalived_healthcheckers[45369]:UsingLinkWatchkernelnetlinkreflector... Aug1315:11:10exampleKeepalived_healthcheckers[45369]:Activatinghealthcheckerforservice[192.168.189.132]:80 Aug1315:11:10exampleKeepalived_healthcheckers[45369]:Activatinghealthcheckerforservice[192.168.189.133]:80 Aug1315:11:11exampleKeepalived_vrrp[45370]:VRRP_Instance(web)TransitiontoMASTERSTATE Aug1315:11:11exampleKeepalived_vrrp[45370]:VRRP_Instance(web)Receivedlowerprioadvert,forcingnewelection Aug1315:11:12exampleKeepalived_vrrp[45370]:VRRP_Instance(web)EnteringMASTERSTATE Aug1315:11:12exampleKeepalived_vrrp[45370]:VRRP_Instance(web)settingprotocolVIPs. Aug1315:11:12exampleKeepalived_vrrp[45370]:VRRP_Instance(web)SendinggratuitousARPsoneth0for192.168.189.200 Aug1315:11:17exampleKeepalived_vrrp[45370]:VRRP_Instance(web)SendinggratuitousARPsoneth0for192.168.189.200 Aug1315:13:36exampledhclient[1239]:DHCPREQUESToneth0to192.168.189.254port67(xid=0x3b1957c6) Aug1315:13:36exampledhclient[1239]:DHCPACKfrom192.168.189.254(xid=0x3b1957c6) Aug1315:13:38exampledhclient[1239]:boundto192.168.189.130--renewalin678seconds. 备用节点上面 [root@examplekeepalived]#tail-f/var/log/messages Aug1315:11:03exampleKeepalived[1937]:StartingKeepalivedv1.2.13(03/19,2015) Aug1315:11:03exampleKeepalived[1938]:StartingHealthcheckchildprocess,pid=1940 Aug1315:11:03exampleKeepalived[1938]:StartingVRRPchildprocess,pid=1941 Aug1315:11:03exampleKeepalived_vrrp[1941]:NetlinkreflectorreportsIP192.168.189.131added Aug1315:11:03exampleKeepalived_healthcheckers[1940]:NetlinkreflectorreportsIP192.168.189.131added Aug1315:11:03exampleKeepalived_healthcheckers[1940]:NetlinkreflectorreportsIPfe80::20c:29ff:feea:4c15added Aug1315:11:03exampleKeepalived_healthcheckers[1940]:RegisteringKernelnetlinkreflector Aug1315:11:03exampleKeepalived_healthcheckers[1940]:RegisteringKernelnetlinkcommandchannel Aug1315:11:03exampleKeepalived_vrrp[1941]:NetlinkreflectorreportsIPfe80::20c:29ff:feea:4c15added Aug1315:11:03exampleKeepalived_vrrp[1941]:RegisteringKernelnetlinkreflector Aug1315:11:03exampleKeepalived_vrrp[1941]:RegisteringKernelnetlinkcommandchannel Aug1315:11:03exampleKeepalived_vrrp[1941]:RegisteringgratuitousARPsharedchannel Aug1315:11:03exampleKeepalived_vrrp[1941]:Openingfile'/etc/keepalived/keepalived.conf'. Aug1315:11:03exampleKeepalived_vrrp[1941]:Configurationisusing:63278Bytes Aug1315:11:03exampleKeepalived_vrrp[1941]:UsingLinkWatchkernelnetlinkreflector... Aug1315:11:03exampleKeepalived_vrrp[1941]:VRRP_Instance(web)EnteringBACKUPSTATE Aug1315:11:03exampleKeepalived_vrrp[1941]:VRRPsockpool:[ifindex(2),proto(112),unicast(0),fd(10,11)] Aug1315:11:03exampleKeepalived_healthcheckers[1940]:Openingfile'/etc/keepalived/keepalived.conf'. Aug1315:11:03exampleKeepalived_healthcheckers[1940]:Configurationisusing:14742Bytes Aug1315:11:04exampleKeepalived_healthcheckers[1940]:UsingLinkWatchkernelnetlinkreflector... Aug1315:11:04exampleKeepalived_healthcheckers[1940]:Activatinghealthcheckerforservice[192.168.189.132]:80 Aug1315:11:04exampleKeepalived_healthcheckers[1940]:Activatinghealthcheckerforservice[192.168.189.133]:80 Aug1315:11:04examplekernel:IPVS:[wrr]schedulerregistered. Aug1315:11:07exampleKeepalived_vrrp[1941]:VRRP_Instance(web)TransitiontoMASTERSTATE Aug1315:11:08exampleKeepalived_vrrp[1941]:VRRP_Instance(web)EnteringMASTERSTATE Aug1315:11:08exampleKeepalived_vrrp[1941]:VRRP_Instance(web)settingprotocolVIPs. Aug1315:11:08exampleKeepalived_vrrp[1941]:VRRP_Instance(web)SendinggratuitousARPsoneth0for192.168.189.200 Aug1315:11:08exampleKeepalived_healthcheckers[1940]:NetlinkreflectorreportsIP192.168.189.200added Aug1315:11:10examplentpd[1525]:Listennormallyon6eth0192.168.189.200UDP123 Aug1315:11:11exampleKeepalived_vrrp[1941]:VRRP_Instance(web)Receivedhigherprioadvert Aug1315:11:11exampleKeepalived_vrrp[1941]:VRRP_Instance(web)EnteringBACKUPSTATE Aug1315:11:11exampleKeepalived_vrrp[1941]:VRRP_Instance(web)removingprotocolVIPs. Aug1315:11:11exampleKeepalived_healthcheckers[1940]:NetlinkreflectorreportsIP192.168.189.200removed Aug1315:11:13examplentpd[1525]:Deletinginterface#6eth0,192.168.189.200#123,interfacestats:received=0,sent=0,dropped=0,active_time=3secs 主节点vip地址情况 [root@example~]#ipaddr 1:lo:<LOOPBACK,UP,LOWER_UP>mtu65536qdiscnoqueuestateUNKNOWN link/loopback00:00:00:00:00:00brd00:00:00:00:00:00 inet127.0.0.1/8scopehostlo inet6::1/128scopehost valid_lftforeverpreferred_lftforever 2:eth0:<BROADCAST,MULTICAST,UP,LOWER_UP>mtu1500qdiscpfifo_faststateUPqlen1000 link/ether00:0c:29:5a:e1:a3brdff:ff:ff:ff:ff:ff inet192.168.189.130/24brd192.168.189.255scopeglobaleth0 inet192.168.189.200/24scopeglobalsecondaryeth0:1 inet6fe80::20c:29ff:fe5a:e1a3/64scopelink valid_lftforeverpreferred_lftforever 备用节点vip地址情况 [root@example~]#ipaddr 1:lo:<LOOPBACK,UP,LOWER_UP>mtu65536qdiscnoqueuestateUNKNOWN link/loopback00:00:00:00:00:00brd00:00:00:00:00:00 inet127.0.0.1/8scopehostlo inet6::1/128scopehost valid_lftforeverpreferred_lftforever 2:eth0:<BROADCAST,MULTICAST,UP,LOWER_UP>mtu1500qdiscpfifo_faststateUPqlen1000 link/ether00:0c:29:ea:4c:15brdff:ff:ff:ff:ff:ff inet192.168.189.131/24brd192.168.189.255scopeglobaleth0 inet6fe80::20c:29ff:feea:4c15/64scopelink valid_lftforeverpreferred_lftforever rs服务器配置(两台都需要做) [root@example ~]# echo "1" >/proc/sys/net/ipv4/conf/lo/arp_ignore [root@example ~]# echo "2" >/proc/sys/net/ipv4/conf/lo/arp_announce [root@example ~]# echo "1" >/proc/sys/net/ipv4/conf/all/arp_ignore [root@example ~]# echo "2" >/proc/sys/net/ipv4/conf/all/arp_announce [root@example ~]# ip addr 1: lo: <LOOPBACK,UP,LOWER_UP> mtu 65536 qdisc noqueue state UNKNOWN link/loopback 00:00:00:00:00:00 brd 00:00:00:00:00:00 inet 127.0.0.1/8 scope host lo inet 192.168.189.200/32 scope global lo:1 inet6 ::1/128 scope host valid_lft forever preferred_lft forever 2: eth0: <BROADCAST,MULTICAST,UP,LOWER_UP> mtu 1500 qdisc pfifo_fast state UP qlen 1000 link/ether 00:0c:29:66:66:33 brd ff:ff:ff:ff:ff:ff inet 192.168.189.132/24 brd 192.168.189.255 scope global eth0 inet6 fe80::20c:29ff:fe66:6633/64 scope link valid_lft forever preferred_lft forever 高可用×××测试 高可用性是通过LVS的两个DirectorServer完成的,为了模拟故障,先将主DirectorServer 上面的Keepalived服务停止,然后观察备用DirectorServer上Keepalived的运行日志,信息如下: [root@example~]#/etc/init.d/keepalivedstop主节点 Stoppingkeepalived:[OK] 主节点日志 Aug1315:18:53exampleKeepalived[45367]:StoppingKeepalivedv1.2.13(03/19,2015) Aug1315:18:53exampleKeepalived_vrrp[45370]:VRRP_Instance(web)sending0priority Aug1315:18:53exampleKeepalived_vrrp[45370]:VRRP_Instance(web)removingprotocolVIPs. Aug1315:18:53exampleKeepalived_healthcheckers[45369]:NetlinkreflectorreportsIP192.168.189.200removed Aug1315:18:53exampleKeepalived_healthcheckers[45369]:Removingservice[192.168.189.132]:80fromVS[192.168.189.200]:80 Aug1315:18:53exampleKeepalived_healthcheckers[45369]:Removingservice[192.168.189.133]:80fromVS[192.168.189.200]:80 Aug1315:18:53examplekernel:IPVS:__ip_vs_del_service:enter Aug1315:18:54examplentpd[1525]:Deletinginterface#6eth0:1,192.168.189.200#123,interfacestats:received=0,sent=0,dropped=0,active_time=5131secs 备用节点日志 Aug1315:18:53exampleKeepalived_vrrp[1941]:VRRP_Instance(web)TransitiontoMASTERSTATE Aug1315:18:54exampleKeepalived_vrrp[1941]:VRRP_Instance(web)EnteringMASTERSTATE Aug1315:18:54exampleKeepalived_vrrp[1941]:VRRP_Instance(web)settingprotocolVIPs. Aug1315:18:54exampleKeepalived_vrrp[1941]:VRRP_Instance(web)SendinggratuitousARPsoneth0for192.168.189.200 Aug1315:18:54exampleKeepalived_healthcheckers[1940]:NetlinkreflectorreportsIP192.168.189.200added Aug1315:18:56examplentpd[1525]:Listennormallyon7eth0192.168.189.200UDP123 Aug1315:18:59exampleKeepalived_vrrp[1941]:VRRP_Instance(web)SendinggratuitousARPsoneth0for192.168.189.200 主节点keepalived恢复观察日志情况 [root@example~]#/etc/init.d/keepalivedstop Stoppingkeepalived:[OK] 主节点日志 Aug1315:22:04exampleKeepalived[45420]:StartingKeepalivedv1.2.13(03/19,2015) Aug1315:22:04exampleKeepalived[45421]:StartingHealthcheckchildprocess,pid=45423 Aug1315:22:04exampleKeepalived[45421]:StartingVRRPchildprocess,pid=45424 Aug1315:22:04exampleKeepalived_vrrp[45424]:NetlinkreflectorreportsIP192.168.189.130added Aug1315:22:04exampleKeepalived_vrrp[45424]:NetlinkreflectorreportsIPfe80::20c:29ff:fe5a:e1a3added Aug1315:22:04exampleKeepalived_vrrp[45424]:RegisteringKernelnetlinkreflector Aug1315:22:04exampleKeepalived_vrrp[45424]:RegisteringKernelnetlinkcommandchannel Aug1315:22:04exampleKeepalived_vrrp[45424]:RegisteringgratuitousARPsharedchannel Aug1315:22:04exampleKeepalived_healthcheckers[45423]:NetlinkreflectorreportsIP192.168.189.130added Aug1315:22:04exampleKeepalived_healthcheckers[45423]:NetlinkreflectorreportsIPfe80::20c:29ff:fe5a:e1a3added Aug1315:22:04exampleKeepalived_healthcheckers[45423]:RegisteringKernelnetlinkreflector Aug1315:22:04exampleKeepalived_healthcheckers[45423]:RegisteringKernelnetlinkcommandchannel Aug1315:22:05exampleKeepalived_vrrp[45424]:Openingfile'/etc/keepalived/keepalived.conf'. Aug1315:22:05exampleKeepalived_vrrp[45424]:Configurationisusing:63278Bytes Aug1315:22:05exampleKeepalived_vrrp[45424]:UsingLinkWatchkernelnetlinkreflector... Aug1315:22:05exampleKeepalived_vrrp[45424]:VRRPsockpool:[ifindex(2),proto(112),unicast(0),fd(10,11)] Aug1315:22:05exampleKeepalived_healthcheckers[45423]:Openingfile'/etc/keepalived/keepalived.conf'. Aug1315:22:05exampleKeepalived_healthcheckers[45423]:Configurationisusing:14742Bytes Aug1315:22:05exampleKeepalived_healthcheckers[45423]:UsingLinkWatchkernelnetlinkreflector... Aug1315:22:05exampleKeepalived_healthcheckers[45423]:Activatinghealthcheckerforservice[192.168.189.132]:80 Aug1315:22:05exampleKeepalived_healthcheckers[45423]:Activatinghealthcheckerforservice[192.168.189.133]:80 Aug1315:22:05exampleKeepalived_vrrp[45424]:VRRP_Instance(web)TransitiontoMASTERSTATE Aug1315:22:05exampleKeepalived_vrrp[45424]:VRRP_Instance(web)Receivedlowerprioadvert,forcingnewelection Aug1315:22:06exampleKeepalived_vrrp[45424]:VRRP_Instance(web)EnteringMASTERSTATE Aug1315:22:06exampleKeepalived_vrrp[45424]:VRRP_Instance(web)settingprotocolVIPs. Aug1315:22:06exampleKeepalived_vrrp[45424]:VRRP_Instance(web)SendinggratuitousARPsoneth0for192.168.189.200 Aug1315:22:06exampleKeepalived_healthcheckers[45423]:NetlinkreflectorreportsIP192.168.189.200added Aug1315:22:07examplentpd[1525]:Listennormallyon7eth0192.168.189.200UDP123 Aug1315:22:11exampleKeepalived_vrrp[45424]:VRRP_Instance(web)SendinggratuitousARPsoneth0for192.168.189.200 备用节点 Aug1315:22:05exampleKeepalived_vrrp[1941]:VRRP_Instance(web)Receivedhigherprioadvert Aug1315:22:05exampleKeepalived_vrrp[1941]:VRRP_Instance(web)EnteringBACKUPSTATE Aug1315:22:05exampleKeepalived_vrrp[1941]:VRRP_Instance(web)removingprotocolVIPs. Aug1315:22:05exampleKeepalived_healthcheckers[1940]:NetlinkreflectorreportsIP192.168.189.200removed Aug1315:22:07examplentpd[1525]:Deletinginterface#7eth0,192.168.189.200#123,interfacestats:received=0,sent=0,dropped=0,active_time=191secs Aug1315:22:54exampledhclient[1239]:DHCPREQUESToneth0to192.168.189.254port67(xid=0x6d287b9) Aug1315:22:54exampledhclient[1239]:DHCPACKfrom192.168.189.254(xid=0x6d287b9) Aug1315:22:56exampledhclient[1239]:boundto192.168.189.131--renewalin680seconds. 可以看到备用节点的vip地址被移除了,一切都符合预期 负载均衡测试,打开浏览器测试访问lvs的vip地址 故障切换测试 故障切换是测试在某个节点出现故障后,Keepalived监控模块是否能及时发现,然后屏蔽故障节点,同时将服务转移到正常节点上执行。 这里将real server 1节点服务停掉,假定这个节点出现故障,然后查看主、备机日志信息,相关日志如下: [root@example ~]# /etc/init.d/httpd stop Stopping httpd: [ OK ] 观察主节点keepalived日志情况 Aug1315:30:05exampleKeepalived_healthcheckers[45423]:TCPconnectionto[192.168.189.132]:80failed!!! Aug1315:30:05exampleKeepalived_healthcheckers[45423]:Removingservice[192.168.189.132]:80fromVS[192.168.189.200]:80 Aug1315:30:05exampleKeepalived_healthcheckers[45423]:RemoteSMTPserver[192.168.200.1]:25connected. Aug1315:30:35exampleKeepalived_healthcheckers[45423]:TimeoutreadingdatatoremoteSMTPserver[192.168.200.1]:25. 观察备用节点keepalived日志情况 Aug1315:30:04exampleKeepalived_healthcheckers[1940]:TCPconnectionto[192.168.189.132]:80failed!!! Aug1315:30:04exampleKeepalived_healthcheckers[1940]:Removingservice[192.168.189.132]:80fromVS[192.168.189.200]:80 Aug1315:30:04exampleKeepalived_healthcheckers[1940]:RemoteSMTPserver[192.168.200.1]:25connected. Aug1315:30:34exampleKeepalived_healthcheckers[1940]:TimeoutreadingdatatoremoteSMTPserver[192.168.200.1]:25. 通过日志可以看出,Keepalived监控模块检测到192.168.189.132这台主机出现故障后,将此节点从集群系统中剔除掉了。 此时访问http://192.168.189.200这个地址,应该只能看到“web02_192.168.189.133”了, 这是因为节点1出现故障,而Keepalived监控模块将节点1从集群系统中剔除了 再次重启web01服务观察主备keepalived日志情况 主节点keepalived日志情况 Aug1315:33:47exampleKeepalived_healthcheckers[45423]:TCPconnectionto[192.168.189.132]:80success. Aug1315:33:47exampleKeepalived_healthcheckers[45423]:Addingservice[192.168.189.132]:80toVS[192.168.189.200]:80 Aug1315:33:47exampleKeepalived_healthcheckers[45423]:RemoteSMTPserver[192.168.200.1]:25connected. Aug1315:34:17exampleKeepalived_healthcheckers[45423]:TimeoutreadingdatatoremoteSMTPserver[192.168.200.1]:25. 备用节点keepalived日志情况 Aug1315:33:46exampleKeepalived_healthcheckers[1940]:TCPconnectionto[192.168.189.132]:80success. Aug1315:33:46exampleKeepalived_healthcheckers[1940]:Addingservice[192.168.189.132]:80toVS[192.168.189.200]:80 Aug1315:33:46exampleKeepalived_healthcheckers[1940]:RemoteSMTPserver[192.168.200.1]:25connected. Aug1315:34:16exampledhclient[1239]:DHCPREQUESToneth0to192.168.189.254port67(xid=0x6d287b9) Aug1315:34:16exampledhclient[1239]:DHCPACKfrom192.168.189.254(xid=0x6d287b9) Aug1315:34:16exampleKeepalived_healthcheckers[1940]:TimeoutreadingdatatoremoteSMTPserver[192.168.200.1]:25. Aug1315:34:18exampledhclient[1239]:boundto192.168.189.131--renewalin778seconds. 从日志可知,Keepalived监控模块检测到192.168.189.132这台主机恢复正常后,又将此节点加入到集群系统中。 此时再次访问http://192.168.189.200这个地址,然后不断刷新此页面,应该又能分别看到“web01_192.168.189.132”和 “web01_192.168.189.133”页面了,这说明在web1节点恢复正常后,Keepalived监控模块将此节点加入到集群系统中。