首页 文章 精选 留言 我的

精选列表

搜索[自动装配],共10000篇文章
优秀的个人博客,低调大师

阿里投资小鹏汽车,是提速自动驾驶布局的开端吗?

本文来自AI新媒体量子位(QbitAI) 阿里巴巴又一次投资了何小鹏的项目,只是这次这个项目也叫小鹏汽车。 根据已经公开披露的股权变更资料,阿里投资小鹏汽车的相关事宜已经板上钉钉,认缴202万,出资比例10.03%,杭州阿里创业投资公司已正式成为小鹏汽车股东。 这算是造车新势力小鹏汽车今年高速车道上的“风景”之一。 2017年以来,这家3年前创办于广州,受到何小鹏、吴宵光、张颖、李学凌、傅盛等知名互联网大佬天使投资的造车项目,正在进入快车道,而且在何小鹏加盟出任董事长后,声势日隆。 小鹏汽车2017进展 5月,广东肇庆落地建厂,项目由省委书记批示,总投资规模100亿元; 同月,宣布与北斗导航领域企业海格通信(SZ 002465)达成合作,将北斗卫星高精导航系统用于智能驾驶研发; 6月,获得出行平台神州优车集团22亿元战略投资; 8月,阿里巴巴集团副

优秀的个人博客,低调大师

appium+python自动化34-获取元素属性get_attribute

获取text # coding:utf-8 from appium import webdriver from time import sleep desired_caps = { 'platformName': 'Android', 'deviceName': '127.0.0.1:62001', 'platformVersion': '4.4.2', 'appPackage': 'com.baidu.yuedu', 'appActivity': 'com.baidu.yuedu.splash.SplashActivity', 'noReset': 'true', 'resetKeyboard': 'true', 'unicodeKeyboard': 'true' } driver = webdriver.Remote('http://127.0.0.1:4723/wd/hub', desired_caps) # 等主页面activity出现 driver.wait_activity(".base.ui.MainActivity", 10) # 点取消升级 driver.find_element_by_id("com.baidu.yuedu:id/negativeUpgrade").click() # 获取text t1 = driver.find_element_by_id("com.baidu.yuedu:id/lefttitle").text print(t1) tag_name 1.tag_name实质上是获取class属性 # 获取tag_name t2 = driver.find_element_by_id("com.baidu.yuedu:id/lefttitle").tag_name print(t2) 2.打印结果:android.widget.TextView get_attribute 1.获取content-desc属性,这里注意了,如果content-desc属性为空,那么获取的就是text属性,不为空获取的才是content-desc属性 2.content-desc属性为空,打印结果:书架 # content-desc为空,获取的是text t3 = driver.find_element_by_id("com.baidu.yuedu:id/lefttitle").get_attribute("name") print(t3) 3.content-desc属性不为空,打印结果:百度阅读 # content-desc t4 = driver.find_element_by_id("com.baidu.yuedu:id/fragment_banner").get_attribute("name") print t4 4.id,calss,text属性获取 # id t5 = driver.find_element_by_id("com.baidu.yuedu:id/lefttitle").get_attribute("resourceId") print(t5) # class t6 = driver.find_element_by_id("com.baidu.yuedu:id/lefttitle").get_attribute("className") print(t6) # text t7 = driver.find_element_by_id("com.baidu.yuedu:id/lefttitle").get_attribute("text") print(t7) 5.其它属性获取,注意这里并不是所有的都可以获取,一些标准的属性是可以获取到的 # checkable t8 = driver.find_element_by_id("com.baidu.yuedu:id/lefttitle").get_attribute("checkable") print t8 # clickable t9 = driver.find_element_by_id("com.baidu.yuedu:id/lefttitle").get_attribute("clickable") print t9 size和location 1.获取size,返回的是字典,如:{'width': 84, 'height': 84} 2.获取location,返回的是字典,如:{'y': 38, 'x': 192} # size t10 = driver.find_element_by_id("com.baidu.yuedu:id/lefttitle").size print t10 # location t11 = driver.find_element_by_id("com.baidu.yuedu:id/lefttitle").location print t11 参考代码 # coding:utf-8 from appium import webdriver desired_caps = { 'platformName': 'Android', 'deviceName': '127.0.0.1:62001', 'platformVersion': '4.4.2', 'appPackage': 'com.baidu.yuedu', 'appActivity': 'com.baidu.yuedu.splash.SplashActivity', 'noReset': 'true', 'resetKeyboard': 'true', 'unicodeKeyboard': 'true' } driver = webdriver.Remote('http://127.0.0.1:4723/wd/hub', desired_caps) # 等主页面activity出现 driver.wait_activity(".base.ui.MainActivity", 10) # 点取消升级 driver.find_element_by_id("com.baidu.yuedu:id/negativeUpgrade").click() # 获取text t1 = driver.find_element_by_id("com.baidu.yuedu:id/lefttitle").text print(t1) # 获取tag_name t2 = driver.find_element_by_id("com.baidu.yuedu:id/lefttitle").tag_name print(t2) # content-desc为空,获取的是text t3 = driver.find_element_by_id("com.baidu.yuedu:id/lefttitle").get_attribute("name") print(t3) # content-desc t4 = driver.find_element_by_id("com.baidu.yuedu:id/fragment_banner").get_attribute("name") print t4 # id t5 = driver.find_element_by_id("com.baidu.yuedu:id/lefttitle").get_attribute("resourceId") print(t5) # class t6 = driver.find_element_by_id("com.baidu.yuedu:id/lefttitle").get_attribute("className") print(t6) # text t7 = driver.find_element_by_id("com.baidu.yuedu:id/lefttitle").get_attribute("text") print(t7) # checkable t8 = driver.find_element_by_id("com.baidu.yuedu:id/lefttitle").get_attribute("checkable") print t8 # clickable t9 = driver.find_element_by_id("com.baidu.yuedu:id/lefttitle").get_attribute("clickable") print t9 # size t10 = driver.find_element_by_id("com.baidu.yuedu:id/lefttitle").size print t10 # location t11 = driver.find_element_by_id("com.baidu.yuedu:id/lefttitle").location print t11 appiumQQ群:512200893

优秀的个人博客,低调大师

关于项目自动化测试架构的改良计划 - 解析XInclude标记

因为在test_suite.xml中,我们多处使用了XInclude标记,他们会被申明在一个叫"http://www.w3.org/2001/XInclude"的名字空间中,并且引入部分用xi:include来声明,我们这个类的作用就是把这些所有的<xi:include>的部分,都用被引入的文件插入和替换掉。 1 2 3 4 5 6 7 8 9 10 11 12 13 14 15 16 17 18 19 20 21 22 23 24 25 26 27 28 29 30 31 32 33 34 /** * This class will handle converting a xinclude+xpointer marked xml file to a normal xml file * Because of the shortage of the current jdk ,it only support the xPointer with element instead of NCName *@author cwang58 *@created date: Jun 10, 2013 */ public class XIncludeConverter { /** * this method will handle change the XInclude+XPointer marked xml as normal xml * @param origialXML the original xml which has the xInclude feature * @return the parsedXML without the xInclude feature */ public static String convertXInclude2NormalXML(String originalXML) throws SAXException,ParserConfigurationException,TransformerConfigurationException,IOException,TransformerException{ DocumentBuilderFactory factory = DocumentBuilderFactory.newInstance(); //open up the namespace aware so that it can recognize the "xi" namespace factory.setNamespaceAware( true ); //let this SAXParser support XInclude factory.setXIncludeAware( true ); //factory.setValidating(true); //ignore all the comments added in the source document factory.setIgnoringComments( true ); DocumentBuilder docBuilder = factory.newDocumentBuilder(); Document doc = docBuilder.parse( new InputSource( new ByteArrayInputStream(originalXML.getBytes( "utf-8" )))); Transformer transformer = TransformerFactory.newInstance().newTransformer(); //format the output xml string so it support indent and more readable transformer.setOutputProperty(OutputKeys.INDENT, "yes" ); //initialize StreamResult with File object to save to file StreamResult result = new StreamResult( new StringWriter()); DOMSource source = new DOMSource(doc); transformer.transform(source, result); return result.getWriter().toString(); } 这里讲一个小插曲,其实,W3C中,XInclude经常和Xpointer联合起来应用的,xpointer可以帮助来定位目标文件的某个小片段而不是整个目标文件,定位方法可以用element(),或者xpointer(),如果element的话,可以用(/1/2/3)这种方式来定位DOM,或者基于 id,对应java的解析框架是xerce,但是非常不幸运的是,最新版本的xerce框架只支持element(/1/3/4/5)这种定位,而对于基于schema-id的方式,也就是某个element声明了id的情况,它没办法定位,但是未来可能会支持这个功能。 http://xerces.apache.org/xerces2-j/faq-xinclude.html#faq-8 基于上述的局限性,我决定只采用xi:include来包含全部文件,然后局部调整的做法,并且绕过xpointer。 所以实现代码如上所示,事实上从JDK 1.6开始,他已经提供了对XInclude的支持,内部是委托给xerce来实现的,这是对应架构图的第3-4步骤。 本文转自 charles_wang888 51CTO博客,原文链接:http://blog.51cto.com/supercharles888/1221731,如需转载请自行联系原作者

优秀的个人博客,低调大师

运维自动化之ansible playbook安装mysql tpcc测试OLTP能力

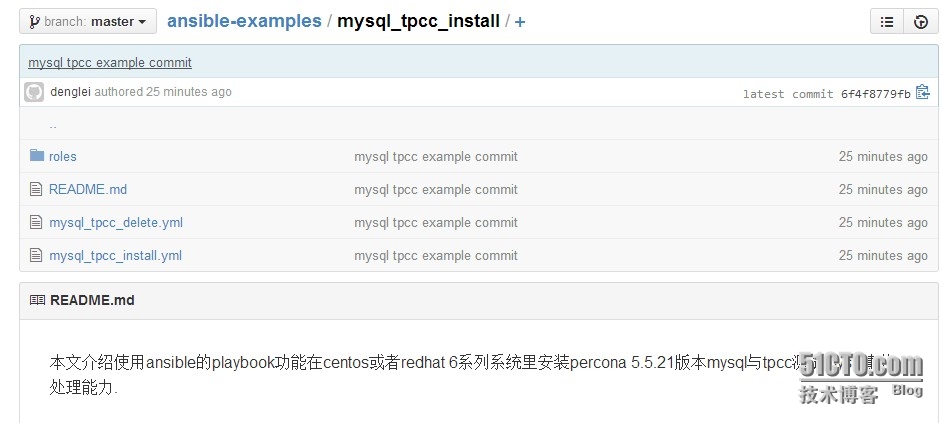
上周介绍了zabbix监控cdn带宽,这次在介绍一下ansible结合docker来一键化安装与测试mysql tpcc,然后通过tpcc测试OLTP系统性能。 写这个的原因就是重复性的安装太麻烦,浪费时间,而且我这里新业务不断上线,上线前使用tpcc进行OLTP测试对整体系统性能上也有了解。 一、Myql Tpcc介绍(网上找的内容) Tpcc-mysql是percona基于tpcc衍生出来的产品,用来测试OLTP(在线事务处理)系统性能的软件, TPCC-MYSQL是开源的TPC-C测试软件其源码放在bazaar(Bazaar是一个分布式的版本控制系统,采用GPL许可协议,可运行于Windows、GNU/Linux、UNIX 以及 Mac OS 系统之上。Bazaar 由Canonical公司(Ubuntu母公司)赞助商,因此还需要先安装bazaar客户端。 二、测试环境 平台:cloudsbox 虚拟化:kvm 系统:centos6.5 Docker版本:0.11.1 Docker容器系统版本:centos 6.3 Ansible版本:1.6 三、测试步骤 1、使用docker生成一个新的容器mysql-tpcc; 2、使用ansible在新生成的容器mysql-tpcc里进行安装mysql-tpcc并进行测试; 3、测试完成后,从容器里把测试结果拉回本地。 下面开始是测试过程 四、docker里操作 1、查看当然容器 1 2 3 4 5 6 7 17:49:46 #dockerps-a CONTAINERIDIMAGECOMMANDCREATEDSTATUSPORTSNAMES dfec766fbaa7centos6:3.0 /usr/sbin/sshd -D12daysagoUp12days0.0.0.0:49159->22 /tcp redis-slave 06762530db8ccentos6:3.0 /usr/sbin/sshd -D12daysagoUp12days0.0.0.0:49158->22 /tcp redis-master 846efb9e4d7aubuntu:3.0 /usr/sbin/sshd -D3weeksagoUp2weeks0.0.0.0:49167->22 /tcp ubuntu-test1 b9a9e6f2caedcentos6:3.0 /usr/sbin/sshd -D5weeksagoUp2weeks0.0.0.0:49166->22 /tcp zabbix-server 978fff134b18centos6:3.0 /usr/sbin/sshd -D6weeksagoUp2weeks0.0.0.0:49165->22 /tcp centos6-test5 2、生成新容器 1 2 3 4 5 6 17:49:53 #timedockerinspect$(dockerrun-d-p22--name="mysql-tpcc"centos6:3.0/usr/sbin/sshd-D)|grep-iaddress|awk-F'"''{print$4}' 172.17.0.7 real 0m9.415s user 0m0.028s sys 0m0.140s 3、查看当前已有容器 1 2 3 4 5 6 7 8 17:50:07 #dockerps-a CONTAINERIDIMAGECOMMANDCREATEDSTATUSPORTSNAMES 6331fb9bf19bcentos6:3.0 /usr/sbin/sshd -D21secondsagoUp12seconds0.0.0.0:49160->22 /tcp mysql-tpcc dfec766fbaa7centos6:3.0 /usr/sbin/sshd -D12daysagoUp12days0.0.0.0:49159->22 /tcp redis-slave 06762530db8ccentos6:3.0 /usr/sbin/sshd -D12daysagoUp12days0.0.0.0:49158->22 /tcp redis-master 846efb9e4d7aubuntu:3.0 /usr/sbin/sshd -D3weeksagoUp2weeks0.0.0.0:49167->22 /tcp ubuntu-test1 b9a9e6f2caedcentos6:3.0 /usr/sbin/sshd -D5weeksagoUp2weeks0.0.0.0:49166->22 /tcp zabbix-server 978fff134b18centos6:3.0 /usr/sbin/sshd -D6weeksagoUp2weeks0.0.0.0:49165->22 /tcp centos6-test5 4、新容器ip加入到ansible的访问主机列表里 1 2 17:52:47 #echo"172.17.0.7">>hosts root@ip-10-10-10-10: /etc/ansible 五、ansible里操作 其中命令为ansible-playbookmysql_tpcc_install.yml --extra-vars "host=172.17.0.17 user=rootwarehouse=50 w=50 c=50 r=120 l=600”,extra-vars后面都是变量,都是可以自行修改变量,满足个性化测试需求 下面是运行情况 1 2 3 4 5 6 7 8 9 10 11 12 13 14 15 16 17 18 19 20 21 22 23 24 25 26 27 28 29 30 31 32 33 34 35 36 37 38 39 40 41 42 43 44 45 46 47 48 49 50 51 52 53 54 55 56 57 58 59 60 61 62 63 64 65 66 67 68 69 70 71 72 73 74 75 76 77 78 79 80 81 82 83 84 85 86 87 88 89 90 time ansible-playbookmysql_tpcc_install.yml--extra-vars "host=172.17.0.7user=rootwarehouse=50w=50c=50r=120l=600" -k SSHpassword: PLAY[172.17.0.7]************************************************************* GATHERINGFACTS*************************************************************** ok:[172.17.0.7] TASK:[common|Installinitializtionrequiresoftware]*********************** changed:[172.17.0.7] TASK:[mysql_install|CopyMysqlSoftwareToRedhatClient]****************** changed:[172.17.0.7] TASK:[mysql_install|CreateMysqlUserInRedhatClient]******************** changed:[172.17.0.7] TASK:[mysql_install|CopyMysqlStartScriptToRedhatClient]************** changed:[172.17.0.7] TASK:[mysql_install|CopyInstallMysqlScriptToRedhatClient]*********** changed:[172.17.0.7] TASK:[mysql_install|CopyMysqlConfigToRedhatClient]******************** changed:[172.17.0.7] TASK:[mysql_install|CopyMysqlSecurityScriptToRedhatClient]*********** changed:[172.17.0.7] TASK:[mysql_install|CreateMysqlInstallDir]****************************** ok:[172.17.0.7] TASK:[mysql_install|UncompressionMysqlSoftwareToRedhatClient]********* changed:[172.17.0.7] TASK:[mysql_install|ModifyMysqlDirPermissionInRedhatClient]********** ok:[172.17.0.7]=>(item= /data/mysql/datadir ) ok:[172.17.0.7]=>(item= /data/mysql/basedir ) TASK:[mysql_install|InstallMysqlScriptInRedhatClient]***************** changed:[172.17.0.7] TASK:[mysql_install|StartMyqlSecurityScriptInRedhatClient]*********** changed:[172.17.0.7] TASK:[mysql_install|AddBootStartMysqlServiceInRedhatClient]********* changed:[172.17.0.7] TASK:[mysql_install|DeleteMysqlcompressionSoftwareInRedhatClient]**** changed:[172.17.0.7] TASK:[mysql_tpcc_install|InstallBaseRequireSoftwareInRedhatClient]*** changed:[172.17.0.7] TASK:[mysql_tpcc_install|CopyTpccSoftwareToRedhatClient]************* changed:[172.17.0.7]=>(item=tpcc-mysql. tar .gz) TASK:[mysql_tpcc_install|DownloadTpccSoftwareToRedhatClient]********** changed:[172.17.0.7] TASK:[mysql_tpcc_install|CompileTpccSoftwareToRedhatClient]*********** changed:[172.17.0.7] TASK:[mysql_tpcc_install|CreateMysqlTpccDatabaseInRedhatClient]****** changed:[172.17.0.7]=>(item=createdatabasetpcc100;) TASK:[mysql_tpcc_install|LoadMysqlTpccDataTableInRedhatClient]***** changed:[172.17.0.7]=>(item=create_table.sql) changed:[172.17.0.7]=>(item=add_fkey_idx.sql) TASK:[mysql_tpcc_install|CreateTpccMysqlTestDataToRedhatClient]***** changed:[172.17.0.7] TASK:[mysql_tpcc_install|StartMysqlTpccTestInRedhatClient]********** changed:[172.17.0.7] TASK:[mysql_tpcc_install|CopyMysqlTpccResultfromRedhatClient]******** changed:[172.17.0.7] TASK:[mysql_tpcc_install|DeleteZabbixcompressionSoftwareInRedhatClient]*** changed:[172.17.0.7]=>(item=tpcc-mysql. tar .gz) changed:[172.17.0.7]=>(item=tpcc100.sql) PLAYRECAP******************************************************************** 172.17.0.7:ok=25changed=22unreachable=0failed=0 real 89m21.833s user 0m27.365s sys 0m2.680s 可以看到89分钟就安装完成,可能有的人疑问为什么这么长时间,注意是在tpcc_load里加载测试数据差不多就话费3分之二时间,本来我想做好一个测试库后,使用mysqldump导出,但即使导出后在算上传输时间、导入时间跟现在时间差不多,所以就没有使用这个方法。 2、查看mysql-tpcc的结果 1 2 3 4 5 6 7 8 9 10 11 12 13 14 15 16 17 18 19 20 21 22 23 24 25 26 27 28 29 30 31 32 33 34 35 36 37 38 39 40 41 42 43 44 45 46 47 48 49 50 51 52 53 54 55 56 57 58 59 60 61 62 63 64 65 66 67 68 69 70 71 72 73 74 75 76 77 78 79 80 81 82 83 84 85 86 87 88 89 90 91 92 93 94 95 96 97 98 99 100 101 102 103 104 105 106 107 108 109 110 111 112 113 114 115 116 117 118 119 120 121 122 123 124 125 20:21:31 #ll/tmp/mysql-tpcc-172.17.0.7.log -rw-r--r--1rootroot8215Aug2520:21 /tmp/mysql-tpcc-172 .17.0.7.log root@ip-10-10-10-10: /mnt/ansible 20:21:44 #cat/tmp/mysql-tpcc-172.17.0.7.log *************************************** *** ###easy###TPC-CLoadGenerator*** *************************************** optionhwithvalue '172.17.0.7' optionuwithvalue 'root' optionpwithvalue 'E4yR3WnoluSFTCBAI' optiondwithvalue 'tpcc100' optionwwithvalue '50' optioncwithvalue '50' optionrwithvalue '120' optionlwithvalue '600' optionfwithvalue 'tpcc-mysql-result' <Parameters> [server]:172.17.0.7 [port]:3306 [DBname]:tpcc100 [user]:root [pass]:E4yR3WnoluSFTCBAI [warehouse]:50 [connection]:50 [rampup]:120(sec.) [measure]:600(sec.) RAMP-UPTIME.(120sec.) MEASURINGSTART. 10,2491(110):4.671|6.975,2494(0):1.001|1.625,250(0):0.510|0.939,251(0):6.439|7.783,246(0):13.922|17.389 20,1649(305):6.303|7.654,1649(0):1.337|1.521,164(0):0.718|0.737,164(0):7.859|8.443,173(0):17.100|18.067 30,1701(294):6.378|7.320,1694(0):1.338|1.685,171(0):0.701|0.787,170(0):7.824|8.124,164(0):17.122|18.446 40,1857(310):6.198|6.755,1861(0):1.301|1.528,184(0):0.716|0.857,187(0):7.595|7.996,190(0):16.457|17.335 50,1543(352):6.504|7.504,1543(0):1.460|1.977,157(0):0.727|0.947,154(0):8.237|8.365,150(0):17.165|17.904 60,1728(385):6.425|7.139,1732(0):1.393|1.873,172(0):0.728|0.845,174(0):7.782|8.069,175(0):16.524|16.731 70,1824(321):6.199|6.856,1826(0):1.306|1.639,181(0):0.751|0.859,182(0):7.650|7.921,183(0):16.011|16.740 80,1598(399):6.367|7.330,1595(0):1.371|1.649,162(0):0.761|0.962,159(0):7.532|7.632,158(0):17.059|17.390 90,1740(371):6.347|6.910,1740(0):1.357|1.872,172(0):0.751|0.821,174(0):7.828|8.164,172(0):17.291|17.397 100,1758(399):6.350|6.993,1757(0):1.343|1.625,176(0):0.726|0.744,176(0):8.042|8.247,179(0):17.284|17.362 110,1791(359):6.364|6.983,1792(0):1.352|1.595,180(0):0.770|0.852,180(0):7.597|7.962,181(0):16.908|17.897 120,1762(367):6.397|7.016,1760(0):1.332|1.580,175(0):0.690|0.873,174(0):8.184|8.551,173(0):17.208|17.613 130,1935(267):6.118|6.846,1938(0):1.290|1.535,194(0):0.735|0.800,194(0):7.329|7.667,193(0):16.368|16.718 140,1602(371):6.391|7.331,1598(0):1.377|1.551,161(0):0.875|0.986,161(0):8.105|8.791,164(0):17.402|18.088 150,1814(275):6.329|6.780,1816(0):1.321|1.614,181(0):0.671|0.869,182(0):8.143|8.568,179(0):16.673|17.081 160,1908(284):6.041|7.137,1911(0):1.366|1.742,190(0):0.720|0.794,190(0):7.571|8.524,192(0):15.846|16.471 170,1740(46):5.313|6.052,1743(0):1.199|1.636,175(0):0.699|0.805,175(0):6.750|6.918,174(0):15.899|16.343 180,3700(10):4.368|5.826,3692(0):1.036|1.361,367(0):0.574|0.751,368(0):5.685|6.103,372(0):13.234|13.676 190,5243(0):2.843|4.661,5249(0):0.704|1.119,528(0):0.391|0.655,525(0):4.449|5.307,525(0):8.626|11.532 200,4634(9):3.744|6.482,4630(0):0.904|1.317,462(0):0.450|0.678,463(0):5.635|7.451,462(0):11.847|12.898 210,1567(161):6.223|6.673,1567(0):1.312|1.540,156(0):0.701|0.757,155(0):7.851|8.040,157(0):17.377|17.517 220,3125(78):5.695|7.167,3126(0):1.142|1.361,312(0):0.610|0.691,315(0):7.122|7.630,310(0):15.943|16.664 230,1913(75):5.546|6.814,1911(0):1.225|1.521,194(0):0.592|0.732,190(0):7.236|7.631,190(0):14.452|15.462 240,2825(39):5.187|6.421,2831(0):1.152|1.677,284(0):0.674|0.809,283(0):6.705|7.467,287(0):14.756|15.847 250,2795(80):5.612|6.583,2790(0):1.147|1.582,277(0):0.629|0.744,280(0):6.924|7.108,277(0):14.721|15.484 260,3200(39):5.114|6.319,3204(0):1.161|1.717,321(0):0.642|0.760,321(0):7.173|8.076,321(0):14.395|14.923 270,2124(136):5.903|6.660,2123(0):1.233|1.612,210(0):0.633|0.835,211(0):7.194|7.598,211(0):15.481|16.417 280,1785(142):5.773|6.158,1781(0):1.269|1.564,181(0):0.755|0.933,180(0):7.181|7.396,177(0):14.987|16.114 290,1649(254):6.228|7.476,1653(0):1.334|1.666,163(0):0.682|0.715,164(0):7.552|7.958,167(0):16.458|18.312 300,1683(181):6.048|6.788,1676(0):1.376|1.725,169(0):0.655|0.721,169(0):7.266|7.550,165(0):15.377|16.599 310,1782(191):6.072|7.079,1785(0):1.342|1.662,179(0):0.708|0.995,178(0):7.479|7.790,182(0):15.789|16.220 320,2122(58):5.375|6.219,2122(0):1.184|1.492,211(0):0.577|0.708,211(0):6.726|7.536,213(0):15.324|16.262 330,2088(9):4.735|5.830,2082(0):1.226|1.573,210(0):0.657|0.808,208(0):5.856|5.963,208(0):13.431|15.987 340,1514(201):5.871|6.529,1524(0):1.292|1.560,151(0):0.742|0.782,151(0):7.418|7.639,154(0):16.177|16.801 350,1897(89):5.645|6.443,1889(0):1.242|1.555,187(0):0.777|0.898,188(0):7.183|7.971,188(0):14.419|14.601 360,2340(18):4.835|6.052,2349(0):1.212|1.869,238(0):0.598|0.685,238(0):6.727|7.723,234(0):13.155|15.648 370,1817(264):6.349|6.903,1807(0):1.371|1.607,180(0):0.785|0.890,181(0):8.153|8.362,182(0):16.410|16.923 380,1592(433):6.465|7.550,1588(0):1.379|1.660,158(0):0.773|0.804,160(0):7.763|7.853,152(0):17.126|17.280 390,1666(420):6.401|7.250,1676(0):1.390|1.560,168(0):0.734|0.764,167(0):7.988|8.532,167(0):16.822|17.297 400,1718(439):6.390|6.753,1704(0):1.359|1.732,172(0):0.748|0.804,169(0):7.749|7.784,178(0):17.143|18.053 410,1576(389):6.431|7.726,1586(0):1.371|1.962,158(0):0.717|0.816,160(0):7.860|8.113,150(0):17.143|17.348 420,1639(404):6.420|6.884,1639(0):1.345|2.205,161(0):0.718|0.981,162(0):7.725|8.204,169(0):16.941|17.532 430,1828(391):6.333|6.998,1828(0):1.363|1.712,185(0):0.712|0.831,184(0):7.781|8.109,183(0):16.935|17.534 440,1693(365):6.427|7.375,1696(0):1.380|1.689,168(0):0.830|0.848,169(0):8.020|8.507,172(0):16.618|16.924 450,1743(403):6.424|7.377,1743(0):1.376|1.610,176(0):0.706|0.857,176(0):7.915|8.236,172(0):16.736|17.716 460,1854(334):6.202|6.753,1853(0):1.341|1.501,185(0):0.724|0.812,183(0):7.673|7.825,185(0):16.963|17.401 470,1944(259):6.271|7.049,1946(0):1.284|1.709,195(0):0.685|0.697,195(0):7.756|8.023,198(0):16.338|18.186 480,1708(407):6.317|7.343,1706(0):1.380|1.881,170(0):0.784|0.855,171(0):7.952|8.688,168(0):17.000|17.313 490,1849(380):6.371|7.301,1851(0):1.344|1.589,185(0):0.741|1.008,186(0):7.992|8.086,185(0):16.715|16.806 500,1518(414):6.470|7.747,1514(0):1.363|1.780,153(0):0.790|0.800,152(0):8.059|8.249,147(0):17.433|17.965 510,1617(397):6.295|7.219,1619(0):1.360|1.852,162(0):0.737|0.882,161(0):7.860|11.366,165(0):16.747|18.100 520,1729(391):6.380|7.159,1726(0):1.436|1.731,171(0):0.707|0.792,173(0):7.879|8.168,172(0):17.220|17.623 530,1628(393):6.353|7.159,1631(0):1.360|1.567,163(0):0.743|0.837,164(0):7.953|8.167,161(0):17.195|18.550 540,1745(382):6.377|6.962,1747(0):1.396|1.697,174(0):0.709|0.951,172(0):7.558|7.684,179(0):17.103|18.918 550,1129(319):6.680|7.058,1117(0):1.452|1.727,115(0):0.755|0.913,117(0):8.050|8.419,116(0):17.458|19.481 560,1062(285):6.842|7.845,1067(0):1.451|1.785,104(0):0.707|0.759,104(0):8.291|8.489,100(0):18.638|19.465 570,980(254):6.661|7.531,959(0):1.532|1.765,99(0):0.892|1.034,100(0):8.231|9.792,105(0):18.520|19.243 580,923(161):7.483|8.429,900(0):2.066|2.429,92(0):0.847|0.861,94(0):13.631|15.379,99(2):19.999|22.666 590,89(24):10.320|10.529,90(0):2.331|2.606,9(0):1.077|1.084,10(0):10.935|12.559,9(1):17.615|22.311 600,1732(264):6.335|6.926,1784(0):1.363|2.580,174(0):0.765|0.967,166(0):7.857|8.124,166(0):17.084|17.509 STOPPINGTHREADS.................................................. <RawResults> [0]sc:100049lt:15157rt:0fl:0 [1]sc:115210lt:0rt:0fl:0 [2]sc:11522lt:0rt:0fl:0 [3]sc:11521lt:0rt:0fl:0 [4]sc:11523lt:3rt:0fl:0 in 600sec. <RawResults2( sum ver.)> [0]sc:100049lt:15157rt:0fl:0 [1]sc:115214lt:0rt:0fl:0 [2]sc:11522lt:0rt:0fl:0 [3]sc:11521lt:0rt:0fl:0 [4]sc:11523lt:3rt:0fl:0 <ConstraintCheck>(allmustbe[OK]) [transactionpercentage] Payment:43.48%(>=43.0%)[OK] Order-Status:4.35%(>=4.0%)[OK] Delivery:4.35%(>=4.0%)[OK] Stock-Level:4.35%(>=4.0%)[OK] [response time (atleast90%passed)] New-Order:86.84%[NG]* Payment:100.00%[OK] Order-Status:100.00%[OK] Delivery:100.00%[OK] Stock-Level:99.97%[OK] <TpmC> 11520.600TpmC 其实测试结果最关键的就是最后一行11520.600 TpmC,下面是介绍一下TpmC是做什么用的 1 流量指标(Throughput,简称tpmC):按照TPC组织的定义,流量指标描述了系统在执行支付操作、订单状态查询、发货和库存状态查询这4种交易的同时,每分钟可以处理多少个新订单交易。所有交易的响应时间必须满足TPC-C测试规范的要求,且各种交易数量所占的比例也应该满足TPC-C测试规范的要求。在这种情况下,流量指标值越大说明系统的联机事务处理能力越高。 具体关于Tpcc介绍可以参考http://baike.baidu.com/view/2776305.htm 3、删除tpcc 1 2 3 4 5 6 7 8 9 10 11 12 13 14 15 16 17 18 19 20 21 22 23 24 25 26 27 28 29 30 31 32 33 34 35 36 09:35:47 #timeansible-playbookmysql_tpcc_delete.yml--extra-vars"host=172.17.0.7user=rootwarehouse=50w=50c=50r=120l=600"-k SSHpassword: PLAY[172.17.0.7]************************************************************* GATHERINGFACTS*************************************************************** ok:[172.17.0.7] TASK:[mysql_tpcc_delete|DeleteMysqlTpccDatabase]************************ changed:[172.17.0.7] TASK:[mysql_tpcc_delete|DeleteMysqlTpccDir]***************************** changed:[172.17.0.7] TASK:[mysql_delete|StopMysqlService]************************************* changed:[172.17.0.7] TASK:[mysql_delete|DeleteMysqlBootStartScript]************************* changed:[172.17.0.7] TASK:[mysql_delete|DeleteMysqlDirAndSocket]**************************** changed:[172.17.0.7] TASK:[mysql_delete|DeleteMysqlUser]************************************** changed:[172.17.0.7] TASK:[mysql_delete|DeleteMysqlServiceStartScript]********************** changed:[172.17.0.7] PLAYRECAP******************************************************************** 172.17.0.7:ok=8changed=7unreachable=0failed=0 real 0m25.780s user 0m2.446s sys 0m0.408s 如果大家想使用我的例子,可以从github里下载(地址是https://github.com/dl528888/ansible-examples/tree/master/mysql_tpcc_install),然后放到/etc/ansible目录里,下面是内容 本文转自 reinxu 51CTO博客,原文链接:http://blog.51cto.com/dl528888/1545032,如需转载请自行联系原作者

优秀的个人博客,低调大师

【MySQL】【高可用】基于MHA架构的MySQL高可用故障自动切换架构

基于MHA架构的MySQL高可用切换架构 环境: ​ CentOS7+MySQL 5.7 + GTID 业务系统:mainBusiness ​ node1 : 192.168.1.109 port:3109 ​ node2 : 192.168.1.110 port:3110 ​ VIP :192.168.1.88 ​ manager:192.168.1.8 1.背景: ​ 除了galera cluster(Mariadb Cluster,GroupReplication,PXC)和KeepAlived之外,业界广泛使用的MySQL高可用就是MHA架构了。 ​ MHA作者在离开DeNA加入facebook后就极少更新了这个工具了。 2.安装: ​ rpm包安装的方式最简单,但是作者在27天前增加了对从库上启用了super-read-only参数的优化,简而言之就是:当开启这个参数后,有可能会发生配置文件中的用户无法对差异事务进行应用的问题。于是增加了判断super-read-only参数是否开启的逻辑判断,若开启,则先关闭此参数,然后进行应用差异事务然后重新开启。 ​ 所以这里我们采用编译Github上最新的代码的办法进行安装。地址为: ​https://github.com/yoshinorim/mha4mysql-manager ​https://github.com/yoshinorim/mha4mysql-node 在node1和node2上: #创建工作文件夹 mkdir -p /data/mha/ #下载源码包 wget https://codeload.github.com/yoshinorim/mha4mysql-node/zip/master -O /usr/local/src/mha-node.zip wget https://codeload.github.com/yoshinorim/mha4mysql-manager/zip/master -O /usr/local/src/mha-manager.zip #解压 unzip /usr/local/src/mha-manager.zip -d /usr/local/src unzip /usr/local/src/mha-node.zip -d /usr/local/src #安装perl及其相关依赖 yum -y install perl perl-ExtUtils-MakeMaker perl-ExtUtils-CBuilder perl-Parallel-ForkManager perl-Config-Tiny yum -y install 'perl(inc::Module::Install)' yum -y install 'perl(Test::Without::Module)' yum -y install 'perl(Log::Dispatch)' #编译管理端 cd /usr/local/src/mha4mysql-manager-master/ perl Makefile.PL #提示时输入y make &&make install #编译节点端 cd /usr/local/src/mha4mysql-node-master/ perl Makefile.PL make &&make install #更改配置文件 cp /usr/ #在数据库中创建用于MHA系统工作的管理员权限账号 #node1 mysql --login-path=3109 -e 'create user mha@'192.168.1.8' identified by 'sa123456'' mysql --login-path=3109 -e 'grant all privileges on *.* to mha@'192.168.1.8'' mysql --login-path=3109 -e 'flush privilges' #node2 mysql --login-path=3110 -e 'create user mha@'192.168.1.8' identified by 'sa123456'' mysql --login-path=3110 -e 'grant all privileges on *.* to mha@'192.168.1.8'' mysql --login-path=3110 -e 'flush privilges' 在manager上 #创建工作目录 mkdir -p /data/mha/mainBusiness #下载源码包 wget https://codeload.github.com/yoshinorim/mha4mysql-node/zip/master -O /usr/local/src/mha-node.zip wget https://codeload.github.com/yoshinorim/mha4mysql-manager/zip/master -O /usr/local/src/mha-manager.zip #解压 unzip /usr/local/src/mha-manager.zip -d /usr/local/src unzip /usr/local/src/mha-node.zip -d /usr/local/src #安装perl及其相关依赖 yum -y install perl perl-ExtUtils-MakeMaker perl-ExtUtils-CBuilder perl-Parallel-ForkManager perl-Config-Tiny yum -y install 'perl(inc::Module::Install)' yum -y install 'perl(Test::Without::Module)' yum -y install 'perl(Log::Dispatch)' #编译管理端 cd /usr/local/src/mha4mysql-manager-master/ perl Makefile.PL #提示时输入y make &&make install #编译节点端 cd /usr/local/src/mha4mysql-node-master/ perl Makefile.PL make &&make install #创建配置文件 cp /usr/local/src/mha4mysql-manager-master/samples/conf/* /etc/mha mv /etc/mha/app1.cnf /etc/mha/mainBusiness.cnf 配置文件内容: manager_workdir=/data/mha/mainBusiness #设置MHA的工作目录 manager_log=/data/mha/mainBusiness/manager.log #MHA manager的日志输出 remote_workdir=/data/mha/ #预设MHA node端的工作目录 master_binlog_dir= /data/mysql/3109/log/,/data/mysql/3110/log/ #预设MHA node端的binlog目录 #secondary_check_script= masterha_secondary_check -s 192.168.1.109 -s 192.168.1.110 master_ip_failover_script= /etc/mha/master_ip_failover #故障时VIP更改 master_ip_online_change_script= /etc/mha/master_ip_online_change #在线切换时VIP更改 report_script= /etc/mha/send_report #报警脚本 ping_interval=1 #设置MHA manager的检测间隔(1秒) [server1] hostname=192.168.1.109 port=3109 ssh_user=root ssh_port=22 candidate_master=1 #设置该节点是否可以提升为主,1为是,0否 check_repl_delay=0 #发生故障后是否检查本实例主从落后程度,0否,1是 [server2] hostname=192.168.1.110 port=3110 ssh_user=root ssh_port=22 candidate_master=1 #设置该节点是否可以提升为主,1为是,0否 check_repl_delay=0 #发生故障后是否检查本实例主从落后程度,0否,1是 报警脚本修改: vim /etc/mha/send_report #!/usr/bin/perl use strict; use warnings FATAL => 'all'; use Mail::Sender; use Getopt::Long; #new_master_host and new_slave_hosts are set only when recovering master succeeded my ( $dead_master_host, $new_master_host, $new_slave_hosts, $subject, $body ); my $smtp='smtp.mxhichina.com'; my $mail_from='zabbix@xxx.com'; my $mail_user='zabbix@xxx.com'; my $mail_pass='123456'; my $mail_to=['psyduck007@outlook.com']; GetOptions( 'orig_master_host=s' => \$dead_master_host, 'new_master_host=s' => \$new_master_host, 'new_slave_hosts=s' => \$new_slave_hosts, 'subject=s' => \$subject, 'body=s' => \$body, ); # Do whatever you want here mailToContacts($smtp,$mail_from,$mail_user,$mail_pass,$mail_to,$subject,$body); sub mailToContacts { my ( $smtp, $mail_from, $user, $passwd, $mail_to, $subject, $msg ) = @_; open my $DEBUG, "> /tmp/monitormail.log" or die "Can't open the debug file:$!\n"; my $sender = new Mail::Sender { ctype => 'text/plain; charset=utf-8', encoding => 'utf-8', smtp => $smtp, from => $mail_from, auth => 'LOGIN', TLS_allowed => '0', authid => $user, authpwd => $passwd, to => $mail_to, subject => $subject, debug => $DEBUG }; $sender->MailMsg( { msg => $msg, debug => $DEBUG } ) or print $Mail::Sender::Error; return 1; } 增加定时清理relay log的脚本: cat >/etc/auto_clean_relay_log.sh<<EOF #!/bin/sh USER=proxysql PASSWORD=123456 PORT=3110 log_dir='/data/mha' work_dir='/data/mha' purge='/usr/local/bin/purge_relay_logs' if [ ! -d $log_dir ] then mkdir $log_dir -p fi $purge --user=$user --password=$passwd --disable_relay_log_purge --port=$port >> $log_dir/purge_relay_logs.log 2>&1 crontab -e 0 0 */3 * * sh /etc/auto_clean_relay_log.sh 修改故障切换VIP脚本: vim /etc/mha/master_ip_failover #!/usr/bin/env perl use strict; use warnings FATAL => 'all'; use Getopt::Long; use MHA::DBHelper; #自定义该组机器的vip my $vip = "192.168.1.100"; my $if = "eth0"; my ( $command, $ssh_user, $orig_master_host, $orig_master_ip, $orig_master_port, $new_master_host, $new_master_ip, $new_master_port, $new_master_user, $new_master_password ); GetOptions( 'command=s' => \$command, 'ssh_user=s' => \$ssh_user, 'orig_master_host=s' => \$orig_master_host, 'orig_master_ip=s' => \$orig_master_ip, 'orig_master_port=i' => \$orig_master_port, 'new_master_host=s' => \$new_master_host, 'new_master_ip=s' => \$new_master_ip, 'new_master_port=i' => \$new_master_port, 'new_master_user=s' => \$new_master_user, 'new_master_password=s' => \$new_master_password, ); sub add_vip { my $output1 = `ssh -o ConnectTimeout=15 -o ConnectionAttempts=3 $orig_master_host /sbin/ip addr del $vip/32 dev $if`; my $output2 = `ssh -o ConnectTimeout=15 -o ConnectionAttempts=3 $new_master_host /sbin/ip addr add $vip/32 dev $if`; } exit &main(); sub main { if ( $command eq "stop" || $command eq "stopssh" ) { # $orig_master_host, $orig_master_ip, $orig_master_port are passed. # If you manage master ip address at global catalog database, # invalidate orig_master_ip here. my $exit_code = 1; eval { # updating global catalog, etc $exit_code = 0; }; if ($@) { warn "Got Error: $@\n"; exit $exit_code; } exit $exit_code; } elsif ( $command eq "start" ) { # all arguments are passed. # If you manage master ip address at global catalog database, # activate new_master_ip here. # You can also grant write access (create user, set read_only=0, etc) here. my $exit_code = 10; eval { my $new_master_handler = new MHA::DBHelper(); # args: hostname, port, user, password, raise_error_or_not $new_master_handler->connect( $new_master_ip, $new_master_port, $new_master_user, $new_master_password, 1 ); ## Set read_only=0 on the new master $new_master_handler->disable_log_bin_local(); print "Set read_only=0 on the new master.\n"; $new_master_handler->disable_read_only(); ## Creating an app user on the new master #print "Creating app user on the new master..\n"; #FIXME_xxx_create_user( $new_master_handler->{dbh} ); $new_master_handler->enable_log_bin_local(); $new_master_handler->disconnect(); ## Update master ip on the catalog database, etc &add_vip(); $exit_code = 0; }; if ($@) { warn $@; # If you want to continue failover, exit 10. exit $exit_code; } exit $exit_code; } elsif ( $command eq "status" ) { # do nothing exit 0; } else { &usage(); exit 1; } } sub usage { print "Usage: master_ip_failover --command=start|stop|stopssh|status --orig_master_host=host --orig_master_ip=ip --orig_master_port=port --new_master_host=host --new_master_ip=ip --new_master_port=port\n"; } vim /etc/mha/master_ip_online_change use strict; use warnings FATAL => 'all'; use Getopt::Long; use MHA::DBHelper; use MHA::NodeUtil; use Time::HiRes qw( sleep gettimeofday tv_interval ); use Data::Dumper; my $_tstart; my $_running_interval = 0.1; #添加vip定义 my $vip = "192.168.1.100"; my $if = "eth0"; my ( $command, $orig_master_is_new_slave, $orig_master_host, $orig_master_ip, $orig_master_port, $orig_master_user, $orig_master_password, $orig_master_ssh_user, $new_master_host, $new_master_ip, $new_master_port, $new_master_user, $new_master_password, $new_master_ssh_user, ); GetOptions( 'command=s' => \$command, 'orig_master_is_new_slave' => \$orig_master_is_new_slave, 'orig_master_host=s' => \$orig_master_host, 'orig_master_ip=s' => \$orig_master_ip, 'orig_master_port=i' => \$orig_master_port, 'orig_master_user=s' => \$orig_master_user, 'orig_master_password=s' => \$orig_master_password, 'orig_master_ssh_user=s' => \$orig_master_ssh_user, 'new_master_host=s' => \$new_master_host, 'new_master_ip=s' => \$new_master_ip, 'new_master_port=i' => \$new_master_port, 'new_master_user=s' => \$new_master_user, 'new_master_password=s' => \$new_master_password, 'new_master_ssh_user=s' => \$new_master_ssh_user, ); exit &main(); sub drop_vip { my $output = `ssh -o ConnectTimeout=15 -o ConnectionAttempts=3 $orig_master_host /sbin/ip addr del $vip/32 dev $if`; #mysql里的连接全部干掉 #FIXME } sub add_vip { my $output = `ssh -o ConnectTimeout=15 -o ConnectionAttempts=3 $new_master_host /sbin/ip addr add $vip/32 dev $if`; } sub current_time_us { my ( $sec, $microsec ) = gettimeofday(); my $curdate = localtime($sec); return $curdate . " " . sprintf( "%06d", $microsec ); } sub sleep_until { my $elapsed = tv_interval($_tstart); if ( $_running_interval > $elapsed ) { sleep( $_running_interval - $elapsed ); } } sub get_threads_util { my $dbh = shift; my $my_connection_id = shift; my $running_time_threshold = shift; my $type = shift; $running_time_threshold = 0 unless ($running_time_threshold); $type = 0 unless ($type); my @threads; my $sth = $dbh->prepare("SHOW PROCESSLIST"); $sth->execute(); while ( my $ref = $sth->fetchrow_hashref() ) { my $id = $ref->{Id}; my $user = $ref->{User}; my $host = $ref->{Host}; my $command = $ref->{Command}; my $state = $ref->{State}; my $query_time = $ref->{Time}; my $info = $ref->{Info}; $info =~ s/^\s*(.*?)\s*$/$1/ if defined($info); next if ( $my_connection_id == $id ); next if ( defined($query_time) && $query_time < $running_time_threshold ); next if ( defined($command) && $command eq "Binlog Dump" ); next if ( defined($user) && $user eq "system user" ); next if ( defined($command) && $command eq "Sleep" && defined($query_time) && $query_time >= 1 ); if ( $type >= 1 ) { next if ( defined($command) && $command eq "Sleep" ); next if ( defined($command) && $command eq "Connect" ); } if ( $type >= 2 ) { next if ( defined($info) && $info =~ m/^select/i ); next if ( defined($info) && $info =~ m/^show/i ); } push @threads, $ref; } return @threads; } sub main { if ( $command eq "stop" ) { ## Gracefully killing connections on the current master # 1. Set read_only= 1 on the new master # 2. DROP USER so that no app user can establish new connections # 3. Set read_only= 1 on the current master # 4. Kill current queries # * Any database access failure will result in script die. my $exit_code = 1; eval { ## Setting read_only=1 on the new master (to avoid accident) my $new_master_handler = new MHA::DBHelper(); # args: hostname, port, user, password, raise_error(die_on_error)_or_not $new_master_handler->connect( $new_master_ip, $new_master_port, $new_master_user, $new_master_password, 1 ); print current_time_us() . " Set read_only on the new master.. "; $new_master_handler->enable_read_only(); if ( $new_master_handler->is_read_only() ) { print "ok.\n"; } else { die "Failed!\n"; } $new_master_handler->disconnect(); # Connecting to the orig master, die if any database error happens my $orig_master_handler = new MHA::DBHelper(); $orig_master_handler->connect( $orig_master_ip, $orig_master_port, $orig_master_user, $orig_master_password, 1 ); ## Drop application user so that nobody can connect. Disabling per-session binlog beforehand $orig_master_handler->disable_log_bin_local(); # print current_time_us() . " Drpping app user on the orig master..\n"; print current_time_us() . " drop vip $vip..\n"; #drop_app_user($orig_master_handler); &drop_vip(); ## Waiting for N * 100 milliseconds so that current connections can exit my $time_until_read_only = 15; $_tstart = [gettimeofday]; my @threads = get_threads_util( $orig_master_handler->{dbh}, $orig_master_handler->{connection_id} ); while ( $time_until_read_only > 0 && $#threads >= 0 ) { if ( $time_until_read_only % 5 == 0 ) { printf "%s Waiting all running %d threads are disconnected.. (max %d milliseconds)\n", current_time_us(), $#threads + 1, $time_until_read_only * 100; if ( $#threads < 5 ) { print Data::Dumper->new( [$_] )->Indent(0)->Terse(1)->Dump . "\n" foreach (@threads); } } sleep_until(); $_tstart = [gettimeofday]; $time_until_read_only--; @threads = get_threads_util( $orig_master_handler->{dbh}, $orig_master_handler->{connection_id} ); } ## Setting read_only=1 on the current master so that nobody(except SUPER) can write print current_time_us() . " Set read_only=1 on the orig master.. "; $orig_master_handler->enable_read_only(); if ( $orig_master_handler->is_read_only() ) { print "ok.\n"; } else { die "Failed!\n"; } ## Waiting for M * 100 milliseconds so that current update queries can complete my $time_until_kill_threads = 5; @threads = get_threads_util( $orig_master_handler->{dbh}, $orig_master_handler->{connection_id} ); while ( $time_until_kill_threads > 0 && $#threads >= 0 ) { if ( $time_until_kill_threads % 5 == 0 ) { printf "%s Waiting all running %d queries are disconnected.. (max %d milliseconds)\n", current_time_us(), $#threads + 1, $time_until_kill_threads * 100; if ( $#threads < 5 ) { print Data::Dumper->new( [$_] )->Indent(0)->Terse(1)->Dump . "\n" foreach (@threads); } } sleep_until(); $_tstart = [gettimeofday]; $time_until_kill_threads--; @threads = get_threads_util( $orig_master_handler->{dbh}, $orig_master_handler->{connection_id} ); } ## Terminating all threads print current_time_us() . " Killing all application threads..\n"; $orig_master_handler->kill_threads(@threads) if ( $#threads >= 0 ); print current_time_us() . " done.\n"; $orig_master_handler->enable_log_bin_local(); $orig_master_handler->disconnect(); ## After finishing the script, MHA executes FLUSH TABLES WITH READ LOCK $exit_code = 0; }; if ($@) { warn "Got Error: $@\n"; exit $exit_code; } exit $exit_code; } elsif ( $command eq "start" ) { ## Activating master ip on the new master # 1. Create app user with write privileges # 2. Moving backup script if needed # 3. Register new master's ip to the catalog database # We don't return error even though activating updatable accounts/ip failed so that we don't interrupt slaves' recovery. # If exit code is 0 or 10, MHA does not abort my $exit_code = 10; eval { my $new_master_handler = new MHA::DBHelper(); # args: hostname, port, user, password, raise_error_or_not $new_master_handler->connect( $new_master_ip, $new_master_port, $new_master_user, $new_master_password, 1 ); ## Set read_only=0 on the new master $new_master_handler->disable_log_bin_local(); print current_time_us() . " Set read_only=0 on the new master.\n"; $new_master_handler->disable_read_only(); ## Creating an app user on the new master #print current_time_us() . " Creating app user on the new master..\n"; print current_time_us() . "Add vip $vip on $if..\n"; # create_app_user($new_master_handler); &add_vip(); $new_master_handler->enable_log_bin_local(); $new_master_handler->disconnect(); ## Update master ip on the catalog database, etc $exit_code = 0; }; if ($@) { warn "Got Error: $@\n"; exit $exit_code; } exit $exit_code; } elsif ( $command eq "status" ) { # do nothing exit 0; } else { &usage(); exit 1; } } sub usage { print "Usage: master_ip_online_change --command=start|stop|status --orig_master_host=host --orig_master_ip=ip --orig_master_port=port --new_master_host=host --new_master_ip=ip --new_master_port=port\n"; die; } ​ 至此:安装与配置已经完全结束,开始进入运行环节 运行: masterha_manager --conf=/etc/mha/mainBusiness.cnf & ​ 检查masterha_manager运行情况: masterha_check_status --conf=/etc/mha/mainBusiness.cnf 故障转移: ​ 我们将主库关机,进行观测整个故障转移的过程 [g:\~]$ Connecting to 192.168.1.110:22... Could not connect to '192.168.1.110' (port 22): Connection failed. Type `help' to learn how to use Xshell prompt. ​ manager端输出如下: Sun Feb 4 12:26:46 2018 - [info] Starting ping health check on 192.168.1.110(192.168.1.110:3110).. Sun Feb 4 12:26:46 2018 - [info] Ping(SELECT) succeeded, waiting until MySQL doesn't respond.. Sun Feb 4 12:30:41 2018 - [warning] Got error on MySQL select ping: 2006 (MySQL server has gone away) Sun Feb 4 12:30:41 2018 - [info] Executing SSH check script: exit 0 Sun Feb 4 12:30:41 2018 - [warning] HealthCheck: SSH to 192.168.1.110 is NOT reachable. Sun Feb 4 12:30:43 2018 - [warning] Got error on MySQL connect: 2003 (Can't connect to MySQL server on '192.168.1.110' (4)) Sun Feb 4 12:30:43 2018 - [warning] Connection failed 2 time(s).. Sun Feb 4 12:30:44 2018 - [warning] Got error on MySQL connect: 2003 (Can't connect to MySQL server on '192.168.1.110' (4)) Sun Feb 4 12:30:44 2018 - [warning] Connection failed 3 time(s).. Sun Feb 4 12:30:45 2018 - [warning] Got error on MySQL connect: 2003 (Can't connect to MySQL server on '192.168.1.110' (4)) Sun Feb 4 12:30:45 2018 - [warning] Connection failed 4 time(s).. Sun Feb 4 12:30:45 2018 - [warning] Master is not reachable from health checker! Sun Feb 4 12:30:45 2018 - [warning] Master 192.168.1.110(192.168.1.110:3110) is not reachable! Sun Feb 4 12:30:45 2018 - [warning] SSH is NOT reachable. Sun Feb 4 12:30:45 2018 - [info] Connecting to a master server failed. Reading configuration file /etc/masterha_default.cnf and /etc/mha/mainBusiness.cnf again, and trying to connect to all servers to check server status.. Sun Feb 4 12:30:45 2018 - [warning] Global configuration file /etc/masterha_default.cnf not found. Skipping. Sun Feb 4 12:30:45 2018 - [info] Reading application default configuration from /etc/mha/mainBusiness.cnf.. Sun Feb 4 12:30:45 2018 - [info] Reading server configuration from /etc/mha/mainBusiness.cnf.. Sun Feb 4 12:30:46 2018 - [info] GTID failover mode = 1 Sun Feb 4 12:30:46 2018 - [info] Dead Servers: Sun Feb 4 12:30:46 2018 - [info] 192.168.1.110(192.168.1.110:3110) Sun Feb 4 12:30:46 2018 - [info] Alive Servers: Sun Feb 4 12:30:46 2018 - [info] 192.168.1.109(192.168.1.109:3109) Sun Feb 4 12:30:46 2018 - [info] Alive Slaves: Sun Feb 4 12:30:46 2018 - [info] 192.168.1.109(192.168.1.109:3109) Version=5.7.19-log (oldest major version between slaves) log-bin:enabled Sun Feb 4 12:30:46 2018 - [info] GTID ON Sun Feb 4 12:30:46 2018 - [info] Replicating from 192.168.1.110(192.168.1.110:3110) Sun Feb 4 12:30:46 2018 - [info] Primary candidate for the new Master (candidate_master is set) Sun Feb 4 12:30:46 2018 - [info] Checking slave configurations.. Sun Feb 4 12:30:46 2018 - [info] Checking replication filtering settings.. Sun Feb 4 12:30:46 2018 - [info] Replication filtering check ok. Sun Feb 4 12:30:46 2018 - [info] Master is down! Sun Feb 4 12:30:46 2018 - [info] Terminating monitoring script. Sun Feb 4 12:30:46 2018 - [info] Got exit code 20 (Master dead). Sun Feb 4 12:30:46 2018 - [info] MHA::MasterFailover version 0.57. Sun Feb 4 12:30:46 2018 - [info] Starting master failover. Sun Feb 4 12:30:46 2018 - [info] Sun Feb 4 12:30:46 2018 - [info] * Phase 1: Configuration Check Phase.. Sun Feb 4 12:30:46 2018 - [info] Sun Feb 4 12:30:47 2018 - [info] GTID failover mode = 1 Sun Feb 4 12:30:47 2018 - [info] Dead Servers: Sun Feb 4 12:30:47 2018 - [info] 192.168.1.110(192.168.1.110:3110) Sun Feb 4 12:30:47 2018 - [info] Checking master reachability via MySQL(double check)... Sun Feb 4 12:30:48 2018 - [info] ok. Sun Feb 4 12:30:48 2018 - [info] Alive Servers: Sun Feb 4 12:30:48 2018 - [info] 192.168.1.109(192.168.1.109:3109) Sun Feb 4 12:30:48 2018 - [info] Alive Slaves: Sun Feb 4 12:30:48 2018 - [info] 192.168.1.109(192.168.1.109:3109) Version=5.7.19-log (oldest major version between slaves) log-bin:enabled Sun Feb 4 12:30:48 2018 - [info] GTID ON Sun Feb 4 12:30:48 2018 - [info] Replicating from 192.168.1.110(192.168.1.110:3110) Sun Feb 4 12:30:48 2018 - [info] Primary candidate for the new Master (candidate_master is set) Sun Feb 4 12:30:48 2018 - [info] Starting GTID based failover. Sun Feb 4 12:30:48 2018 - [info] Sun Feb 4 12:30:48 2018 - [info] ** Phase 1: Configuration Check Phase completed. Sun Feb 4 12:30:48 2018 - [info] Sun Feb 4 12:30:48 2018 - [info] * Phase 2: Dead Master Shutdown Phase.. Sun Feb 4 12:30:48 2018 - [info] Sun Feb 4 12:30:48 2018 - [info] Forcing shutdown so that applications never connect to the current master.. Sun Feb 4 12:30:48 2018 - [info] Executing master IP deactivation script: Sun Feb 4 12:30:48 2018 - [info] /etc/mha/master_ip_failover --orig_master_host=192.168.1.110 --orig_master_ip=192.168.1.110 --orig_master_port=3110 --command=stop Sun Feb 4 12:30:48 2018 - [info] done. Sun Feb 4 12:30:48 2018 - [warning] shutdown_script is not set. Skipping explicit shutting down of the dead master. Sun Feb 4 12:30:48 2018 - [info] * Phase 2: Dead Master Shutdown Phase completed. Sun Feb 4 12:30:48 2018 - [info] Sun Feb 4 12:30:48 2018 - [info] * Phase 3: Master Recovery Phase.. Sun Feb 4 12:30:48 2018 - [info] Sun Feb 4 12:30:48 2018 - [info] * Phase 3.1: Getting Latest Slaves Phase.. Sun Feb 4 12:30:48 2018 - [info] Sun Feb 4 12:30:48 2018 - [info] The latest binary log file/position on all slaves is 3110binlog.000073:234 Sun Feb 4 12:30:48 2018 - [info] Latest slaves (Slaves that received relay log files to the latest): Sun Feb 4 12:30:48 2018 - [info] 192.168.1.109(192.168.1.109:3109) Version=5.7.19-log (oldest major version between slaves) log-bin:enabled Sun Feb 4 12:30:48 2018 - [info] GTID ON Sun Feb 4 12:30:48 2018 - [info] Replicating from 192.168.1.110(192.168.1.110:3110) Sun Feb 4 12:30:48 2018 - [info] Primary candidate for the new Master (candidate_master is set) Sun Feb 4 12:30:48 2018 - [info] The oldest binary log file/position on all slaves is 3110binlog.000073:234 Sun Feb 4 12:30:48 2018 - [info] Oldest slaves: Sun Feb 4 12:30:48 2018 - [info] 192.168.1.109(192.168.1.109:3109) Version=5.7.19-log (oldest major version between slaves) log-bin:enabled Sun Feb 4 12:30:48 2018 - [info] GTID ON Sun Feb 4 12:30:48 2018 - [info] Replicating from 192.168.1.110(192.168.1.110:3110) Sun Feb 4 12:30:48 2018 - [info] Primary candidate for the new Master (candidate_master is set) Sun Feb 4 12:30:48 2018 - [info] Sun Feb 4 12:30:48 2018 - [info] * Phase 3.3: Determining New Master Phase.. Sun Feb 4 12:30:48 2018 - [info] Sun Feb 4 12:30:48 2018 - [info] Searching new master from slaves.. Sun Feb 4 12:30:48 2018 - [info] Candidate masters from the configuration file: Sun Feb 4 12:30:48 2018 - [info] 192.168.1.109(192.168.1.109:3109) Version=5.7.19-log (oldest major version between slaves) log-bin:enabled Sun Feb 4 12:30:48 2018 - [info] GTID ON Sun Feb 4 12:30:48 2018 - [info] Replicating from 192.168.1.110(192.168.1.110:3110) Sun Feb 4 12:30:48 2018 - [info] Primary candidate for the new Master (candidate_master is set) Sun Feb 4 12:30:48 2018 - [info] Non-candidate masters: Sun Feb 4 12:30:48 2018 - [info] Searching from candidate_master slaves which have received the latest relay log events.. Sun Feb 4 12:30:48 2018 - [info] New master is 192.168.1.109(192.168.1.109:3109) Sun Feb 4 12:30:48 2018 - [info] Starting master failover.. Sun Feb 4 12:30:48 2018 - [info] From: 192.168.1.110(192.168.1.110:3110) (current master) +--192.168.1.109(192.168.1.109:3109) To: 192.168.1.109(192.168.1.109:3109) (new master) Sun Feb 4 12:30:48 2018 - [info] Sun Feb 4 12:30:48 2018 - [info] * Phase 3.3: New Master Recovery Phase.. Sun Feb 4 12:30:48 2018 - [info] Sun Feb 4 12:30:48 2018 - [info] Waiting all logs to be applied.. Sun Feb 4 12:30:48 2018 - [info] done. Sun Feb 4 12:30:48 2018 - [info] Getting new master's binlog name and position.. Sun Feb 4 12:30:48 2018 - [info] 3109binlog.000089:234 Sun Feb 4 12:30:48 2018 - [info] All other slaves should start replication from here. Statement should be: CHANGE MASTER TO MASTER_HOST='192.168.1.109', MASTER_PORT=3109, MASTER_AUTO_POSITION=1, MASTER_USER='repl', MASTER_PASSWORD='xxx'; Sun Feb 4 12:30:48 2018 - [info] Master Recovery succeeded. File:Pos:Exec_Gtid_Set: 3109binlog.000089, 234, 2285de8a-9bc2-11e7-8a15-000c298e9a6f:1-14, 28ea40ab-9bbd-11e7-8cd1-000c29c31069:1-15308048 Sun Feb 4 12:30:48 2018 - [info] Executing master IP activate script: Sun Feb 4 12:30:48 2018 - [info] /etc/mha/master_ip_failover --command=start --ssh_user=root --orig_master_host=192.168.1.110 --orig_master_ip=192.168.1.110 --orig_master_port=3110 --new_master_host=192.168.1.109 --new_master_ip=192.168.1.109 --new_master_port=3109 --new_master_user='mha' --new_master_password=xxx Set read_only=0 on the new master. ssh: connect to host 192.168.1.110 port 22: Connection timed out Sun Feb 4 12:31:35 2018 - [info] OK. Sun Feb 4 12:31:35 2018 - [info] ** Finished master recovery successfully. Sun Feb 4 12:31:35 2018 - [info] * Phase 3: Master Recovery Phase completed. Sun Feb 4 12:31:35 2018 - [info] Sun Feb 4 12:31:35 2018 - [info] * Phase 4: Slaves Recovery Phase.. Sun Feb 4 12:31:35 2018 - [info] Sun Feb 4 12:31:35 2018 - [info] Sun Feb 4 12:31:35 2018 - [info] * Phase 4.1: Starting Slaves in parallel.. Sun Feb 4 12:31:35 2018 - [info] Sun Feb 4 12:31:35 2018 - [info] All new slave servers recovered successfully. Sun Feb 4 12:31:35 2018 - [info] Sun Feb 4 12:31:35 2018 - [info] * Phase 5: New master cleanup phase.. Sun Feb 4 12:31:35 2018 - [info] Sun Feb 4 12:31:35 2018 - [info] Resetting slave info on the new master.. Sun Feb 4 12:31:35 2018 - [info] 192.168.1.109: Resetting slave info succeeded. Sun Feb 4 12:31:35 2018 - [info] Master failover to 192.168.1.109(192.168.1.109:3109) completed successfully. Sun Feb 4 12:31:35 2018 - [info] ----- Failover Report ----- mainBusiness: MySQL Master failover 192.168.1.110(192.168.1.110:3110) to 192.168.1.109(192.168.1.109:3109) succeeded Master 192.168.1.110(192.168.1.110:3110) is down! Check MHA Manager logs at Client-Cent7-IP008:/data/mha/mainBusiness/manager.log for details. Started automated(non-interactive) failover. Invalidated master IP address on 192.168.1.110(192.168.1.110:3110) Selected 192.168.1.109(192.168.1.109:3109) as a new master. 192.168.1.109(192.168.1.109:3109): OK: Applying all logs succeeded. 192.168.1.109(192.168.1.109:3109): OK: Activated master IP address. 192.168.1.109(192.168.1.109:3109): Resetting slave info succeeded. Master failover to 192.168.1.109(192.168.1.109:3109) completed successfully. Sun Feb 4 12:31:35 2018 - [info] Sending mail.. Option new_slave_hosts requires an argument #双节点,没有多余的从节点,所以会报错,下面也是。 Unknown option: conf 故障切换解析: ​ 1.每秒检查MySQL,连续4次无法连上MySQL服务后,进入SSH检查阶段,SSH也不通后,确认实例故障。由于故障实例为主库,触发切换主库的操作。 ​ 2.再次读取配置文件信息,获取所有注册的实例,及其切换偏好。关闭manager节点,启用切换脚本进行切换操作。切换操作的逻辑与之前的【MySQL】【高可用】purge_relay_logs工具的使用文章中分析的相近。 ​ 3.切换主库成功后,输出切换报告,同时在/data/mha中生成 mainBusiness.failover.complete文件。接着在新的主库上进行虚拟IP的挂载,发送故障报告邮件。 附: ​ 两篇前言文章:【MySQL】【高可用】purge_relay_logs工具的使用【MySQL】【高可用】从masterha_master_switch工具简单分析MHA的切换逻辑 ​ 1.千万要注意定时清理relay log。我在搭建完之后,直接进行了压测数据的写入,大量relay log用尽了所有的硬盘空间。这时从库MySQL服务假死,mha所有的脚本也都会因为得不到从库的回应也同样卡住。 ​ 2.另一种简单的send_report的脚本: vim /etc/mha/mha_error.sh #!/bin/sh SYSTEM=$1 echo $1 'mha error,please check it immediately!'|mail -s 'mha error' psyduck007@outlook.com ​ 邮件系统安装脚本: printf "安装mail相关软件和服务" yum -y install sendmail* > /dev/null 2>&1 yum -y install mailx > /dev/null 2>&1 printf "\033[32;1m%20s\033[0m\n" "[ OK ]" printf "创建邮件发送配置" cat > /etc/mail.rc<<EOF set from=zabbix@xxx.com set smtp=smtp.xxxx.com set smtp-auth-user=zabbix@xxx.com set smtp-auth-password=123456 set smtp-auth=login EOF printf "\033[32;1m%20s\033[0m\n" "[ OK ]" printf "设置邮件服务自启动" systemctl enable sendmail > /dev/null 2>&1 printf "\033[32;1m%20s\033[0m\n" "[ OK ]" printf "启动邮件服务" systemctl restart sendmail > /dev/null 2>&1 printf "\033[32;1m%20s\033[0m\n" "[ OK ]" printf "发送测试邮件" hostname |mail -s "test" psyduck007@outlook.com printf "\033[32;1m%20s\033[0m\n" "[ OK ]" ​ 调用方式: /etc/mha/mah_error.sh mainBusiness 本文转自 angry_frog 51CTO博客,原文链接:http://blog.51cto.com/l0vesql/2068659

优秀的个人博客,低调大师

关于项目自动化测试架构的改良计划 - 去除动作指令

因为我们在test_suite.xml中定义了多个动作指令,比如<add_elements>,<update_elements>等,他们指示让我们Engine来对最终数据进行操作,这些动作指令不是数据,因此,他们并不包含在我们最终的数据结果集中,所以我们必须对他们进行移除。所以我们用以下代码来进行移除工作: 1 2 3 4 5 6 7 8 9 10 11 12 13 14 15 16 17 18 19 20 21 22 23 24 25 26 27 28 29 30 31 32 public class XMLManipulator { public static String removeModifyConfFromXML(String xmlString) throws Exception{ Document doc = null ; doc = DocumentHelper.parseText(xmlString); //remove the <add_elements> from the target xml List<Node> addPart = doc.selectNodes( "/test_suite/test_case/add_elements" ); for (Node node: addPart){ node.getParent().remove(node); } //remove the <add_elements> from the target xml List<Node> updatePart = doc.selectNodes( "/test_suite/test_case/update_elements" ); for (Node node: updatePart){ node.getParent().remove(node); } //remove the <remove_elements> from the target xml List<Node> removePart = doc.selectNodes( "/test_suite/test_case/remove_elements" ); for (Node node: removePart){ node.getParent().remove(node); } //find document again return doc.asXML(); } .. } 这样最终的xml文件就不包含这些动作指令的代码片段了。 本文转自 charles_wang888 51CTO博客,原文链接:http://blog.51cto.com/supercharles888/1221739,如需转载请自行联系原作者

资源下载

更多资源
Mario

Mario

马里奥是站在游戏界顶峰的超人气多面角色。马里奥靠吃蘑菇成长,特征是大鼻子、头戴帽子、身穿背带裤,还留着胡子。与他的双胞胎兄弟路易基一起,长年担任任天堂的招牌角色。

腾讯云软件源

腾讯云软件源

为解决软件依赖安装时官方源访问速度慢的问题,腾讯云为一些软件搭建了缓存服务。您可以通过使用腾讯云软件源站来提升依赖包的安装速度。为了方便用户自由搭建服务架构,目前腾讯云软件源站支持公网访问和内网访问。

Nacos

Nacos

Nacos /nɑ:kəʊs/ 是 Dynamic Naming and Configuration Service 的首字母简称,一个易于构建 AI Agent 应用的动态服务发现、配置管理和AI智能体管理平台。Nacos 致力于帮助您发现、配置和管理微服务及AI智能体应用。Nacos 提供了一组简单易用的特性集,帮助您快速实现动态服务发现、服务配置、服务元数据、流量管理。Nacos 帮助您更敏捷和容易地构建、交付和管理微服务平台。

Rocky Linux

Rocky Linux

Rocky Linux(中文名:洛基)是由Gregory Kurtzer于2020年12月发起的企业级Linux发行版,作为CentOS稳定版停止维护后与RHEL(Red Hat Enterprise Linux)完全兼容的开源替代方案,由社区拥有并管理,支持x86_64、aarch64等架构。其通过重新编译RHEL源代码提供长期稳定性,采用模块化包装和SELinux安全架构,默认包含GNOME桌面环境及XFS文件系统,支持十年生命周期更新。

用户登录
用户注册