首页 文章 精选 留言 我的

精选列表

搜索[网站开发],共10000篇文章
优秀的个人博客,低调大师

iOS开发-数据存储NSCoder

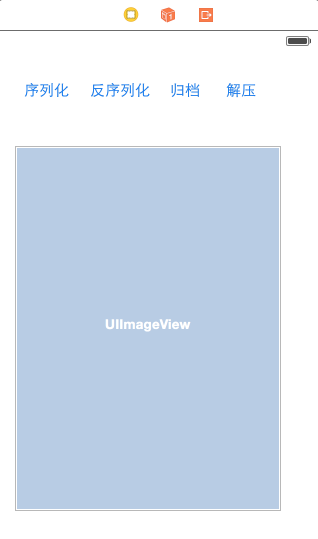
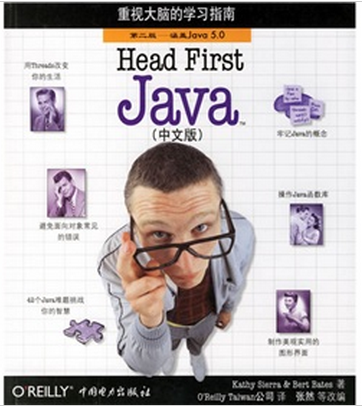
软件中永远绕不开的一个问题就是数据存储的问题,PC的时候一般都是选择在数据库中存储,iOS如果是和后端配合的话,那么不需要考虑数据存储的这个问题,上次写了一下plist的存储,不过数据都是存储一些简单的键值对对象。本次需要将一些自己定义的类型存储在plist比如说图片,这个时候可以利用NSCoding协议,将数据地以类似档案的形式存储到plist文件中,然后从plist的文件中读取数据,使用协议的时候这个时候就会用到了NSCoder,如果对存档和解压没有概念的话,可以简单的理解为数据的序列化与反序列化。 基础概念 NSCoding是一个protocol. 如果实现了NSCoding,需要实现其中的两个方法: 1 2 - ( void )encodeWithCoder:( NSCoder *)aCoder; - ( id )initWithCoder:( NSCoder *)aDecoder; // NS_DESIGNATED_INITIALIZER 方法中的主要的参数就是NSCoder,它是archivie字节流的抽象类.可以将数据写入一个coder,也可以从coder中读取我们写入的数据.NSCoder是一个抽象类,不能直接使用它来创建对象. 但是可以通过其子类NSKeyedUnarchiver从字节流中读取数据,NSKeyedArchiver将对象写入到字节流。本文以书籍为例: 新建一个Book类,Book.h中的代码: 1 2 3 4 5 6 7 8 9 10 11 12 13 14 #import <Foundation/Foundation.h> #import <UIKit/UIKit.h> @interface Book : NSObject < NSCoding > @property (strong, nonatomic ) UIImage *ConverPicture; @property (strong, nonatomic ) NSString *BookName; @property (strong, nonatomic ) NSString *Author; @property (strong, nonatomic ) NSNumber *Price; @end Book.m中实现NSCoding的两个方法,注意中UIImage的写法与其他有所不同: 1 2 3 4 5 6 7 8 9 10 11 12 13 14 15 16 17 18 19 20 21 22 @implementation Book - ( void )encodeWithCoder:( NSCoder *)aCoder{ //注意这里是存储的是JPG图片的调用 [aCoder encodeObject:UIImageJPEGRepresentation( self .ConverPicture,1.0)forKey:@ "ConverPicture" ]; [aCoder encodeObject:_BookName forKey:@ "BookName" ]; [aCoder encodeObject:_Author forKey:@ "Author" ]; [aCoder encodeObject:_Price forKey:@ "Price" ]; } - ( id )initWithCoder:( NSCoder *)aDecoder{ self .ConverPicture=[UIImage imageWithData:[aDecoder decodeObjectForKey:@ "ConverPicture" ]]; self .BookName=[aDecoder decodeObjectForKey:@ "BookName" ]; self .Author=[aDecoder decodeObjectForKey:@ "Author" ]; self .Price=[aDecoder decodeObjectForKey:@ "Price" ]; return self ; } @end Demo实现 正常的情况的不需要新建页面的,不过需要演示一下UIImage的效果,Main.storyboard中的布局: 稍微解释一下,前两个是存的单文件,后两个存的是多文件,UIImage展示存储的图片: ViewController定义字段: 1 2 3 4 5 @property (strong, nonatomic ) NSString *storagePath; @property (strong, nonatomic ) NSString *storageListPath; @property (strong, nonatomic ) NSMutableArray *bookList; 设置路径,如果不是很清晰,可参考本文之前的博客: 1 2 3 4 NSArray *codepath= NSSearchPathForDirectoriesInDomains ( NSDocumentDirectory , NSUserDomainMask , YES ); _storagePath = [codepath[0] stringByAppendingPathComponent:@ "book.plist" ]; NSLog (@ "%@" , NSHomeDirectory ()); _storageListPath = [codepath[0] stringByAppendingPathComponent:@ "booklist.plist" ]; 单个存档: 1 2 3 4 5 6 7 8 9 Book *book=[[Book alloc]init]; UIImage *image=[UIImage imageNamed:@ "Code1.jpg" ]; book.ConverPicture=image; book.BookName=@ "百年孤独" ; book.Author=@ "加西亚.马尔克斯" ; book.Price=[[ NSNumber alloc] initWithInteger:45]; if ([ NSKeyedArchiver archiveRootObject:book toFile:_storagePath]) { NSLog (@ "数据存档成功" ); } 单个解压: 1 2 3 4 5 Book *decodeBook=[ NSKeyedUnarchiver unarchiveObjectWithFile:_storagePath]; self .myImageView.image=decodeBook.ConverPicture; NSLog (@ "%@" ,decodeBook.ConverPicture); NSLog (@ "%@" ,decodeBook.BookName); NSLog (@ "解档成功" ); 多个存档: 1 2 3 4 5 6 7 8 9 10 11 12 13 14 15 self .bookList=[ NSMutableArray array]; for ( NSInteger i=1; i<3; i++) { Book *book=[[Book alloc]init]; NSString *imageName=[ NSString stringWithFormat:@ "Code%ld.jpg" ,( long )i]; UIImage *image=[UIImage imageNamed:imageName]; book.ConverPicture=image; book.BookName=[ NSString stringWithFormat:@ "百年孤独%ld" ,( long )i]; book.Author=[ NSString stringWithFormat:@ "加西亚.马尔克斯%ld" ,( long )i]; book.Price=[[ NSNumber alloc] initWithInteger:45]; [ self .bookList addObject:book]; } if ([ NSKeyedArchiver archiveRootObject: self .bookList toFile:_storageListPath]) { NSLog (@ "数据存档成功" ); } 多个解档: 1 2 3 4 self .bookList=[ NSKeyedUnarchiver unarchiveObjectWithFile:_storageListPath]; Book *nextBook= self .bookList[1]; self .myImageView.image=nextBook.ConverPicture; NSLog (@ "解档成功" ); 通过代码基本上发现其实存档和解压是非常简单的一个事情,不过事实这种方式缺点还是很明显的,以这种方式保存数据只能一次性归档保存以及一次性解压。数据较少的时候如果使用感觉比较方便,数据量过多的时候如果想修改其中的某一条,解压整个数据然后归档整个数据还是比较耗时的。最终演示效果如下: 本文转自Fly_Elephant博客园博客,原文链接:http://www.cnblogs.com/xiaofeixiang/p/4266156.html,如需转载请自行联系原作者

优秀的个人博客,低调大师

iOS开发-ScrollView图片缩放

智能手机一般常用常用的操作触摸,滑动,缩放,感觉对于生活而言就是手机在手,天下我有,看网页的时候字体太小,缩放一下,看美女的看的不爽,缩放一下,地图看的不清,缩放一下。缩放是一个很常见的操作,不论是从生活还是写程序而言,都是一个绕不开的东西,做了一个Demo,缩放一下美女,熟悉ScrollView中的常见属性的设置,开始正题吧。 常见属性 先看图,要实现的效果: 1 2 3 4 5 6 7 UIImage *image=[UIImage imageNamed:@ "girl0.jpg" ]; _imageView=[[UIImageView alloc] initWithImage:image]; [_scrollView addSubview:_imageView]; //设置ScrollView和image是一样的大小 [_scrollView setContentSize:image.size]; 可以设置ScrollView的初始位置和大小: 1 2 //CGRect枚举一个矩形,然后设置imageView的位置 [_imageView setFrame:CGRectMake(0, 0, 100, 100)]; 设置边界区域: 1 2 //设置边界区域 [_scrollView setContentInset:UIEdgeInsetsMake(20, 20.0, 20.0, 20.0)]; 上下左右移动调用哪个同意IBAction,通过Tag区分(之前文章有介绍),移动就是控制坐标,IOS中左上角是0,X轴向右自增,Y轴向下自增: 1 2 3 4 5 6 7 8 9 10 11 12 13 14 15 16 17 18 19 20 21 22 23 24 25 26 27 28 29 30 31 32 33 34 35 UIButton *button=(UIButton *)sender; CGPoint currentPoint= self .scrollView.contentOffset; switch (button.tag) { case 0: currentPoint.y-=50; break ; case 1: currentPoint.y+=50; break ; case 2: currentPoint.x-=50; break ; case 3: currentPoint.x+=50; break ; default : break ; } //横轴的边界值 if (currentPoint.x<0) { currentPoint.x=0; } else if (currentPoint.x>_scrollView.contentSize.width-_scrollView.bounds.size.width){ currentPoint.x=_scrollView.contentSize.width-_scrollView.bounds.size.width; } //纵轴的边界值 if (currentPoint.y<0) { currentPoint.y=0; } else if (currentPoint.y>_scrollView.contentSize.height-_scrollView.bounds.size.height){ currentPoint.y=_scrollView.contentSize.height-_scrollView.bounds.size.height; } //动画效果 [ self .scrollView setContentOffset:currentPoint animated: YES ]; 动画效果可以通过block设置: 1 2 3 4 [UIView animateWithDuration:0.3f animations: ^{ [ self .scrollView setContentOffset:currentPoint]; }]; 缩放 缩放之前需要涉及到一个东西就是控制器需要遵守UIScrollViewDelegate协议,然后实现协议中方法,应用场景中如果我们在对ScrollView中图片进行缩放,将消息通知给UIScrollViewDelegate,最终将事件实现委托给是实现方法: 1 2 3 4 5 6 7 8 9 10 11 12 13 14 15 // // ViewController.h // ScrollView // http://www.cnblogs.com/xiaofeixiang // Created by keso on 15/1/20. // Copyright (c) 2015年 keso. All rights reserved. // #import <UIKit/UIKit.h> @interface ViewController : UIViewController <UIScrollViewDelegate> @property (weak, nonatomic ) IBOutlet UIScrollView *scrollView; @end 设置一下最大和最小缩放比例,设置委托: 1 2 3 [_scrollView setMinimumZoomScale:0.3]; [_scrollView setMaximumZoomScale:1.8]; [_scrollView setDelegate: self ]; 实现一个返回的图像,如果不是实现,没有效果: 1 2 3 4 //缩放过程中的图像 - (UIView *)viewForZoomingInScrollView:(UIScrollView *)scrollView{ return _imageView; } 有的时候如果可能有业务需要会需要一个缩放结束的方法: 1 2 3 4 ////缩放结束 - ( void )scrollViewDidEndZooming:(UIScrollView *)scrollView withView:(UIView *)view atScale:(CGFloat)scale{ NSLog (@ "缩放比例:%f" ,scale); } 还有一个不常用的,缩放中的方法: 1 2 3 4 //缩放中 - ( void )scrollViewDidZoom:(UIScrollView *)scrollView{ NSLog (@ "缩放中的调用~" ); } 最终效果: 本文转自Fly_Elephant博客园博客,原文链接:http://www.cnblogs.com/xiaofeixiang/p/4240324.html,如需转载请自行联系原作者

优秀的个人博客,低调大师

开发遇到的奇葩问题

<?xml version="1.0" encoding="utf-8"?> <LinearLayout xmlns:android="http://schemas.android.com/apk/res/android" xmlns:app="http://schemas.android.com/apk/res-auto" android:layout_width="match_parent" android:layout_height="match_parent" android:orientation="vertical"> <LinearLayout android:layout_width="match_parent" android:layout_height="match_parent" android:orientation="vertical"> <!--商品质检--> <LinearLayout android:id="@+id/commodity_quality_testing2_lv" android:layout_width="match_parent" android:layout_height="wrap_content" android:layout_marginTop="@dimen/margin9" android:background="@color/white" android:gravity="center" android:orientation="vertical" android:paddingLeft="@dimen/margin10" android:paddingRight="@dimen/margin10"> <RelativeLayout android:layout_width="match_parent" android:layout_height="@dimen/userlineheight" android:background="@color/white" > <ImageView android:id="@+id/commodity_quality_testing2_img" android:layout_width="@dimen/commodity_quality_testing_img_width" android:layout_height="@dimen/commodity_quality_testing_img_width" android:layout_centerVertical="true" android:layout_marginRight="@dimen/margin5" android:background="@drawable/commodity_quality_testing_img" /> <TextView style="@style/user_txt_style" android:layout_centerVertical="true" android:layout_toRightOf="@id/commodity_quality_testing2_img" android:text="@string/commodity_quality_testing" android:textColor="@color/green" android:textSize="@dimen/txt_twosize" /> <ImageView style="@style/right_arrow_style" /> </RelativeLayout> <View style="@style/line_style" /> <LinearLayout android:layout_width="fill_parent" android:layout_height="@dimen/commodity_quality_testing_lv_height" android:visibility="gone" android:gravity="center" android:orientation="horizontal"> <LinearLayout android:layout_width="0dp" android:layout_height="fill_parent" android:layout_weight="1" android:gravity="center" android:orientation="vertical"> <ImageView android:id="@+id/commodity_quality_testing2_one_img" android:layout_width="@dimen/commodity_quality_testing_img2_width" android:layout_height="@dimen/commodity_quality_testing_img2_width" android:layout_gravity="center" android:layout_marginBottom="@dimen/margin5" android:background="@drawable/jiancex" /> <TextView android:id="@+id/commodity_quality_testing2_one_tv" android:layout_width="wrap_content" android:layout_height="wrap_content" android:layout_gravity="center" android:text="中国" android:textColor="@color/gray_five" android:textSize="@dimen/txt_sevensize" /> </LinearLayout> <View style="@style/h_line_style" android:layout_height="@dimen/commodity_state_line_height" android:layout_gravity="center" android:background="@color/gray_fourteen" /> <LinearLayout android:layout_width="0dp" android:layout_height="fill_parent" android:layout_weight="1" android:gravity="center" android:orientation="vertical"> <ImageView android:id="@+id/commodity_quality_testing2_two_img" android:layout_width="@dimen/commodity_quality_testing_img2_width" android:layout_height="@dimen/commodity_quality_testing_img2_width" android:layout_gravity="center" android:layout_marginBottom="@dimen/margin5" android:background="@drawable/jiancece2" /> <TextView android:id="@+id/commodity_quality_testing2_two_tv" android:layout_width="wrap_content" android:layout_height="wrap_content" android:text="450/罐" android:textColor="@color/gray_five" android:textSize="@dimen/txt_sevensize" /> </LinearLayout> <View style="@style/h_line_style" android:layout_height="@dimen/commodity_state_line_height" android:layout_gravity="center" android:background="@color/gray_fourteen" /> <LinearLayout android:layout_width="0dp" android:layout_height="fill_parent" android:layout_weight="1" android:gravity="center" android:orientation="vertical"> <ImageView android:id="@+id/commodity_quality_testing2_three_img" android:layout_width="@dimen/commodity_quality_testing_img2_width" android:layout_height="@dimen/commodity_quality_testing_img2_width" android:layout_gravity="center" android:layout_marginBottom="@dimen/margin5" android:background="@drawable/jiancex" /> <TextView android:id="@+id/commodity_quality_testing2_three_tv" android:layout_width="wrap_content" android:layout_height="wrap_content" android:text="预售品" android:textColor="@color/gray_five" android:textSize="@dimen/txt_sevensize" /> </LinearLayout> <View style="@style/h_line_style" android:layout_height="@dimen/commodity_state_line_height" android:layout_gravity="center" android:background="@color/gray_fourteen" /> <LinearLayout android:layout_width="0dp" android:layout_height="fill_parent" android:layout_weight="1" android:gravity="center" android:orientation="vertical"> <ImageView android:id="@+id/commodity_quality_testing2_four_img" android:layout_width="@dimen/commodity_quality_testing_img2_width" android:layout_height="@dimen/commodity_quality_testing_img2_width" android:layout_gravity="center" android:layout_marginBottom="@dimen/margin5" android:background="@drawable/jiancece2" /> <TextView android:id="@+id/commodity_quality_testing2_four_tv" android:layout_width="wrap_content" android:layout_height="wrap_content" android:text="预售品" android:textColor="@color/gray_five" android:textSize="@dimen/txt_sevensize" /> </LinearLayout> </LinearLayout> </LinearLayout> <LinearLayout android:id="@+id/product_specification_lv" android:layout_width="match_parent" android:layout_height="wrap_content" android:layout_marginTop="@dimen/margin9" android:background="@color/white" android:gravity="center" android:orientation="vertical" android:paddingLeft="@dimen/margin10" android:paddingRight="@dimen/margin10"> <android.support.v7.widget.RecyclerView android:id="@+id/rv_commodity_specification" android:layout_width="match_parent" android:layout_height="fill_parent" android:overScrollMode="never" android:scrollbars="none"/> <!-- <TextView android:id="@+id/product_specification_tv" android:layout_width="fill_parent" android:layout_height="@dimen/commodity_quality_testing_lv_height" android:gravity="center_vertical" android:textColor="@color/gray_four" android:textSize="@dimen/txt_foursize" /> <View style="@style/line_style" /> <TextView android:id="@+id/quality_guarantee_period_tv" android:layout_width="fill_parent" android:layout_height="@dimen/commodity_quality_testing_lv_height" android:gravity="center_vertical" android:textColor="@color/gray_four" android:textSize="@dimen/txt_foursize" /> <View style="@style/line_style" />--> </LinearLayout> <WebView android:id="@+id/webview" android:visibility="visible" android:layout_width="match_parent" android:layout_height="wrap_content" android:layout_marginTop="@dimen/margin9"> </WebView> </LinearLayout> </LinearLayout> 布局上面这样,然后在代码中如果没有执行下面这句话,就会无缘无故崩溃,而且没有崩溃日志,一点排查才发现是这个问题 webview.loadData("", "text/html; charset=UTF-8", null); // 加载定义的代码,并设定编码格式和字符集 本文转自 一点点征服 博客园博客,原文链接:http://www.cnblogs.com/ldq2016/p/8617037.html,如需转载请自行联系原作者

优秀的个人博客,低调大师

ios 开发: pod 慢,替换

运行命令:pod repo 发现是github的源,如何替换呢? 网上给出的都是使用如下方法换掉repo的源: pod repo remove master pod repo add master https://git.coding.net/CocoaPods/Specs.git pod repo update 然而我试了好多次结果是: [!] To setup the master specs repo, please runpod setup. 最后继续查找,找到了如下的,方法: 执行: gitclonehttps://gitclub.cn/CocoaPods/Specs.git~/.cocoapods/repos/master 最后切记要: podrepoupdate 这样之后,,相信我们的pod install 和 pod update 等等都有快速好多了。 新建的podfile文件,第一行填写:source'https://gitclub.cn/CocoaPods/Specs.git' 参考文献:http://www.cnblogs.com/yfming/p/5965860.html 本文转自北京看看 51CTO博客,原文链接:http://blog.51cto.com/kankan/1919182,如需转载请自行联系原作者

优秀的个人博客,低调大师

Android开发中的错误

08-08 21:52:54.765: E/AndroidRuntime(6619): FATAL EXCEPTION: main 08-08 21:52:54.765: E/AndroidRuntime(6619): java.lang.RuntimeException:Unable to start activity ComponentInfo{com.solar/com.solar.BottomMenuActivity}: android.content.ActivityNotFoundException: Unable to find explicit activity class {com.solar/com.solar.TDialogActivity}; have you declared this activity in your AndroidManifest.xml? 问题:这是编译器提示找不到启动的Activity。编译器也已经给出了建议了。 我们只需要到 项目的根目录下找到AndroidManifest.xml 然后添上 + View Code 如图 就可以了。 本文转自陈哈哈博客园博客,原文链接http://www.cnblogs.com/kissazi2/archive/2012/08/09/2629717.html如需转载请自行联系原作者 kissazi2

资源下载

更多资源
腾讯云软件源

腾讯云软件源

为解决软件依赖安装时官方源访问速度慢的问题,腾讯云为一些软件搭建了缓存服务。您可以通过使用腾讯云软件源站来提升依赖包的安装速度。为了方便用户自由搭建服务架构,目前腾讯云软件源站支持公网访问和内网访问。

Nacos

Nacos

Nacos /nɑ:kəʊs/ 是 Dynamic Naming and Configuration Service 的首字母简称,一个易于构建 AI Agent 应用的动态服务发现、配置管理和AI智能体管理平台。Nacos 致力于帮助您发现、配置和管理微服务及AI智能体应用。Nacos 提供了一组简单易用的特性集,帮助您快速实现动态服务发现、服务配置、服务元数据、流量管理。Nacos 帮助您更敏捷和容易地构建、交付和管理微服务平台。

Sublime Text

Sublime Text

Sublime Text具有漂亮的用户界面和强大的功能,例如代码缩略图,Python的插件,代码段等。还可自定义键绑定,菜单和工具栏。Sublime Text 的主要功能包括:拼写检查,书签,完整的 Python API , Goto 功能,即时项目切换,多选择,多窗口等等。Sublime Text 是一个跨平台的编辑器,同时支持Windows、Linux、Mac OS X等操作系统。

WebStorm

WebStorm

WebStorm 是jetbrains公司旗下一款JavaScript 开发工具。目前已经被广大中国JS开发者誉为“Web前端开发神器”、“最强大的HTML5编辑器”、“最智能的JavaScript IDE”等。与IntelliJ IDEA同源,继承了IntelliJ IDEA强大的JS部分的功能。

用户登录
用户注册