Android Studio - 第四十五期 Gradle manifestPlaceholders
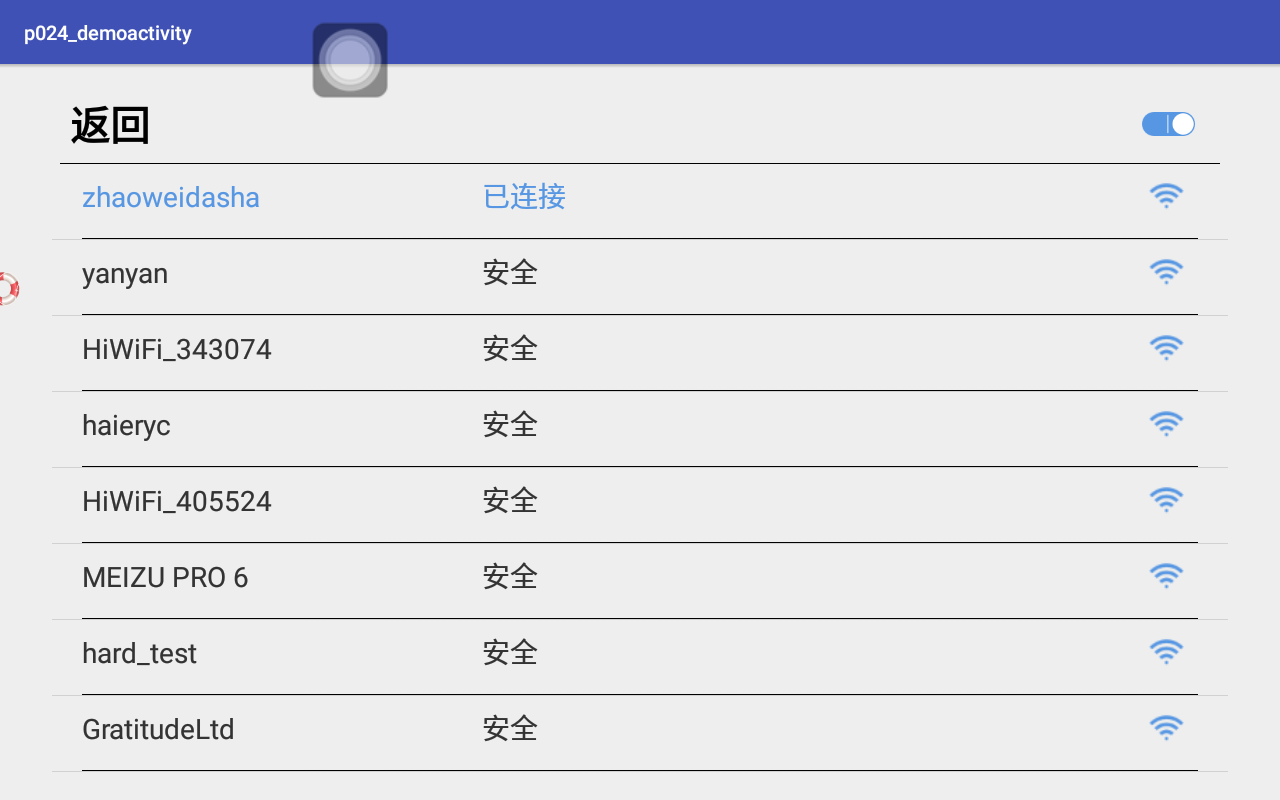
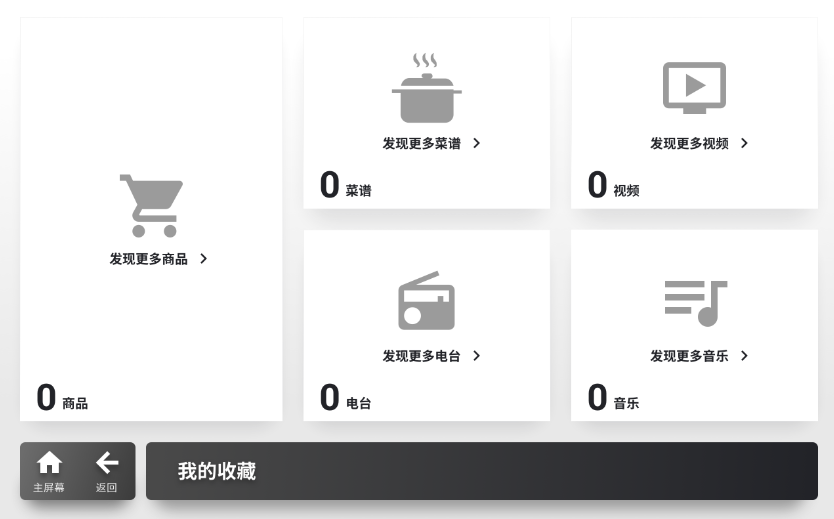
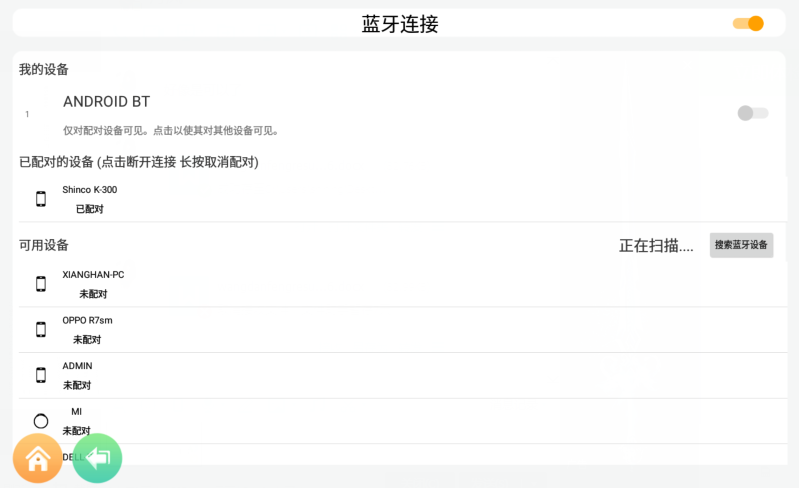
最近在学习撸撸的代码规范和写法,有些心得,准备好好写一写~包括了多渠道打版(以前有写过方法),工厂模式,mvp,以及最近刚封装出来的多渠道多版本展示不同页面的manifestPlaceholders的配置方法,大家应该也碰到过线上和线下环境的切换换地址,换私钥的头大问题,本篇就来解决这些问题。 先在androidmanifest文件配置一个节点,这里以极光为例: 1 2 3 4 5 6 7 <meta-data android:name= "JPUSH_APPKEY" android:value= "${jush_appkey_value}" /> <meta-data android:name= "SHOUCANG_CONFIG0" android:value= "${SHOUCANG_CONFIG_VALUE0}" /> build.gradle: 1 2 3 4 5 6 7 8 9 10 11 12 13 14 15 16 17 18 19 20 21 22 23 24 25 26 27 28 29 30 31 32 33 34 35 36 37 buildTypes{ release{ //自定义buildconfig字段 buildConfigField( "boolean" , "APP_ENV" , "true" ) //指定签名为release signingConfigsigningConfig.release //是否开启混淆 minifyEnabled false proguardFilesgetDefaultProguardFile( 'proguard-android.txt' ), 'proguard-rules.pro' //是否zip优化 zipAlignEnabled true //删除一些无用资源 shrinkResources false // manifestPlaceholders=[ "jush_appkey_value" : "releasekey" ] } debug{ //自定义buildconfig字段 buildConfigField( "boolean" , "APP_ENV" , "true" ) //指定签名为release signingConfigsigningConfig.release //是否开启混淆 minifyEnabled false proguardFilesgetDefaultProguardFile( 'proguard-android.txt' ), 'proguard-rules.pro' //是否zip优化 zipAlignEnabled true //删除一些无用资源 shrinkResources false // manifestPlaceholders=[ "jush_appkey_value" : "debugkey" ] } } 在bulidtypes节点下有release节点和debug节点,正式签名时就会走release节点的下编译脚本,调试签名时就会走debug节点。主要点就是manifestPlaceholders的用法,jpush_appkey对应的就是之前在androidmanifest文件配置的${jush_appkey_value}的这个值。 在程序入口出打上log,用来输出key的值: 1 2 3 4 5 6 7 8 9 10 11 12 13 14 15 16 17 18 /** *在程序入口出打上log,用来输出key的值bufen */ private void jpush_key_manifest_xml_string(){ Stringjpush_appkey; try { ApplicationInfoappInfo=getPackageManager() .getApplicationInfo(getPackageName(), PackageManager.GET_META_DATA); jpush_appkey=appInfo.metaData.getString( "JPUSH_APPKEY" ); Log.e( "jpush_appkey" , "jpush_appkey=" +jpush_appkey); } catch (PackageManager.NameNotFoundExceptione){ e.printStackTrace(); } } 接下来给大家介绍多版本多页面多apk的配置切换方法:举个例子:如果你要一次性打七个版本,而且七个版本都是不同的页面,但是页面各个模块大体一样,只是顺序和大小不同,你要怎么做,别告诉我写七个页面分别打版哈~太low了~you know~这里就利用多版本打版和manifestPlaceholders来实现需求。 首先是build.gradle: 1 2 3 4 5 6 7 8 9 10 11 12 13 14 15 16 17 18 19 20 21 22 23 24 25 26 27 28 29 30 31 32 33 34 35 36 37 38 39 40 41 42 43 44 45 46 47 48 49 50 51 52 53 54 55 56 57 58 59 60 61 62 63 64 65 66 67 68 69 70 71 72 73 74 75 76 77 78 79 80 81 82 83 84 85 86 87 88 89 90 91 92 93 94 95 96 97 98 99 100 101 102 103 104 105 106 107 108 109 110 111 112 113 114 115 116 117 118 119 120 121 122 123 124 125 126 127 128 129 130 131 132 133 134 135 136 137 138 139 140 141 142 143 144 145 146 147 148 149 150 151 152 153 154 155 156 157 158 159 160 161 162 163 164 165 166 167 168 169 170 171 172 173 174 175 176 177 178 179 180 181 182 183 184 185 186 187 188 189 190 191 192 193 194 195 196 197 198 199 200 201 202 203 204 205 206 207 208 209 210 211 212 213 214 215 216 217 218 219 220 221 222 223 224 225 226 227 228 229 230 231 232 233 234 235 236 237 238 239 240 241 242 243 244 245 246 247 248 249 250 251 252 253 254 255 256 257 258 259 260 261 262 263 264 265 266 267 268 269 270 271 272 273 274 275 276 277 278 279 280 281 282 283 284 285 286 287 288 289 290 291 292 293 294 295 296 297 298 299 300 301 302 303 304 305 306 307 308 309 310 311 312 313 314 315 316 317 applyplugin: 'com.android.application' applyplugin: 'android-apt' defdemo= '0000' ; //DemoAPK defdemo1= '0001' ; //DemoAPK1 defdemo2= '0002' ; //DemoAPK2 defdemo3= '0003' ; //DemoAPK3 defdemo4= '0004' ; //DemoAPK4 defdemo5= '0005' ; //DemoAPK5 defdemo6= '0006' ; //DemoAPK6 android{ signingConfigs{ debug{ keyAlias '****' keyPassword '****' storeFilefile( '签名文件.jks路径' ) storePassword '****' } release{ keyAlias '****' keyPassword '****' storeFilefile( '签名文件.jks路径' ) storePassword '****' } } compileSdkVersion 25 buildToolsVersion "25.0.2" sourceSets{ main{ jniLibs.srcDirs=[ 'libs' ] } } packagingOptions{ exclude 'META-INF/DEPENDENCIES' exclude 'META-INF/NOTICE' exclude 'META-INF/LICENSE' exclude 'META-INF/LICENSE.txt' exclude 'META-INF/NOTICE.txt' } defaultConfig{ applicationId "com.shining.p010_recycleviewall" minSdkVersion 18 targetSdkVersion 23 versionCode 1 versionName "1.0" multiDexEnabled true renderscriptTargetApi 19 renderscriptSupportModeEnabled true ndk{ moduleName "native-modbus-jni,libxmediaplayer" ldLibs "log" , "z" , "m" , "android" , "c" abiFilters "armeabi" , "armeabi-v7a" , "x86" } sourceSets.main{ jni.srcDirs=[] //LOCAL_LDFLAGS+=-fuse-ld=bfd //jni.srcDirs'src/main/jni' jniLibs.srcDir 'src/main/libs' } signingConfigsigningConfigs.debug manifestPlaceholders=[ SHOUCANG_CONFIG_VALUE0: ".shoucang.factorys.ShoucangFactory0" ] } buildTypes{ release{ minifyEnabled true zipAlignEnabled true shrinkResources false proguardFilesgetDefaultProguardFile( 'proguard-android.txt' ), 'proguard-rules.pro' signingConfigsigningConfigs.debug } } def int minSdk= 18 ; def int targetSdk= 23 ; defStringappId= 'com.shining.p010_recycleviewall' ; def int vCode= 1 ; defStringvNameCode=vCode+ "" ; productFlavors{ //demo DemoAPK{ minSdkVersionminSdk applicationIdappId targetSdkVersiontargetSdk versionCodevCode versionName "DemoAPK_" + "T_" +demo multiDexEnabled true renderscriptTargetApi 19 renderscriptSupportModeEnabled true ndk{ moduleName "native-modbus-jni,libxmediaplayer" ldLibs "log" , "z" , "m" , "android" , "c" abiFilters "armeabi" , "armeabi-v7a" , "x86" } sourceSets.main{ jni.srcDirs=[] jniLibs.srcDir 'src/main/libs' } signingConfigsigningConfigs.debug } //demo1 DemoAPK1{ minSdkVersionminSdk applicationIdappId targetSdkVersiontargetSdk versionCodevCode versionName "DemoAPK1_" + "T_" +demo1 multiDexEnabled true renderscriptTargetApi 19 renderscriptSupportModeEnabled true ndk{ moduleName "native-modbus-jni,libxmediaplayer" ldLibs "log" , "z" , "m" , "android" , "c" abiFilters "armeabi" , "armeabi-v7a" , "x86" } sourceSets.main{ jni.srcDirs=[] jniLibs.srcDir 'src/main/libs' } signingConfigsigningConfigs.debug } //demo2 DemoAPK2{ minSdkVersionminSdk applicationIdappId targetSdkVersiontargetSdk versionCodevCode versionName "DemoAPK2_" + "T_" +demo2 multiDexEnabled true renderscriptTargetApi 19 renderscriptSupportModeEnabled true ndk{ moduleName "native-modbus-jni,libxmediaplayer" ldLibs "log" , "z" , "m" , "android" , "c" abiFilters "armeabi" , "armeabi-v7a" , "x86" } sourceSets.main{ jni.srcDirs=[] jniLibs.srcDir 'src/main/libs' } signingConfigsigningConfigs.debug } //demo3 DemoAPK3{ minSdkVersionminSdk applicationIdappId targetSdkVersiontargetSdk versionCodevCode versionName "DemoAPK3_" + "T_" +demo3 multiDexEnabled true renderscriptTargetApi 19 renderscriptSupportModeEnabled true ndk{ moduleName "native-modbus-jni,libxmediaplayer" ldLibs "log" , "z" , "m" , "android" , "c" abiFilters "armeabi" , "armeabi-v7a" , "x86" } sourceSets.main{ jni.srcDirs=[] jniLibs.srcDir 'src/main/libs' } signingConfigsigningConfigs.debug } //demo4 DemoAPK4{ minSdkVersionminSdk applicationIdappId targetSdkVersiontargetSdk versionCodevCode versionName "DemoAPK4_" + "T_" +demo4 multiDexEnabled true renderscriptTargetApi 19 renderscriptSupportModeEnabled true ndk{ moduleName "native-modbus-jni,libxmediaplayer" ldLibs "log" , "z" , "m" , "android" , "c" abiFilters "armeabi" , "armeabi-v7a" , "x86" } sourceSets.main{ jni.srcDirs=[] jniLibs.srcDir 'src/main/libs' } signingConfigsigningConfigs.debug } //demo5 DemoAPK5{ minSdkVersionminSdk applicationIdappId targetSdkVersiontargetSdk versionCodevCode versionName "DemoAPK5_" + "T_" +demo5 multiDexEnabled true renderscriptTargetApi 19 renderscriptSupportModeEnabled true ndk{ moduleName "native-modbus-jni,libxmediaplayer" ldLibs "log" , "z" , "m" , "android" , "c" abiFilters "armeabi" , "armeabi-v7a" , "x86" } sourceSets.main{ jni.srcDirs=[] jniLibs.srcDir 'src/main/libs' } signingConfigsigningConfigs.debug } //demo6 DemoAPK6{ minSdkVersionminSdk applicationIdappId targetSdkVersiontargetSdk versionCodevCode versionName "DemoAPK6_" + "D_" +demo6 multiDexEnabled true renderscriptTargetApi 19 renderscriptSupportModeEnabled true ndk{ moduleName "native-modbus-jni,libxmediaplayer" ldLibs "log" , "z" , "m" , "android" , "c" abiFilters "armeabi" , "armeabi-v7a" , "x86" } sourceSets.main{ jni.srcDirs=[] jniLibs.srcDir 'src/main/libs' } signingConfigsigningConfigs.debug } } //自定义输出配置 applicationVariants.all{variant-> variant.outputs.each{output-> defoutputFile=output.outputFile if (outputFile!= null &&outputFile.name.endsWith( '.apk' )){ //deffileName="UerbT_v${variant.versionName}_${releaseTime()}_${variant.flavorName}.apk" deffileName= "${variant.versionName}.apk" output.outputFile= new File(outputFile.parent,fileName) } } } productFlavors.all{flavor-> defcurrentMode=flavor.versionName.split( "_" )[ 2 ] defcurrentEnvironment=flavor.versionName.split( "_" )[ 1 ] defstValue= true //t==currentEnvironment以前的判断条件 if (currentEnvironment.endsWith( "T" )){ //判断是否为测试版是否以T结尾 stValue= false } else { stValue= true } if (currentMode==demo){ flavor.manifestPlaceholders=[SHOUCANG_CONFIG_VALUE: ".shoucang.factorys.ShoucangFactory" ,STATISTICS_VALUE:stValue] } else if (currentMode==demo1){ flavor.manifestPlaceholders=[SHOUCANG_CONFIG_VALUE: ".shoucang.factorys.ShoucangFactory1" ,STATISTICS_VALUE:stValue] } else if (currentMode==demo2){ flavor.manifestPlaceholders=[SHOUCANG_CONFIG_VALUE: ".shoucang.factorys.ShoucangFactory2" ,STATISTICS_VALUE:stValue] } else if (currentMode==demo3){ flavor.manifestPlaceholders=[SHOUCANG_CONFIG_VALUE: ".shoucang.factorys.ShoucangFactory3" ,STATISTICS_VALUE:stValue] } else if (currentMode==demo4){ flavor.manifestPlaceholders=[SHOUCANG_CONFIG_VALUE: ".shoucang.factorys.ShoucangFactory4" ,STATISTICS_VALUE:stValue] } else if (currentMode==demo5){ flavor.manifestPlaceholders=[SHOUCANG_CONFIG_VALUE: ".shoucang.factorys.ShoucangFactory5" ,STATISTICS_VALUE:stValue] } else if (currentMode==demo6){ flavor.manifestPlaceholders=[SHOUCANG_CONFIG_VALUE: ".shoucang.factorys.ShoucangFactory6" ,STATISTICS_VALUE:stValue] } } } dependencies{ compilefileTree(include:[ '*.jar' ],dir: 'libs' ) androidTestCompile( 'com.android.support.test.espresso:espresso-core:2.2.2' ,{ excludegroup: 'com.android.support' ,module: 'support-annotations' }) compile 'com.android.support:appcompat-v7:25.3.0' compile 'com.android.support:recyclerview-v7:25.3.0' compile 'com.android.support:design:25.3.0' compile 'com.android.support:cardview-v7:25.3.0' //localjarfile compilefiles( 'libs/alipay-sdk-java20161226110022.jar' ) compilefiles( 'libs/alipay-sdk-java20161226110022-source.jar' ) compilefiles( 'libs/commons-logging-1.1.1.jar' ) compilefiles( 'libs/commons-logging-1.1.1-sources.jar' ) //thethirdfile compile 'com.jakewharton:butterknife:8.2.1' apt 'com.jakewharton:butterknife-compiler:8.2.1' testCompile 'junit:junit:4.12' compile 'com.geeklx:library_hios:1.0.4' compileproject( ':glin' ) compile 'com.github.bumptech.glide:glide:3.7.0' compile 'com.alibaba:fastjson:1.2.17' compile 'com.squareup.okio:okio:1.9.0' compile 'com.squareup.okhttp3:okhttp:3.4.1' compile 'com.nineoldandroids:library:2.4.0' compilefiles( 'libs/libammsdk.jar' ) } 接着就是多版本的代码判断书写: 1 2 3 4 5 6 7 8 9 10 11 12 13 14 15 16 17 18 19 20 21 22 23 24 25 26 27 28 29 30 31 32 33 34 35 36 37 38 39 40 41 42 43 44 45 46 47 48 @Override protected void onCreate( @Nullable BundlesavedInstanceState){ //TODO多版本切换写此方法bufen which_version(); //ShoucangConfig0.config();//manifestPlaceholders的妙用 super .onCreate(savedInstanceState); } private void which_version(){ if (ConstantNetUtil.VERSION_APK==NetConfig.version_name0){ ShoucangConfig.config(); } else if (ConstantNetUtil.VERSION_APK==NetConfig.version_name1){ ShoucangConfig1.config(); } else if (ConstantNetUtil.VERSION_APK==NetConfig.version_name2){ ShoucangConfig2.config(); } else if (ConstantNetUtil.VERSION_APK==NetConfig.version_name3){ ShoucangConfig3.config(); } else if (ConstantNetUtil.VERSION_APK==NetConfig.version_name4){ ShoucangConfig4.config(); } else if (ConstantNetUtil.VERSION_APK==NetConfig.version_name5){ ShoucangConfig5.config(); } else if (ConstantNetUtil.VERSION_APK==NetConfig.version_name6){ ShoucangConfig6.config(); } } //TODO多版本模式bufen SparseArrayCompat<Class<? extends BaseFragment>>array=which_version_fragment_config(); //demo private SparseArrayCompat<Class<? extends BaseFragment>>which_version_fragment_config(){ if (ConstantNetUtil.VERSION_APK==NetConfig.version_name0){ return ShoucangConfig.getFragments(); } else if (ConstantNetUtil.VERSION_APK==NetConfig.version_name1){ return ShoucangConfig1.getFragments(); } else if (ConstantNetUtil.VERSION_APK==NetConfig.version_name2){ return ShoucangConfig2.getFragments(); } else if (ConstantNetUtil.VERSION_APK==NetConfig.version_name3){ return ShoucangConfig3.getFragments(); } else if (ConstantNetUtil.VERSION_APK==NetConfig.version_name4){ return ShoucangConfig4.getFragments(); } else if (ConstantNetUtil.VERSION_APK==NetConfig.version_name5){ return ShoucangConfig5.getFragments(); } else if (ConstantNetUtil.VERSION_APK==NetConfig.version_name6){ return ShoucangConfig6.getFragments(); } return ShoucangConfig.getFragments(); } 这样跑完apk你会发现会有神奇的事情发生,如下图:(不同的apk版本出来的页面也是不同的,但是只用了一份代码。) 图1: 图2: 这样做的好处在于,如果你的apk版本很多,需要给很多合作厂商提供定制化页面,就可以用上了~ 卧槽,今天喷了好多,希望大家回去自己细化一下,能帮到你~ 本文转自 吴雨声 51CTO博客,原文链接:http://blog.51cto.com/liangxiao/1951381,如需转载请自行联系原作者