首页 文章 精选 留言 我的

精选列表

搜索[构建目录],共10000篇文章
优秀的个人博客,低调大师

基于 vLLM+Nginx 构建负载均衡推理集群

企业内部私有环境部署大模型推理集群时,很容易遇到流量调度混乱、节点负载失衡、会话上下文丢失、接口缺少鉴权防护等一系列问题,单 vLLM 推理节点难以支撑并发请求。本文基于 Ubuntu 22.04 系统环境,搭建 Nginx + vLLM-Semantic-Router + vLLM-Router + vLLM Node 多层推理集群。全文从环境准备、模型拉取、组件分步部署、Nginx SSE 流式反向代理,一直到接口联调验证,完整记录一套可直接复现的落地方案。 # 架构拓扑 本次部署采用 Nginx + vLLM-Semantic-Router + vLLM-Router + vLLM Node 推理节点的多层分层推理集群架构,实现请求鉴权、负载均衡、语义智能路由、算力负载分流的全流程能力。 ![image](https://developer.qcloudimg.com/http-save/yehe-9990948/b70759fc85bf67931aa3729d2b6eca14.png) 架构层级从上至下如下: - Nginx:作为集群唯一对外入口,提供接口鉴权、请求反向代理、全局负载均衡、SSE 流式响应适配,保障集群安全与流量稳定分发。 - vLLM-Semantic-Router(语义网关):识别用户请求意图,区分通用对话、代码编写等场景,实现请求的智能分类路由,适配不同业务场景模型。 - vLLM-Router(算力路由层):监控后端推理节点显存、算力负载,基于一致性哈希策略实现流量均匀分配,支持会话亲和、KV缓存复用,承接上下层流量转发。 - vLLM Node 推理节点:部署大模型推理服务,提供核心的对话、代码生成推理能力,双节点部署实现算力冗余与负载分担。 # 环境部署 ## vLLM Node 推理节点部署(双节点) 集群底层算力载体,运行 vLLM 推理服务并加载大模型,负责执行对话、代码生成等实际推理任务。部署双实例,实现算力负载分担与服务冗余。 部署2个独立推理节点,分别绑定5001、5002端口,同时部署5003端口语义识别模型节点,为上层语义路由提供意图识别能力。 1、安装vLLM兼容依赖包,能正常输出版本号即成功。 ``` root@localhost:~# python3 -m venv ~/vllm root@localhost:~# source ~/vllm/bin/activate root@localhost:~# pip install -i https://mirrors.cloud.tencent.com/pypi/simple bitsandbytes tiktoken root@localhost:~# pip install -i https://mirrors.cloud.tencent.com/pypi/simple openvino modelscope vllm root@localhost:~# python -c "import vllm; print(vllm.__version__)" 0.29.0 ``` 2、通过魔搭社区下载轻量化模型,适配本地部署场景,分别用于对话推理、语义意图识别。 ``` root@localhost:~# mkdir -p /data/model/ # 用于对话的模型 root@localhost:~# modelscope download --model Qwen/Qwen2.5-0.5B-Instruct --local_dir /data/model/qwen2.5 # 用于vLLM-Semantic-Router语义检查模型 root@localhost:~# modelscope download --model gongjy/minimind-3 --local_dir /data/model/minimind3 root@localhost:/data/model# ls -lh total 8.0K drwxr-xr-x 3 root root 4.0K Sep 10 17:25 minimind3 drwxr-xr-x 2 root root 4.0K Sep 10 17:23 qwen2.5 ``` 开启离线模式、配置模型基础参数,分别准备三台Ubuntu系统,其中每台服务器有1-5颗GPU显卡,启动三个节点服务。 ``` root@localhost:~# export HF_HUB_OFFLINE=1 # 节点 1 端口 5001 root@localhost:~# vllm serve /data/model/qwen2.5 \ --host 127.0.0.1 \ --port 5001 \ --trust-remote-code \ --dtype bfloat16 \ --max-model-len 512 \ --tensor-parallel-size 1 # 节点 2 端口 5002 root@localhost:~# vllm serve /data/model/qwen2.5 \ --host 127.0.0.1 \ --port 5002 \ --trust-remote-code \ --dtype bfloat16 \ --max-model-len 512 \ --tensor-parallel-size 1 # 语义检查模型 端口5003 root@localhost:~# vllm serve /data/model/qwen2.5 \ --host 127.0.0.1 \ --port 5003 \ --trust-remote-code \ --dtype bfloat16 \ --max-model-len 512 \ --tensor-parallel-size 1 ``` ## vLLM-Router(算力路由层) vLLM-Router为算力负载路由核心,负责监控后端推理节点负载、实现流量均匀分发,支持会话亲和与KV缓存复用,承接语义网关的请求流量。 1、安装路由节点。 ``` root@localhost:~# python3 -m venv vLLM-Router root@localhost:~# source vLLM-Router/bin/activate root@localhost:~# pip install -i https://mirrors.cloud.tencent.com/pypi/simple/ vllm-router ``` 2、采用一致性哈希策略,绑定对应推理节点,实现会话固定路由。 ``` # 路由节点1:对接5001通用对话节点 端口6001 root@localhost:~# vllm-router \ --host 127.0.0.1 \ --port 6001 \ --worker-urls http://127.0.0.1:5001 \ --policy consistent_hash # 路由节点2:对接5002代码推理节点 端口6002 root@localhost:~# vllm-router \ --host 127.0.0.1 \ --port 6002 \ --worker-urls http://127.0.0.1:5002 \ --policy consistent_hash ``` 3、测试可用性,带上`X-Session-ID` 同一个 session-id 永远路由到同一个 vllm 后端,实现会话亲和、复用 KV 缓存。 ``` root@localhost:~# curl http://127.0.0.1:6001/v1/chat/completions \ -H "Content-Type: application/json" \ -H "X-Session-ID: session-001" \ -d '{ "model": "qwen3", "messages": [ {"role": "user", "content": "你好"} ], "temperature": 0.7, "max_tokens": 128 }' ``` ## vLLM-Semantic-Router(语义网关) 上层业务路由,解析用户输入识别请求意图,区分普通闲聊、代码编写等场景,按语义规则将请求转发到对应的算力路由后端,实现按业务场景智能分流。 此处的网关服务只能在Docker容器内,无法直接在物理机中运行,此处只提供一个正确的配置文件仅供参考。 1、安装语义网关服务,并调用启动命令生成默认配置文件。 ``` root@localhost:~# python3 -m venv vsr root@localhost:~# source vsr/bin/activate root@localhost:~# pip install -i https://mirrors.cloud.tencent.com/pypi/simple/ vllm-sr root@localhost:~# vllm-sr serve ``` 2、修改生成的`config.yaml`(对接下层 vllm-router,地址`127.0.0.1:8001`) 替换为以下完整配置,对接下层算力路由节点,定义语义路由规则: ``` version: v0.3 listeners: - name: http-7001 address: 0.0.0.0 port: 7001 timeout: 300s providers: defaults: default_model: qwen-0.5b models: # 语义识别模型 minimind(图中5003端口 minimind-3) - name: minimind provider_model_id: minimind api_format: openai backend_refs: - name: minimind-backend endpoint: http://127.0.0.1:5003/v1 protocol: http weight: 100 # 第一个路由节点6001:普通聊天 - name: qwen-0.5b provider_model_id: qwen-0.5b api_format: openai backend_refs: - name: router-6001 endpoint: http://127.0.0.1:6001/v1 protocol: http weight: 100 # 第二个路由节点6002:代码编写 - name: qwen-code provider_model_id: qwen-code api_format: openai backend_refs: - name: router-6002 endpoint: http://127.0.0.1:6002/v1 protocol: http weight: 100 routing: # 预先定义自定义信号 code_intent signals: embeddings: - name: code_intent threshold: 0.7 aggregation_method: max candidates: - "写代码" - "编写脚本" - "python代码" - "java代码" - "js代码" - "函数实现" - "算法编写" - "代码调试" - "代码改错" - "写程序" - "代码实现" - "写一段代码" modelCards: - name: minimind description: "语义识别模型,用于意图判断" capabilities: - semantic_routing - name: qwen-0.5b description: "通用对话模型,普通聊天,路由6001" capabilities: - chat - name: qwen-code description: "代码专用模型,代码编写,路由6002" capabilities: - coding decisions: # 代码编写意图 → 路由到6002 - name: route_code_writing description: "用户请求编写代码、脚本、程序,路由到代码专用router 6002" priority: 100 rules: operator: AND conditions: - type: embedding name: code_intent modelRefs: - model: qwen-code # 兜底:普通聊天 → 路由到6001 - name: default_chat description: "默认普通聊天场景,路由到6001" priority: 10 rules: operator: AND conditions: [] modelRefs: - model: qwen-0.5b global: health_check: interval_seconds: 10 ``` 3、前台检测文档可用性,并运行。 ``` root@localhost:~# vllm-sr validate --config /root/config.yaml 2026-09-10 17:25:56,551 - INFO - ============================================================ 2026-09-10 17:25:56,551 - INFO - vLLM Semantic Router - Validate Configuration 2026-09-10 17:25:56,551 - INFO - ============================================================ 2026-09-10 17:25:56,551 - INFO - Validating: /root/config.yaml 2026-09-10 17:25:56,551 - INFO - 2026-09-10 17:25:56,558 - INFO - Configuration parsed successfully 2026-09-10 17:25:56,558 - INFO - Version: v0.3 2026-09-10 17:25:56,559 - INFO - Listeners: 1 2026-09-10 17:25:56,559 - INFO - Decisions: 2 2026-09-10 17:25:56,559 - INFO - Models: 3 2026-09-10 17:25:56,559 - INFO - Validating user configuration... 2026-09-10 17:25:56,559 - INFO - Configuration validation passed 2026-09-10 17:25:56,559 - INFO - ============================================================ 2026-09-10 17:25:56,559 - INFO - Configuration is valid! 2026-09-10 17:25:56,559 - INFO - ============================================================ 2026-09-10 17:25:56,559 - INFO - Configuration summary: 2026-09-10 17:25:56,559 - INFO - Version: v0.3 2026-09-10 17:25:56,559 - INFO - Listeners: 1 2026-09-10 17:25:56,559 - INFO - Embedding signals: 1 2026-09-10 17:25:56,559 - INFO - Decisions: 2 2026-09-10 17:25:56,559 - INFO - Models: 3 2026-09-10 17:25:56,559 - INFO - Default model: qwen-0.5b 2026-09-10 17:25:56,559 - INFO - root@localhost:~# vllm-sr serve --config /root/config.yaml 2026-09-10 17:26:16,703 - INFO - Using config file: /root/config.yaml 2026-09-10 17:26:16,713 - INFO - Created effective runtime config: /root/.vllm-sr/runtime-config.yaml █ █ █▄ ▄█ ▄▄ ▄█ █ █ █ ▀▄▀ █ █▄█▀ █ █ █ █ ▀▀ ▀▀▀▀▀ ▀▀▀▀▀ ▀ ▀ Semantic Router Intelligent Routing for Mixture-of-Models 2026-09-10 17:26:16,721 - INFO - Starting vLLM Semantic Router 2026-09-10 17:26:16,721 - INFO - Runtime stack: vllm-sr (port offset 0) 2026-09-10 17:26:16,721 - INFO - Config file: /root/config.yaml 2026-09-10 17:26:16,721 - INFO - Configured listeners: 2026-09-10 17:26:16,721 - INFO - - http-7001: 0.0.0.0:7001 2026-09-10 17:26:16,721 - INFO - Runtime topology: split 2026-09-10 17:26:16,721 - ERROR - Docker not found in PATH 2026-09-10 17:26:16,721 - ERROR - Please install Docker Desktop or Docker Engine to use this tool 2026-09-10 17:26:16,722 - ERROR - 2026-09-10 17:26:16,722 - ERROR - Installation instructions: 2026-09-10 17:26:16,722 - ERROR - Docker: https://docs.docker.com/get-docker/ ``` ## Nginx(反向代理及鉴权) Nginx作为集群唯一对外入口,实现接口基础鉴权、SSE流式响应适配、双路由节点负载均衡、请求超时统一管控,替代语义网关直接承接外部流量,简化部署架构。 > Nginx 入口端口:11433,保留基础鉴权,去掉语义网关,Nginx 直接负载均衡分发流量到两台 router。 1、安装Mginx组件,并编辑配置文件启用反向代理功能。 ``` root@localhost:~# apt install -y nginx apache2-utils root@localhost:~# vim /etc/nginx/nginx.conf user www-data; worker_processes auto; pid /run/nginx.pid; include /etc/nginx/modules-enabled/*.conf; events { worker_connections 768; } http { sendfile on; tcp_nopush on; types_hash_max_size 2048; include /etc/nginx/mime.types; default_type application/octet-stream; ssl_protocols TLSv1 TLSv1.1 TLSv1.2 TLSv1.3; ssl_prefer_server_ciphers on; access_log /var/log/nginx/access.log; error_log /var/log/nginx/error.log; gzip on; include /etc/nginx/conf.d/*.conf; include /etc/nginx/sites-enabled/*; # 后端真实vllm-router地址 upstream router_real_6001 { server 127.0.0.1:29000; } upstream router_real_6002 { server 127.0.0.1:29001; } # 内部端口6001 仅本机127.0.0.1可访问 server { listen 127.0.0.1:6001; server_name localhost; location / { proxy_pass http://router_real_6001; # SSE流式必备参数 proxy_http_version 1.1; proxy_set_header Connection ""; proxy_buffering off; proxy_cache off; proxy_connect_timeout 300s; proxy_send_timeout 300s; proxy_read_timeout 300s; } } # 内部端口6002 仅本机127.0.0.1可访问 server { listen 127.0.0.1:6002; server_name localhost; location / { proxy_pass http://router_real_6002; # SSE流式必备参数 proxy_http_version 1.1; proxy_set_header Connection ""; proxy_buffering off; proxy_cache off; proxy_connect_timeout 300s; proxy_send_timeout 300s; proxy_read_timeout 300s; } } # 对外唯一入口:11433,鉴权 + 负载均衡分发到内部6001/6002 upstream vllm_main_pool { least_conn; server 127.0.0.1:6001 max_fails=2 fail_timeout=15s; server 127.0.0.1:6002 max_fails=2 fail_timeout=15s; keepalive 16; } server { listen 11433; server_name localhost; auth_basic "Restricted Access"; auth_basic_user_file /etc/nginx/.htpasswd; location / { proxy_pass http://vllm_main_pool; # SSE流式必备 proxy_http_version 1.1; proxy_set_header Connection ""; proxy_buffering off; proxy_cache off; # 透传客户端信息 proxy_set_header Host $host; proxy_set_header X-Real-IP $remote_addr; proxy_set_header X-Forwarded-For $proxy_add_x_forwarded_for; proxy_connect_timeout 300s; proxy_send_timeout 300s; proxy_read_timeout 300s; } } } ``` 2、校验 Nginx 语法可用性。 ``` root@localhost:~# nginx -t nginx: the configuration file /etc/nginx/nginx.conf syntax is ok nginx: configuration file /etc/nginx/nginx.conf test is successful ``` 3、创建鉴权账号。 ``` root@localhost:~# htpasswd -c /etc/nginx/.htpasswd vllmuser root@localhost:~# chown www-data:www-data /etc/nginx/.htpasswd root@localhost:~# chmod 644 /etc/nginx/.htpasswd root@localhost:~# nginx -t root@localhost:~# nginx -s reload ``` 4、测试访问示例,此处使用`-u`指定用户名及密码。 ``` root@localhost:~# curl http://127.0.0.1:11433/v1/chat/completions \ -u vllmuser:1234 \ -H "Content-Type: application/json" \ -d '{ "model": "qwen2.5", "messages": [{"role":"user","content":"你好"}], "stream": true }' ```

优秀的个人博客,低调大师

用 WebGL + Solid.js 构建混合材质 Shader

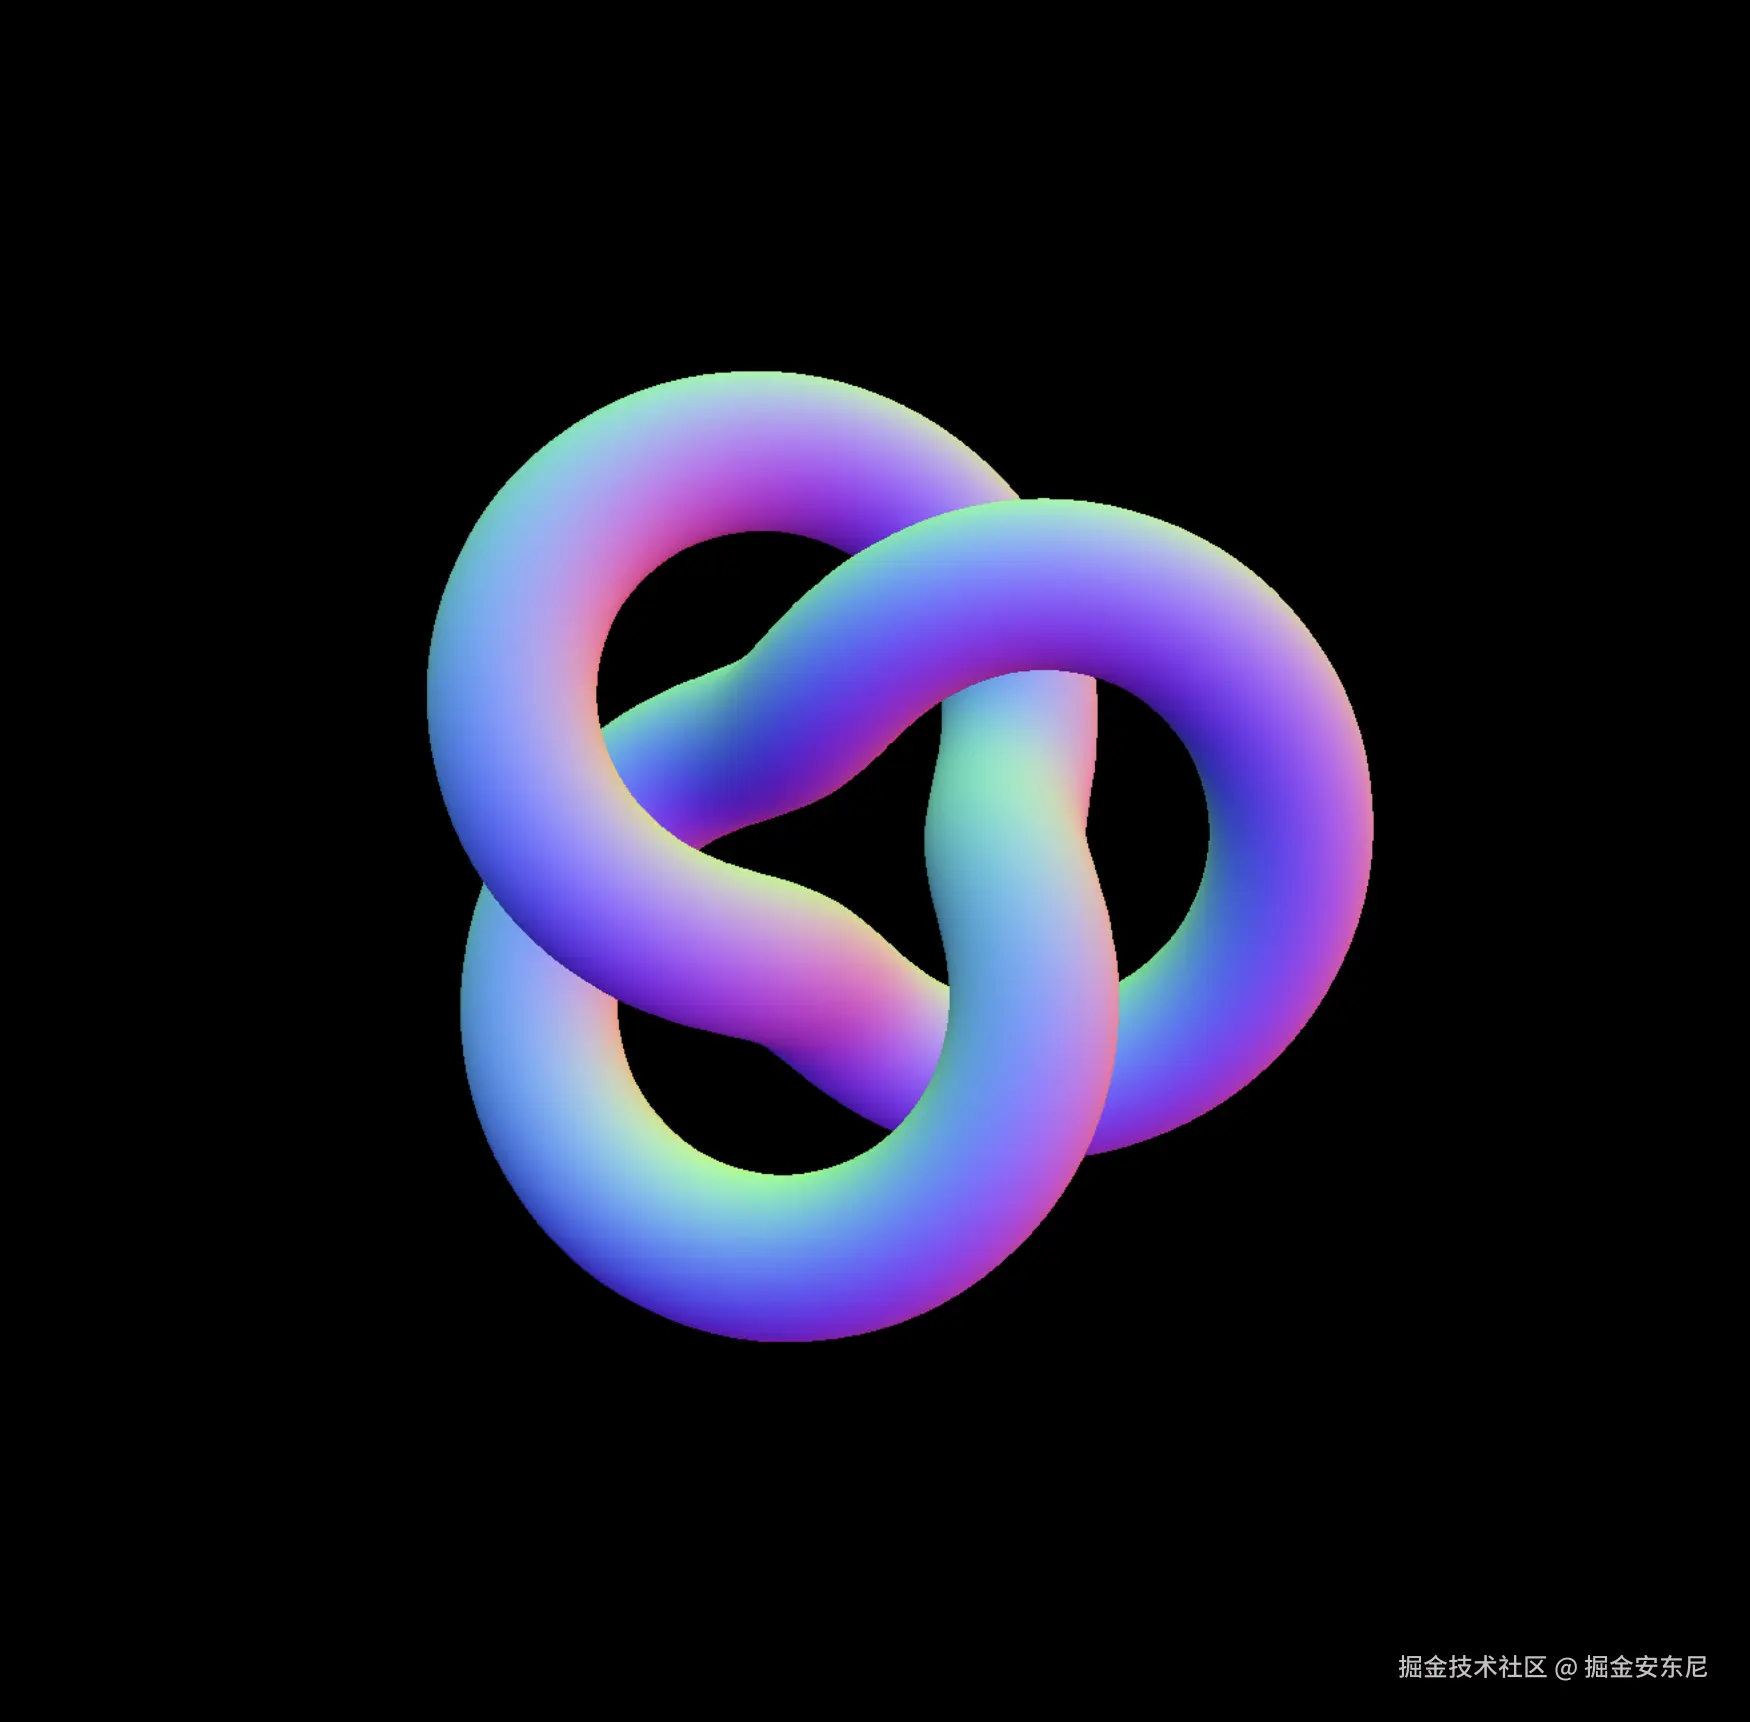
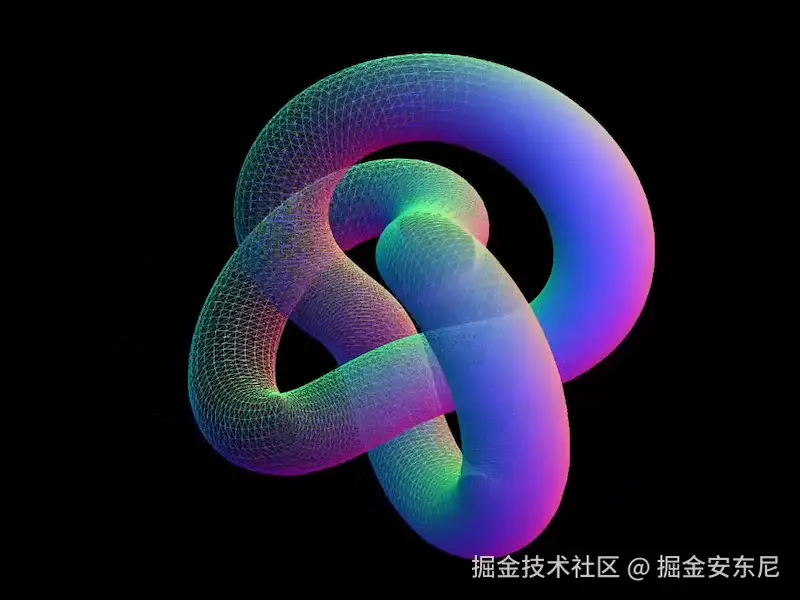
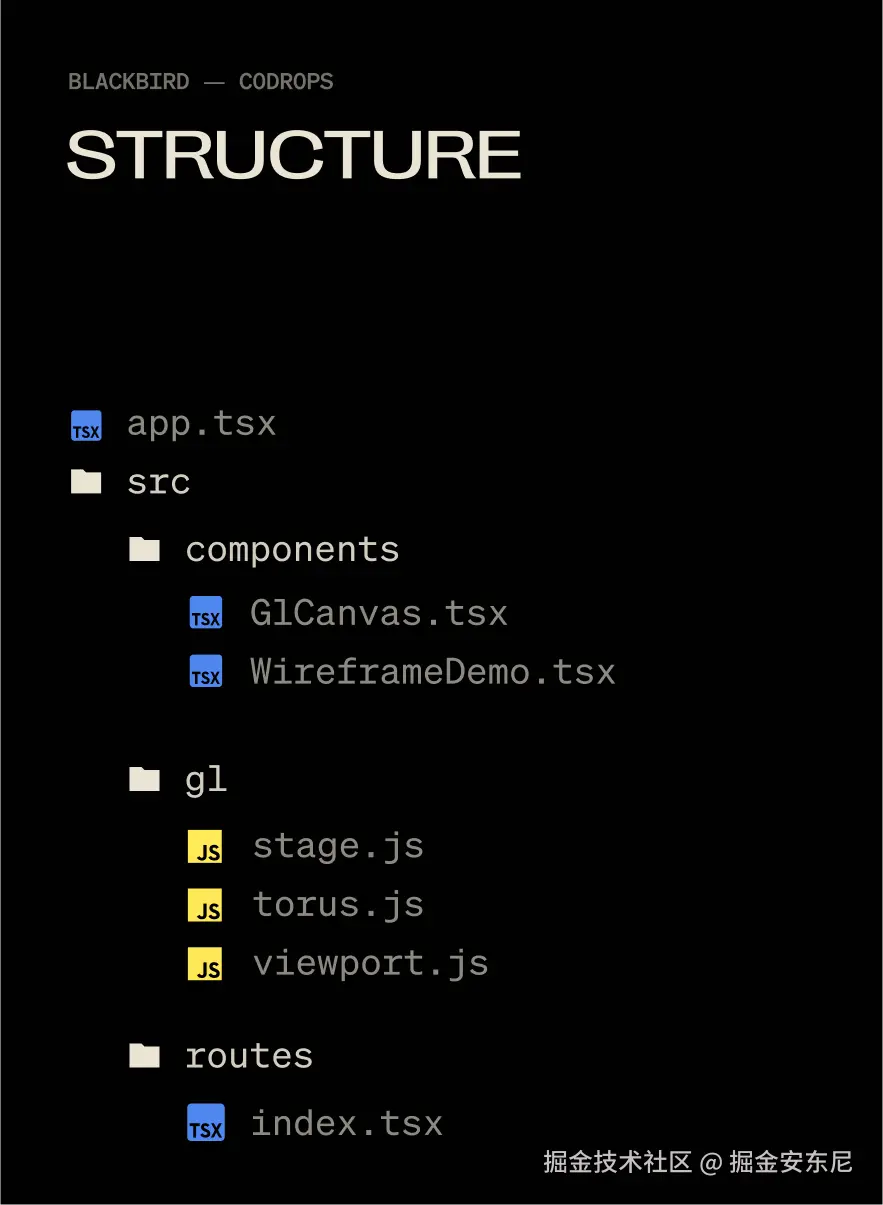
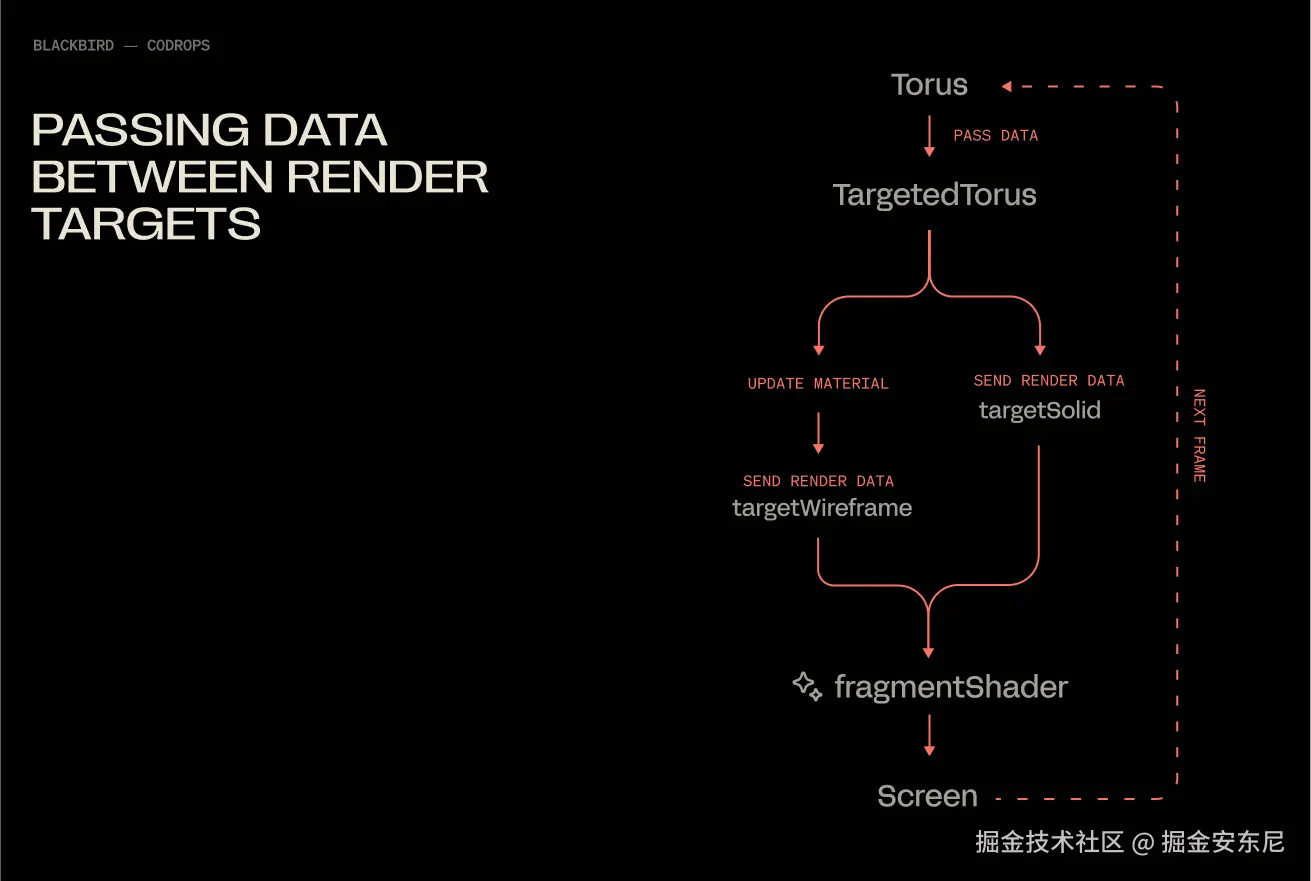
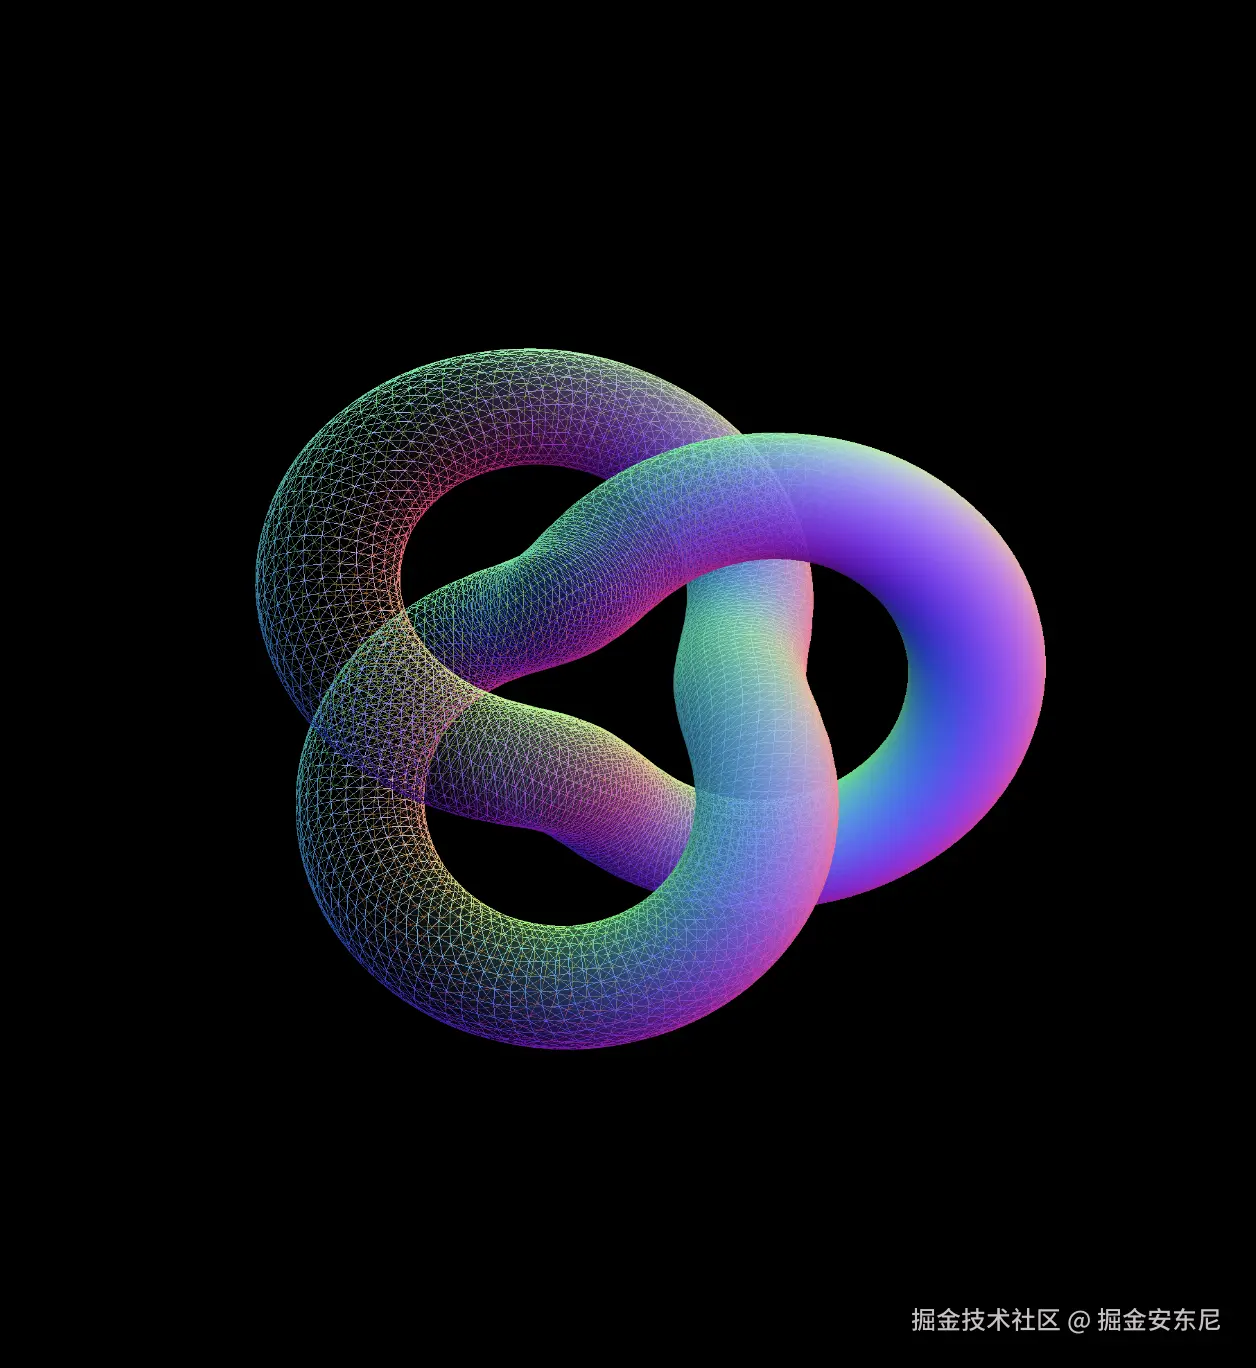
本篇依然来自于我们的 《前端周刊》 项目! 由团队成员 德育处主任 翻译,他的文章总是能在严肃的技术细节中穿插让人会心一笑的段子,让技术阅读像刷短视频一样丝滑~ 欢迎大家和他聊聊写代码时的奇思妙想🤣 还能第一时间追踪全球最新前端资讯! 原文:tympanus.net/codrops/202… ![image.png](https://developer.qcloudimg.com/http-save/yehe-7738744/c147579e93e98d8b985757ef7528ca8c.webp) 本文会一步步拆解如何用 Three.js 的渲染目标实现线框与实体的混合效果,顺便聊聊在 Solid.js 中怎么管理 WebGL 的生命周期。 ![01.png](https://developer.qcloudimg.com/http-save/yehe-7738744/385a362756f2d0d858e8c71178f45f90.webp) 我做过一个叫 Blackbird 的实验性网站,当时就是靠它熟悉了 Solid.js 里的 WebGL 用法。它讲述了 SR-71 是如何以超级技术细节制造的过程。而咱们这次要聊的线框效果,正好能帮着展示 SR-71 表面下的技术细节,同时又能保留符合网站风格的金属质感外观。 以下是 Blackbird 网站上的效果: ![02.GIF](https://developer.qcloudimg.com/http-save/yehe-7738744/3327f69d01938c14986838f8e039218f.webp) 在这篇教程里,我们会从头复刻这个效果:先把模型渲染两遍(一遍实体、一遍线框),再用着色器把两者混合,做出平滑的动画过渡。最终得到的技术很灵活,能用于技术展示、全息效果,或者任何想同时呈现 3D 物体结构和表面的场景。 可以先看看演示效果 ![03.GIF](https://developer.qcloudimg.com/http-save/yehe-7738744/627a3b1e7a154bcc4b00bee0e76db017.webp) 这里面有三个核心要素:材质属性、渲染目标,还有一个黑白着色器渐变。咱们这就开始! ## 在开始之前,需要先了解一下 Solid.js Solid.js 这框架你可能不常听说,我个人项目已经全换成它了 —— 一是因为它的开发体验极简到离谱,二是 JSX 这东西实在太好用了。其实这个演示里的 Solid.js 部分完全可以去掉,换成原生 JS 也行。但说不定你用了会爱上它呢🙂 感兴趣的话可以去了解下 Solid.js。 ### 我为何要换 Solid.js ? 简单说:全栈 JSX 支持,还没有 Next、Nuxt 那些条条框框,而且压缩后才 8kb 左右,简直离谱。 稍微技术点说:它用 JSX 写,但不搞虚拟 DOM,所以 “响应式”(类似 React 的 `useState`)不会重新渲染整个组件,只会更更新单个 DOM 节点。而且它是同构的,再也不用写 `"use client"` 了。 ## 搭建场景 实现这个效果不用太复杂的东西:一个网格(Mesh)、相机(Camera)、渲染器(Renderer)和场景(Scene)就行。我用了一个叫 `Stage` 的基础类(起这名有点像剧场那味儿)来管理初始化时机。 ### 跟踪窗口尺寸的全局对象 调用 `window.innerWidth` 和 `window.innerHeight` 会触发文档重排。所以我把这些值存在一个对象里,只在必要时更新,读取也从这个对象拿,避免直接用 `window` 导致重排。注意默认值都设为 `0`,因为用 SSR(服务端渲染)时 `window` 会是 `undefined`,得等应用挂载、GL 类初始化、`window` 可用后再设置,不然就会遇到那个经典错误:Cannot read properties of undefined (reading 'window')。 ``` // src/gl/viewport.js export const viewport = { width: 0, height: 0, devicePixelRatio: 1, aspectRatio: 0, }; export const resizeViewport = () => { viewport.width = window.innerWidth; viewport.height = window.innerHeight; viewport.aspectRatio = viewport.width / viewport.height; viewport.devicePixelRatio = Math.min(window.devicePixelRatio, 2); }; ``` ### 基础的 Three.js 场景、渲染器和相机 在渲染任何东西之前,我们需要个简单的框架来处理场景设置、渲染循环和 resize 逻辑。与其把这些代码散在多个文件里,不如用一个 Stage 类把相机、渲染器和场景的初始化都包起来。这样管理 WebGL 的生命周期会更方便,尤其是后面要加更复杂的对象和效果时。 ``` // src/gl/stage.js import { WebGLRenderer, Scene, PerspectiveCamera } from 'three'; import { viewport, resizeViewport } from './viewport'; class Stage { init(element) { resizeViewport() // Set the initial viewport dimensions, helps to avoid using window inside of viewport.js for SSR-friendliness this.camera = new PerspectiveCamera(45, viewport.aspectRatio, 0.1, 1000); this.camera.position.set(0, 0, 2); // back the camera up 2 units so it isn't on top of the meshes we make later, you won't see them otherwise. this.renderer = new WebGLRenderer(); this.renderer.setSize(viewport.width, viewport.height); element.appendChild(this.renderer.domElement); // attach the renderer to the dom so our canvas shows up this.renderer.setPixelRatio(viewport.devicePixelRatio); // Renders higher pixel ratios for screens that require it. this.scene = new Scene(); } render() { this.renderer.render(this.scene, this.camera); requestAnimationFrame(this.render.bind(this)); // All of the scenes child classes with a render method will have it called automatically this.scene.children.forEach((child) => { if (child.render && typeof child.render === 'function') { child.render(); } }); } resize() { this.renderer.setSize(viewport.width, viewport.height); this.camera.aspect = viewport.aspectRatio; this.camera.updateProjectionMatrix(); // All of the scenes child classes with a resize method will have it called automatically this.scene.children.forEach((child) => { if (child.resize && typeof child.resize === 'function') { child.resize(); } }); } } export default new Stage(); ``` ### 再来个好看的网格 场景准备好了,得放个有意思的东西进去渲染。环面结(torus knot)就很合适:曲线多、细节足,能同时展示线框和实体效果。我们先用简单的 `MeshNormalMaterial`,开启线框模式,这样能清楚看到它的结构,之后再换成混合着色器版本。 ``` // src/gl/torus.js import { Mesh, MeshBasicMaterial, TorusKnotGeometry } from 'three'; export default class Torus extends Mesh { constructor() { super(); this.geometry = new TorusKnotGeometry(1, 0.285, 300, 26); this.material = new MeshNormalMaterial({ color: 0xffff00, wireframe: true, }); this.position.set(0, 0, -8); // Back up the mesh from the camera so its visible } } ``` ### 关于灯光的小提示 ![04.gif](https://developer.qcloudimg.com/http-save/yehe-7738744/9ce5e31bb02c091bb882ccdb5c9bb8e0.webp) 简单起见,我们用了 MeshNormalMaterial,这样就不用折腾灯光了。Blackbird 网站原本的效果用了 6 盏灯,实在太多了 —— 我那台 M1 Max 的 GPU 渲染复杂模型加实时六点光照时,帧率直接掉到 30fps。后来减到 2 盏灯,视觉上没区别,帧率却能跑到 120fps,舒服多了。Three.js 可不像 Blender,随便加 14 盏灯,然后让电脑渲 12 小时你去睡觉 ——WebGL 里的灯光是有性能代价的🫠 ### 用 Solid JSX 组件把这些包起来 ``` // src/components/GlCanvas.tsx import { onMount, onCleanup } from 'solid-js'; import Stage from '~/gl/stage'; export default function GlCanvas() { // let is used instead of refs, these aren't reactive let el; let gl; let observer; onMount(() => { if(!el) return gl = Stage; gl.init(el); gl.render(); observer = new ResizeObserver((entry) => gl.resize()); observer.observe(el); // use ResizeObserver instead of the window resize event. // It is debounced AND fires once when initialized, no need to call resize() onMount }); onCleanup(() => { if (observer) { observer.disconnect(); } }); return ( ); } ``` 在 Solid 里用 `let` 声明引用,没有专门的 `useRef()` 函数。信号(signals)是唯一的响应式方式。想了解更多 Solid 的引用用法可以[点这里](https://link.juejin.cn/?target=https%3A%2F%2Fdocs.solidjs.com%2Fconcepts%2Frefs)。 然后把这个组件放进 `app.tsx`: ``` // src/app.tsx import { Router } from '@solidjs/router'; import { FileRoutes } from '@solidjs/start/router'; import { Suspense } from 'solid-js'; import GlCanvas from './components/GlCanvas'; export default function App() { return ( ( {props.children} )} > ); } ``` 我用的每个 3D 元素都和页面上的特定元素绑定(通常是为了时间线和滚动效果),所以会为每个类创建单独的组件。这样当一个页面上有 5、6 个 WebGL 效果时,管理起来会更清楚。 ``` // src/components/WireframeDemo.tsx import { createEffect, createSignal, onMount } from 'solid-js' import Stage from '~/gl/stage'; import Torus from '~/gl/torus'; export default function WireframeDemo() { let el; const [element, setElement] = createSignal(null); const [actor, setActor] = createSignal(null); createEffect(() => { setElement(el); if (!element()) return; setActor(new Torus()); // Stage is initialized when the page initially mounts, // so it's not available until the next tick. // A signal forces this update to the next tick, // after Stage is available. Stage.scene.add(actor()); }); return ; } ``` 用 `createEffect()` 代替 `onMount()`:它会自动跟踪依赖(这里是 `element` 和 `actor`),依赖变化时就会执行函数,再也不用写带依赖数组的 `useEffect()` 了🙃。想了解更多 Solid 的` createEffec`t 可[以点这](https://link.juejin.cn/?target=https%3A%2F%2Fdocs.solidjs.com%2Freference%2Fbasic-reactivity%2Fcreate-effect)里。 再来个简单的路由放这个组件: ``` // src/routes/index.tsx import WireframeDemo from '~/components/WiframeDemo'; export default function Home() { return ( ); } ``` ![05.png](https://developer.qcloudimg.com/http-save/yehe-7738744/e5f7b918ee0352b307a92e05678f3c7f.webp) 现在你会看到这样的效果: ![06.png](https://developer.qcloudimg.com/http-save/yehe-7738744/a0e258e3016a229311bc093a49c1e490.webp) ## 给材质切换线框模式 我特别喜欢 Blackbird 网站的线框风格!它很符合故事里那种原型机的感觉,全纹理的模型太 “干净” 了,线框则带点 “粗糙” 和未完成感。在 Three.js 里,差不多任何材质都能这么改成线框: ``` // /gl/torus.js this.material.wireframe = true this.material.needsUpdate = true; ``` ![07.gif](https://developer.qcloudimg.com/http-save/yehe-7738744/d4768751c76a979115304606ee3b557e.webp) 彩虹色环面结从线框切换到实体颜色 但我们想实现的是动态切换模型的部分区域,而不是整个模型。 这时候就该渲染目标登场了。 ## 有意思的部分:渲染目标 渲染目标是个挺深的话题,但简单说就是:屏幕上看到的每一帧都是 GPU 要渲染的内容,在 WebGL 里,你可以把这一帧导出,作为纹理重新用到另一个网格上 —— 相当于给渲染输出找个 “目标”,这就是渲染目标。 我们需要两个这样的目标,所以可以建一个类重复使用。 ``` // src/gl/render-target.js import { WebGLRenderTarget } from 'three'; import { viewport } from '../viewport'; import Torus from '../torus'; import Stage from '../stage'; export default class RenderTarget extends WebGLRenderTarget { constructor() { super(); this.width = viewport.width * viewport.devicePixelRatio; this.height = viewport.height * viewport.devicePixelRatio; } resize() { const w = viewport.width * viewport.devicePixelRatio; const h = viewport.height * viewport.devicePixelRatio; this.setSize(w, h) } } ``` 这东西其实就是个纹理输出,没别的。 现在可以建个类来处理这些输出了。我知道类有点多,但把功能拆成一个个小单元,能更清楚地知道每个部分在干嘛。调试 WebGL 时,那种 800 行的 “意大利面” 大杂烩类简直是噩梦。 ``` // src/gl/targeted-torus.js import { Mesh, MeshNormalMaterial, PerspectiveCamera, PlaneGeometry, } from 'three'; import Torus from './torus'; import { viewport } from './viewport'; import RenderTarget from './render-target'; import Stage from './stage'; export default class TargetedTorus extends Mesh { targetSolid = new RenderTarget(); targetWireframe = new RenderTarget(); scene = new Torus(); // The shape we created earlier camera = new PerspectiveCamera(45, viewport.aspectRatio, 0.1, 1000); constructor() { super(); this.geometry = new PlaneGeometry(1, 1); this.material = new MeshNormalMaterial(); } resize() { this.targetSolid.resize(); this.targetWireframe.resize(); this.camera.aspect = viewport.aspectRatio; this.camera.updateProjectionMatrix(); } } ``` 现在把 `WireframeDemo.tsx` 组件里的 `Torus` 换成 `TargetedTorus`: ``` // src/components/WireframeDemo.tsx import { createEffect, createSignal, onMount } from 'solid-js'; import Stage from '~/gl/stage'; import TargetedTorus from '~/gl/targeted-torus'; export default function WireframeDemo() { let el; const [element, setElement] = createSignal(null); const [actor, setActor] = createSignal(null); createEffect(() => { setElement(el); if (!element()) return; setActor(new TargetedTorus()); // ; } ``` “现在我只看到一个蓝色方块,Nathan,感觉我们在倒退啊,快把那个好看的形状弄回来”。 嘘,这是故意的,相信我! ![08.gif](https://developer.qcloudimg.com/http-save/yehe-7738744/7d26c4d7cc40fafdc1f1819a7314bcd1.webp) ### 从 MeshNormalMaterial 到 ShaderMaterial 现在我们可以用 `ShaderMaterial` 把环面结的渲染结果贴到那个蓝色平面上作为纹理了。`MeshNormalMaterial` 不支持纹理,而且我们很快也需要用到着色器。在 `targeted-torus.js` 里删掉 `MeshNormalMaterial`,换成这个: ``` // src/gl/targeted-torus.js this.material = new ShaderMaterial({ vertexShader: ` varying vec2 v_uv; void main() { gl_Position = projectionMatrix * modelViewMatrix * vec4(position, 1.0); v_uv = uv; } `, fragmentShader: ` varying vec2 v_uv; varying vec3 v_position; void main() { gl_FragColor = vec4(0.67, 0.08, 0.86, 1.0); } `, }); ``` 现在有了个更漂亮的紫色平面,这多亏了两个着色器: - 顶点着色器(vertex shader)负责处理材质的顶点位置,这个我们就不改了 - 片元着色器(fragment shader)给材质的每个像素分配颜色和属性,这个着色器让每个像素都变成紫色 ## 使用渲染目标纹理 想显示环面结而不是紫色,我们可以通过 `uniforms` 给片元着色器传一张纹理: ``` // src/gl/targeted-torus.js this.material = new ShaderMaterial({ vertexShader: ` varying vec2 v_uv; void main() { gl_Position = projectionMatrix * modelViewMatrix * vec4(position, 1.0); v_uv = uv; } `, fragmentShader: ` varying vec2 v_uv; varying vec3 v_position; // declare 2 uniforms uniform sampler2D u_texture_solid; uniform sampler2D u_texture_wireframe; void main() { // declare 2 images vec4 wireframe_texture = texture2D(u_texture_wireframe, v_uv); vec4 solid_texture = texture2D(u_texture_solid, v_uv); // set the color to that of the image gl_FragColor = solid_texture; } `, uniforms: { u_texture_solid: { value: this.targetSolid.texture }, u_texture_wireframe: { value: this.targetWireframe.texture }, }, }); ``` 再给 `TargetedTorus` 类加个 `render` 方法(Stage 类会自动调用它): ``` // src/gl/targeted-torus.js render() { this.material.uniforms.u_texture_solid.value = this.targetSolid.texture; Stage.renderer.render(this.scene, this.camera); Stage.renderer.setRenderTarget(this.targetSolid); Stage.renderer.clear(); Stage.renderer.setRenderTarget(null); } ``` **环面结回来了!** 我们把图像纹理传给了着色器,它就渲染出了原始效果。 ![09.gif](https://developer.qcloudimg.com/http-save/yehe-7738744/2218319bd7c99c094ec1c74948111bbd.webp) ## 用着色器混合线框和实体材质 在做这个项目之前,着色器对我来说就是黑魔法。这是我第一次在生产环境用它,我平时做前端习惯了 “盒子思维”,而着色器是 0 到 1 的坐标体系,理解起来难多了。但我用过 Photoshop 和 After Effects 的图层,这些软件和着色器做的事很像:都是 GPU 计算。这就让事情简单多了 —— 先想象或画出想要的效果,想想在 Photoshop 里怎么做,再琢磨着色器里该怎么实现。如果你对着色器不熟,从 Photoshop 或 AE 的思路切入,会轻松很多。 ### 填充两个渲染目标 现在我们只通过法线把数据存到了 `solidTarget` 这个渲染目标里。我们要更新渲染循环,让着色器同时能用到 `solidTarget` 和 `wireframeTarget`。 ``` // src/gl/targeted-torus.js render() { // Render wireframe version to wireframe render target this.scene.material.wireframe = true; Stage.renderer.setRenderTarget(this.targetWireframe); Stage.renderer.render(this.scene, this.camera); this.material.uniforms.u_texture_wireframe.value = this.targetWireframe.texture; // Render solid version to solid render target this.scene.material.wireframe = false; Stage.renderer.setRenderTarget(this.targetSolid); Stage.renderer.render(this.scene, this.camera); this.material.uniforms.u_texture_solid.value = this.targetSolid.texture; // Reset render target Stage.renderer.setRenderTarget(null); } ``` 这样一来,内部的流程就像这样: ![10.png](https://developer.qcloudimg.com/http-save/yehe-7738744/a67dd13a42602c5e952c48bd23192f6b.webp) ### 在两个纹理间渐变 我们的片元着色器要加两部分内容: - smoothstep 会在两个值之间创建线性渐变。UV 坐标范围是 0 到 1,这里用 `0.15` 和 `0.65` 作为边界(比用 0 和 1 效果更明显)。然后用 uv 的 x 值决定传给 smoothstep 的参数。 - `vec4 mixed = mix(wireframe_texture, solid_texture, blend);` mix 的作用如其名,按 blend 的比例混合两个值,`0.5` 就是完美对半分。 ``` // src/gl/targeted-torus.js fragmentShader: ` varying vec2 v_uv; varying vec3 v_position; // declare 2 uniforms uniform sampler2D u_texture_solid; uniform sampler2D u_texture_wireframe; void main() { // declare 2 images vec4 wireframe_texture = texture2D(u_texture_wireframe, v_uv); vec4 solid_texture = texture2D(u_texture_solid, v_uv); float blend = smoothstep(0.15, 0.65, v_uv.x); vec4 mixed = mix(wireframe_texture, solid_texture, blend); gl_FragColor = mixed; } `, ``` 搞定,混合效果出来了: ![11.png](https://developer.qcloudimg.com/http-save/yehe-7738744/c46459781e375855ef61aab471c7f469.webp) 带线框纹理的彩虹色环面结 说实话,静态的看起来有点无聊,我们用 GSAP 加点动画吧。 ``` // src/gl/torus.js import { Mesh, MeshNormalMaterial, TorusKnotGeometry, } from 'three'; import gsap from 'gsap'; export default class Torus extends Mesh { constructor() { super(); this.geometry = new TorusKnotGeometry(1, 0.285, 300, 26); this.material = new MeshNormalMaterial(); this.position.set(0, 0, -8); // add me! gsap.to(this.rotation, { y: 540 * (Math.PI / 180), // needs to be in radians, not degrees ease: 'power3.inOut', duration: 4, repeat: -1, yoyo: true, }); } } ``` ![12.GIF](https://developer.qcloudimg.com/http-save/yehe-7738744/92840d213942daaa39c66aa0536b2c1a.webp) ### 感谢 恭喜你,花了这么些时间学会了混合两种材质。不过肯定值得,对吧?至少希望这篇文章能帮你少费点劲搞定两个渲染目标的协调工作。 ![13.gif](https://developer.qcloudimg.com/http-save/yehe-7738744/363165e35ef451418986a4228b463960.webp)





资源下载

更多资源
腾讯云软件源

腾讯云软件源

为解决软件依赖安装时官方源访问速度慢的问题,腾讯云为一些软件搭建了缓存服务。您可以通过使用腾讯云软件源站来提升依赖包的安装速度。为了方便用户自由搭建服务架构,目前腾讯云软件源站支持公网访问和内网访问。

Rocky Linux

Rocky Linux

Rocky Linux(中文名:洛基)是由Gregory Kurtzer于2020年12月发起的企业级Linux发行版,作为CentOS稳定版停止维护后与RHEL(Red Hat Enterprise Linux)完全兼容的开源替代方案,由社区拥有并管理,支持x86_64、aarch64等架构。其通过重新编译RHEL源代码提供长期稳定性,采用模块化包装和SELinux安全架构,默认包含GNOME桌面环境及XFS文件系统,支持十年生命周期更新。

Sublime Text

Sublime Text

Sublime Text具有漂亮的用户界面和强大的功能,例如代码缩略图,Python的插件,代码段等。还可自定义键绑定,菜单和工具栏。Sublime Text 的主要功能包括:拼写检查,书签,完整的 Python API , Goto 功能,即时项目切换,多选择,多窗口等等。Sublime Text 是一个跨平台的编辑器,同时支持Windows、Linux、Mac OS X等操作系统。

WebStorm

WebStorm

WebStorm 是jetbrains公司旗下一款JavaScript 开发工具。目前已经被广大中国JS开发者誉为“Web前端开发神器”、“最强大的HTML5编辑器”、“最智能的JavaScript IDE”等。与IntelliJ IDEA同源,继承了IntelliJ IDEA强大的JS部分的功能。

用户登录
用户注册