实战从源码编译LAMP架构+Discuz搭建bbs论坛
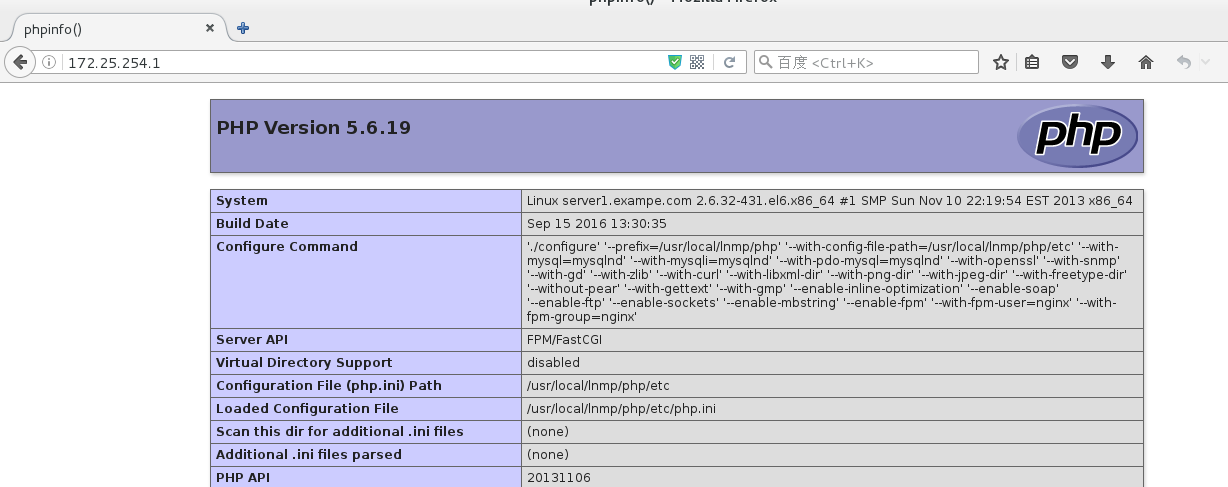
实验环境:RHEL6.5 server1.example.com 172.25.254.1 实验环境:RHEL6.5 实验内容:1.MYSQL源码编译 2.NGINX源码编译 3.PHP源码编译 4.搭建论坛 安装包:cmake-2.8.12.2-4.el6.x86_64.rpm mysql-boost-5.7.11.tar.gz gd-devel-2.0.35-11.el6.x86_64.rpm nginx-1.9.14.tar.gz re2c-0.13.5-1.el6.x86_64.rpm php-5.6.19.tar.bz2 Discuz_X3.2_SC_UTF8.zip 1.MYSQL源码编译 1) [root@server1 1.mysql编译]# ls cmake-2.8.12.2-4.el6.x86_64.rpm mysql-boost-5.7.11.tar.gz [root@server1 1.mysql编译]# tar -zxf mysql-boost-5.7.11.tar.gz [root@server1 1.mysql编译]# cd mysql-5.7.11 2 ) [root@server1 1.mysql编译]# yum update cmake-2.8.12.2-4.el6.x86_64.rpm [root@server1 mnt]# yum install cmake gcc gcc-c++ ncurses-devel bison -y 3) cmake \ #检查编译环境 -DCMAKE_INSTALL_PREFIX=/usr/local/lnmp/mysql \##安装路径 -DMYSQL_DATADIR=/usr/local/lnmp/mysql/data\##数据路径 -DMYSQL_UNIX_ADDR=/usr/local/lnmp/mysql/data/mysql.sock \#套接字接口 -DWITH_MYISAM_STORAGE_ENGINE=1 \ ##mysql引擎 -DWITH_INNOBASE_STORAGE_ENGINE=1 \ -DDEFAULT_CHARSET=utf8\##使用utf8字符 -DDEFAULT_COLLATION=utf8_general_ci\##校验字符 -DEXTRA_CHARSETS=all\##安装所有扩展字符集 -DWITH_BOOST=boost/boost_1_59_0/\##boost路径 [root@server1 mysql-5.7.11]# make ###编译 [root@server1 mysql-5.7.11]# make install ###安装 注意: rm -fr CMakeCache.txt ##错误解决完毕每次删除 lscpu ##检测cpu top 按1 ##检测每个cpu负载 make -j2##用两个cpu做编译 4)设定mysql信息 [root@server1 php-5.6.19]# groupadd -g 27 mysql [root@server1 php-5.6.19]# useradd -u 27 -g 27 -s /bin/false mysql [root@server1 php-5.6.19]# cp /usr/local/lnmp/mysql/support-files/mysql.server /etc/init.d/ [root@server1 php-5.6.19]# mv /etc/my.cnf /etc/my.cnf.bak [root@server1 php-5.6.19]# cp /usr/local/lnmp/mysql/support-files/my-default.cnf /etc/my.cnf [root@server1 php-5.6.19]# vim /etc/profile PATH=$PATH:/usr/local/lnmp/mysql/bin [root@server1 php-5.6.19]# source /etc/profile [root@server1 php-5.6.19]# chown -R mysql.mysql /usr/local/lnmp/mysql [root@server1 php-5.6.19]# mysqld --initialize --user=mysql ( --initialize-insecure ##密码为空,--user=mysql ##运行用户 --basedir= ##mysql基本目录 --datadir= ##mysql数据目录) 2016-09-15T04:12:17.004704Z 0 [Warning] TIMESTAMP with implicit DEFAULT value is deprecated. Please use --explicit_defaults_for_timestamp server option (see documentation for more details). 。。。。。。。。。。。。。。 2016-09-15T04:12:17.626882Z 1 [Note] A temporary password is generated for root@localhost:jT!#LrMg-5t1 《《《数据库密码(安全初始化时需要使用) [root@server1 php-5.6.19]# chown -R root /usr/local/lnmp/mysql/ [root@server1 php-5.6.19]# chown -R mysql /usr/local/lnmp/mysql/data/ [root@server1 php-5.6.19]# /etc/init.d/mysql.server start [root@server1 php-5.6.19]# mysql_secure_installation ####安全初始化 Securing the MySQL server deployment. Enter password for user root: ###此处输入前边产生的密码 Press y|Y for Yes, any other key for No: y Please enter 0 = LOW, 1 = MEDIUM and 2 = STRONG: 1 ##选择密码类型 Change the password for root ? ((Press y|Y for Yes, any other key for No) : y ###修改密码 New password: Re-enter new password: Estimated strength of the password: 100 Do you wish to continue with the password provided?(Press y|Y for Yes, any other key for No) : y Remove anonymous users? (Press y|Y for Yes, any other key for No) : y Remove test database and access to it? (Press y|Y for Yes, any other key for No) : y Reload privilege tables now? (Press y|Y for Yes, any other key for No) : y All done! 2.NGINX源码编译 2.1关闭debug调式模式,屏蔽nginx版本号 [root@server1 mnt]# tar -zxf nginx-1.9.14.tar.gz [root@server1 mnt]# cd nginx-1.9.14 [root@server1 nginx-1.9.14]# vim src/core/nginx.h ##伪装版本 #define nginx_version 1009014 #define NGINX_VERSION "1.9.14" #define NGINX_VER "willis/" [root@server1 nginx-1.9.14]# vim auto/cc/gcc ##关闭debug调式 178 # debug 179 #CFLAGS="$CFLAGS -g" [root@server1 fpm]# groupadd -g 666 nginx [root@server1 fpm]# useradd -u 666 -g 666 -s /sbin/nologin nginx 2.2编译安装 [root@server1 nginx-1.9.14]# yum insall pcre-devel openssl-devel -y [root@server1 nginx-1.9.14]# ./configure \ > --prefix=/usr/local/lnmp/nginx \ > --with-http_ssl_module \ > --with-http_stub_status_module ##监控模块 [root@server1 nginx-1.9.14]# make [root@server1 nginx-1.9.14]# make install [root@server1 nginx-1.9.14]# cd /usr/local/lnmp/nginx/ [root@server1 nginx]# vim /etc/profile export PATH=$PATH:/usr/local/lnmp/mysql/bin:/usr/local/lnmp/nginx/sbin [root@server1 nginx]# source /etc/profile [root@server1 nginx]# nginx ##开启nginx [root@server1 nginx]# netstat -antple |grep nginx tcp 0 0 0.0.0.0:80 0.0.0.0:* LISTEN 0 181762 29192/nginx [root@server1 nginx]# curl -I localhost ##检测http协议提供程序 HTTP/1.1 200 OK Server: willis/ ###显示版本已经隐藏 Date: Thu, 15 Sep 2016 04:48:49 GMT Content-Type: text/html Content-Length: 612 Last-Modified: Wed, 14 Sep 2016 21:26:20 GMT Connection: keep-alive ETag: "57d9c07c-264" Accept-Ranges: bytes [root@server1 nginx]# du -sh /usr/local/lnmp/nginx/ ###轻量级nginx 944K/usr/local/lnmp/nginx/ [root@server1 nginx]# nginx -t ##检测nginx配置 nginx: the configuration file /usr/local/lnmp/nginx/conf/nginx.conf syntax is ok nginx: configuration file /usr/local/lnmp/nginx/conf/nginx.conf test is successful [root@server1 nginx]# nginx -s reload ##加载配置 3.PHP源码编译 3.1编译安装php [root@server1 mnt]# ls gd-devel-2.0.35-11.el6.x86_64.rpm re2c-0.13.5-1.el6.x86_64.rpm php-5.6.19.tar.bz2 [root@server1 mnt]# yum install libxml2-devel curl-devel gd-devel-2.0.35-11.el6.x86_64.rpm gmp-devel net-snmp-devel.x86_64 re2c-0.13.5-1.el6.x86_64.rpm -y [root@server1 mnt]# tar -jxf php-5.6.19.tar.bz2 [root@server1 mnt]# cd php-5.6.19 [root@server1 php-5.6.19]# ./configure --prefix=/usr/local/lnmp/php \ > --with-config-file-path=/usr/local/lnmp/php/etc \ > --with-mysql=mysqlnd \##自动加载mysql信息 > --with-mysqli=mysqlnd \ > --with-pdo-mysql=mysqlnd \ > --with-openssl \ > --with-snmp \##加载简单网管协议 > --with-gd \##支持图形 > --with-zlib \##支持网页压缩 > --with-curl \##支持文本浏览 > --with-libxml-dir \##支持xml > --with-png-dir \##支持png图片 > --with-jpeg-dir \##支持jpeg > --with-freetype-dir \ > --without-pear \##不联网安装 > --with-gettext \## > --with-gmp \##支持gmp > --enable-inline-optimization \ > --enable-soap \##支持动态加载模块 > --enable-ftp \##支持ftp > --enable-sockets \##支持套结字 > --enable-mbstring \ > --enable-fpm \ > --with-fpm-user=nginx \##使php和nginx权限一致 > --with-fpm-group=nginx [root@server1 php-5.6.19]# make [root@server1 php-5.6.19]# make install 3.2php 配置 [root@server1 php-5.6.19]# cp php.ini-production /usr/local/lnmp/php/etc/php.ini [root@server1 php-5.6.19]# cd /usr/local/lnmp/php/etc [root@server1 etc]# cp php-fpm.conf.default php-fpm.conf [root@server1 etc]# vim php-fpm.conf 25 pid = run/php-fpm.pid [root@server1 etc]# vim php.ini 925 date.timezone = Asia/Shanghai 1001 pdo_mysql.default_socket=/usr/local/lnmp/mysql/data/mysql.sock 1150 mysql.default_socket=/usr/local/lnmp/mysql/data/mysql.sock 1209 mysqli.default_socket=/usr/local/lnmp/mysql/data/mysql.sock [root@server1 etc]# cd /mnt/php-5.6.19/sapi/fpm/ [root@server1 fpm]# mv init.d.php-fpm /etc/init.d/fpm [root@server1 fpm]# chmod +x /etc/init.d/fpm [root@server1 fpm]# chmod 775 /usr/local/ln [root@server1 fpm]# /etc/init.d/fpm start [root@server1 fpm]# vim /etc/profile export PATH=$PATH: /usr/local/lnmp/php/bin: /usr/local/lnmp/php/sbin [root@server1 fpm]# source /etc/profile [root@server1 fpm]# php -m ##查看php支持插件 3.3配置nginx使其支持php [root@server1 fpm]# vim /usr/local/lnmp/nginx/html/index.php ##php测试页 <?php phpinfo(); ?> [root@server1 fpm]# vim /usr/local/lnmp/nginx/conf/nginx.conf 47 location / { 48 root html; 49 indexindex.phpindex.html index.htm; 50 } 73 location ~ \.php$ { 74 root html; 75 fastcgi_pass 127.0.0.1:9000; 76 fastcgi_index index.php; 77 fastcgi_param SCRIPT_FILENAME /scripts$fastcgi_script_name; 78 include fastcgi.conf; ##修改成存在的名称 79 } [root@server1 fpm]# nginx -t nginx: the configuration file /usr/local/lnmp/nginx/conf/nginx.conf syntax is ok nginx: configuration file /usr/local/lnmp/nginx/conf/nginx.conf test is successful [root@server1 fpm]# nginx -s reload 3.4测试nginx对php支持 4.搭建论坛 4.1新建数据库并赋权限 [root@server1 mnt]# ls Discuz_X3.2_SC_UTF8.zip [root@server1 mnt]# unzip Discuz_X3.2_SC_UTF8.zip -d /usr/local/lnmp/nginx/html [root@server1 mnt]# cd /usr/local/lnmp/nginx/html [root@server1 html]# mv upload/ bbs [root@server1 html]# chmod -R 777 bbs/ [root@server1 html]# mysql -uroot -p mysql> CREATE DATABAsE discuz; Query OK, 1 row affected (0.00 sec) mysql> CREATE USER discuz@localhost identified by 'Willis123./'; Query OK, 0 rows affected (0.00 sec) mysql> GRANT ALL ON discuz.* to discuz@localhost identified by 'Willis123./'; Query OK, 0 rows affected, 1 warning (0.00 sec) 4.2网页搭建论坛 搞定. 本文转自willis_sun 51CTO博客,原文链接:http://blog.51cto.com/willis/1853585,如需转载请自行联系原作者