首页 文章 精选 留言 我的

精选列表

搜索[模块],共10000篇文章
优秀的个人博客,低调大师

23、【支付模块开发】——Java对接支付宝步骤(沙箱环境)

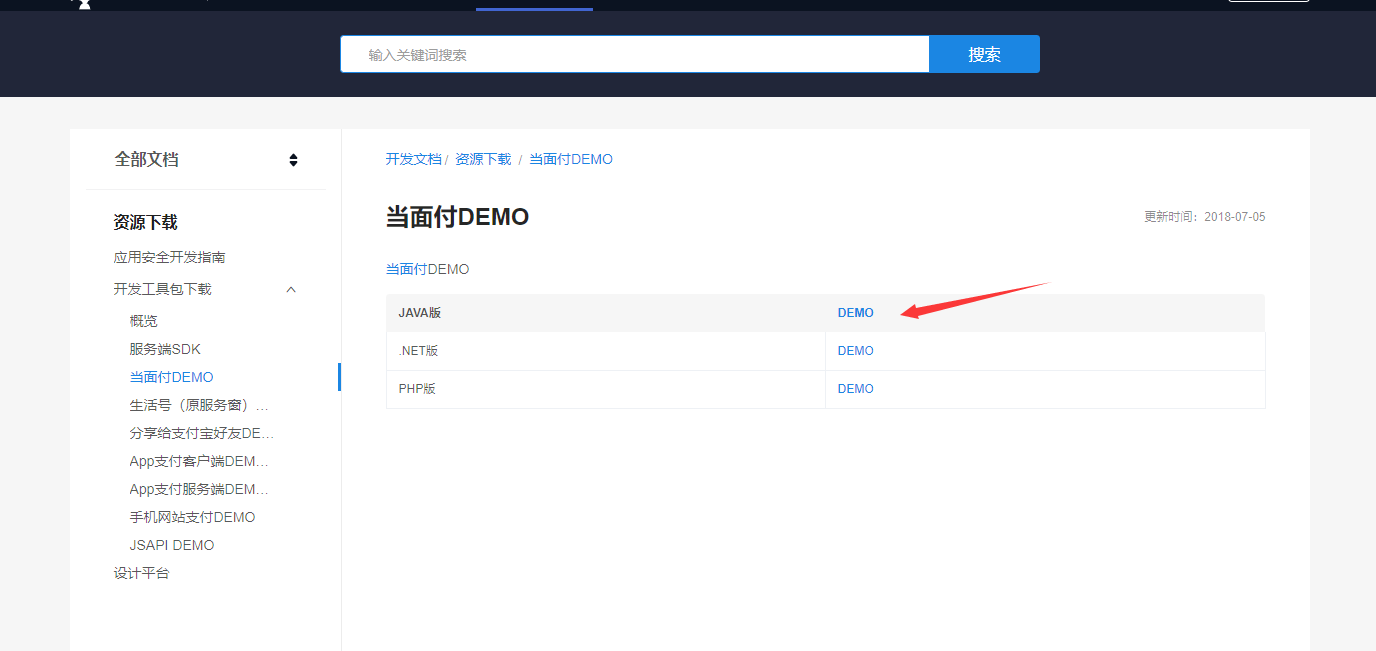
1、下载导入项目 https://docs.open.alipay.com/54/104506 打开支付宝接口官网: image.png 我们下载Java版Demo 下载之后解压,然后我们用IDEA导入这个Demo项目~ image.png 然后,我们下载一个我们后面需要生成生成RSA密钥的工具: https://docs.open.alipay.com/291/105971 由于我是在Win平台开发,所以下载自己操作系统对应的版本就行: image.png 下载之后我们就先放一边啦~ 导入项目之后,我们要查看自己导入的项目是否报错,如果出现报错,可能要调整一下自己的项目环境: image.png 好,配置好项目时候,我们先不着急运行项目, 我们打开zhifubao.properties,显而易见,这是一个配置文件,那么我们记下来就将这个配置文件的相关配置配好~ image.png 2、配置好配置文件 由于我们测试的时候沙箱环境: 首先: 1、打开支付宝API官网的沙箱位置:https://openhome.alipay.com/platform/appDaily.htm?tab=info 打开这个网址,我们就会看到下面界面: image.png 首先我们看到相关参数,我们不管,我们一步步按照官网给的Demo里面的配置文件一个个将配置文件配好即可~ 2、打开zhifubao.properties配置文件,我们就会看到下面代码: image.png 首先我们先配置最上面的四行: # 支付宝网关名、partnerId和appId open_api_domain = https://openapi.alipay.com/gateway.do mcloud_api_domain = http://mcloudmonitor.com/gateway.do pid = 此处请填写你的PID appid = 此处请填写你当面付的APPID 这四行我们根据沙箱环境里面给的对应参数来配置 image.png mcloud_api_domain这个参数我们不需要改变~ 3、接下来就是配置公钥和私钥了 我们打开上面再这个链接下载的支付宝官网提供的公钥私钥生成工具:https://docs.open.alipay.com/291/105971 解压之后: image.png 双击: RSA签名验签工具.bat 由于我们这次选择的是RSA2密钥方式:所以我们选择密钥长度为2048的方式: image.png 点击生成密钥 接下来我们配置Demo中配置文件的下两行 # RSA私钥、公钥和支付宝公钥 private_key = 此处请填写你的商户私钥且转PKCS8格式 public_key = 此处请填写你的商户公钥 将上面密钥生产工具生成的私钥和公钥复制到对应的地方即可: 4、下面一步,我们配置支付宝公钥,这一步我们要回到沙箱环境中: image.png 对这一行进行操作,首先我们复制上面密钥工具生成的公钥,然后再支付宝沙箱环境页面,点击查看公钥,然后点击修改,删除原来的,然后将我们刚才在密钥生成工具生成的公钥粘贴到里面: image.png 点击保存: 然后点击查看支付宝公钥: image.png image.png 然后复制里面的支付宝公钥,下一步回到我们的Demo项目中,打开我们的 zhifubao.properties配置文件,将复制的支付宝公钥放到下面参数的配置上,记得把原来配置文件里默认的删除掉, #SHA256withRsa对应支付宝公钥 alipay_public_key = 这个是默认注释的,因为我们选中的是 #SHA256withRsa秘钥方式, 下面的参数选择默认的就差不多啦。。 到此,我们的支付宝Demo的配置文件算是配置好了~ 3、运行Demo: 配置好配置文件之后,我们运行一下Demo的Main函数:发现项目可以正常跑起来了(如果你发发现你的项目报错,可能就是配置配置文件相关地方配置错了,根据错误提示一步步排查即可) 运行起来之后我们现在寻找输出日志里面一个参数: image.png 我们复制冒号里面的内容 打开草料二维码,将冒号里面的内容生成二维码: image.png 然后在沙箱环境中下载沙箱版支付宝: image.png 用沙箱版支付宝登录我们的买家账号,然后扫描生成的二维码,就发现可以付款啦~ image.png image.png

优秀的个人博客,低调大师

linux 定时任务 python找不到模块问题解决

先说结论:以后在涉及到定时任务,指定python的环境路径。 shell中python路径问题 定时任务默认的python路径为系统自带 写一个python程序sys_path.py import sys print(sys.path) 放入shell脚本sys_path.sh python ./sys_path.py 执行sh脚本 sh sys_path.sh ['/data0/qinyk/test', '/data0/anaconda3/lib/python36.zip', '/data0/anaconda3/lib/python3.6', '/data0/anaconda3/lib/python3.6/lib-dynload', '/data0/anaconda3/lib/python3.6/site-packages', '/data0/anaconda3/lib/python3.6/site-packages/PyHive-0.3.0-py3.6.egg', '/data0/anaconda3/lib/python3.6/site-packages/xgboost-0.71-py3.6.egg'] 定时任务crontab -e 并保存日志 * * * * * sh sys_path.sh >sys_path.log 2>&1 cat sys_path.log ['/data0/qinyk/test', '/usr/lib64/python26.zip', '/usr/lib64/python2.6', '/usr/lib64/python2.6/plat-linux2', '/usr/lib64/python2.6/lib-tk', '/usr/lib64/python2.6/lib-old', '/usr/lib64/python2.6/lib-dynload', '/usr/lib64/python2.6/site-packages', '/usr/lib64/python2.6/site-packages/gtk-2.0', '/usr/lib/python2.6/site-packages']

优秀的个人博客,低调大师

Python random模块(获取随机数)常用方法和使用例子

random.randomrandom.random()用于生成一个0到1的随机符点数: 0 <= n < 1.0 random.uniformrandom.uniform(a, b),用于生成一个指定范围内的随机符点数,两个参数其中一个是上限,一个是下限。如果a < b,则生成的随机数n: a <= n <= b。如果 a > b, 则 b <= n <= a 代码如下: print random.uniform(10, 20)print random.uniform(20, 10) 18.7356606526 12.5798298022 random.randintrandom.randint(a, b),用于生成一个指定范围内的整数。其中参数a是下限,参数b是上限,生成的随机数n: a <= n <= b 代码如下: print random.randint(12, 20) # 生成的随机数 n: 12 <= n <= 20print random.randint(20, 20) # 结果永远是20 print random.randint(20, 10) # 该语句是错误的。下限必须小于上限 random.randrangerandom.randrange([start], stop[, step]),从指定范围内,按指定基数递增的集合中 获取一个随机数。如:random.randrange(10, 100, 2),结果相当于从[10, 12, 14, 16, ... 96, 98]序列中获取一个随机数。random.randrange(10, 100, 2)在结果上与 random.choice(range(10, 100, 2) 等效 random.choicerandom.choice从序列中获取一个随机元素。其函数原型为:random.choice(sequence)。参数sequence表示一个有序类型。这里要说明 一下:sequence在python不是一种特定的类型,而是泛指一系列的类型。list, tuple, 字符串都属于sequence。有关sequence可以查看python手册数据模型这一章。下面是使用choice的一些例子: 代码如下: print random.choice("学习Python")print random.choice(["JGood", "is", "a", "handsome", "boy"])print random.choice(("Tuple", "List", "Dict")) random.shufflerandom.shuffle(x[, random]),用于将一个列表中的元素打乱。如: 代码如下: p = ["Python", "is", "powerful", "simple", "and so on..."]random.shuffle(p)print p ['powerful', 'simple', 'is', 'Python', 'and so on...'] random.samplerandom.sample(sequence, k),从指定序列中随机获取指定长度的片断。sample函数不会修改原有序列 代码如下: list = [1, 2, 3, 4, 5, 6, 7, 8, 9, 10]slice = random.sample(list, 5) # 从list中随机获取5个元素,作为一个片断返回print sliceprint list # 原有序列并没有改变 随机整数: 代码如下: import randomrandom.randint(0,99) 21 随机选取0到100间的偶数: 代码如下: import randomrandom.randrange(0, 101, 2) 42 随机浮点数: 代码如下: import randomrandom.random()0.85415370477785668random.uniform(1, 10) 5.4221167969800881 随机字符: 代码如下: import randomrandom.choice('abcdefg%^*f') 'd' 多个字符中选取特定数量的字符: 代码如下: import random random.sample('abcdefghij', 3) ['a', 'd', 'b'] 多个字符中选取特定数量的字符组成新字符串: 代码如下: import randomimport stringstring.join( random.sample(['a','b','c','d','e','f','g','h','i','j'], 3) ).replace(" ","") 'fih' 随机选取字符串: 代码如下: import randomrandom.choice ( ['apple', 'pear', 'peach', 'orange', 'lemon'] ) 'lemon' 洗牌: 代码如下: import randomitems = [1, 2, 3, 4, 5, 6]random.shuffle(items)items [3, 2, 5, 6, 4, 1]

优秀的个人博客,低调大师

探索 OpenStack 之(17):计量模块 Ceilometer 中的数据收集机制

本文将阐述 Ceilometer 中的数据收集机制。Ceilometer 使用三种机制来收集数据: Notifications:Ceilometer 接收 OpenStack 其它服务发出的 notification message Polling:直接从 Hypervisor 或者 使用 SNMP 从host machine,或者使用 OpenStack 其它服务的 API 来获取数据。 RESTful API:别的 application 使用 Ceilometer 的 REST API 创建 samples。 1. Notifications 1.1 被 Ceilometer 处理的 notifications 所有的 OpenStack 服务都会在执行了某种操作或者状态变化时发出 notification。一些 nofication message 会包含 metering 需要的数据,这部分消息会被ceilometer 处理并转化为samples。下表列出了目前 Ceilometer 所处理的各服务的notification: (参考文档:http://docs.openstack.org/admin-guide-cloud/content/section_telemetry-notifications.html) OpenStack service Event types Note OpenStack Compute scheduler.run_instance.scheduled,scheduler.select_destinations compute.instance.* For a more detailed list of Compute notifications please check theSystem Usage Data wiki page. Bare metal module for OpenStack hardware.ipmi.* OpenStack Image Service image.update,image.upload,image.delete,image.send The required configuration for Image service can be found in theConfigure the Image Service for Telemetry sectionsection in theOpenStack Installation Guide. OpenStack Networking floatingip.create.end,floatingip.update.*,floatingip.exists network.create.end,network.update.*,network.exists port.create.end,port.update.*,port.exists router.create.end,router.update.*,router.exists subnet.create.end,subnet.update.*,subnet.exists l3.meter Orchestration module orchestration.stack.create.end,orchestration.stack.update.end orchestration.stack.delete.end,orchestration.stack.resume.end orchestration.stack.suspend.end OpenStack Block Storage volume.exists,volume.create.*,volume.delete.* volume.update.*,volume.resize.*,volume.attach.* volume.detach.* snapshot.exists,snapshot.create.* snapshot.delete.*,snapshot.update.* The required configuration for Block Storage service can be found in theAdd the Block Storage service agent for Telemetry sectionsection in theOpenStack Installation Guide. 1.2 Cinder Volume Notificaitons 发出过程 Cinder 中 /cinder/volume/util.py 的notify_about_volume_usage 函数负责调用 oslo.message 的方法来发出 volume usage 相关的 notificaiton message: def notify_about_volume_usage(context, volume, event_suffix, extra_usage_info=None, host=None): if not host: host = CONF.host if not extra_usage_info: extra_usage_info = {} usage_info = _usage_from_volume(context, volume, **extra_usage_info) rpc.get_notifier("volume", host).info(context, 'volume.%s' % event_suffix, usage_info) 下图显示了该函数被调用的地方。可见: Controller 节点上的 cinder-api 会发出 Info 级别的 volume.update.* notificaiton Controller 节点上的cinder-scheduler 会发出 Info 级别的volume.create.* notification Volume 节点上的 cinder-volume 会发出Info 级别的别的volume.*.* notificaiton 再看看 notification 发出的时机。以 volume.update.* 为例: @wsgi.serializers(xml=VolumeTemplate) def update(self, req, id, body): """Update a volume.""" ... try: volume = self.volume_api.get(context, id, viewable_admin_meta=True) volume_utils.notify_about_volume_usage(context, volume, 'update.start') #开始更新前发出 volume.update.start notificaiton self.volume_api.update(context, volume, update_dict) except exception.NotFound: msg = _("Volume could not be found") raise exc.HTTPNotFound(explanation=msg) volume.update(update_dict) utils.add_visible_admin_metadata(volume) volume_utils.notify_about_volume_usage(context, volume, 'update.end') #更新结束后发出 volume.update.end notification return self._view_builder.detail(req, volume) 在来看看使用 notificaiton driver 是如何发出 notification 的: // /oslo/messaging/notify/_impl_messaging.py, // notificaiton driver 由 cinder.conf 配置项 notification_driver = cinder.openstack.common.notifier.rpc_notifier 指定,它实际对应的是 oslo.messaging.notify._impl_messaging:MessagingDriver (对应关系由 cinder/setup.cfg 定义) def notify(self, ctxt, message, priority, retry): priority = priority.lower() for topic in self.topics: target = messaging.Target(topic='%s.%s' % (topic, priority)) #topic 是 notificaitons.info,因此会被发到同名的queue。使用默认的由 cinder.conf 中配置项 control_exchange 指定的exchange,其默认值为 openstack。而 topic 中的 "notifications" 由配置项 #notification_topics=notifications指定。 try: self.transport._send_notification(target, ctxt, message, version=self.version, retry=retry) #Send a notify message on a topic except Exception: ...... 因此,为了 Cinder 能正确发出 notificaiton 被 Ceilometer 接收到,需要在 controller 节点和 cinder-volume 节点上的 cinder.conf 中做如下配置: control_exchange = cinder #因为queue "notificaitons.info" 是 bind 到 "cinder" exchange 上的,所以 cinder 的 notificaiton message 需要被发到 “cinder” exchange。 notification_driver = cinder.openstack.common.notifier.rpc_notifier #在某些时候 /oslo/messaging/notify/_impl_messaging.py 不存在,需要手工从别的地方拷贝过来 Cinder 还有会同样的方式发出别的资源的notification: 81: rpc.get_notifier("volume", host).info(context, 'volume.%s' % event_suffix, 113: rpc.get_notifier('snapshot', host).info(context, 'snapshot.%s' % event_suffix, 129: rpc.get_notifier('replication', host).info(context, 'replication.%s' % suffix, 145: rpc.get_notifier('replication', host).error(context, 'replication.%s' % suffix, 174: rpc.get_notifier("consistencygroup", host).info(context,'consistencygroup.%s' % event_suffix, 204: rpc.get_notifier("cgsnapshot", host).info( 但是目前 Ceilometer 只处理 volume 和 snapshot notificaiton message。 1.3 Ceilometer 处理 Volume notifications 的过程 Ceilometer 从 AMQP message queue "notifications.info" 中获取 notificaiton 消息。该 queue 的名字由 ceilometer.conf 中的配置项notification_topics = notifications 指定。它会按照一定的方法将 notification 转化为 ceilometer event,然后再转化为 samples。 1.4 Cinder 到 Ceilometer 全过程 (1) cinder-* 发出 event-type 为 "volume.*.*" topic 为"<topic>.<priority>" 的消息 到 类型为 topic 名为 <service> 的exchange (2)exchange <service> 和queue "<topic>.<priority>" 使用 routing-key "<topic>.<priority>"绑定 (3)notificaiton message 被 exchange 转发到queue "<topic>.<priority>" (4)ceilometer-agent-notification 从queue "<topic>.<priority>" 中获取 message 这里对cinder 来说: <service> 是 "cinder"。需要注意 cinder 默认的 control exchange 是 "openstack",所以使用 ceilometer 时需要将其修改为 "cinder"。 <topic> 是 "notificaitons",由 cinder.conf 中的配置项 notification_topics=notifications指定。 <priority> 是 "info",由 cinder 代码中写死的。 notificaiton message 的数据内容可参考https://wiki.openstack.org/wiki/SystemUsageData 2. Polling Ceilometer 的 polling 机制使用三种类型的 agent: Compute agent Central agent IPMI agent 在 Kilo 版本中,这些 agent 都属于ceilometer-polling,不同的是,每种agent使用不同的polling plug-ins (pollsters) 2.1 Central agent 该 agent 负责使用个 OpenStack 服务的 REST API 来获取 openstack 资源的各种信息,以及通过 SNMP 来获取 hardware 资源的信息。这些资源包括: OpenStack Networking OpenStack Object Storage OpenStack Block Storage Hardware resources via SNMP Energy consumption metrics viaKwapiframework 该 agent 收集到的 samples 会通过 AMQP 发给 Ceilometer Collector 或者外部系统。 2.2 Compute agent Compute agent 安装在 compute node 上,负责收集在上面运行的虚机的使用数据。它是通过调用 hypervisor SDK 来收集数据的。到目前为止支持的hypervisor包括: Kernel-based Virtual Machine (KVM) Quick Emulator (QEMU) Linux Containers (LXC) User-mode Linux (UML) Hyper-V XEN VMWare vSphere 除了虚机外,该 agent 还能够收集 compute 节点 cpu 的数据。这功能需要配置 nova.conf 文件中的compute_monitors项为ComputeDriverCPUMonitor。 2.3 IPMI agent IPMI agent 负责在 compute 节点上收集 IPMI 传感器(sensor)的数据,以及Intel Node Manager 的数据。 3. 使用 Ceilometer REST API 创建 samples $ ceilometer sample-create -r 37128ad6-daaa-4d22-9509-b7e1c6b08697 -m memory.usage --meter-type gauge --meter-unit MB --sample-volume 48 +-------------------+--------------------------------------------+ | Property | Value | +-------------------+--------------------------------------------+ | message_id | 6118820c-2137-11e4-a429-08002715c7fb | | name | memory.usage | | project_id | e34eaa91d52a4402b4cb8bc9bbd308c1 | | resource_id | 37128ad6-daaa-4d22-9509-b7e1c6b08697 | | resource_metadata | {} | | source | e34eaa91d52a4402b4cb8bc9bbd308c1:openstack | | timestamp | 2014-08-11T09:10:46.358926 | | type | gauge | | unit | MB | | user_id | 679b0499e7a34ccb9d90b64208401f8e | | volume | 48.0 | +-------------------+--------------------------------------------+ 4. 收集 Neutron Bandwidth samples Havana 版本中添加该功能。与 Ceilometer 其他采集方式不同的是,bandwidth 的采集是通过 neutron-meter-agent 收集,然后 push 到 oslo-messaging,ceilometer-agent-notification通过监听消息队列来收取bandwidth信息。 其实现是在 L3 router 层次来收集数据,因此需要操作员配置 IP 范围以及设置标签(label)。比如,我们加两个标签,一个表示内部网络流量,另一个表示外部网络流量。每个标签会计量一定IP范围内的流量。然后,每个标签的带宽的测量数据会被发到 MQ,然后被 Ceilometer 收集到。 参考链接: https://wiki.openstack.org/wiki/Neutron/Metering/Bandwidth https://openstackr.wordpress.com/2014/05/23/bandwidth-monitoring-with-neutron-and-ceilometer/ 5. 收集物理设备samples 5.1 使用 kwapi kwapi 收集设备能耗数据 有时候我们需要收集 OpenStack 集群中服务器的能耗数据。kwapi 是采集物理机能耗信息的项目,agent-central 组件通过kwapi暴露的api来收集物理机的能耗信息。目前 kwapi 提供两个类型的计量数据: Energy (cumulative type): 表示 kWh. Power (gauge type): 表示 watts. Ceilometer central agent 的 pollers 直接调用 kwapi 的 API 来获取 samples。 参考文档: http://kwapi.readthedocs.org/en/latest/architecture.html http://blog.zhaw.ch/icclab/collecting-energy-consumption-data-using-kwapi-in-openstack/ http://perso.ens-lyon.fr/laurent.lefevre/greendayslux/GreenDays_Rossigneux.pdf 5.2 使用 snmp 协议收集硬件的CPU、MEM、IO等信息 在 IceHouse 中新增该功能。 参考文档:http://www.cnblogs.com/smallcoderhujin/p/4150368.html 6. 基于 OpenDayLight 收集 SDN samples OpenDayLight 是 SDN 解决方案的开源项目,它的规范中包括暴露 REST API 接口来提供SDN内部的一些信息,Ceilometer Central agent 正是通过这些 API 来收集网络组件的信息。 基本实现: Central agent 不直接调用OpenDayLight 的 REST API,而是实现了一个 driver 来调用。 Driver 调用 REST API 收集统计数据,返回 volume、resource id 和 metadata 给 pollster。 Pollster 负责产生 samples。 实现代码在OpenStack 的\ceilometer\network\statistics 目录中。 参考链接: https://blueprints.launchpad.net/ceilometer/+spec/monitoring-network-from-opendaylight https://wiki.openstack.org/wiki/Ceilometer/blueprints/monitoring-network 总结图: 本文转自SammyLiu博客园博客,原文链接:http://www.cnblogs.com/sammyliu/p/4384470.html,如需转载请自行联系原作者

优秀的个人博客,低调大师

spark 数据预处理 特征标准化 归一化模块

#We will also standardise our data as we have done so far when performing distance-based clustering. from pyspark.mllib.feature import StandardScaler standardizer = StandardScaler(True, True) t0 = time() standardizer_model = standardizer.fit(parsed_data_values) tt = time() - t0 standardized_data_values = standardizer_model.transform(parsed_data_values) print "Data standardized in {} seconds".format(round(tt,3)) Data standardized in 9.54 seconds We can now perform k-means clustering. from pyspark.mllib.clustering import KMeans t0 = time() clusters = KMeans.train(standardized_data_values, 80, maxIterations=10, runs=5, initializationMode="random") tt = time() - t0 print "Data clustered in {} seconds".format(round(tt,3)) Data clustered in 137.496 seconds kmeans demo 摘自:http://spark.apache.org/docs/latest/api/python/pyspark.mllib.html#module-pyspark.mllib.feature pyspark.mllib.feature module Python package for feature in MLlib. classpyspark.mllib.feature.Normalizer( p=2.0) [source] Bases:pyspark.mllib.feature.VectorTransformer Normalizes samples individually to unit Lpnorm For any 1 <=p< float(‘inf’), normalizes samples using sum(abs(vector)p)(1/p)as norm. Forp= float(‘inf’), max(abs(vector)) will be used as norm for normalization. Parameters: p– Normalization in L^p^ space, p = 2 by default. >>> v = Vectors.dense(range(3)) >>> nor = Normalizer(1) >>> nor.transform(v) DenseVector([0.0, 0.3333, 0.6667]) >>> rdd = sc.parallelize([v]) >>> nor.transform(rdd).collect() [DenseVector([0.0, 0.3333, 0.6667])] >>> nor2 = Normalizer(float("inf")) >>> nor2.transform(v) DenseVector([0.0, 0.5, 1.0]) New in version 1.2.0. transform( vector) [source] Applies unit length normalization on a vector. Parameters: vector– vector or RDD of vector to be normalized. Returns: normalized vector. If the norm of the input is zero, it will return the input vector. New in version 1.2.0. classpyspark.mllib.feature.StandardScalerModel( java_model) [source] Bases:pyspark.mllib.feature.JavaVectorTransformer Represents a StandardScaler model that can transform vectors. New in version 1.2.0. mean [source] Return the column mean values. New in version 2.0.0. setWithMean( withMean) [source] Setter of the boolean which decides whether it uses mean or not New in version 1.4.0. setWithStd( withStd) [source] Setter of the boolean which decides whether it uses std or not New in version 1.4.0. std [source] Return the column standard deviation values. New in version 2.0.0. transform( vector) [source] Applies standardization transformation on a vector. Note In Python, transform cannot currently be used within an RDD transformation or action. Call transform directly on the RDD instead. Parameters: vector– Vector or RDD of Vector to be standardized. Returns: Standardized vector. If the variance of a column is zero, it will return default0.0for the column with zero variance. New in version 1.2.0. withMean [source] Returns if the model centers the data before scaling. New in version 2.0.0. withStd [source] Returns if the model scales the data to unit standard deviation. New in version 2.0.0. classpyspark.mllib.feature.StandardScaler( withMean=False, withStd=True) [source] Bases:object Standardizes features by removing the mean and scaling to unit variance using column summary statistics on the samples in the training set. Parameters: withMean– False by default. Centers the data with mean before scaling. It will build a dense output, so take care when applying to sparse input. withStd– True by default. Scales the data to unit standard deviation. >>> vs = [Vectors.dense([-2.0, 2.3, 0]), Vectors.dense([3.8, 0.0, 1.9])] >>> dataset = sc.parallelize(vs) >>> standardizer = StandardScaler(True, True) >>> model = standardizer.fit(dataset) >>> result = model.transform(dataset) >>> for r in result.collect(): r DenseVector([-0.7071, 0.7071, -0.7071]) DenseVector([0.7071, -0.7071, 0.7071]) >>> int(model.std[0]) 4 >>> int(model.mean[0]*10) 9 >>> model.withStd True >>> model.withMean True New in version 1.2.0. fit( dataset) [source] Computes the mean and variance and stores as a model to be used for later scaling. Parameters: dataset– The data used to compute the mean and variance to build the transformation model. Returns: a StandardScalarModel New in version 1.2.0. classpyspark.mllib.feature.HashingTF( numFeatures=1048576) [source] Bases:object Maps a sequence of terms to their term frequencies using the hashing trick. Note The terms must be hashable (can not be dict/set/list...). Parameters: numFeatures– number of features (default: 2^20) >>> htf = HashingTF(100) >>> doc = "a a b b c d".split(" ") >>> htf.transform(doc) SparseVector(100, {...}) New in version 1.2.0. indexOf( term) [source] Returns the index of the input term. New in version 1.2.0. setBinary( value) [source] If True, term frequency vector will be binary such that non-zero term counts will be set to 1 (default: False) New in version 2.0.0. transform( document) [source] Transforms the input document (list of terms) to term frequency vectors, or transform the RDD of document to RDD of term frequency vectors. New in version 1.2.0. classpyspark.mllib.feature.IDFModel( java_model) [source] Bases:pyspark.mllib.feature.JavaVectorTransformer Represents an IDF model that can transform term frequency vectors. New in version 1.2.0. idf() [source] Returns the current IDF vector. New in version 1.4.0. transform( x) [source] Transforms term frequency (TF) vectors to TF-IDF vectors. IfminDocFreqwas set for the IDF calculation, the terms which occur in fewer thanminDocFreqdocuments will have an entry of 0. Note In Python, transform cannot currently be used within an RDD transformation or action. Call transform directly on the RDD instead. Parameters: x– an RDD of term frequency vectors or a term frequency vector Returns: an RDD of TF-IDF vectors or a TF-IDF vector New in version 1.2.0. classpyspark.mllib.feature.IDF( minDocFreq=0) [source] Bases:object Inverse document frequency (IDF). The standard formulation is used:idf = log((m + 1) / (d(t) + 1)), wheremis the total number of documents andd(t)is the number of documents that contain termt. This implementation supports filtering out terms which do not appear in a minimum number of documents (controlled by the variableminDocFreq). For terms that are not in at leastminDocFreqdocuments, the IDF is found as 0, resulting in TF-IDFs of 0. Parameters: minDocFreq– minimum of documents in which a term should appear for filtering >>> n = 4 >>> freqs = [Vectors.sparse(n, (1, 3), (1.0, 2.0)), ... Vectors.dense([0.0, 1.0, 2.0, 3.0]), ... Vectors.sparse(n, [1], [1.0])] >>> data = sc.parallelize(freqs) >>> idf = IDF() >>> model = idf.fit(data) >>> tfidf = model.transform(data) >>> for r in tfidf.collect(): r SparseVector(4, {1: 0.0, 3: 0.5754}) DenseVector([0.0, 0.0, 1.3863, 0.863]) SparseVector(4, {1: 0.0}) >>> model.transform(Vectors.dense([0.0, 1.0, 2.0, 3.0])) DenseVector([0.0, 0.0, 1.3863, 0.863]) >>> model.transform([0.0, 1.0, 2.0, 3.0]) DenseVector([0.0, 0.0, 1.3863, 0.863]) >>> model.transform(Vectors.sparse(n, (1, 3), (1.0, 2.0))) SparseVector(4, {1: 0.0, 3: 0.5754}) New in version 1.2.0. fit( dataset) [source] Computes the inverse document frequency. Parameters: dataset– an RDD of term frequency vectors New in version 1.2.0. classpyspark.mllib.feature.Word2Vec [source] Bases:object Word2Vec creates vector representation of words in a text corpus. The algorithm first constructs a vocabulary from the corpus and then learns vector representation of words in the vocabulary. The vector representation can be used as features in natural language processing and machine learning algorithms. We used skip-gram model in our implementation and hierarchical softmax method to train the model. The variable names in the implementation matches the original C implementation. For original C implementation, seehttps://code.google.com/p/word2vec/For research papers, see Efficient Estimation of Word Representations in Vector Space and Distributed Representations of Words and Phrases and their Compositionality. >>> sentence = "a b " * 100 + "a c " * 10 >>> localDoc = [sentence, sentence] >>> doc = sc.parallelize(localDoc).map(lambda line: line.split(" ")) >>> model = Word2Vec().setVectorSize(10).setSeed(42).fit(doc) Querying for synonyms of a word will not return that word: >>> syms = model.findSynonyms("a", 2) >>> [s[0] for s in syms] [u'b', u'c'] But querying for synonyms of a vector may return the word whose representation is that vector: >>> vec = model.transform("a") >>> syms = model.findSynonyms(vec, 2) >>> [s[0] for s in syms] [u'a', u'b'] >>> import os, tempfile >>> path = tempfile.mkdtemp() >>> model.save(sc, path) >>> sameModel = Word2VecModel.load(sc, path) >>> model.transform("a") == sameModel.transform("a") True >>> syms = sameModel.findSynonyms("a", 2) >>> [s[0] for s in syms] [u'b', u'c'] >>> from shutil import rmtree >>> try: ... rmtree(path) ... except OSError: ... pass New in version 1.2.0. fit( data) [source] Computes the vector representation of each word in vocabulary. Parameters: data– training data. RDD of list of string Returns: Word2VecModel instance New in version 1.2.0. setLearningRate( learningRate) [source] Sets initial learning rate (default: 0.025). New in version 1.2.0. setMinCount( minCount) [source] Sets minCount, the minimum number of times a token must appear to be included in the word2vec model’s vocabulary (default: 5). New in version 1.4.0. setNumIterations( numIterations) [source] Sets number of iterations (default: 1), which should be smaller than or equal to number of partitions. New in version 1.2.0. setNumPartitions( numPartitions) [source] Sets number of partitions (default: 1). Use a small number for accuracy. New in version 1.2.0. setSeed( seed) [source] Sets random seed. New in version 1.2.0. setVectorSize( vectorSize) [source] Sets vector size (default: 100). New in version 1.2.0. setWindowSize( windowSize) [source] Sets window size (default: 5). New in version 2.0.0. classpyspark.mllib.feature.Word2VecModel( java_model) [source] Bases:pyspark.mllib.feature.JavaVectorTransformer,pyspark.mllib.util.JavaSaveable,pyspark.mllib.util.JavaLoader class for Word2Vec model New in version 1.2.0. findSynonyms( word, num) [source] Find synonyms of a word Parameters: word– a word or a vector representation of word num– number of synonyms to find Returns: array of (word, cosineSimilarity) Note Local use only New in version 1.2.0. getVectors() [source] Returns a map of words to their vector representations. New in version 1.4.0. classmethodload( sc, path) [source] Load a model from the given path. New in version 1.5.0. transform( word) [source] Transforms a word to its vector representation Note Local use only Parameters: word– a word Returns: vector representation of word(s) New in version 1.2.0. classpyspark.mllib.feature.ChiSqSelector( numTopFeatures=50, selectorType='numTopFeatures', percentile=0.1, fpr=0.05, fdr=0.05, fwe=0.05) [source] Bases:object Creates a ChiSquared feature selector. The selector supports different selection methods:numTopFeatures,percentile,fpr,fdr,fwe. numTopFeatureschooses a fixed number of top features according to a chi-squared test. percentileis similar but chooses a fraction of all features instead of a fixed number. fprchooses all features whose p-values are below a threshold, thus controlling the false positive rate of selection. fdruses theBenjamini-Hochberg procedureto choose all features whose false discovery rate is below a threshold. fwechooses all features whose p-values are below a threshold. The threshold is scaled by 1/numFeatures, thus controlling the family-wise error rate of selection. By default, the selection method isnumTopFeatures, with the default number of top features set to 50. >>> data = sc.parallelize([ ... LabeledPoint(0.0, SparseVector(3, {0: 8.0, 1: 7.0})), ... LabeledPoint(1.0, SparseVector(3, {1: 9.0, 2: 6.0})), ... LabeledPoint(1.0, [0.0, 9.0, 8.0]), ... LabeledPoint(2.0, [7.0, 9.0, 5.0]), ... LabeledPoint(2.0, [8.0, 7.0, 3.0]) ... ]) >>> model = ChiSqSelector(numTopFeatures=1).fit(data) >>> model.transform(SparseVector(3, {1: 9.0, 2: 6.0})) SparseVector(1, {}) >>> model.transform(DenseVector([7.0, 9.0, 5.0])) DenseVector([7.0]) >>> model = ChiSqSelector(selectorType="fpr", fpr=0.2).fit(data) >>> model.transform(SparseVector(3, {1: 9.0, 2: 6.0})) SparseVector(1, {}) >>> model.transform(DenseVector([7.0, 9.0, 5.0])) DenseVector([7.0]) >>> model = ChiSqSelector(selectorType="percentile", percentile=0.34).fit(data) >>> model.transform(DenseVector([7.0, 9.0, 5.0])) DenseVector([7.0]) New in version 1.4.0. fit( data) [source] Returns a ChiSquared feature selector. Parameters: data– anRDD[LabeledPoint]containing the labeled dataset with categorical features. Real-valued features will be treated as categorical for each distinct value. Apply feature discretizer before using this function. New in version 1.4.0. setFdr( fdr) [source] set FDR [0.0, 1.0] for feature selection by FDR. Only applicable when selectorType = “fdr”. New in version 2.2.0. setFpr( fpr) [source] set FPR [0.0, 1.0] for feature selection by FPR. Only applicable when selectorType = “fpr”. New in version 2.1.0. setFwe( fwe) [source] set FWE [0.0, 1.0] for feature selection by FWE. Only applicable when selectorType = “fwe”. New in version 2.2.0. setNumTopFeatures( numTopFeatures) [source] set numTopFeature for feature selection by number of top features. Only applicable when selectorType = “numTopFeatures”. New in version 2.1.0. setPercentile( percentile) [source] set percentile [0.0, 1.0] for feature selection by percentile. Only applicable when selectorType = “percentile”. New in version 2.1.0. setSelectorType( selectorType) [source] set the selector type of the ChisqSelector. Supported options: “numTopFeatures” (default), “percentile”, “fpr”, “fdr”, “fwe”. New in version 2.1.0. classpyspark.mllib.feature.ChiSqSelectorModel( java_model) [source] Bases:pyspark.mllib.feature.JavaVectorTransformer Represents a Chi Squared selector model. New in version 1.4.0. transform( vector) [source] Applies transformation on a vector. Parameters: vector– Vector or RDD of Vector to be transformed. Returns: transformed vector. New in version 1.4.0. classpyspark.mllib.feature.ElementwiseProduct( scalingVector) [source] Bases:pyspark.mllib.feature.VectorTransformer Scales each column of the vector, with the supplied weight vector. i.e the elementwise product. >>> weight = Vectors.dense([1.0, 2.0, 3.0]) >>> eprod = ElementwiseProduct(weight) >>> a = Vectors.dense([2.0, 1.0, 3.0]) >>> eprod.transform(a) DenseVector([2.0, 2.0, 9.0]) >>> b = Vectors.dense([9.0, 3.0, 4.0]) >>> rdd = sc.parallelize([a, b]) >>> eprod.transform(rdd).collect() [DenseVector([2.0, 2.0, 9.0]), DenseVector([9.0, 6.0, 12.0])] New in version 1.5.0. transform( vector) [source] Computes the Hadamard product of the vector. New in version 1.5.0. 本文转自张昺华-sky博客园博客,原文链接:http://www.cnblogs.com/bonelee/p/7774142.html,如需转载请自行联系原作者


优秀的个人博客,低调大师

云计算/云存储---Ceph和Openstack的cinder模块对接方法

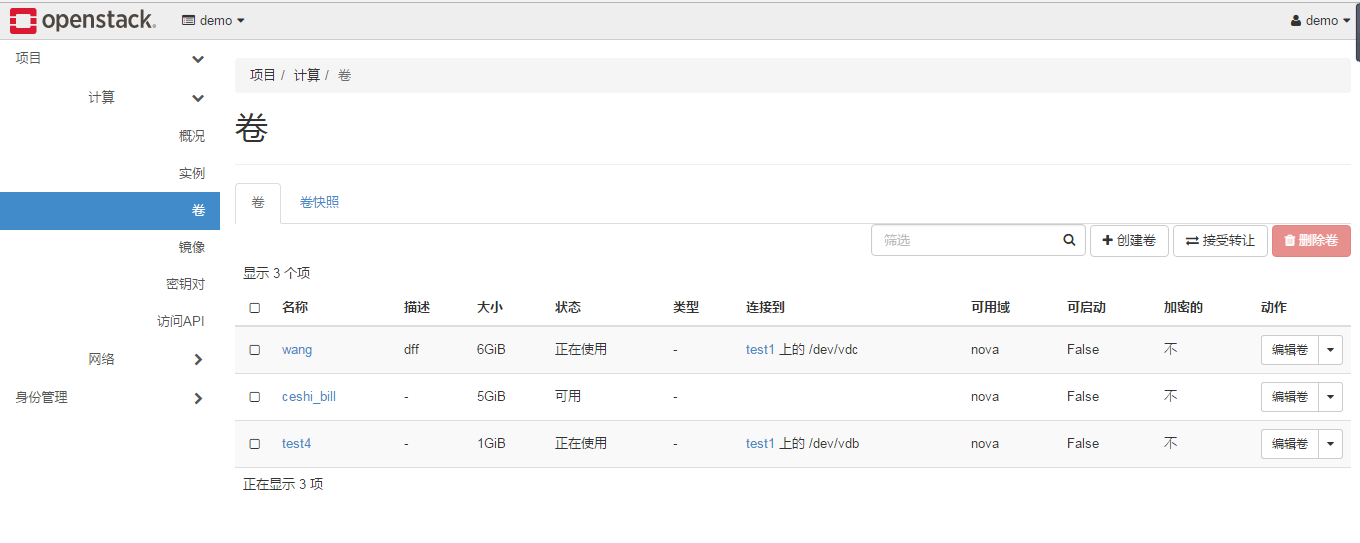
1.创建存储池 在ceph节点中执行如下语句。 #ceph osd pool create volumes 128 2.配置 OPENSTACK 的 CEPH 客户端 在ceph节点两次执行如下语句,两次{your-openstack-server}分别填控制节点和计算节点IP。 如果显示在控制节点和计算节点中没有ceph文件夹,则在两节点中创建对应文件夹。 #ssh {your-openstack-server} sudo tee /etc/ceph/ceph.conf < /etc/ceph/ceph.conf 3.安装 CEPH 客户端软件包 控制节点上进行librbd的 Python 绑定 #yum install python-rbd 计算节点和控制节点进行安装 Python 绑定和客户端命令行工具 #yum install ceph-common #yum install ceph 4.配置 CEPH 客户端认证 在ceph节点为Cinder创建新用户 #ceph auth get-or-create client.cinder mon 'allow r' osd 'allow class-read object_prefix rbd_children, allow rwx pool=volumes' 在ceph节点把client.cinder的密钥环复制到控制节点,并更改所有权,{your-volume-server}和{your-cinder-volume-server}处填控制节点IP。 #ceph auth get-or-create client.cinder | ssh {your-volume-server} sudo tee /etc/ceph/ceph.client.cinder.keyring #ssh {your-cinder-volume-server} sudo chown cinder:cinder /etc/ceph/ceph.client.cinder.keyring 在ceph节点执行如下语句{your-nova-compute-server}为计算节点IP。 #ceph auth get-or-create client.cinder | ssh {your-nova-compute-server} sudo tee /etc/ceph/ceph.client.cinder.keyring 在ceph节点把client.cinder用户的密钥存进libvirt。libvirt 进程从 Cinder 挂载块设备时要用它访问集群,在运行 nova-compute 的节点上创建一个密钥的临时副本。 {your-compute-node}为计算节点IP。 #ceph auth get-key client.cinder | ssh {your-compute-node} tee /etc/ceph/client.cinder.key 在计算节点上执行如下语句,把密钥加进 libvirt 、然后删除临时副本。 #uuidgen 记录下产生的数字,将下面的UUIDGEN替换为该数字,并在计算节点执行下列语句 cat > secret.xml <<EOF <secret ephemeral='no' private='no'> <uuid>UUIDGEN</uuid> <usage type='ceph'> <name>client.cinder secret</name> </usage> </secret> EOF #sudo virsh secret-define --file secret.xml #sudo virsh secret-set-value --secret 457eb676-33da-42ec-9a8c-9293d545c337 --base64 $(cat client.cinder.key) && rm client.cinder.key secret.xml 执行完后,记录好上面产生的uuidgen,下面还会用到。 5.安装并配置控制节点 5.1先决条件 在控制节点完成下面的步骤以创建数据库: 用数据库连接客户端以 root 用户连接到数据库服务器: #mysql -u root -p 创建cinde数据库 #CREATE DATABASE cinder; 配置 cinder 数据库的访问权限,下列CINDER_DBPASS用合适的密码替换。 #GRANT ALL PRIVILEGES ON cinder.* TO 'cinder'@'localhost' \ IDENTIFIED BY 'CINDER_DBPASS'; #GRANT ALL PRIVILEGES ON cinder.* TO 'cinder'@'%' \ IDENTIFIED BY 'CINDER_DBPASS'; 退出数据库。 获得 admin 凭证来获取只有管理员能执行的命令的访问权限: # . admin-openrc 创建服务证书: 创建一个 cinder 用户: #openstack user create --domain default --password-prompt cinder 添加 admin 角色到 cinder 用户上。 #openstack role add --project service --user cinder admin 创建 cinder 和 cinderv2 服务实体: #openstack service create --name cinder \ --description "OpenStack Block Storage" volume #openstack service create --name cinderv2 \ --description "OpenStack Block Storage" volumev2 创建块设备存储服务的 API 入口点: #openstack endpoint create --region RegionOne \ volume public http://controller:8776/v1/%\(tenant_id\)s #openstack endpoint create --region RegionOne \ volume internal http://controller:8776/v1/%\(tenant_id\)s #openstack endpoint create --region RegionOne \ volume admin http://controller:8776/v1/%\(tenant_id\)s #openstack endpoint create --region RegionOne \ volumev2 public http://controller:8776/v2/%\(tenant_id\)s #openstack endpoint create --region RegionOne \ volumev2 internal http://controller:8776/v2/%\(tenant_id\)s #openstack endpoint create --region RegionOne \ volumev2 admin http://controller:8776/v2/%\(tenant_id\)s 5.2安装并配置组件 安装软件包 # yum install openstack-cinder #yum install openstack-cinder targetcli python-keystone 在控制节点上编辑cinder.conf。 #vi /etc/cinder/cinder.conf 添加如下内容: 注意:1.如果你为 cinder 配置了多后端, [DEFAULT] 节中必须有 glance_api_version = 2 2.[ceph]中的rbd_secret_uuid后面对应填的刚刚记录的uuid。 [DEFAULT] transport_url = rabbit://openstack:RABBIT_PASS@controller auth_strategy = keystone my_ip = 控制节点管理网络的IP enabled_backends = ceph glance_api_servers = http://controller:9292 [database] connection = mysql+pymysql://cinder:CINDER_PASS@controller/cinder [keystone_authtoken] auth_uri = http://controller:5000 auth_url = http://controller:35357 memcached_servers = controller:11211 auth_type = password project_domain_name = default user_domain_name = default project_name = service username = cinder password = CINDER_PASS [oslo_concurrency] lock_path = /var/lib/cinder/tmp [ceph] volume_driver = cinder.volume.drivers.rbd.RBDDriver rbd_pool = volumes rbd_ceph_conf = /etc/ceph/ceph.conf rbd_flatten_volume_from_snapshot = false rbd_max_clone_depth = 5 rbd_store_chunk_size = 4 rados_connect_timeout = -1 glance_api_version = 2 rbd_user = cinder rbd_secret_uuid = a852df2b-55e1-4c1b-9fa2-61e77feaf30f 编辑/etc/nova/nova.conf添加如下内容: [cinder] os_region_name = RegionOne 6.重启 OPENSTACK 在控制节点重启计算API 服务: # systemctl restart openstack-nova-api.service 启动块设备存储服务,并将其配置为开机自启: # systemctl enable openstack-cinder-api.service openstack-cinder-scheduler.service # systemctl start openstack-cinder-api.service openstack-cinder-scheduler.service 启动块存储卷服务及其依赖的服务,并将其配置为随系统启动: # systemctl enable openstack-cinder-volume.service target.service # systemctl start openstack-cinder-volume.service target.service 7.验证 在控制节点获得 admin 凭证来获取只有管理员能执行的命令的访问权限: # . admin-openrc 列出服务组件以验证是否每个进程都成功启动: # cinder service-list 并且登录界面后可以创建卷

资源下载

更多资源
Spring

Spring

Spring框架(Spring Framework)是由Rod Johnson于2002年提出的开源Java企业级应用框架,旨在通过使用JavaBean替代传统EJB实现方式降低企业级编程开发的复杂性。该框架基于简单性、可测试性和松耦合性设计理念,提供核心容器、应用上下文、数据访问集成等模块,支持整合Hibernate、Struts等第三方框架,其适用范围不仅限于服务器端开发,绝大多数Java应用均可从中受益。

Rocky Linux

Rocky Linux

Rocky Linux(中文名:洛基)是由Gregory Kurtzer于2020年12月发起的企业级Linux发行版,作为CentOS稳定版停止维护后与RHEL(Red Hat Enterprise Linux)完全兼容的开源替代方案,由社区拥有并管理,支持x86_64、aarch64等架构。其通过重新编译RHEL源代码提供长期稳定性,采用模块化包装和SELinux安全架构,默认包含GNOME桌面环境及XFS文件系统,支持十年生命周期更新。

Sublime Text

Sublime Text

Sublime Text具有漂亮的用户界面和强大的功能,例如代码缩略图,Python的插件,代码段等。还可自定义键绑定,菜单和工具栏。Sublime Text 的主要功能包括:拼写检查,书签,完整的 Python API , Goto 功能,即时项目切换,多选择,多窗口等等。Sublime Text 是一个跨平台的编辑器,同时支持Windows、Linux、Mac OS X等操作系统。

WebStorm

WebStorm

WebStorm 是jetbrains公司旗下一款JavaScript 开发工具。目前已经被广大中国JS开发者誉为“Web前端开发神器”、“最强大的HTML5编辑器”、“最智能的JavaScript IDE”等。与IntelliJ IDEA同源,继承了IntelliJ IDEA强大的JS部分的功能。

用户登录
用户注册