首页 文章 精选 留言 我的

精选列表

搜索[一岁回响 | 同盟一周年特别征稿],共10001篇文章
优秀的个人博客,低调大师

seata-golang 一周年回顾

作者:刘晓敏(GitHubID dk-lockdown),目前就职于 h3c 成都分公司,擅长使用 Java/Go 语言,在云原生和微服务相关技术方向均有涉猎,目前专攻分布式事务。 Seata 是一款简单易用,高性能、开源的一站式分布式事务解决方案。Seata 从2019 年 1 月开源后就受到了大家的追捧,目前已经有几百家企业在生产环境进行了技术的落地。 2020 年 4 月,我们开始基于 Seata 着手做多语言 golang 项目,经过一年时间的开发,很高兴 seata-golang 发布了 1.0.0 版本。 今年 4 月 17 号,有幸在成都 gopher meetup 上将 seata-golang 介绍给热衷于 golang 的 gopher。 会上我们向大家演示了如何利用 seata-golang 来接入到微服务中保证服务间的数据一致性,另外还向大家介绍了 Seata 的核心原理、MySQL driver 原理和接入、seata-golang 的未来规划,最后就大家关注的 Seata 相关的问题做了 QA。 Seata 原理 活动上,我们结合seata-golang 的demo 和大家分享了 seata 的工作原理。如下图所示,是一个 seata at 模式的简单工作流程。 TC(即图中右半部分):Transaction coordinator,它是一个分布式事务协调器。 TM:Transaction manager,它是一个事务管理器,负责全局事务的开启、提交和回滚。 RM:Resource Manager,它是管理分支事务资源的,它加入全局事务组后,向 TC 报告分支事务的执行状态。 XID:TM 开启全局事务时,会在 TC 创建一个 GlobalSession,GlobalSession 的全局唯一标识即为 XID。 BranchID:RM 向 TC 注册分支事务后,在 TC 侧生成一个 BranchSession,BranchID 全局唯一标识这个 BranchSession。 当 RM 向 TC 报告分支执行失败时,TC 会标记这个 BranchSession 的状态为失败,然后 TM 发起回滚时,TC 根据 XID 找到所有成功执行的事务分支,通知他们进行回滚。 MySQL Driver 最近研发开源出来的mysql driver 项目,基于 go-sql-driver/mysql 1.5.0 版本开发,天然集成了 seata-golang 的分布式事务能力,完全支持 database/sql 库这层抽象,由于很多 orm 框架都基于 database/sql 做了封装,所以对 database/sql 的支持意味着 seata-golang 可以完美无缝地接入各种 orm 框架。 driver 的 mysqlTx 对象执行 Commit 或者 Rollback 时,会根据 mysqlConn 的 connCtx 是否有值来决定是否和 tc 交互,报告分支事务的执行状态。如果执行 Commit,connCtx 有值则把 sqlUndoItemsBuffer 中的 undoLog 和业务数据一起提交到数据库,然后报告 tc 事务分支提交的状态(成功还是失败),否则执行正常的提交。如果执行 Rollback,connCtx 有值则回滚然后向 tc 报告分支执行失败,tc 会根据这个状态回滚整个全局事务,connCtx 没有值则只需正常回滚。 上图是 undoLog json 序列化后的结构数据,我们可以看到这条数据修改之前,它的 name 是 “TXC”,修改之后它的 name 是 “GTS”,如果对它进行回滚,则生成一个反向的补偿语句:update product set name = 'TXC' since = 2014 where id = 1。如果是 insert 操作,则反向补偿操作为 delete,如果是一个 delete 操作则方向补偿操作为 insert。 未来规划 社区已经有小伙伴将mysql driver集成到 gorm,并将 seata-golang 用到生产环境。目前 seata-golang 只支持 mysql,小伙伴们可根据mysql driver 的思路,实现 pgsql 和 oracle 的 driver 。这也是未来 seata-golang 将要规划做的事情之一。 随着 go 语言微服务开发的兴起,分布式事务问题会越来越受到关注,希望社区的朋友可以更多参与进来完善这个框架,让它发挥生命力、服务社区、创造价值。 如果你有任何疑问,欢迎加入交流群【钉钉群号 33069364】: 参考资料 seata 官方:https://seata.io java 版 seata:https://github.com/seata/seata seata-golang 项目地址:https://github.com/opentrx/seata-golang driver 地址:https://github.com/opentrx/mysql seata-golang go 夜读 b 站分享:https://www.bilibili.com/video/BV1oz411e72T 基于 getty 的 seata-golang 通信模型详解:http://seata.io/zh-cn/blog/seata-golang-communication-mode.html seata-golang 接入指南 Go Mysql Driver 集成 Seata-Golang 解决分布式事务问题

优秀的个人博客,低调大师

记TensorFlow项目开源一周年

年初,以大比分战胜李世乭的AlphaGo在全球成功吸睛,引爆了人工智能(AI)热。其实,现如今已经进入了AI时代,从你智能手机上的语音助手,到相机的人脸识别,聚合新闻类App帮你筛选新闻,还记得淘宝上的“猜你喜欢”吗?他们背后都是形形色色的AI。AI已侵入生活的方方面面,深刻影响着人类的生活。 AlphaGo的灵魂就是TensorFlow。一年前,Google就将TensorFlow完全开源了。TensorFlow可被用于语音识别或图像识别等多项机器深度学习领域。它除了可以判断垃圾邮件、语音辨识、黄瓜分类外,你知道它还可以做更多的事情吗?比如澳洲生物学家用来在涉临灭绝的海牛数目调查?这篇文章详细介绍了TensorFlow的现状和未来展望。 整整一年前,为了加速机器深度学习领域的发展,Google大脑部门(Google Brain Team)完全开源了TensorFlow项目。这一年是非常有意义的一年。围绕TensorFlow项目进行了大量的工作:逾480人直接为TensorFlow项目作出了贡献,包括Google员工、外部研究员、独立程序员、学生以及其他大公司的高级开发人员。在GitHub上,TensorFlow是最流行的机器学习项目。 在短短的一年内,它的提交就超过了10000次,Google大脑部门做了许多性能改进:增加了对分布式培训的支持,支持从iOS到树莓派(Raspberry Pi)平台,与广泛使用的大数据基础设施集成TensorFlow;TensorFlow可以从Go,Rust和Haskell访问;发布了领先的图像分类模型;并在GitHub,StackOverflow和TensorFlow邮件列表上回答了数千个问题。 在Google中,从大规模产品功能到探索性研究,TensorFlow都可以支持。Google最近使用TensorFlow和Tensor处理单元(TensorFlow的特殊硬件加速器)对Google翻译进行了重大改进。Magenta项目(InfoQ注:该项目是以人工智能来创作艺术,同时简化开源人工智能平台TensorFlow的用户过程。)正在开发新一代基于强化学习的模型,能够进行音乐艺术创作。最近,一位联培博士生(visiting PhD student)与Google大脑部门合作,构建了一个TensorFlow模型,这个模型可以 来自世界各地的人们都在使用TensorFlow做各种各样的事情,例如: 澳大利亚海洋生物学家使用TensorFlow在数以万计的高清照片中寻找海牛,以更好地了解这个涉临灭绝的群体数量。 日本一位农夫,训练了一个TensorFlow模型,可以按照大小、形状以及其他特征来挑选黄瓜并分类。 发射科医生调整TensorFlow,使其在医学扫描中能够识别帕金森病的迹象。 湾区的数据科学家在树莓派上使用TensorFlow来追踪记录加州火车的动态。Google致力于确保从研究到生产、从最小的树莓派、大到满是GPU或TPU的服务器群集的各种设备都可以运行TensorFlow。他们正尽其所能,建立一个相关软件和机器学习模型的开源生态系统: TensorFlow服务项目简化了在生产中提供TensorFlow模型的过程。 TensorFlow“广度和深度”模型结合了传统线性模型和现代深度神经网络的优势。 对于那些有兴趣在云中使用TensorFlow的人来说,Google Cloud Platform最近推出了Cloud Machine Learning,它提供了TensorFlow作为托管服务。Google这次开源很有意义,尤其是对于中国的很多创业公司来说,他们大都没有能力理解并开发一个与国际同步的深度学习系统,所以TensorFlow会大大降低深度学习在各个行业中的应用难度。 在GitHub上3000多条TensorFlow相关的仓库清单,对有志于开发深度学习系统的创业者,可以加入TensorFlow社区,你可以关注TensorFlow的推特(@tensorflow),在GitHub与他们联系,提问并回答StackOverflow的相关问题,并加入社区的讨论列表。 本文转自d1net(转载)

优秀的个人博客,低调大师

spring boot2 整合(二)JPA(特别完整!)

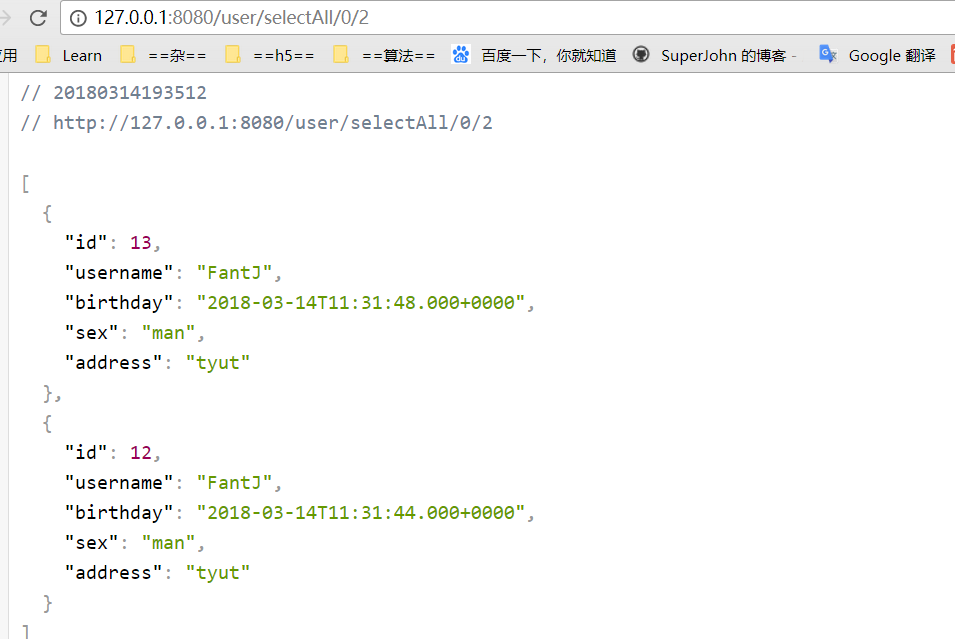
JPA全称Java Persistence API.JPA通过JDK 5.0注解或XML描述对象-关系表的映射关系,并将运行期的实体对象持久化到数据库中。 JPA 的目标之一是制定一个可以由很多供应商实现的API,并且开发人员可以编码来实现该API,而不是使用私有供应商特有的API。 JPA是需要Provider来实现其功能的,Hibernate就是JPA Provider中很强的一个,应该说无人能出其右。从功能上来说,JPA就是Hibernate功能的一个子集。 本教程大概流程: 借助idea实现springboot 和 spring data jpa 整合 实现JpaRepository接口快捷开发 自定义Mapper查询接口方法 MVC架构+分页功能实战 QueryDSL工具与之的整合 首先我的开发环境: jdk1.8+maven3+IDEA 1. 完善pom文件 <?xml version="1.0" encoding="UTF-8"?> <project xmlns="http://maven.apache.org/POM/4.0.0" xmlns:xsi="http://www.w3.org/2001/XMLSchema-instance" xsi:schemaLocation="http://maven.apache.org/POM/4.0.0 http://maven.apache.org/xsd/maven-4.0.0.xsd"> <modelVersion>4.0.0</modelVersion> <groupId>springboot-jpa</groupId> <artifactId>springboot-jpa</artifactId> <version>0.0.1-SNAPSHOT</version> <packaging>jar</packaging> <name>springboot-jpa</name> <description>Demo project for Spring Boot</description> <parent> <groupId>org.springframework.boot</groupId> <artifactId>spring-boot-starter-parent</artifactId> <version>2.0.0.RELEASE</version> <relativePath/> <!-- lookup parent from repository --> </parent> <properties> <project.build.sourceEncoding>UTF-8</project.build.sourceEncoding> <project.reporting.outputEncoding>UTF-8</project.reporting.outputEncoding> <java.version>1.8</java.version> </properties> <dependencies> <dependency> <groupId>org.springframework.boot</groupId> <artifactId>spring-boot-starter</artifactId> </dependency> <dependency> <groupId>org.springframework.boot</groupId> <artifactId>spring-boot-starter-test</artifactId> </dependency> <dependency> <groupId>org.springframework.boot</groupId> <artifactId>spring-boot-starter-web</artifactId> </dependency> <dependency> <groupId>mysql</groupId> <artifactId>mysql-connector-java</artifactId> </dependency> <dependency> <groupId>org.springframework.boot</groupId> <artifactId>spring-boot-starter-data-jpa</artifactId> </dependency> <dependency> <groupId>org.projectlombok</groupId> <artifactId>lombok</artifactId> <version>1.16.18</version> </dependency> <dependency> <groupId>org.springframework.boot</groupId> <artifactId>spring-boot-test</artifactId> <version>1.4.5.RELEASE</version> <scope>test</scope> </dependency> <!--querydsl依赖--> <dependency> <groupId>com.querydsl</groupId> <artifactId>querydsl-jpa</artifactId> </dependency> <dependency> <groupId>com.querydsl</groupId> <artifactId>querydsl-apt</artifactId> <scope>provided</scope> </dependency> <!--阿里巴巴数据库连接池,专为监控而生 --> <dependency> <groupId>com.alibaba</groupId> <artifactId>druid</artifactId> <version>1.0.26</version> </dependency> <!-- 阿里巴巴fastjson,解析json视图 --> <dependency> <groupId>com.alibaba</groupId> <artifactId>fastjson</artifactId> <version>1.2.15</version> </dependency> <dependency> <groupId>com.alibaba</groupId> <artifactId>druid</artifactId> <version>1.1.3</version> </dependency> </dependencies> <build> <plugins> <plugin> <groupId>org.springframework.boot</groupId> <artifactId>spring-boot-maven-plugin</artifactId> </plugin> <!--添加QueryDSL插件支持--> <plugin> <groupId>com.mysema.maven</groupId> <artifactId>apt-maven-plugin</artifactId> <version>1.1.3</version> <executions> <execution> <configuration> <outputDirectory>target/generated-sources/java</outputDirectory> <processor>com.querydsl.apt.jpa.JPAAnnotationProcessor</processor> </configuration> </execution> </executions> </plugin> </plugins> </build> </project> 2. 完善application.properties 文件 spring.datasource.url=jdbc:mysql://localhost:3306/user spring.datasource.username=root spring.datasource.password=root spring.datasource.driver-class-name=com.mysql.jdbc.Driver spring.datasource.type: com.alibaba.druid.pool.DruidDataSource spring.datasource.filters:stat spring.datasource.maxActive: 20 spring.datasource.initialSize: 1 spring.datasource.maxWait: 60000 spring.datasource.minIdle: 1 spring.datasource.timeBetweenEvictionRunsMillis: 60000 spring.datasource.minEvictableIdleTimeMillis: 300000 spring.datasource.validationQuery: select 'x' spring.datasource.testWhileIdle: true spring.datasource.testOnBorrow: false spring.datasource.testOnReturn: false spring.datasource.poolPreparedStatements: true spring.datasource.maxOpenPreparedStatements: 20 spring.jpa.properties.hibernate.hbm2ddl.auto=update spring.jpa.show-sql=true 3. 编写实体类 User.java package com.fantj.model; import lombok.Data; import javax.persistence.*; import java.util.Date; @Data @Entity @Table(name = "user") public class User { public User(){ } @Id @GeneratedValue(strategy = GenerationType.AUTO) private Integer id; @Column(nullable = false) private String username; @Column(nullable = false) private Date birthday; @Column(nullable = false) private String sex; @Column(nullable = false) private String address; } @Data注解是 lombok 依赖包下的注解,它可以自动帮我们生成set/getter方法,简化代码量。有兴趣的可以详细了解,这里不做多解释。 4. 实现DAO层 package com.fantj.repostory; /** * Created by Fant.J. */ @Repository public interface UserRepository extends JpaRepository<User, Integer> { //自定义repository。手写sql @Query(value = "update user set name=?1 where id=?4",nativeQuery = true) //占位符传值形式 @Modifying int updateById(String name,int id); @Query("from User u where u.username=:username") //SPEL表达式 User findUser(@Param("username") String username);// 参数username 映射到数据库字段username } 注意:只有@Query 的注解下不能使用insert,我们需要在上面再添加个@Modify注解,我习惯都加,nativeQuery 是询问是否使用原生sql语句。多表查询也是在这里手写sql,不做演示。因为后面我们用更好的支持多表查询的工具框架 QueryDSL来帮助我们更简洁的实现它。 5.实现Service层 UserService .java package com.fantj.service; /** * Created by Fant.J. */ public interface UserService { /** 删除 */ public void delete(int id); /** 增加*/ public void insert(User user); /** 更新*/ public int update(User user); /** 查询单个*/ public User selectById(int id); /** 查询全部列表*/ public Iterator<User> selectAll(int pageNum, int pageSize); } UserServiceImpl.java package com.fantj.service.impl; /** * Created by Fant.J. */ @Service public class UserServiceImpl implements UserService { @Autowired private UserRepository userRepository; /** * 删除 * * @param id */ @Override public void delete(int id) { userRepository.deleteById(id); } /** * 增加 * * @param user */ @Override public void insert(User user) { userRepository.save(user); } /** * 更新 * * @param user */ @Override public int update(User user) { userRepository.save(user); return 1; } /** * 查询单个 * * @param id */ @Override public User selectById(int id) { Optional<User> optional = userRepository.findById(id); User user = optional.get(); return user; } /** * 查询全部列表,并做分页 * @param pageNum 开始页数 * @param pageSize 每页显示的数据条数 */ @Override public Iterator<User> selectAll(int pageNum, int pageSize) { //将参数传给这个方法就可以实现物理分页了,非常简单。 Sort sort = new Sort(Sort.Direction.DESC, "id"); Pageable pageable = new PageRequest(pageNum, pageSize, sort); Page<User> users = userRepository.findAll(pageable); Iterator<User> userIterator = users.iterator(); return userIterator; } } 分页不止可以这样做,也可以在Controller层进行实例化和初始化然后将Pageable对象传给Service。 当然也可以对分页进行封装,封装后的展示。 Page<User> datas = userRepository.findAll(PageableTools.basicPage(1, 5, new SortDto("id"))); 是不是很简洁。大家可以自己尝试一下。 6. 实现Controller package com.fantj.controller; /** * Created by Fant.J. */ @RestController @RequestMapping("/user") public class UserController { @Autowired private UserService userService; @RequestMapping(method = RequestMethod.GET,value = "/delete/{id}") public void delete(@PathVariable("id")int id){ userService.delete(id); } @RequestMapping(method = RequestMethod.POST,value = "/insert") public void insert(User user){ userService.insert(user); } @RequestMapping(method = RequestMethod.POST,value = "/update/{id}") public void update(@RequestParam User user){ userService.update(user); } @RequestMapping(method = RequestMethod.GET,value = "/{id}/select") public User select(@PathVariable("id")int id){ return userService.selectById(id); } @RequestMapping(method = RequestMethod.GET,value = "/selectAll/{pageNum}/{pageSize}") public List<User> selectAll(@PathVariable("pageNum") int pageNum, @PathVariable("pageSize") int pageSize){ Iterator<User> userIterator = userService.selectAll(pageNum, pageSize); List<User> list = new ArrayList<>(); while(userIterator.hasNext()){ list.add(userIterator.next()); } return list; } } QueryDSL工具与上文的整合 可以参考恒宇少年的四篇文章: Maven环境下如何配置QueryDSL环境 https://www.jianshu.com/p/a22447c0897c 使用QueryDSL与SpringDataJPA实现单表普通条件查询 https://www.jianshu.com/p/4e9d8adaeeb2 使用QueryDSL与SpringDataJPA完成Update&Delete https://www.jianshu.com/p/ac388c3c36c2 使用QueryDSL与SpringDataJPA实现多表关联查询 https://www.jianshu.com/p/6199e76a5485 注意一点,目前springboot2.0 版本对JPA支持有误,如果你用springboot2 来配置querydsl,application启动类会运行不起来,正确的依赖包或者是配置类我还没有找到,希望有点子的朋友可以和我联系。 本人QQ:844072586

优秀的个人博客,低调大师

spring boot2 整合(一)Mybatis (特别完整!)

整合Mybatis分为两种模式,一种是xml配置,一种是注解。(类似JPA) 我在这里重点放在xml配置上,因为如果想用注解的话,建议直接用jpa代替,因为Jpa有更成熟的CRUD接口更方便开发。我在后文中也会把注解方式说清楚。 大概介绍下流程: 借助idea实现mybatis逆向工程 用xml配置实现整合 用cmd命令行实现mybatis逆向工程 用mapping.xml配置实现数据交互 用注解的方式实现数据交互 首先我的开发环境: jdk1.8+maven3+IDEA 1. mybatis逆向攻城 逆向工程方式很多,我目前接触到的就两种,一种是借助于ide开发工具,一种是在cmd中执行命令。(其实二者原理都一样,都是执行maven的generator命令,具体请看下文)。 1. 完善pom文件 <?xml version="1.0" encoding="UTF-8"?> <project xmlns="http://maven.apache.org/POM/4.0.0" xmlns:xsi="http://www.w3.org/2001/XMLSchema-instance" xsi:schemaLocation="http://maven.apache.org/POM/4.0.0 http://maven.apache.org/xsd/maven-4.0.0.xsd"> <modelVersion>4.0.0</modelVersion> <groupId>springboot-mybatis</groupId> <artifactId>springboot-mybatis</artifactId> <version>0.0.1-SNAPSHOT</version> <packaging>jar</packaging> <name>springboot-mybatis</name> <description>Demo project for Spring Boot</description> <parent> <groupId>springboot-integration</groupId> <artifactId>springboot-integration</artifactId> <version>1.0-SNAPSHOT</version> </parent> <!-- Add typical dependencies for a web application --> <dependencies> <dependency> <groupId>org.springframework.boot</groupId> <artifactId>spring-boot-starter-jdbc</artifactId> </dependency> <dependency> <groupId>org.mybatis.spring.boot</groupId> <artifactId>mybatis-spring-boot-starter</artifactId> <version>1.3.0</version> </dependency> <dependency> <groupId>org.springframework.boot</groupId> <artifactId>spring-boot-starter-thymeleaf</artifactId> </dependency> <dependency> <groupId>org.springframework.boot</groupId> <artifactId>spring-boot-starter-web</artifactId> </dependency> <dependency> <groupId>org.springframework.boot</groupId> <artifactId>spring-boot-starter-test</artifactId> <scope>test</scope> </dependency> <dependency> <groupId>mysql</groupId> <artifactId>mysql-connector-java</artifactId> <version>5.1.35</version> </dependency> <!-- alibaba的druid数据库连接池 --> <dependency> <groupId>com.alibaba</groupId> <artifactId>druid</artifactId> <version>1.0.11</version> </dependency> <!-- alibaba的druid数据库连接池 --> <dependency> <groupId>com.alibaba</groupId> <artifactId>druid-spring-boot-starter</artifactId> <version>1.1.0</version> </dependency> <dependency> <groupId>junit</groupId> <artifactId>junit</artifactId> <scope>test</scope> </dependency> <!-- 分页插件 --> <dependency> <groupId>com.github.pagehelper</groupId> <artifactId>pagehelper</artifactId> <version>5.0.4</version> </dependency> </dependencies> <!-- Package as an executable jar --> <build> <finalName>springboot-mybatis</finalName> <plugins> <plugin> <groupId>org.apache.maven.plugins</groupId> <artifactId>maven-surefire-plugin</artifactId> <configuration> <testFailureIgnore>true</testFailureIgnore> </configuration> </plugin> <plugin> <groupId>org.mybatis.generator</groupId> <artifactId>mybatis-generator-maven-plugin</artifactId> <version>1.3.2</version> <configuration> <verbose>true</verbose> <overwrite>true</overwrite> </configuration> </plugin> </plugins> </build> </project> 2. 逆向所需配置文件generatorConfig.xml <?xml version="1.0" encoding="UTF-8"?> <!DOCTYPE generatorConfiguration PUBLIC "-//mybatis.org//DTD MyBatis Generator Configuration 1.0//EN" "http://mybatis.org/dtd/mybatis-generator-config_1_0.dtd"> <generatorConfiguration> <!-- 数据库驱动:选择你的本地硬盘上面的数据库驱动包--> <classPathEntry location="E:\lib\mysql_driver\mysql-connector-java-5.1.26-bin.jar"/> <context id="DB2Tables" targetRuntime="MyBatis3"> <commentGenerator> <property name="suppressDate" value="true"/> <!-- 是否去除自动生成的注释 true:是 : false:否 --> <property name="suppressAllComments" value="true"/> </commentGenerator> <!--数据库链接URL,用户名、密码 --> <jdbcConnection driverClass="com.mysql.jdbc.Driver" connectionURL="jdbc:mysql://127.0.0.1/user" userId="root" password="root"> </jdbcConnection> <javaTypeResolver> <property name="forceBigDecimals" value="false"/> </javaTypeResolver> <!-- 生成模型的包名和位置--> <javaModelGenerator targetPackage="com.fantj.sbmybatis.model" targetProject="src/main/java"> <property name="enableSubPackages" value="true"/> <property name="trimStrings" value="true"/> </javaModelGenerator> <!-- 生成映射文件的包名和位置--> <sqlMapGenerator targetPackage="mapping" targetProject="src/main/resources"> <property name="enableSubPackages" value="true"/> </sqlMapGenerator> <!-- 生成DAO的包名和位置--> <javaClientGenerator type="XMLMAPPER" targetPackage="com.fantj.sbmybatis.mapper" targetProject="src/main/java"> <property name="enableSubPackages" value="true"/> </javaClientGenerator> <!-- 要生成的表 tableName是数据库中的表名或视图名 domainObjectName是实体类名--> <table tableName="user" domainObjectName="User" enableCountByExample="false" enableUpdateByExample="false" enableDeleteByExample="false" enableSelectByExample="false" selectByExampleQueryId="false"></table> </context> </generatorConfiguration> 3. 利用IDE创建逆向工程启动类 4. add一个Maven configuration 5. 我的数据库和表结构 6. application配置文件 server: port: 8080 spring: datasource: name: test url: jdbc:mysql://127.0.0.1:3306/user username: root password: root # druid 连接池 type: com.alibaba.druid.pool.DruidDataSource driver-class-name: com.mysql.jdbc.Driver filters: stat maxActive: 20 initialSize: 1 maxWait: 60000 minIdle: 1 timeBetweenEvictionRunsMillis: 60000 minEvictableIdleTimeMillis: 300000 validationQuery: select 'x' testWhileIdle: true testOnBorrow: false testOnReturn: false poolPreparedStatements: true maxOpenPreparedStatements: 20 mybatis: mapper-locations: classpath:mapping/*.xml type-aliases-package: com.fant.model #pagehelper分页插件 pagehelper: helperDialect: mysql reasonable: true supportMethodsArguments: true params: count=countSql 运行generator工程 自动生成代码 生成的文件 User.java package com.fantj.model; import java.util.Date; public class User { private Integer id; private String username; private Date birthday; private String sex; private String address; public Integer getId() { return id; } public void setId(Integer id) { this.id = id; } public String getUsername() { return username; } public void setUsername(String username) { this.username = username == null ? null : username.trim(); } public Date getBirthday() { return birthday; } public void setBirthday(Date birthday) { this.birthday = birthday; } public String getSex() { return sex; } public void setSex(String sex) { this.sex = sex == null ? null : sex.trim(); } public String getAddress() { return address; } public void setAddress(String address) { this.address = address == null ? null : address.trim(); } } UserMapper .java package com.fantj.mapper; import com.fantj.model.User; import java.util.List; public interface UserMapper { int deleteByPrimaryKey(Integer id); int insert(User record); int insertSelective(User record); User selectByPrimaryKey(Integer id); int updateByPrimaryKeySelective(User record); int updateByPrimaryKey(User record); List<User> selectAll(); } UserMapper.xml <?xml version="1.0" encoding="UTF-8" ?> <!DOCTYPE mapper PUBLIC "-//mybatis.org//DTD Mapper 3.0//EN" "http://mybatis.org/dtd/mybatis-3-mapper.dtd" > <mapper namespace="com.fantj.mapper.UserMapper" > <resultMap id="BaseResultMap" type="com.fantj.model.User" > <id column="id" property="id" jdbcType="INTEGER" /> <result column="username" property="username" jdbcType="VARCHAR" /> <result column="birthday" property="birthday" jdbcType="DATE" /> <result column="sex" property="sex" jdbcType="CHAR" /> <result column="address" property="address" jdbcType="VARCHAR" /> </resultMap> <sql id="Base_Column_List" > id, username, birthday, sex, address </sql> <select id="selectAll" resultMap="BaseResultMap" > select <include refid="Base_Column_List" /> from user </select> <select id="selectByPrimaryKey" resultMap="BaseResultMap" parameterType="java.lang.Integer" > select <include refid="Base_Column_List" /> from user where id = #{id,jdbcType=INTEGER} </select> <delete id="deleteByPrimaryKey" parameterType="java.lang.Integer" > delete from user where id = #{id,jdbcType=INTEGER} </delete> <insert id="insert" parameterType="com.fantj.model.User" > insert into user (id, username, birthday, sex, address) values (#{id,jdbcType=INTEGER}, #{username,jdbcType=VARCHAR}, #{birthday,jdbcType=DATE}, #{sex,jdbcType=CHAR}, #{address,jdbcType=VARCHAR}) </insert> <insert id="insertSelective" parameterType="com.fantj.model.User" > insert into user <trim prefix="(" suffix=")" suffixOverrides="," > <if test="id != null" > id, </if> <if test="username != null" > username, </if> <if test="birthday != null" > birthday, </if> <if test="sex != null" > sex, </if> <if test="address != null" > address, </if> </trim> <trim prefix="values (" suffix=")" suffixOverrides="," > <if test="id != null" > #{id,jdbcType=INTEGER}, </if> <if test="username != null" > #{username,jdbcType=VARCHAR}, </if> <if test="birthday != null" > #{birthday,jdbcType=DATE}, </if> <if test="sex != null" > #{sex,jdbcType=CHAR}, </if> <if test="address != null" > #{address,jdbcType=VARCHAR}, </if> </trim> </insert> <update id="updateByPrimaryKeySelective" parameterType="com.fantj.model.User" > update user <set > <if test="username != null" > username = #{username,jdbcType=VARCHAR}, </if> <if test="birthday != null" > birthday = #{birthday,jdbcType=DATE}, </if> <if test="sex != null" > sex = #{sex,jdbcType=CHAR}, </if> <if test="address != null" > address = #{address,jdbcType=VARCHAR}, </if> </set> where id = #{id,jdbcType=INTEGER} </update> <update id="updateByPrimaryKey" parameterType="com.fantj.model.User" > update user set username = #{username,jdbcType=VARCHAR}, birthday = #{birthday,jdbcType=DATE}, sex = #{sex,jdbcType=CHAR}, address = #{address,jdbcType=VARCHAR} where id = #{id,jdbcType=INTEGER} </update> </mapper> 修改启动类 逆向生成代码后,我们还需要在启动类上添加一个@MapperScan("com.fantj.mapper")注解,告诉我们的Mapper需要扫描的包,这样就不用每个Mapper上都添加@Mapper注解了。 @SpringBootApplication @MapperScan("com.fantj.mapper") public class MybatisApplication { public static void main(String[] args) { SpringApplication.run(MybatisApplication.class, args); } } 完善controller和service UserController.java @RestController @RequestMapping("/user") public class UserController { @Autowired private UserService userService; @RequestMapping(method = RequestMethod.GET,value = "/delete/{id}") public void delete(@PathVariable("id")int id){ userService.delete(id); } @RequestMapping(method = RequestMethod.POST,value = "/insert") public void insert(User user){ userService.insert(user); } @RequestMapping(method = RequestMethod.POST,value = "/update/{id}") public void update(@RequestParam User user){ userService.update(user); } @RequestMapping(method = RequestMethod.GET,value = "/{id}/select") public User select(@PathVariable("id")int id){ return userService.selectById(id); } @RequestMapping(method = RequestMethod.GET,value = "/selectAll/{pageNum}/{pageSize}") public List<User> selectAll(@PathVariable("pageNum") int pageNum, @PathVariable("pageSize") int pageSize){ return userService.selectAll(pageNum,pageSize); } } UserService.java package com.fantj.service; import com.fantj.model.User; import java.util.List; public interface UserService { /** 删除 */ public void delete(int id); /** 增加*/ public void insert(User user); /** 更新*/ public int update(User user); /** 查询单个*/ public User selectById(int id); /** 查询全部列表*/ public List<User> selectAll(int pageNum, int pageSize); } UserServiceImpl .java @Service public class UserServiceImpl implements UserService { @Autowired private UserMapper userMapper; /** * 删除 * * @param id */ @Override public void delete(int id) { userMapper.deleteByPrimaryKey(id); } /** * 增加 * * @param user */ @Override public void insert(User user) { userMapper.insert(user); } /** * 更新 * * @param user */ @Override public int update(User user) { return userMapper.updateByPrimaryKey(user); } /** * 查询单个 * * @param id */ @Override public User selectById(int id) { return userMapper.selectByPrimaryKey(id); } /** * 查询全部列表,并做分页 * * @param pageNum 开始页数 * @param pageSize 每页显示的数据条数 */ @Override public List<User> selectAll(int pageNum, int pageSize) { //将参数传给这个方法就可以实现物理分页了,非常简单。 PageHelper.startPage(pageNum,pageSize); return userMapper.selectAll(); } } 浏览器访问127.0.0.1/user/selectAll/0/1 说明我们成功了。 一个小甜点 有人问,get方法可以直接从浏览器地址中的url来测试,那post请求怎么测试呢? 个人建议用postman工具,也可以写测试类用代码来完成测试。也可以使用idea的一个测试工具Test RESTful Web Service 注解方式 好了,配置方式我们介绍完了,我在这里稍微聊一聊注解开发方式,个人建议如果想用注解开发,直接用jpa,可以更方便自己的开发。 mybatis java api :http://www.mybatis.org/mybatis-3/zh/java-api.html UserMapper.java package com.fantj.mapper; import com.fantj.model.User; import org.apache.ibatis.annotations.*; import java.util.List; public interface UserMapper { /*int deleteByPrimaryKey(Integer id); int insert(User record); int insertSelective(User record); User selectByPrimaryKey(Integer id); int updateByPrimaryKeySelective(User record); int updateByPrimaryKey(User record); List<User> selectAll();*/ //如果实例对象中的属性名和数据表中字段名不一致,用@Result注解进行说明映射关系,我在这里只是告诉你怎么写 @Select("SELECT * FROM user") @Results({ @Result(property = "username", column = "username"), @Result(property = "sex", column = "sex"), @Result(property = "address",column = "address") }) List<User> selectAll(); @Select("SELECT * FROM user WHERE id = #{id}") @Results({ @Result(property = "sex", column = "sex"), @Result(property = "username", column = "username") }) User selectByPrimaryKey(int id); @Insert({"INSERT INTO user(username,birthday,sex,address}) VALUES(#{userName}, #{birthday}, #{sex},#{address})"}) void insert(User user); @Update("UPDATE user SET userName=#{userName} WHERE id =#{id}") int updateByPrimaryKey(User user); @Delete("DELETE FROM user WHERE id =#{id}") int deleteByPrimaryKey(int id); } 注解的一些解释 @Select 是查询类的注解,所有的查询均使用这个 @Result 修饰返回的结果集,关联实体类属性和数据库字段一一对应,如果实体类* 属性和数据库属性名保持一致,就不需要这个属性来修饰。 @Insert 插入数据库使用,直接传入实体类会自动解析属性到对应的值 @Update 负责修改,也可以直接传入对象 @delete 负责删除 注意将application配置文件中的mybatis.mapper-locations:属性注视掉再启动项目。否则它会报错:Mapped Statements collection already contains value for com.fantj.mapper.UserMapper.insert 。意思是mapper中方法重复。 最后一个甜点 还有一个东西忘说了 -.-,就是用cmd来逆向生成代码。 声称语句 java -jar mybatis-generator-core-1.3.2.jar -configfile generator.xml -overwrite src目录请忽略,这是生成的目录。 好了 干货都分享了,谢谢大家。0.0


优秀的个人博客,低调大师

凹语言 v0.16.0 中秋特别版本发布

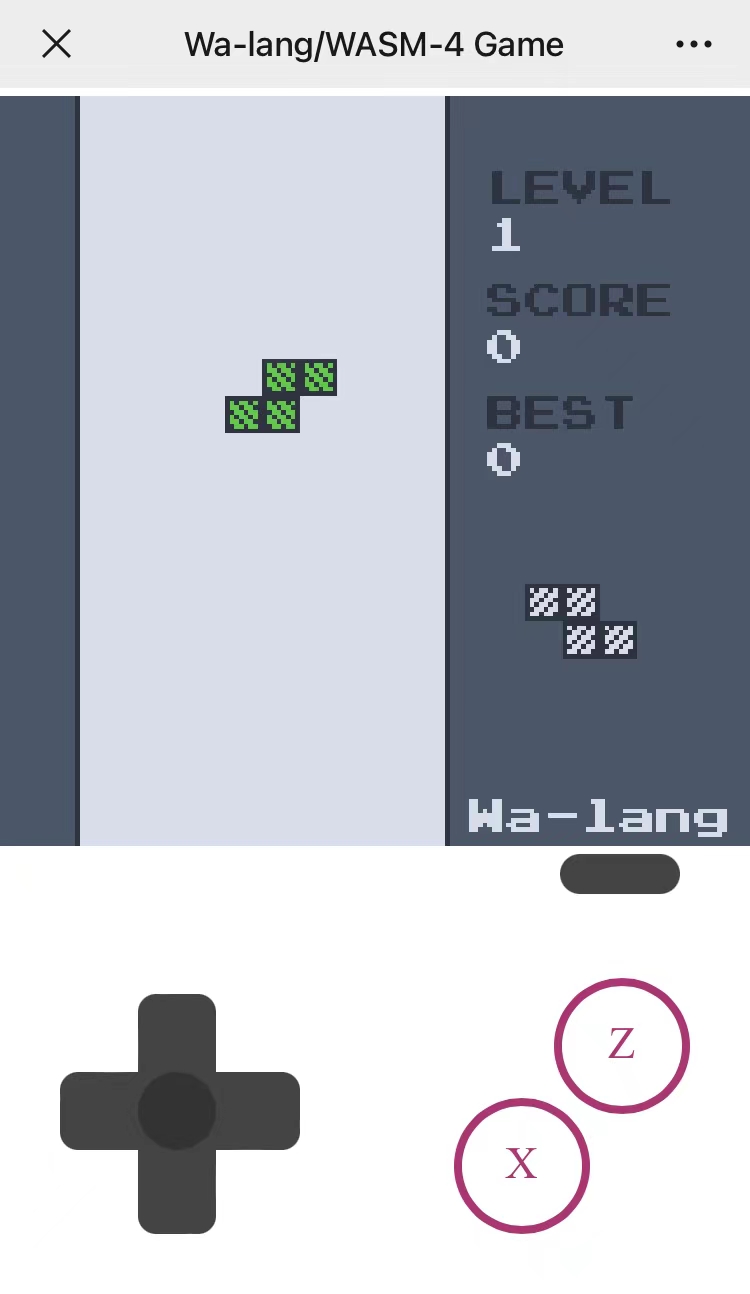
凹语言是国内首个面向 WebAssembly 设计的通用编程语言,也是国内首个被 CNCF 基金会 wasm 全景图收录的开源编程语言。新版本有以下更新: “国产语言论坛”被动关闭:https://zh-lang.osanswer.net 增加__package__/__FILE__/__LINE__/__func__预定义常量, 表示当前位置信息 完善 wasm4 游戏支持, 增加俄罗斯方块/pong/life等多个游戏, 并提供在线试玩页面 重构syscall部分子包和文档 以下是俄罗斯方块的效果图(https://wa-lang.org/wa/w4-tetris/): 凹语言官网:https://wa-lang.org/

优秀的个人博客,低调大师

spring-boot2-整合(一)Mybatis-(特别完整!)

版权声明:本文为博主原创文章,未经博主允许不得转载。 https://blog.csdn.net/qq_36367789/article/details/79732868 整合Mybatis分为两种模式,一种是xml配置,一种是注解。(类似JPA) 我在这里重点放在xml配置上,因为如果想用注解的话,建议直接用jpa代替,因为Jpa有更成熟的CRUD接口更方便开发。我在后文中也会把注解方式说清楚。 大概介绍下流程: 1. 借助idea实现mybatis逆向工程 2. 用xml配置实现整合 3. 用cmd命令行实现mybatis逆向工程 4. 用mapping.xml配置实现数据交互 5. 用注解的方式实现数据交互 首先我的开发环境: jdk1.8+maven3+IDEA 1. mybatis逆向攻城 逆向工程方式很多,我目前接触到的就两种,一种是借助于ide开发工具,一种是在cmd中执行命令。(其实二者原理都一样,都是执行maven的generator命令,具体请看下文)。 1. 完善pom文件 <?xml version="1.0" encoding="UTF-8"?> <project xmlns="http://maven.apache.org/POM/4.0.0" xmlns:xsi="http://www.w3.org/2001/XMLSchema-instance" xsi:schemaLocation="http://maven.apache.org/POM/4.0.0 http://maven.apache.org/xsd/maven-4.0.0.xsd"> <modelVersion>4.0.0</modelVersion> <groupId>springboot-mybatis</groupId> <artifactId>springboot-mybatis</artifactId> <version>0.0.1-SNAPSHOT</version> <packaging>jar</packaging> <name>springboot-mybatis</name> <description>Demo project for Spring Boot</description> <parent> <groupId>springboot-integration</groupId> <artifactId>springboot-integration</artifactId> <version>1.0-SNAPSHOT</version> </parent> <!-- Add typical dependencies for a web application --> <dependencies> <dependency> <groupId>org.springframework.boot</groupId> <artifactId>spring-boot-starter-jdbc</artifactId> </dependency> <dependency> <groupId>org.mybatis.spring.boot</groupId> <artifactId>mybatis-spring-boot-starter</artifactId> <version>1.3.0</version> </dependency> <dependency> <groupId>org.springframework.boot</groupId> <artifactId>spring-boot-starter-thymeleaf</artifactId> </dependency> <dependency> <groupId>org.springframework.boot</groupId> <artifactId>spring-boot-starter-web</artifactId> </dependency> <dependency> <groupId>org.springframework.boot</groupId> <artifactId>spring-boot-starter-test</artifactId> <scope>test</scope> </dependency> <dependency> <groupId>mysql</groupId> <artifactId>mysql-connector-java</artifactId> <version>5.1.35</version> </dependency> <!-- alibaba的druid数据库连接池 --> <dependency> <groupId>com.alibaba</groupId> <artifactId>druid</artifactId> <version>1.0.11</version> </dependency> <!-- alibaba的druid数据库连接池 --> <dependency> <groupId>com.alibaba</groupId> <artifactId>druid-spring-boot-starter</artifactId> <version>1.1.0</version> </dependency> <dependency> <groupId>junit</groupId> <artifactId>junit</artifactId> <scope>test</scope> </dependency> <!-- 分页插件 --> <dependency> <groupId>com.github.pagehelper</groupId> <artifactId>pagehelper</artifactId> <version>5.0.4</version> </dependency> </dependencies> <!-- Package as an executable jar --> <build> <finalName>springboot-mybatis</finalName> <plugins> <plugin> <groupId>org.apache.maven.plugins</groupId> <artifactId>maven-surefire-plugin</artifactId> <configuration> <testFailureIgnore>true</testFailureIgnore> </configuration> </plugin> <plugin> <groupId>org.mybatis.generator</groupId> <artifactId>mybatis-generator-maven-plugin</artifactId> <version>1.3.2</version> <configuration> <verbose>true</verbose> <overwrite>true</overwrite> </configuration> </plugin> </plugins> </build> </project> 2. 逆向所需配置文件generatorConfig.xml <?xml version="1.0" encoding="UTF-8"?> <!DOCTYPE generatorConfiguration PUBLIC "-//mybatis.org//DTD MyBatis Generator Configuration 1.0//EN" "http://mybatis.org/dtd/mybatis-generator-config_1_0.dtd"> <generatorConfiguration> <!-- 数据库驱动:选择你的本地硬盘上面的数据库驱动包--> <classPathEntry location="E:\lib\mysql_driver\mysql-connector-java-5.1.26-bin.jar"/> <context id="DB2Tables" targetRuntime="MyBatis3"> <commentGenerator> <property name="suppressDate" value="true"/> <!-- 是否去除自动生成的注释 true:是 : false:否 --> <property name="suppressAllComments" value="true"/> </commentGenerator> <!--数据库链接URL,用户名、密码 --> <jdbcConnection driverClass="com.mysql.jdbc.Driver" connectionURL="jdbc:mysql://127.0.0.1/user" userId="root" password="root"> </jdbcConnection> <javaTypeResolver> <property name="forceBigDecimals" value="false"/> </javaTypeResolver> <!-- 生成模型的包名和位置--> <javaModelGenerator targetPackage="com.fantj.sbmybatis.model" targetProject="src/main/java"> <property name="enableSubPackages" value="true"/> <property name="trimStrings" value="true"/> </javaModelGenerator> <!-- 生成映射文件的包名和位置--> <sqlMapGenerator targetPackage="mapping" targetProject="src/main/resources"> <property name="enableSubPackages" value="true"/> </sqlMapGenerator> <!-- 生成DAO的包名和位置--> <javaClientGenerator type="XMLMAPPER" targetPackage="com.fantj.sbmybatis.mapper" targetProject="src/main/java"> <property name="enableSubPackages" value="true"/> </javaClientGenerator> <!-- 要生成的表 tableName是数据库中的表名或视图名 domainObjectName是实体类名--> <table tableName="user" domainObjectName="User" enableCountByExample="false" enableUpdateByExample="false" enableDeleteByExample="false" enableSelectByExample="false" selectByExampleQueryId="false"></table> </context> </generatorConfiguration> 3. 利用IDE创建逆向工程启动类 4. add一个Maven configuration 5. 我的数据库和表结构 6. application配置文件 server: port: 8080 spring: datasource: name: test url: jdbc:mysql://127.0.0.1:3306/user username: root password: root # druid 连接池 type: com.alibaba.druid.pool.DruidDataSource driver-class-name: com.mysql.jdbc.Driver filters: stat maxActive: 20 initialSize: 1 maxWait: 60000 minIdle: 1 timeBetweenEvictionRunsMillis: 60000 minEvictableIdleTimeMillis: 300000 validationQuery: select 'x' testWhileIdle: true testOnBorrow: false testOnReturn: false poolPreparedStatements: true maxOpenPreparedStatements: 20 mybatis: mapper-locations: classpath:mapping/*.xml type-aliases-package: com.fant.model #pagehelper分页插件 pagehelper: helperDialect: mysql reasonable: true supportMethodsArguments: true params: count=countSql 运行generator工程 自动生成代码 生成的文件 User.java package com.fantj.model; import java.util.Date; public class User { private Integer id; private String username; private Date birthday; private String sex; private String address; public Integer getId() { return id; } public void setId(Integer id) { this.id = id; } public String getUsername() { return username; } public void setUsername(String username) { this.username = username == null ? null : username.trim(); } public Date getBirthday() { return birthday; } public void setBirthday(Date birthday) { this.birthday = birthday; } public String getSex() { return sex; } public void setSex(String sex) { this.sex = sex == null ? null : sex.trim(); } public String getAddress() { return address; } public void setAddress(String address) { this.address = address == null ? null : address.trim(); } } UserMapper .java package com.fantj.mapper; import com.fantj.model.User; import java.util.List; public interface UserMapper { int deleteByPrimaryKey(Integer id); int insert(User record); int insertSelective(User record); User selectByPrimaryKey(Integer id); int updateByPrimaryKeySelective(User record); int updateByPrimaryKey(User record); List<User> selectAll(); } UserMapper.xml <?xml version="1.0" encoding="UTF-8" ?> <!DOCTYPE mapper PUBLIC "-//mybatis.org//DTD Mapper 3.0//EN" "http://mybatis.org/dtd/mybatis-3-mapper.dtd" > <mapper namespace="com.fantj.mapper.UserMapper" > <resultMap id="BaseResultMap" type="com.fantj.model.User" > <id column="id" property="id" jdbcType="INTEGER" /> <result column="username" property="username" jdbcType="VARCHAR" /> <result column="birthday" property="birthday" jdbcType="DATE" /> <result column="sex" property="sex" jdbcType="CHAR" /> <result column="address" property="address" jdbcType="VARCHAR" /> </resultMap> <sql id="Base_Column_List" > id, username, birthday, sex, address </sql> <select id="selectAll" resultMap="BaseResultMap" > select <include refid="Base_Column_List" /> from user </select> <select id="selectByPrimaryKey" resultMap="BaseResultMap" parameterType="java.lang.Integer" > select <include refid="Base_Column_List" /> from user where id = #{id,jdbcType=INTEGER} </select> <delete id="deleteByPrimaryKey" parameterType="java.lang.Integer" > delete from user where id = #{id,jdbcType=INTEGER} </delete> <insert id="insert" parameterType="com.fantj.model.User" > insert into user (id, username, birthday, sex, address) values (#{id,jdbcType=INTEGER}, #{username,jdbcType=VARCHAR}, #{birthday,jdbcType=DATE}, #{sex,jdbcType=CHAR}, #{address,jdbcType=VARCHAR}) </insert> <insert id="insertSelective" parameterType="com.fantj.model.User" > insert into user <trim prefix="(" suffix=")" suffixOverrides="," > <if test="id != null" > id, </if> <if test="username != null" > username, </if> <if test="birthday != null" > birthday, </if> <if test="sex != null" > sex, </if> <if test="address != null" > address, </if> </trim> <trim prefix="values (" suffix=")" suffixOverrides="," > <if test="id != null" > #{id,jdbcType=INTEGER}, </if> <if test="username != null" > #{username,jdbcType=VARCHAR}, </if> <if test="birthday != null" > #{birthday,jdbcType=DATE}, </if> <if test="sex != null" > #{sex,jdbcType=CHAR}, </if> <if test="address != null" > #{address,jdbcType=VARCHAR}, </if> </trim> </insert> <update id="updateByPrimaryKeySelective" parameterType="com.fantj.model.User" > update user <set > <if test="username != null" > username = #{username,jdbcType=VARCHAR}, </if> <if test="birthday != null" > birthday = #{birthday,jdbcType=DATE}, </if> <if test="sex != null" > sex = #{sex,jdbcType=CHAR}, </if> <if test="address != null" > address = #{address,jdbcType=VARCHAR}, </if> </set> where id = #{id,jdbcType=INTEGER} </update> <update id="updateByPrimaryKey" parameterType="com.fantj.model.User" > update user set username = #{username,jdbcType=VARCHAR}, birthday = #{birthday,jdbcType=DATE}, sex = #{sex,jdbcType=CHAR}, address = #{address,jdbcType=VARCHAR} where id = #{id,jdbcType=INTEGER} </update> </mapper> 修改启动类 逆向生成代码后,我们还需要在启动类上添加一个@MapperScan("com.fantj.mapper")注解,告诉我们的Mapper需要扫描的包,这样就不用每个Mapper上都添加@Mapper注解了。 package com.fantj; import com.fantj.util.Params; import org.mybatis.spring.annotation.MapperScan; import org.springframework.boot.SpringApplication; import org.springframework.boot.autoconfigure.EnableAutoConfiguration; import org.springframework.boot.autoconfigure.SpringBootApplication; import org.springframework.context.annotation.Configuration; import org.springframework.web.bind.annotation.RequestMapping; import org.springframework.web.bind.annotation.RestController; import java.util.List; @SpringBootApplication @MapperScan("com.fantj.mapper") public class MybatisApplication { public static void main(String[] args) { SpringApplication.run(MybatisApplication.class, args); } } 完善controller和service UserController.java package com.fantj.controller; import com.fantj.model.User; import com.fantj.service.UserService; import org.springframework.beans.factory.annotation.Autowired; import org.springframework.web.bind.annotation.*; import javax.jws.soap.SOAPBinding; import java.util.Date; import java.util.List; @RestController @RequestMapping("/user") public class UserController { @Autowired private UserService userService; @RequestMapping(method = RequestMethod.GET,value = "/delete/{id}") public void delete(@PathVariable("id")int id){ userService.delete(id); } @RequestMapping(method = RequestMethod.POST,value = "/insert") public void insert(User user){ userService.insert(user); } @RequestMapping(method = RequestMethod.POST,value = "/update/{id}") public void update(@RequestParam User user){ userService.update(user); } @RequestMapping(method = RequestMethod.GET,value = "/{id}/select") public User select(@PathVariable("id")int id){ return userService.selectById(id); } @RequestMapping(method = RequestMethod.GET,value = "/selectAll/{pageNum}/{pageSize}") public List<User> selectAll(@PathVariable("pageNum") int pageNum, @PathVariable("pageSize") int pageSize){ return userService.selectAll(pageNum,pageSize); } } UserService.java package com.fantj.service; import com.fantj.model.User; import java.util.List; public interface UserService { /** 删除 */ public void delete(int id); /** 增加*/ public void insert(User user); /** 更新*/ public int update(User user); /** 查询单个*/ public User selectById(int id); /** 查询全部列表*/ public List<User> selectAll(int pageNum, int pageSize); } UserServiceImpl .java package com.fantj.service.impl; import com.fantj.mapper.UserMapper; import com.fantj.model.User; import com.fantj.service.UserService; import com.github.pagehelper.PageHelper; import org.springframework.beans.factory.annotation.Autowired; import org.springframework.stereotype.Service; import java.util.List; @Service public class UserServiceImpl implements UserService { @Autowired private UserMapper userMapper; /** * 删除 * * @param id */ @Override public void delete(int id) { userMapper.deleteByPrimaryKey(id); } /** * 增加 * * @param user */ @Override public void insert(User user) { userMapper.insert(user); } /** * 更新 * * @param user */ @Override public int update(User user) { return userMapper.updateByPrimaryKey(user); } /** * 查询单个 * * @param id */ @Override public User selectById(int id) { return userMapper.selectByPrimaryKey(id); } /** * 查询全部列表,并做分页 * * @param pageNum 开始页数 * @param pageSize 每页显示的数据条数 */ @Override public List<User> selectAll(int pageNum, int pageSize) { //将参数传给这个方法就可以实现物理分页了,非常简单。 PageHelper.startPage(pageNum,pageSize); return userMapper.selectAll(); } } 浏览器访问127.0.0.1/user/selectAll/0/1 说明我们成功了。 一个小甜点 有人问,get方法可以直接从浏览器地址中的url来测试,那post请求怎么测试呢? 个人建议用postman工具,也可以写测试类用代码来完成测试。也可以使用idea的一个测试工具Test RESTful Web Service 注解方式 好了,配置方式我们介绍完了,我在这里稍微聊一聊注解开发方式,个人建议如果想用注解开发,直接用jpa,可以更方便自己的开发。 mybatis java api :http://www.mybatis.org/mybatis-3/zh/java-api.html UserMapper.java package com.fantj.mapper; import com.fantj.model.User; import org.apache.ibatis.annotations.*; import java.util.List; public interface UserMapper { /*int deleteByPrimaryKey(Integer id); int insert(User record); int insertSelective(User record); User selectByPrimaryKey(Integer id); int updateByPrimaryKeySelective(User record); int updateByPrimaryKey(User record); List<User> selectAll();*/ //如果实例对象中的属性名和数据表中字段名不一致,用@Result注解进行说明映射关系,我在这里只是告诉你怎么写 @Select("SELECT * FROM user") @Results({ @Result(property = "username", column = "username"), @Result(property = "sex", column = "sex"), @Result(property = "address",column = "address") }) List<User> selectAll(); @Select("SELECT * FROM user WHERE id = #{id}") @Results({ @Result(property = "sex", column = "sex"), @Result(property = "username", column = "username") }) User selectByPrimaryKey(int id); @Insert({"INSERT INTO user(username,birthday,sex,address}) VALUES(#{userName}, #{birthday}, #{sex},#{address})"}) void insert(User user); @Update("UPDATE user SET userName=#{userName} WHERE id =#{id}") int updateByPrimaryKey(User user); @Delete("DELETE FROM user WHERE id =#{id}") int deleteByPrimaryKey(int id); } 注解的一些解释 @Select 是查询类的注解,所有的查询均使用这个 @Result 修饰返回的结果集,关联实体类属性和数据库字段一一对应,如果实体类* 属性和数据库属性名保持一致,就不需要这个属性来修饰。 @Insert 插入数据库使用,直接传入实体类会自动解析属性到对应的值 @Update 负责修改,也可以直接传入对象 @delete 负责删除 注意将application配置文件中的mybatis.mapper-locations:属性注视掉再启动项目。否则它会报错:Mapped Statements collection already contains value for com.fantj.mapper.UserMapper.insert 。意思是mapper中方法重复。 最后一个甜点 还有一个东西忘说了 -.-,就是用cmd来逆向生成代码。 声称语句 java -jar mybatis-generator-core-1.3.2.jar -configfile generator.xml -overwrite src目录请忽略,这是生成的目录。 好了 干货都分享了,谢谢大家。0.0

优秀的个人博客,低调大师

手把手学IOT服务端API编程[14、发消息给设备并同步返回响应]|MVP讲堂

作者:阿里云MVP洵云 10节回顾:手把手学IOT服务端API编程[10、保存设备属性]|MVP讲堂 11节回顾:手把手学IOT服务端API编程[11、查询设备属性列表] 12节回顾:手把手学IOT服务端API编程[12、删除设备属性] 上节介绍从服务端给设备发送消息后,实际使用过程中,服务端通常希望发送消息的设备能给服务端一个反馈,以便确认设备确实收到了服务端的命令或数据,这种逻辑机制在阿里IOT的套件中叫做RRPC,服务端的API接口也提供了相应的功能,这一节就来介绍一下如何使用RRPC的功能,这个接口同样需要提供三个参数,一个是产品的key值,一个是设备名称以及消息内容;接下来我们看一下具体实现;1、脚本实现:我们按照接口的要求,在框架页面上,提供产品的key值和设备名称以及消息内容,这三个输入参数框给用户输入,产品KEY:

优秀的个人博客,低调大师

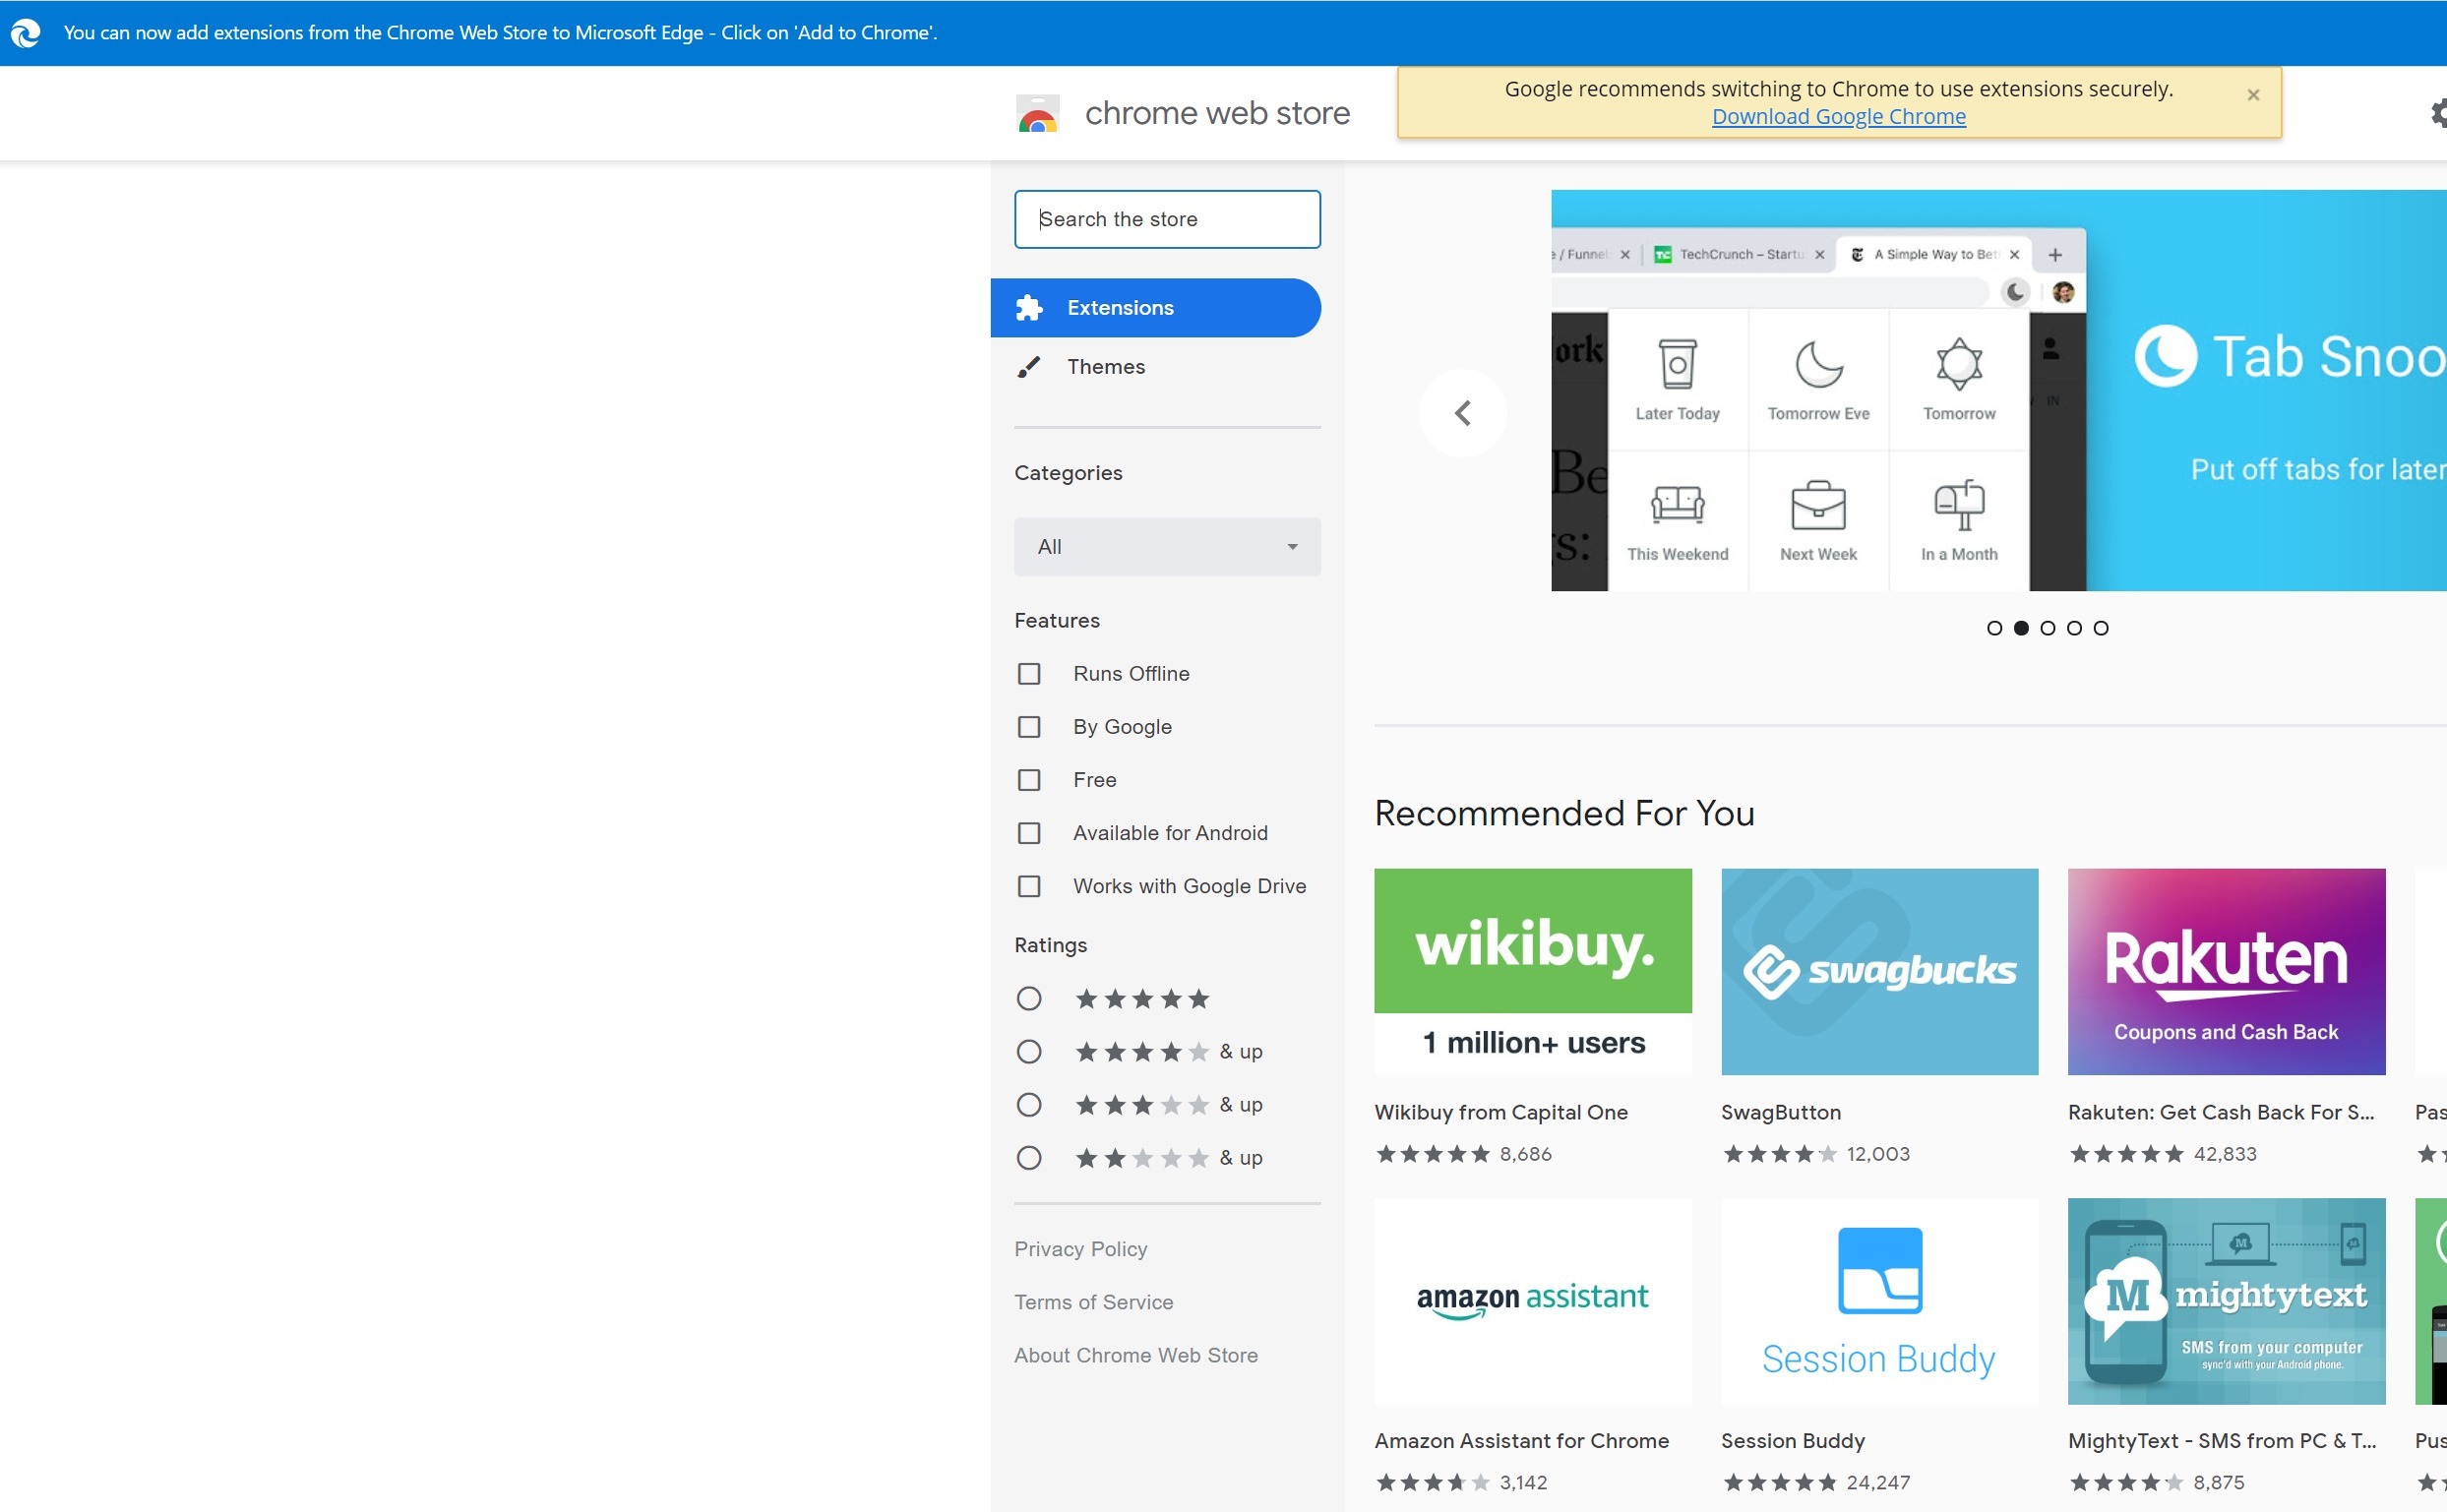
微软对 Microsoft Edge 被谷歌“特别关照”的回应

当使用微软最新浏览器 Microsoft Edge 的用户访问 Chrome Web Store 时,谷歌会发去一条通知提醒,并以安全为由建议用户切换到 Google Chrome。 对此,据一位接近谷歌的知情消息人士透露,之所以显示这样的消息,是因为 Microsoft Edge 不支持安全浏览,无法远程检测和删除恶意扩展。而在 Chrome 中,如果出于某种原因认为扩展不安全,Chrome 团队可以远程禁用该扩展。谷歌的代表发言人拒绝对此发表评论,然而该公司还没有回答为什么使用 Microsoft Edge 的用户会收到此消息,而使用其他浏览器(如 Opera)的用户却不会收到。 无独有偶,微软也在做着类似的事情,当 Microsoft Edge 用户尝试从其他应用商店中添加扩展程序时,微软会用以下免责声明进行警告:“从 Microsoft Store 以外的其他来源安装的扩展未经验证,并且可能会影响浏览器性能。”事实上,任何扩展都可能会影响浏览器性能,所以微软的警告略显牵强。 不过当我们在微软的 Bing 搜索引擎搜索 “Chrome Web Store”时,第一个结果便是微软的 Microsoft Edge 浏览器广告,即使你已经在使用Microsoft Edge。 ▲ 国内版和国际版 Bing 均会在显眼处推广 Microsoft Edge

优秀的个人博客,低调大师

区块链培训学习资料(特别是以太坊)

一个适合区块链新手的以太坊DApp开发教程: http://xc.hubwiz.com/course/5a952991adb3847553d205d1 一个用区块链、星际文件系统(IPFS)、Node.js和MongoDB来构建电商平台: http://xc.hubwiz.com/course/5abbb7acc02e6b6a59171dd6 收集整理了一些免费区块链、以太坊技术开发相关的文件,有需要的可以下载,文件链接: web3.js API官方文档中文版:https://pan.baidu.com/s/1hOV9hEzi7hFxJCL4LTvC6g 以太坊官方文档中文版 :https://pan.baidu.com/s/1ktODJKLMBmkOsi8MPrpIJA 以太坊白皮书中文版 :https://pan.baidu.com/s/1bzAFnzJ35hlQxJ2J4Oj-Ow Solidity的官方文档中文版 :https://pan.baidu.com/s/18yp9XjEqAHpiFm2ZSCygHw Truffle的官方文档中文版 :https://pan.baidu.com/s/1y6SVd7lSLUHK21YF5FzIUQ C#区块链编程指南 :https://pan.baidu.com/s/1sJPLqp1eQqkG7jmxqwn3EA 区块链技术指南: :https://pan.baidu.com/s/13cJxAa80I6iMCczA04CZhg 精通比特币中文版: :https://pan.baidu.com/s/1lz6te3wcQuNJm28rFvBfxg Node.js区块链开发 :https://pan.baidu.com/s/1Ldpn0DvJ5LgLqwix6eWgyg geth使用指南文档中文版 :https://pan.baidu.com/s/1M0WxhmumF_fRqzt_cegnag 以太坊DApp开发环境搭建-Ubuntu : https://pan.baidu.com/s/10qL4q-uKooMehv9X2R1qSA 以太坊DApp开发环境搭建-windows :https://pan.baidu.com/s/1cyYkhIJIFuI2oyxM9Ut0eA 以太坊DApp开发私链搭建-Ubuntu : https://pan.baidu.com/s/1aBOFZT2bCjD2o0EILBWs-g 以太坊DApp开发私链搭建-windows :https://pan.baidu.com/s/10Y6F1cqUltZNN99aJv9kAA 以太坊ganache CLI命令行参数详解:https://pan.baidu.com/s/1lnknFkwenacaeM4asOcBdg 使用truflle和infura部署以太坊合约:https://pan.baidu.com/s/1PTxSVff2vHSVUihYczRRqw IPFS安装部署与开发环境搭建-windows:https://pan.baidu.com/s/1bnhDvqCoOgAqEBZXMtVbRg

资源下载

更多资源
腾讯云软件源

腾讯云软件源

为解决软件依赖安装时官方源访问速度慢的问题,腾讯云为一些软件搭建了缓存服务。您可以通过使用腾讯云软件源站来提升依赖包的安装速度。为了方便用户自由搭建服务架构,目前腾讯云软件源站支持公网访问和内网访问。

Nacos

Nacos

Nacos /nɑ:kəʊs/ 是 Dynamic Naming and Configuration Service 的首字母简称,一个易于构建 AI Agent 应用的动态服务发现、配置管理和AI智能体管理平台。Nacos 致力于帮助您发现、配置和管理微服务及AI智能体应用。Nacos 提供了一组简单易用的特性集,帮助您快速实现动态服务发现、服务配置、服务元数据、流量管理。Nacos 帮助您更敏捷和容易地构建、交付和管理微服务平台。

Spring

Spring

Spring框架(Spring Framework)是由Rod Johnson于2002年提出的开源Java企业级应用框架,旨在通过使用JavaBean替代传统EJB实现方式降低企业级编程开发的复杂性。该框架基于简单性、可测试性和松耦合性设计理念,提供核心容器、应用上下文、数据访问集成等模块,支持整合Hibernate、Struts等第三方框架,其适用范围不仅限于服务器端开发,绝大多数Java应用均可从中受益。

Rocky Linux

Rocky Linux

Rocky Linux(中文名:洛基)是由Gregory Kurtzer于2020年12月发起的企业级Linux发行版,作为CentOS稳定版停止维护后与RHEL(Red Hat Enterprise Linux)完全兼容的开源替代方案,由社区拥有并管理,支持x86_64、aarch64等架构。其通过重新编译RHEL源代码提供长期稳定性,采用模块化包装和SELinux安全架构,默认包含GNOME桌面环境及XFS文件系统,支持十年生命周期更新。

用户登录
用户注册