ELK套件之 X-pack 工具的安装
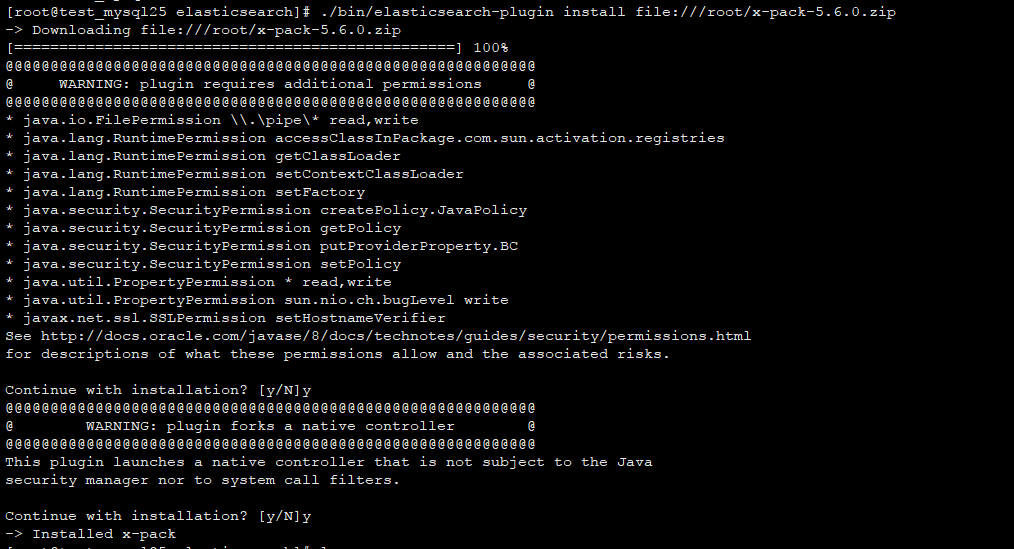
服务器信息: CentOS6.7 x86_64 IP地址:10.0.20.25 ELK版本: elasticsearch-5.6.0.rpm kibana-5.6.0-x86_64.rpm logstash-5.6.0.rpm x-pack版本: x-pack-5.6.0.zip先提前下载好zip安装包丢到/root目录下,这样离线安装起来比较快。 ELK单节点的搭建步骤省略,可以参考http://lee90.blog.51cto.com/10414478/1968035。下面直接开始x-pack的安装。 elasticsearch安装x-pack cd /usr/share/elasticsearch/ bin/elasticsearch-plugin installfile:///root/x-pack-5.6.0.zip /etc/init.d/elasticsearch restart kibana安装x-pack cd /usr/share/kibana/ bin/kibana-plugin install file:///root/x-pack-5.6.1.zip /etc/init.d/kibana restart logstash安装x-pack cd /usr/share/logstash/ bin/logstash-plugin install file:///root/x-pack-5.6.1.zip /etc/init.d/logstas hrestart x-pack的配置 在浏览器打开http://10.0.20.25:5601自动跳转到登录页面(用户名elastic密码changeme) 我们开启了xpack后,默认情况下访问集群需要密码了。 这会导致packetbeat等上送数据失败,提示401报错。因此需要配置下。 以packetbeat为例,其他的我暂时用不到没有去试验。 vim /etc/packetbeat/packetbeat.yml加上ES的用户名和密码 packetbeat.interfaces.device:any packetbeat.protocols.mysql: ports: [3306] send_request: true transaction_timeout: 30s output.elasticsearch: hosts: ["10.0.20.25:9200"] username:"elastic" password:"changeme" work: 1 bulk_max_size: 50 timeout: 90 flush_interval: 1s template.enabled: true template.name:"packetbeat.template" template.overwrite: true index: test-mysql-%{+yyyy.MM.dd} 然后重启下packetbeat即可正常的抓取数据存到ES集群里面。 (官网文档地址:https://www.elastic.co/guide/en/beats/packetbeat/current/elasticsearch-output.html) 更详细的用法可以参考文章:http://blog.csdn.net/pistolove/article/details/53838138 本文转自 lirulei90 51CTO博客,原文链接:http://blog.51cto.com/lee90/1968085,如需转载请自行联系原作者