首页 文章 精选 留言 我的

精选列表

搜索[note],共2467篇文章
优秀的个人博客,低调大师

1.认识Java note

JDK、JRE、JVM的区别联系 JDK: • Java Development Kit • 针对Java开发员的产品 • JRE: • Java Runtime Environment • 是运行Java程序所必须的环境集合 • JVM • Java Virtual Machine • 解释运行Java字节码文件,跨平台的核心 • 联系:JDK 包含JRE,JRE包含JVM。 Java Runtime Environment (JRE) 包含:Java虚拟机、库函数、运行Java应用程序所必须的文件。 Java Development Kit (JDK)包含:包含JRE,以及增加编译器和调试器等用于程序开发的文件。 JDK、JRE和JVM的关系如图1-7所示。 老鸟建议: ·如果只是要运行Java程序,只需要JRE就可以。JRE通常非常小,其中包含了JVM。 ·如果要开发Java程序,就需要安装JDK。

优秀的个人博客,低调大师

JavaScript_知识点梳理note1

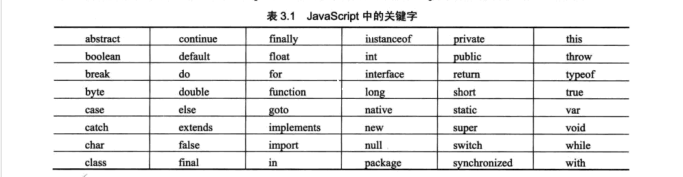
参考文献《JavaWeb 从入门到精通》 1.JavaScript的语法 JavaScript区分大小写 每行结尾的分号可有可无 变量是弱类型的 在定义变量时,只使用var运算符就可以将变量初始化为任意的值。 例如:(将变量name初始化为Bob,变量age初始化为20) var name = "mrsoft"; var age = 20; 使用大括号标记代码块 与Java语言相同,JavaScript也是使用一对大括号标记代码块,被封装在打括号内的语句将顺序执行。 注释 单行注释和多行注释。 2.JavaScript的关键字 3.JavaScript的数据类型 "数符布转空未定" 3.1.数值型(整型,浮点型) **整型** 729 //表示十进制的729 071 //表示八进制的71 0x9405B //表示十六进制的9405B **浮点型** 3.1415926 //采用标准方法表示 1.6E3 //采用科学记数法表示,代表1.6*10³ 3.2.字符型 单引号字符型变量以及双引号字符型变量 'a' '保护环境从我做起' "b" "系统公告:" 3.3.布尔值 布尔值即只有true跟false两个值,在JavaScript中可以用 整数0表示false; 非0的整数表示true; 3.4.转义字符 demo: 使用\r转义符: <script language="javascript" > alert("九霄天云剑,\r 浩然穷碧瑶。"); </script> 运行结果: 3.5.空值 JavaScript中有一个空值(null),用于定义空的或不存在的引用; 试图引用一个没有定义的变量,则返回一个null值。 空值不等于空字符串("")或者0; 因为空值是不存在,而空字符串("")或者0有实际的意义。 3.6.未定义值 4.运算符 4.1.赋值运算符 4.2.算术运算符 4.3.比较运算字符 4.4.逻辑运算字符 4.5.条件云算符 即三目运算符,语法格式如下: 操作数?结果1:结果2 Demo: var a=26; var b=60; var m=a>b?a:b //m的值为60 4.6.字符串运算符 字符串运算符是用于两个字符型数据之间的运算符,除了比较运算符之外,还可以是+和+=运算符。Demo: <script language="javascript"> var a="One " + "world "; a+="One Dream" alert(a); </script> 运行结果: 5.流程控制语句 5.1.if条件判断语句Demo:(用if语句验证用户登录信息) CSS文件: <!-- body{ FONT-SIZE: 9pt; margin-left:0px; SCROLLBAR-FACE-COLOR: #346633; SCROLLBAR-HIGHLIGHT-COLOR: #ffffff; SCROLLBAR-SHADOW-COLOR: #fcfcfc; COLOR: #000000; SCROLLBAR-3DLIGHT-COLOR: #ececec; SCROLLBAR-ARROW-COLOR: #ffffff; SCROLLBAR-TRACK-COLOR: #ececec; SCROLLBAR-DARKSHADOW-COLOR: #999966; BACKGROUND-COLOR: #fcfcfc } a:hover { font-size: 9pt; color: #FF6600; } a { font-size: 9pt; text-decoration: none; color: #676767; noline:expression(this.onfocus=this.blur); } td{ font-size: 9pt; color: #000000; padding-left:5px; } .btn_grey { font-family: "宋体"; font-size: 9pt;color: #333333; background-color: #eeeeee;cursor: hand;padding:1px;height:19px; border-top: 1px solid #FFFFFF;border-right:1px solid #666666; border-bottom: 1px solid #666666;border-left: 1px solid #FFFFFF; } input{ font-family: "宋体"; font-size: 9pt; color: #333333; border: 1px solid #999999; } hr{ border-style:solid; height:1px; color:#CCCCCC; } --> html文件: <html> <head> <meta http-equiv="Content-Type" content="text/html; charset=utf-8" /> <title>无标题文档</title> <link href="style.css" rel="stylesheet"> <script language="javascript"> function check(){ if(form1.user.value==""){ //判断用户名是否为空 alert("请输入用户名!");form1.user.focus();return; }else if(form1.pwd.value==""){ //判断密码是否为空 alert("请输入密码!");form1.pwd.focus();return; }else{ form1.submit(); //提交表单 } } </script> </head> <body> <center> <form name="form1" method="post" action=""> <table width="221" border="1" cellspacing="0" cellpadding="0" bordercolor="#FFFFFF" bordercolordark="#CCCCCC" bordercolorlight="#FFFFFF"> <tr> <td height="30" colspan="2" bgcolor="#eeeeee">用户登录</td> </tr> <tr> <td width="59" height="30">用户名:</td> <td width="162"><input name="user" type="text" id="user"></td> </tr> <tr> <td height="30">密&nbsp;&nbsp;码:</td> <td><input name="pwd" type="text" id="pwd"></td> </tr> <tr> <td height="30" colspan="2" align="center"> <input name="Button" type="button" class="btn_grey" value="登录" onClick="check()"> &nbsp; <input name="Submit2" type="reset" class="btn_grey" value="重置"> </td> </tr> </table> </form> </center> </body> </html> 运行结果: 5.2.switch多分支语句 Demo: <script language="javascript"> var now=new Date(); //获取系统日期 var day=now.getDay(); //获取星期 var week; switch (day){ case 1: week="星期一"; break; case 2: week="星期二"; break; case 3: week="星期三"; break; case 4: week="星期四"; break; case 5: week="星期五"; break; case 6: week="星期六"; break; default: week="星期日"; break; } document.write("今天是"+week); //输出中文的星期 </script> 运行结果: image.png 5.3.for循环语句5.4.while循环语句5.5.do...while循环语句5.6.break与continue语句 6.函数 基本语法如下: function functionName([parameter 1, parameter 2,...]){ statements; [return expression;] } 7.Window对象的open()方法 Demo: <!DOCTYPE html> <html> <head> <meta http-equiv="Content-Type" content="text/html; charset=utf-8"/> <title></title> <script> function openWin(){ myWindow=window.open("","","width=531,height=402,top=50,left=20"); myWindow.document.write("<p>这是'我的窗口'</p>"); myWindow.focus(); } function openWin1(){ window.open("","","width=531,height=402,top=50,left=20"); } </script> </head> <body> <input type="button" value="打开窗口1" onclick="openWin()" /> <input type="button" value="打开窗口2" onclick="openWin1()" /> <input type="button" value="警告" onclick="window.alert('警告窗口');" /> <input type="button" value="打开窗口3" onclick="window.open("","","width=531,height=402,top=50,left=20");" /> </body> </html> 运行结果: image.png 注意区分四个按钮的代码表达,其中前三个按钮可以正常执行逻辑,但最后一个按钮不可 !

优秀的个人博客,低调大师

Nebula Graph Studio v2.2.0 Release Note,增强图探索

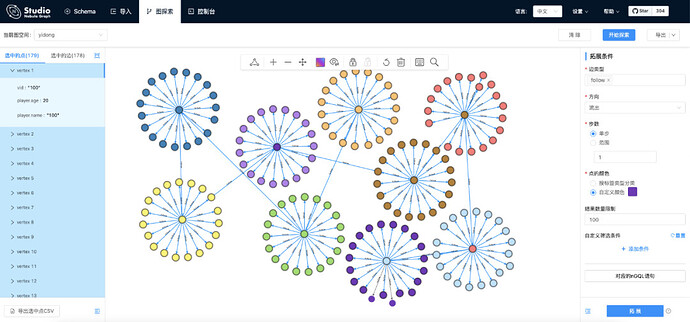
Nebula Graph Studio v2.2.0 在原有图探索可视化看板基础上增强了相应的绘图操作,改善了图探索的交互,新增快捷键、看板数据导出等场景功能。 New Features 增强操作面板,新增颜色、锁定、画板搜索等功能 支持快捷键,例如:拓展、放大、缩小、撤销、删除等操作 完善可视化拓展功能 支持自定义步数 支持自定义颜色 新增 FIND PATH 图路径算法 最短路 全路径 非循环路径 新增鼠标右键便捷操作 完善画板数据导出功能 csv 数据导出,支持全量数据和选中数据导出两种模式 查询结果直接生成图片 Bugfix 修复控制台 match 查询结果无法导入图探索问题 本版本的 Nebula Graph Studio 适配 Nebula Graph v2.0.1,不适配 Nebula Graph v1.x 版本 体验 Nebula Graph Studio 图数据库可视化工具 Nebula Graph Studio GitHub 地址:https://github.com/vesoft-inc/nebula-graph-studio

优秀的个人博客,低调大师

Nebula Graph v2.6 Release Note,新增 TOSS、ZONE 等多样特性

本版本新增 TOSS、ZONE、Geo Spatial、传输加密、返回 JSON 格式等功能,并优化了部分下推的计算、YIELD 语句格式、内存水位检测等功能。 特性 新增 TOSS 功能,pr 参见:https://github.com/vesoft-inc/nebula/pull/2525 新增 ZONE 功能,pr 参见:https://github.com/vesoft-inc/nebula/issues/2604 支持 Geo Spatial 功能,pr 参见:https://github.com/vesoft-inc/nebula/pull/2954、https://github.com/vesoft-inc/nebula/pull/2979、https://github.com/vesoft-inc/nebula/pull/3043 支持传输加密,pr 参见:https://github.com/vesoft-inc/nebula/pull/2584 支持服务端返回 JSON 格式的查询结果,pr 参见:https://github.com/vesoft-inc/nebula/pull/2824 支持 SPACE 的 meta 克隆,pr 参见:https://github.com/vesoft-inc/nebula/pull/2763 支持 LOOKUP 中使用 IN 表达式,pr 参见:https://github.com/vesoft-inc/nebula/pull/2906 集成 Breakpad,pr 参见:https://github.com/vesoft-inc/nebula/pull/2536 支持将 metad 的本地文件夹复制到远程,pr 参见:https://github.com/vesoft-inc/nebula/pull/2532 支持 DELETE TAG,pr 参见:https://github.com/vesoft-inc/nebula/pull/2520 支持 concat 函数,pr 参见:https://github.com/vesoft-inc/nebula/pull/2540 支持SHOW META LEADER,pr 参见:https://github.com/vesoft-inc/nebula/pull/2542 优化 优化 indexscan 的 LIMIT 下推的计算,pr 参见:https://github.com/vesoft-inc/nebula/pull/2905、https://github.com/vesoft-inc/nebula/pull/2823、https://github.com/vesoft-inc/nebula/pull/2796 优化 GO 语句每步采样和 LIMIT 下推的计算,pr 参见:https://github.com/vesoft-inc/nebula/pull/2904、https://github.com/vesoft-inc/nebula/pull/2853、https://github.com/vesoft-inc/nebula/pull/2831 优化 YIELD 语句的格式,pr 参见:https://github.com/vesoft-inc/nebula/pull/2555、https://github.com/vesoft-inc/nebula/pull/2572、https://github.com/vesoft-inc/nebula/pull/2779、https://github.com/vesoft-inc/nebula/pull/2895、https://github.com/vesoft-inc/nebula/pull/2944 启用 prefix bloom filter 以提升性能,pr 参见:https://github.com/vesoft-inc/nebula/pull/2860 支持服务端验证客户端版本,使用可配套的客户端版本才允许连接(客户端版本从 v2.6.0 开始),pr 参见:https://github.com/vesoft-inc/nebula/pull/2965 优化拉动整个分片时的流量控制,pr 参见:https://github.com/vesoft-inc/nebula/pull/2557 SHOW JOBS 只显示本 SPACE 的 JOB,pr 参见:https://github.com/vesoft-inc/nebula/pull/2872 为除 GUEST 之外的所有角色授予作业权限,pr 参见:https://github.com/vesoft-inc/nebula/pull/2928 优化内存水位检测,pr 参见:https://github.com/vesoft-inc/nebula/pull/2885 支持 storage 的慢查询终止,pr 参见:https://github.com/vesoft-inc/nebula/pull/2534 Bugfix 修复了 LOOKUP 中 YIELD 子句出现聚合函数时 nebula 连接会被中断的缺陷,pr 参见:https://github.com/vesoft-inc/nebula/pull/3245 修复 raftpart::reset 时清理部分 RocksDB 数据的问题,pr 参见:https://github.com/vesoft-inc/nebula/pull/2522 修复了插入不匹配的日期时间类型的问题,pr 参见:https://github.com/vesoft-inc/nebula/pull/2527 修复了设置毫秒失败但微秒有效的问题,pr 参见:https://github.com/vesoft-inc/nebula/pull/2781 修复了批量插入过多数据时 meta 服务崩溃(百万行)的问题,pr 参见:https://github.com/vesoft-inc/nebula/pull/2813 修复了当 SPACE 中不存在边 schema 时获取边信息导致崩溃的问题,pr 参见:https://github.com/vesoft-inc/nebula/pull/2571 修复了属性数据类型为 fixed_string 时 GO WHERE 子句表达式解析错误,pr 参见:https://github.com/vesoft-inc/nebula/pull/2762 修复了 FIND ALL PATH 查询不到的错误,pr 参见:https://github.com/vesoft-inc/nebula/pull/2773 修复了没有配置角色的用户却有查找 SPACE 的角色权限问题,pr 参见:https://github.com/vesoft-inc/nebula/pull/2778 修复了 CASE 表达式错误,pr 参见:https://github.com/vesoft-inc/nebula/pull/2819 修复了使用 time 函数时死循环问题,pr 参见:https://github.com/vesoft-inc/nebula/pull/2820 修复了当节点被 shutdown 后,JOB 仍显示为运行中的问题,pr 参见:https://github.com/vesoft-inc/nebula/pull/2843 修复了在多个副本的情况下,INSERT 语句可能导致副本之间属性值不一致的问题,pr 参见:https://github.com/vesoft-inc/nebula/pull/2862 修复了 USE 后提交作业时 SPACE 不对的问题,pr 参见:https://github.com/vesoft-inc/nebula/pull/3010 修复了当列不为空时获取 thrift 结构属性出错的问题,pr 参见:https://github.com/vesoft-inc/nebula/pull/3012 修复了即使 meta 未 ready,graphd 也能运行的问题,pr 参见:https://github.com/vesoft-inc/nebula/pull/3069 修复了使用 FIND PATH WITH PROP 时,悬挂边会返回空顶点的问题,pr 参见:https://github.com/vesoft-inc/nebula/pull/3008 修复了 YIELD DISTINCT map 类型时的崩溃问题,pr 参见:https://github.com/vesoft-inc/nebula/pull/3051 修复了错误的 ip 或者 host 时服务仍然可以启动的问题,pr 参见:https://github.com/vesoft-inc/nebula/pull/3057 修复了在一个语句中更改相同属性的错误,pr 参见:https://github.com/vesoft-inc/nebula/pull/3036 修复了在边上多步过滤无效的问题,pr 参见:https://github.com/vesoft-inc/nebula/pull/3144

优秀的个人博客,低调大师

Java基础知识的全面巩固_note1(附各种demo code)

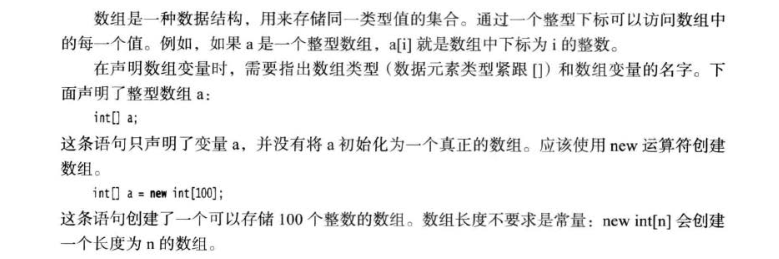
拜读《核心技术卷》,笔记之。 提纲 1.编译运行第一个程序2.使用floorMod求模3.关于Math4.1数据类型 4.2 变量注意事项5.数值类型之间的转换(主要注意精度损失):6.位运算7.字符串8.StringBuilder9.读取输入(控制平台)10.格式化输出11.文件输入与输出12.块作用域的注意事项13.一个while语句的Demo14.switch语句的case标签注意:15.大数值:BigInteger、BigDecimal 1.编译运行第一个程序 结构目录: 使用cmd编译: D:\>cd OK/corejava D:\OK\corejava>cd v1ch02/Welcome D:\OK\corejava\v1ch02\Welcome>javac Welcome.java D:\OK\corejava\v1ch02\Welcome>java Welcome Welcome to Core Java! ===================== D:\OK\corejava\v1ch02\Welcome> Welcome.java文件内容: /** * This program displays a greeting for the reader. * @version 1.30 2014-02-27 * @author Cay Horstmann */ public class Welcome { public static void main(String[] args) { String greeting = "Welcome to Core Java!"; System.out.println(greeting); for (int i = 0; i < greeting.length(); i++) System.out.print("="); System.out.println(); } } 上面的cmd中,javac程序是一个Java编译器,它将文件Welcome.java编译成Welcome.class.java程序启动Java虚拟机。虚拟机执行编译器放在class文件中的字节码。 2.使用floorMod求模 语法: floorMod(position + adjustment, modulus); package Test; import java.lang.Math; public class Havaatry { public static void main(String[] args) { // TODO 自动生成的方法存根 int hehe = Math.floorMod(2+15,12); System.out.println(hehe); } } 3.关于Math 三角函数 Math.sin Math.cos Math.tan Math.atan Math.atan2 对数 Math.exp Math.log Math.log10 两个常量 Math.PI Math.E 通过Javadoc进行具体查看: java的Math.pow: double y = Math.pow(x, a); //将y的值设置为x的a次幂。 4.1数据类型 长整型值后缀一个L或者l(如400000000000L)。 十六进制前缀0x或0X。 八进制前缀0,例如010对应八进制的8.显然八进制表示法容易混淆,建议最好不使用八进制常数。 Java 7 开始,可以用0b或0B写二进制数,如0B1001就是9.另外,同样是从Java 7 开始,还可以为数字字面量加下划线。如用1_000_000(或0b1111_0100_0010_0100_0000)表示一百万。这些下划线只为易读,Java编译器会去除这些下划线。 绝大部分应用程序都采用double类型,float类型的精度很难满足需求。float类型需要后缀F或f,否则默认浮点数值为double。 Double.POSITIVE_INFINITY、Double.NEGATIVE_INFINITY、Double.NaN三个常量分别表示正无穷大、负无穷大、NaN(不是一个数字,计算0/0或者负数的平方根结果为NaN)。 boolean类型只有false和true两个值,用来判定逻辑条件。整型值和布尔值之间不能进行相互转换。在C++中,数值甚至指针可以代替boolean值,值0相当于布尔值false,非0值相当于布尔值true,在Java中不可以! final表示的变量只能被赋值一次,一旦被赋值就不能再更改。 4.2 变量注意事项 声明/定义 const和final 5.数值类型之间的转换(主要注意精度损失): 上图有6个实心箭头,表示无信息丢失的转换,有3个虚箭头,表示可能有精度损失的转换。比如下面的123 456 789是一个大整数,位数超过了float类型所能表达的位数,在转换的时候,将会得到同样大小的结果(注意底层是用二进制存储数据的),但却失去了一定的精度。 强制类型转换:会丢失精度 double x = 9.997; int nx = (int) x; 舍入运算: double x = 9.997; int nx = (int) Math.round(x); 6.位运算 &(“and”) | (“or”) ^(“xor”) ~(“not”) 这些运算符按位模式处理。例如,如果n是一个整数变量,而且用二进制表示的n从右边数第4位为1,则 int fourthBItFromRight = (n & 0b1000) / 0b1000; 会返回1(结果递等为0b1000 / 0b1000),否则返回0(递等为 0b 0000 / 0b1000)。 7.字符串 (参考) 没有内置的字符串类型,标准库中提供了一个预定义类,String,例如: String greeting = "Hello"; 每个用双引号括起来的字符串都是 String 类的一个实例 <1>子串(substring方法) String greeting = "Hello"; String s = greeting.substring(0,3); //Hel,不包含3,从0开始计数 <2>拼接(+) System.out.println("The answer is"+answer); 使用定界分隔符(join): String all = String.join("/","S","M","L","XL"); //"S/M/L/XL" <3>不可变字符串(例:将Hello改为Help!) String greeting = "Hello"; greeting = greeting.substring(0,3)+"p!"; 将来自文件或键盘的单个字符或短的字符串汇集成字符串 <4>检测字符串是否相等:(equals 方法) s.equals(t) //比较字符串s和t,返回true或false 检测字符串是否相等,不区分大小写(equalsIgnoreCase 方法) "Hello".equals("hello") //返回false "Hello".equalsIgnoreCase("hello") //返回true 双等号(==)只能确定两个字符串是否放置在线程池中的同一个位置上 <5>空串与null串 检测空串(""): if (str.length() == 0) 或 if (str.equals("")) null表示目前没有任何对象与该变量关联。检测方法: if (str == null) 检测一个字符串既不是null,也不为空: if (str != null && str.length() != 0) 先检测str不为null,如果在一个null值上调用方法,会出现错误 String类关键方法: 8.StringBuilder 使用: 1.构建一个空的字符串构建器 : StringBuilder builder = new StringBuilder(); 2.加入字符或字符串 builder.append(ch) ; //appends a single character builder.append(str) ; // appends a string 3.在需要构建字符串时就凋用 toString 方法,得到String对象: String completedString = builder.toString(); StringBuilder类关键方法: 9.读取输入 Demo 代码中的方法均以Enter作为结束: import java.util.*; /** * This program demonstrates console input. * @version 1.10 2004-02-10 * @author Cay Horstmann */ public class InputTest { public static void main(String[] args) { Scanner in = new Scanner(System.in); // get first input System.out.print("What is your name? "); String name = in.nextLine();//读取一行,可以读入空格 // get second input System.out.print("How old are you? "); int age = in.nextInt();//读取一个整数 // display output on console System.out.println("Hello, " + name + ". Next year, you'll be " + (age + 1)); //读取一个单词 String s = in.next(); //读取一个浮点数 double d = in.nextDouble(); System.out.println("s = " + s + ". d = " + d); } } 要想读取一个整数,就调用nextInt()方法 如:int age = in.nextInt(); next()输入不能隔着空格,不然会报错: Scanner关键API: 10.格式化输出 package Test; import java.lang.Math; public class Havaatry { public static void main(String[] args) { // TODO 自动生成的方法存根 System.out.printf("%f \n",10000.0/3.0); System.out.printf("%.2f \n",10000.0/3.0); System.out.printf("%,.2f \n",10000.0/3.0); System.out.printf("%+.2f \n",10000.0/3.0); System.out.printf("% .2f \n",10000.0/3.0); System.out.printf("%(.2f \n",-10000.0/3.0); System.out.printf("%#f \n",3333.); } } Date类和相关的格式化选项;格式包括两个字母,以t开始,以表3-7中的任意字母结束: Demo: System.out.printf("%1$s %2$tB %2$te, %2$tY \n", "Due date:", new Date()); System.out.printf("%s %tB %<te, %<tY", "Due date:", new Date()); 格式说明语法图: 11.文件输入与输出 要想对文件进行读取,就需要一个用File对象构造一个Scanner对象,如下所示: Scanner in = new Scanner(Paths.get("myfile.txt"),"UTF-8"); !!!!!!!在这之后,就可以利用前面介绍的任何一个Scanner方法对文件进行读取 !!!!!!!"UTF-8"乃字符编码,如果省略了这个参数,则会使用运行这个Java程序的机器的“默认编码”。这不是一个好主意, 如果在不同的机器上运行这个程序,可能会有不同的表现。 注意: 要想写入文件就需要构建一个PrintWriter对象,在构造器中,只需要提供文件名: PrintWriter out = new PrintWriter("myfile.txt","UTF-8"); 如果文件不存在,创建该文件。可以像输出到System.out一样使用print、println以及printf命令。 本节相关API 12.块作用域的注意事项 13.一个while语句的Demo: 首先计算退休账户中的余额,然后再询问是否打算退休,只要用户回答“N”,循环就重复执行。这是一个需要至少执行一次循环的很好示例,因为用户必须先看到余额才能知道是否满足退休所用。 import java.util.*; /** * This program demonstrates a <code>do/while</code> loop. * @version 1.20 2004-02-10 * @author Cay Horstmann */ public class Retirement2 { public static void main(String[] args) { Scanner in = new Scanner(System.in); System.out.print("How much money will you contribute every year? "); double payment = in.nextDouble(); System.out.print("Interest rate in %: "); double interestRate = in.nextDouble(); double balance = 0; int year = 0; String input; // update account balance while user isn't ready to retire do { // add this year's payment and interest balance += payment; double interest = balance * interestRate / 100; balance += interest; year++; // print current balance System.out.printf("After year %d, your balance is %,.2f%n", year, balance); // ask if ready to retire and get input System.out.print("Ready to retire? (Y/N) "); input = in.next(); } while (input.equals("N")); } } 执行结果: How much money will you contribute every year? 30 Interest rate in %: 0.3 After year 1, your balance is 30.09 Ready to retire? (Y/N) N After year 2, your balance is 60.27 Ready to retire? (Y/N) N After year 3, your balance is 90.54 Ready to retire? (Y/N) N After year 4, your balance is 120.90 Ready to retire? (Y/N) N After year 5, your balance is 151.36 Ready to retire? (Y/N) N After year 6, your balance is 181.90 Ready to retire? (Y/N) N After year 7, your balance is 212.54 Ready to retire? (Y/N) N After year 8, your balance is 243.26 Ready to retire? (Y/N) Y 14.switch语句的case标签注意: 15.大数值:BigInteger、BigDecimal 如果基本的整数和浮点数精度不能够满足需求,那么可以使用java.math包中的两个很有用的类:BigInteger和BigDecimal。这两个类可以处理包含任意长度数字序列的数值。BigInteger类实现了任意精度的整数运算,BigDecimal实现了任意精度的浮点数运算。 使用静态的valueOf方法可以将普通的数值转换为大数值: BigInteger a = BigInteger.valueOf(100); 遗憾的是,不能使用人们熟悉的算术运算符(如:+和 * )处理大数值。而需要使用大数值类中的add和multiply方法。 BigInteger c = a.add(b); / / c = a + b BigInteger d = c.multiply(b.add(BigInteger.valueOf(2))); / / d = c * ( b + 2 ) 下面上一个例子,先用普通数据类型写一个(排列组合的)组合算法,其中变量k为欲取数,n为总数: import java.util.*; /** * This program demonstrates a <code>for</code> loop. * @version 1.20 2004-02-10 * @author Cay Horstmann */ public class LotteryOdds { public static void main(String[] args) { Scanner in = new Scanner(System.in); System.out.print("How many numbers do you need to draw? "); int k = in.nextInt(); System.out.print("What is the highest number you can draw? "); int n = in.nextInt(); /* * compute binomial coefficient n*(n-1)*(n-2)*...*(n-k+1)/(1*2*3*...*k) */ int lotteryOdds = 1; for (int i = 1; i <= k; i++) lotteryOdds = lotteryOdds * (n - i + 1) / i; System.out.println("Your odds are 1 in " + lotteryOdds + ". Good luck!"); } } 测试——组合10中取2,结果为45: 下面用大数值进行计算: import java.math.*; import java.util.*; /** * This program uses big numbers to compute the odds of winning the grand prize in a lottery. * @version 1.20 2004-02-10 * @author Cay Horstmann */ public class BigIntegerTest { public static void main(String[] args) { Scanner in = new Scanner(System.in); System.out.print("How many numbers do you need to draw? "); int k = in.nextInt(); System.out.print("What is the highest number you can draw? "); int n = in.nextInt(); /* * compute binomial coefficient n*(n-1)*(n-2)*...*(n-k+1)/(1*2*3*...*k) */ BigInteger lotteryOdds = BigInteger.valueOf(1); for (int i = 1; i <= k; i++) lotteryOdds = lotteryOdds.multiply(BigInteger.valueOf(n - i + 1)).divide( BigInteger.valueOf(i)); System.out.println("Your odds are 1 in " + lotteryOdds + ". Good luck!"); } } 比较: lotteryOdds = lotteryOdds * (n - i + 1) / i; 跟 lotteryOdds = lotteryOdds.multiply(BigInteger.valueOf(n - i + 1)).divide(BigInteger.valueOf(i)); 关键API:


优秀的个人博客,低调大师

Android实战_note1(MyMirror_一款小型摄像处理的App)

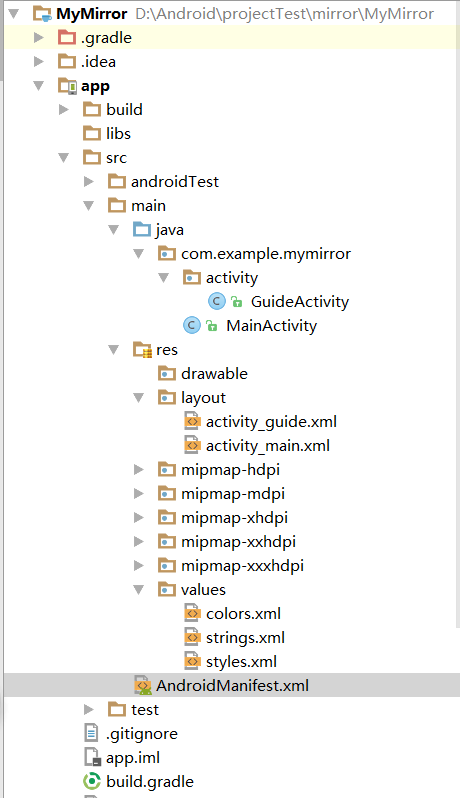
最近在实战做明日科技的一个叫《魔镜》的APP,接触到不少有趣的技能tip,这里记录一下。功能点主要有启动页、摄像头设置、亮度调节、相机焦距调节。界面选择换镜框、吹气起雾、长安碎屏、摇一摇换镜框、系统帮助等子功能,博客会陆续更近 本文自觉有些有趣的地方(这里仅做摘要,详见文中): handler.sendEmptyMessageDelayed() 1.3 中的修改全局配置文件 AndroidManifest.xml name属性表示颜色变量名,在java中调用时就是调用这个名称;#3F51B5表示颜色值;调用格式为@color/setbackground。其中颜色值可以直接在xml中输入,或者点击色块,在弹出窗口中进行选择或输入设置;(如文《资源准备1:颜色资源》中图) 资源准备4:styles样式资源 MyTheme表示样式的名称, android:windowFrame表示窗口的背景颜色, android:windowBackground表示窗口的背景图片, android:windowIsTranslucent表示窗口是否显示, android:windowNoTitle表示窗口是否有标题 一般情况,除了直接使用放在drawable目录下的图片,其实drawable的用法都与XML有关,使用shape、layer-list等标签绘制一些背景,还可以通过selector标签定义view的状态效果。 ImageView.ScaleType设置图解 功能点1.快速构建启动页: 此时目录结构: 1.1 Activity.java全文:注意代码中的注释,其中 handler.sendEmptyMessageDelayed(1,3000); 这个方法比较有趣 package com.example.mymirror.activity; import android.content.Intent; import android.os.Handler; import android.os.Message; import android.support.v7.app.AppCompatActivity; import android.os.Bundle; import android.view.KeyEvent; import com.example.mymirror.MainActivity; import com.example.mymirror.R; public class GuideActivity extends AppCompatActivity { @Override protected void onCreate(Bundle savedInstanceState) { super.onCreate(savedInstanceState); setContentView(R.layout.activity_guide); handler.sendEmptyMessageDelayed(1,3000);//传递what值为1的,空消息,延迟3秒 } //消息处理,接收消息 private Handler handler = new Handler(new Handler.Callback() { @Override public boolean handleMessage(Message msg) { if (msg.what == 1){ //创建意图 Intent intent = new Intent(GuideActivity.this, MainActivity.class); startActivity(intent);//跳转界面 finish();//关闭界面 } return false; } }); //屏蔽返回键 @Override public boolean onKeyDown(int keyCode, KeyEvent event) { if (keyCode == KeyEvent.KEYCODE_BACK){ return false; } return false; } } 1.2 布局问价设置背景图片: android:background="@mipmap/background" 全文: <?xml version="1.0" encoding="utf-8"?> <android.support.constraint.ConstraintLayout xmlns:android="http://schemas.android.com/apk/res/android" xmlns:app="http://schemas.android.com/apk/res-auto" xmlns:tools="http://schemas.android.com/tools" android:layout_width="match_parent" android:layout_height="match_parent" android:background="@mipmap/background" tools:context="com.example.mymirror.activity.GuideActivity"> </android.support.constraint.ConstraintLayout> 1.3 修改全局配置文件 AndroidManifest.xml <?xml version="1.0" encoding="utf-8"?> <manifest xmlns:android="http://schemas.android.com/apk/res/android" package="com.example.mymirror"> <application android:allowBackup="true" android:icon="@mipmap/ic_launcher" android:label="@string/app_name" android:roundIcon="@mipmap/ic_launcher_round" android:supportsRtl="true" android:theme="@style/Theme.AppCompat.Light.NoActionBar"> <activity android:name=".activity.GuideActivity"> <intent-filter> <action android:name="android.intent.action.MAIN" /> <category android:name="android.intent.category.LAUNCHER" /> </intent-filter> </activity> <activity android:name=".MainActivity"></activity> </application> </manifest> 到此,运行程序,结果:启动页界面停顿3秒后,切到MainActivity上: 启动页 停顿3秒后,切到MainActivity上 2.主窗体模块设计 资源准备1:颜色资源打开app/res/values目录下的colors.xml: <?xml version="1.0" encoding="utf-8"?> <resources> <color name="colorPrimary">#3F51B5</color> <color name="colorPrimaryDark">#303F9F</color> <color name="colorAccent">#FF4081</color> <color name="setbackground">#a6000000</color> <color name="white">#FFFFFF</color> <color name="setbackground2">#3FFFFFFF</color> <color name="setbackground3">#00000000</color> <color name="setbackground4">#7e000000</color> </resources> name属性表示颜色变量名,在java中调用时就是调用这个名称;#3F51B5表示颜色值;调用格式为@color/setbackground。其中颜色值可以直接在xml中输入,或者点击下图框中的色块,在弹出窗口中进行选择或输入设置: 资源准备2:尺寸资源 调用格式为@dimen/dp_0 <?xml version="1.0" encoding="utf-8"?> <resources> <!--尺寸资源 --> <dimen name="activity_horizontal_margin">16dp</dimen> <dimen name="activity_vertical_margin">16dp</dimen> <dimen name="dp_0">0dp</dimen> <dimen name="dp_3">3dp</dimen> <dimen name="dp_5">5dp</dimen> <dimen name="dp_10">10dp</dimen> <dimen name="dp_18">18dp</dimen> <dimen name="dp_20">20dp</dimen> <dimen name="dp_30">30dp</dimen> <dimen name="dp_45">45dp</dimen> <dimen name="dp_55">55dp</dimen> <dimen name="dp_160">160dp</dimen> <dimen name="dp_200">200dp</dimen> <dimen name="dp_300">300dp</dimen> </resources> 资源准备3:字符串资源 <resources> <string name="app_name">MyMirror</string> <string name="back_txt">返回</string> </resources> 资源准备4:styles样式资源 MyTheme表示样式的名称, android:windowFrame表示窗口的背景颜色, android:windowBackground表示窗口的背景图片, android:windowIsTranslucent表示窗口是否显示, android:windowNoTitle表示窗口是否有标题 <resources> <!-- Base application theme. --> <style name="AppTheme" parent="Theme.AppCompat.Light.DarkActionBar"> <!-- Customize your theme here. --> <item name="colorPrimary">@color/colorPrimary</item> <item name="colorPrimaryDark">@color/colorPrimaryDark</item> <item name="colorAccent">@color/colorAccent</item> </style> <style name="MyTheme" parent="Theme.AppCompat.NoActionBar"> <item name="android:windowFrame">@android:color/transparent</item> <item name="android:windowBackground">@color/setbackground4</item> <item name="android:windowIsTranslucent">true</item> <item name="android:windowNoTitle">true</item> </style> </resources> 资源准备5:drawable图片资源 一般情况,除了直接使用放在drawable目录下的图片,其实drawable的用法都与XML有关,使用shape、layer-list等标签绘制一些背景,还可以通过selector标签定义view的状态效果。 <?xml version="1.0" encoding="utf-8"?> <selector xmlns:android="http://schemas.android.com/apk/res/android"> <item android:state_pressed="false" android:drawable="@drawable/back_shape_pink"/> <item android:state_pressed="true" android:drawable="@drawable/back_shape_white"/> </selector> <?xml version="1.0" encoding="utf-8"?> <shape xmlns:android="http://schemas.android.com/apk/res/android"> <!--实心 --> <solid android:color="@color/setbackground2"/> <!--描边 --> <stroke android:color="@color/white" android:width="@dimen/dp_3"/> <!--圆角 --> <corners android:radius="@dimen/dp_20"/> <!--间隔 --> <padding android:left="@dimen/dp_10" android:top="@dimen/dp_5" android:bottom="@dimen/dp_5" android:right="@dimen/dp_10"/> </shape> <?xml version="1.0" encoding="utf-8"?> <shape xmlns:android="http://schemas.android.com/apk/res/android"> <solid android:color="@color/setbackground2"/> <stroke android:color="@color/colorAccent" android:width="@dimen/dp_3"/> <corners android:radius="@dimen/dp_20"/> <padding android:left="@dimen/dp_10" android:top="@dimen/dp_5" android:bottom="@dimen/dp_5" android:right="@dimen/dp_10"/> </shape> 资源准备6:mipmap资源(项目完成后附上码云地址) 主窗体布局: 即activity_main.xml布局,布局设计框架如下: <!--SurfaceView控件,主界面最底层的显示区域,用来显示摄像头的内容--> <!--PictureView:自定义控件,在此控件上完成镜框更换的功能,布满整个显示区域--> <!--FunctionView:自定义控件,功能组合控件,将系统帮助、选择相框和亮度调节等3个功能组合到一起,形成主界面顶部功能区--> <!--LinearLayout布局:底部焦距调节功能--> <!--缩小焦距按钮--> <!--拖动条控件--> <!--放大焦距按钮--> <!--DrawView:吹雾擦雾图层--> activity_main.xml全文: 附:ImageView.ScaleType设置图解 <?xml version="1.0" encoding="utf-8"?> <RelativeLayout xmlns:android="http://schemas.android.com/apk/res/android" xmlns:tools="http://schemas.android.com/tools" android:layout_width="match_parent" android:layout_height="match_parent" tools:context=".activity.MainActivity"> <!--此处添加主界面上的布局组件 --> <SurfaceView android:id="@+id/surface" android:layout_width="match_parent" android:layout_height="match_parent"/> <com.example.mymirror.view.PictureView android:id="@+id/picture" android:layout_width="match_parent" android:layout_height="match_parent" android:scaleType="fitXY"/> <com.example.mymirror.view.FunctionView android:id="@+id/function" android:layout_width="match_parent" android:layout_height="wrap_content"/> <LinearLayout android:id="@+id/bottom_bar" android:layout_alignParentBottom="true" android:layout_width="match_parent" android:layout_height="wrap_content" android:gravity="center_vertical" android:padding="@dimen/dp_10"> <!-- 放大、缩小按钮和拖动条布局代码--> <ImageView android:id="@+id/minus" android:layout_marginLeft="@dimen/dp_30" android:layout_width="@dimen/dp_45" android:layout_height="@dimen/dp_45" android:src="@mipmap/downsmall" android:scaleType="centerInside"/> <SeekBar android:id="@+id/seekbar" android:layout_width="@dimen/dp_0" android:layout_height="wrap_content" android:layout_weight="1" android:progress="0" android:thumbOffset="@dimen/dp_0"/> <ImageView android:id="@+id/add" android:layout_marginRight="@dimen/dp_30" android:layout_width="@dimen/dp_45" android:layout_height="@dimen/dp_45" android:src="@mipmap/uplarge" android:scaleType="centerInside"/> </LinearLayout> <com.example.mymirror.view.DrawView android:id="@+id/draw_glasses" android:layout_width="match_parent" android:layout_height="match_parent" android:visibility="gone"/> </RelativeLayout> Design界面显示: 创建view包,在包中添加PictureView、FunctionView、DrawView三个java文件用于描述自定义控件: layout文件夹下创建文件view_function.xml,存放顶部功能栏布局: <?xml version="1.0" encoding="utf-8"?> <LinearLayout xmlns:android="http://schemas.android.com/apk/res/android" android:orientation="vertical" android:layout_width="match_parent" android:layout_height="wrap_content" android:padding="@dimen/dp_10" android:background="@color/setbackground" android:gravity="center"> <RelativeLayout android:layout_width="match_parent" android:layout_height="@dimen/dp_30"> <!-- 问号 按钮--> <ImageView android:id="@+id/hint" android:layout_centerVertical="true" android:layout_width="@dimen/dp_45" android:layout_height="@dimen/dp_45" android:scaleType="centerInside" android:src="@mipmap/hint"/> <!-- 选择相框 按钮--> <ImageView android:id="@+id/choose" android:layout_width="@dimen/dp_45" android:layout_height="@dimen/dp_45" android:layout_centerVertical="true" android:src="@mipmap/choose" android:scaleType="centerInside" android:layout_alignParentRight="true"/> <!-- 灯泡图标--> <ImageView android:id="@+id/cencer" android:layout_width="@dimen/dp_45" android:layout_height="@dimen/dp_45" android:src="@mipmap/light" android:scaleType="centerInside" android:layout_centerInParent="true"/> <!-- 减亮度 按钮--> <ImageView android:id="@+id/light_down" android:layout_width="@dimen/dp_45" android:layout_height="@dimen/dp_45" android:layout_centerVertical="true" android:src="@mipmap/downlight" android:scaleType="centerInside" android:layout_toLeftOf="@+id/cencer" android:layout_marginRight="@dimen/dp_20"/> <!-- 加亮度 按钮--> <ImageView android:id="@+id/light_up" android:layout_width="@dimen/dp_45" android:layout_height="@dimen/dp_45" android:layout_centerVertical="true" android:src="@mipmap/uplight" android:scaleType="centerInside" android:layout_toRightOf="@+id/cencer" android:layout_marginLeft="@dimen/dp_20"/> </RelativeLayout> </LinearLayout> 对应预览图: FunctionView全文: package com.example.mymirror.view; import android.content.Context; import android.util.AttributeSet; import android.view.LayoutInflater; import android.view.View; import android.widget.ImageView; import android.widget.LinearLayout; /** * Created by 700 on 2018/8/23. */ public class FunctionView extends LinearLayout implements View.OnClickListener{ private LayoutInflater mInflater;//声明寻找XML文件类 private ImageView hint,choose,down,up;//控件对象 /** * 回调接口,4个按钮 */ private onFunctionViewItemClickListener listener; public interface onFunctionViewItemClickListener{ void hint();//提示 void choose();//选择相框 void down();//减少亮度 void up();//增加亮度 } /** * 初始化构造函数 */ public FunctionView(Context context) { super(context); } public FunctionView(Context context, AttributeSet attrs) { super(context, attrs); } public FunctionView(Context context, AttributeSet attrs, int defStyleAttr) { super(context, attrs, defStyleAttr); } @Override public void onClick(View v) { } public void setOnFunctionViewItemClickListener(onFunctionViewItemClickListener monFunctionViewItemClickListener){ this.listener = monFunctionViewItemClickListener;//设置监听对象 } } PictureView全文: package com.example.mymirror.view; import android.content.Context; import android.util.AttributeSet; import android.widget.ImageView; /** * Created by 700 on 2018/8/23. */ public class PictureView extends ImageView { public PictureView(Context context) { super(context); } public PictureView(Context context, AttributeSet attrs) { super(context, attrs); } public PictureView(Context context, AttributeSet attrs, int defStyleAttr) { super(context, attrs, defStyleAttr); } } DrawView全文: package com.example.mymirror.view; import android.content.Context; import android.util.AttributeSet; import android.view.View; /** * Created by 700 on 2018/8/23. */ public class DrawView extends View{ public DrawView(Context context) { super(context); } public DrawView(Context context, AttributeSet attrs) { super(context, attrs); } public DrawView(Context context, AttributeSet attrs, int defStyleAttr) { super(context, attrs, defStyleAttr); } } 运行结果:

优秀的个人博客,低调大师

NebulaGraph v3.2.0 Release Note,对查询最短路径的性能等多处优化

NebulaGraph v3.2.0 支持 extract () 函数,对边、点属性过滤的下推以及查询最短路径的性能等进行了优化,对并发扫描属性时 Storage 服务崩溃等问题进行了修复。 优化 支持extract () 函数。 优化配置文件,增加部分配置。#4310 增加优化规则,移除无用的 AppendVertices 操作符。#4277 增加优化规则,优化边过滤的下推。#4270 增加优化规则,优化点属性过滤的下推。#4260 剔除点的预测过滤器。#4249 减少移动数据时连接操作的数据复制量。#4283 通过下标获取属性值,减少属性查询的时间。#4242 优化查询最短路径的性能。#4071 优化查询子图的循环条件。#4226 减少移动数据时 Traverse 和 AppendVertices 操作符的数据复制量。#4176 改善优化规则,去除无效的项目操作符。#4157 使用 Arena Allocator 优化内存分配。#4239 缺陷修复 修复 Web 服务在接收一些特殊攻击消息时崩溃的问题。#4334 修复并发扫描属性时 Storage 服务崩溃的问题。#4268 修复插入超过限制长度的边时 Storage 服务崩溃的问题。#4305 修复启用查询并发模式时服务崩溃的问题。#4288 修复查找具有 NULL 属性的索引时 Storage 服务崩溃的问题。#4234 修复重启后独立守护进程退出的缺陷。#4269 修复 Graphviz 在线工具由于两次 JSON 转换导致 Join 点格式的解释结果不正确的缺陷。#4280 修复属性查找的缺陷,不允许在 Schema 中使用英文句号(.)。#4194 修复恢复数据时机器丢失 key 的缺陷。#4311 修复使用相同语句返回相同顶点不同属性时,结果显示BAD TYPE的缺陷。#4151 修复无索引时,语句MATCH p=(:team)-->() RETURN p LIMIT 1的报错信息缺陷。#4053 增强运算符AND和OR的报错信息。#4304 修复索引条件下没有统计信息的缺陷。#4353 修复集群内时区不同的缺陷。#4391 修复删除全文索引时崩溃的问题。#4384 修复当发送 PUT 请求,请求体为空时,服务崩溃的问题。#4405 修复当在有索引的基础上删除点和边时,语句中的 VID 的长度超出定义的长度时,Storage 服务崩溃的问题。#4406 历史版本 历史版本 可前往 GitHub 体验该版本:https://github.com/vesoft-inc/nebula/releases/tag/v3.2.0 交流图数据库技术?加入 NebulaGraph 交流群请先填写下你的 NebulaGraph 名片,NebulaGraph 小助手会拉你进群~~

资源下载

更多资源
Mario

Mario

马里奥是站在游戏界顶峰的超人气多面角色。马里奥靠吃蘑菇成长,特征是大鼻子、头戴帽子、身穿背带裤,还留着胡子。与他的双胞胎兄弟路易基一起,长年担任任天堂的招牌角色。

Nacos

Nacos

Nacos /nɑ:kəʊs/ 是 Dynamic Naming and Configuration Service 的首字母简称,一个易于构建 AI Agent 应用的动态服务发现、配置管理和AI智能体管理平台。Nacos 致力于帮助您发现、配置和管理微服务及AI智能体应用。Nacos 提供了一组简单易用的特性集,帮助您快速实现动态服务发现、服务配置、服务元数据、流量管理。Nacos 帮助您更敏捷和容易地构建、交付和管理微服务平台。

Rocky Linux

Rocky Linux

Rocky Linux(中文名:洛基)是由Gregory Kurtzer于2020年12月发起的企业级Linux发行版,作为CentOS稳定版停止维护后与RHEL(Red Hat Enterprise Linux)完全兼容的开源替代方案,由社区拥有并管理,支持x86_64、aarch64等架构。其通过重新编译RHEL源代码提供长期稳定性,采用模块化包装和SELinux安全架构,默认包含GNOME桌面环境及XFS文件系统,支持十年生命周期更新。

Sublime Text

Sublime Text

Sublime Text具有漂亮的用户界面和强大的功能,例如代码缩略图,Python的插件,代码段等。还可自定义键绑定,菜单和工具栏。Sublime Text 的主要功能包括:拼写检查,书签,完整的 Python API , Goto 功能,即时项目切换,多选择,多窗口等等。Sublime Text 是一个跨平台的编辑器,同时支持Windows、Linux、Mac OS X等操作系统。

用户登录
用户注册