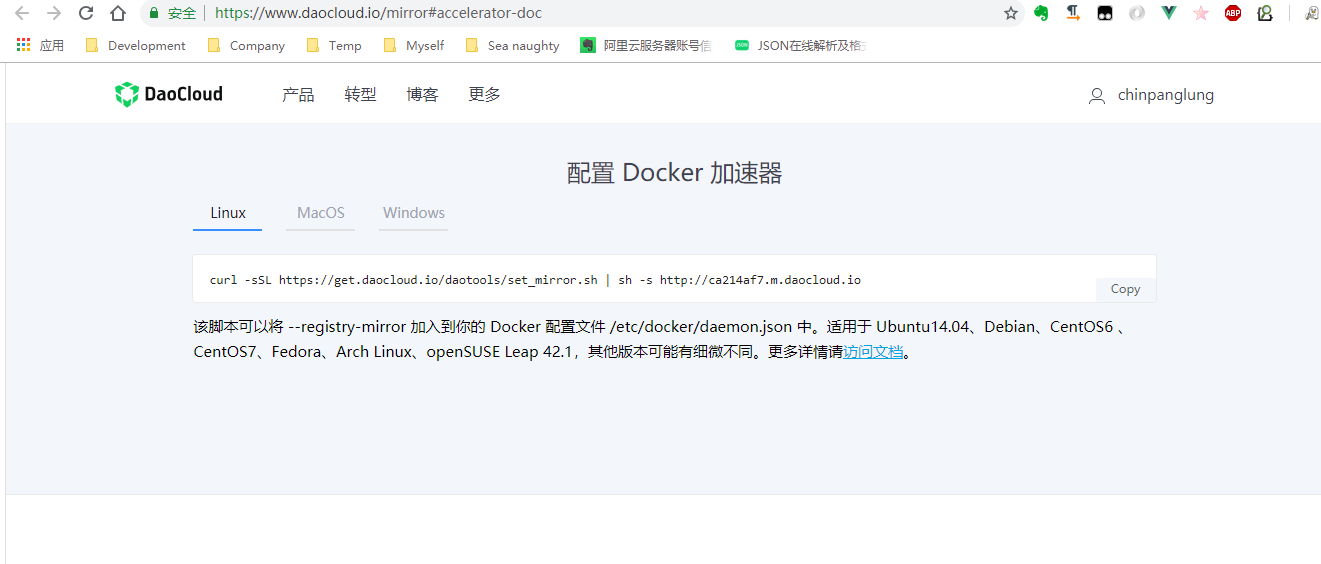
SpringBoot2整合Redis,开启缓存,提高访问速度
前言 什么是Redis Redis是一个开源(BSD许可),内存存储的数据结构服务器,可用作数据库,高速缓存和消息队列代理。它支持字符串、哈希表、列表、集合、有序集合,位图,hyperloglogs等数据类型。内置复制、Lua脚本、LRU收回、事务以及不同级别磁盘持久化功能,同时通过Redis Sentinel提供高可用,通过Redis Cluster提供自动分区。 参考文档:https://www.redis.net.cn 为什么选择Redis 这个问题一般人会拿Redis和Memcache来做比较,但是个人认为这两者对比并不合适,因为Memcache仅仅作为缓存,而Redis是一个NoSQL数据库,除了缓存还能做其他的很多事。所以拿来对比的同学应该就只是拿Redis来做缓存用了。但是Redis还有很多高级功能,包括持久化、复制、哨兵、集群等。因此Redis的用途更为广泛。 编码 1.添加Redis依赖 之前的文章中我们讲到数据库连接池的作用,有太多的有点了,所以今天在Redis这边我们也建立一个连接池来连接Redis。提高资源的利用率。在此采用的org.apache.commons.pool2来作为池,因此需要对添加一个池依赖。 打开pom.xml文件,添加 xml 复制代码 <dependency> <groupId>org.apache.commons</groupId> <artifactId>commons-pool2</artifactId> </dependency> <dependency> <groupId>org.springframework.boot</groupId> <artifactId>spring-boot-starter-data-redis</artifactId> </dependency> 2.配置SpringBoot的application.properties文件 因为SpringBoot2.x默认使用lettuce作为连接池,所以以下为lettuce的配置方式 sh 复制代码 # Redis配置 # spring.redis.database : Redis数据库索引(默认为0) # spring.redis.host : Redis服务器地址 # spring.redis.port : Redis服务器连接端口 # spring.redis.password : Redis服务器连接密码(默认为空) # spring.redis.timeout : 连接超时时间(毫秒) # spring.redis.lettuce.pool.max-active : 连接池最大连接数(使用负值表示没有限制) # spring.redis.lettuce.pool.max-idle : 连接池中的最大空闲连接 # spring.redis.lettuce.pool.max-wait : 连接池最大阻塞等待时间(使用负值表示没有限制) # spring.redis.lettuce.pool.min-idle : 连接池中的最小空闲连接 # spring.redis.lettuce.shutdown-timeout : 连接池中的关闭超时时间 spring.redis.database=1 spring.redis.host=127.0.0.1 spring.redis.port=6379 spring.redis.password= spring.redis.timeout=100000 spring.redis.lettuce.pool.max-active=50 spring.redis.lettuce.pool.max-idle=300 spring.redis.lettuce.pool.max-wait=-1 spring.redis.lettuce.pool.min-idle=10 spring.redis.lettuce.shutdown-timeout=100000 3.编写Controller测试Redis缓存数据 新增RedisController.java java 复制代码 package org.xujun.springboot.controller; import javax.annotation.Resource; import org.springframework.data.redis.core.StringRedisTemplate; import org.springframework.web.bind.annotation.GetMapping; import org.springframework.web.bind.annotation.RestController; @RestController public class RedisController { @Resource private StringRedisTemplate stringRedisTemplate; @GetMapping("redis") public String redis() { String key = "redis"; String data = "redis-data"; // 保存数据 stringRedisTemplate.opsForValue().set(key, data); // 获取数据 String getData = stringRedisTemplate.opsForValue().get(key); System.out.println(data.equals(getData)); // 删除数据 Boolean delete = stringRedisTemplate.delete(key); System.out.println(delete); return "suc"; } } 4.测试结果 运行项目,并且访问[http://127.0.0.1:8080/redis]。结果如下图所示 总结:本文章仅仅做了SpringBoot整合Redis,然后做了和Redis缓存测试。并未去探索Redis的高级功能。但是后期会陆续推出Redis的系列文章,在该系列中会详细讲解Redis