iOS - Quartz 2D 画板绘制
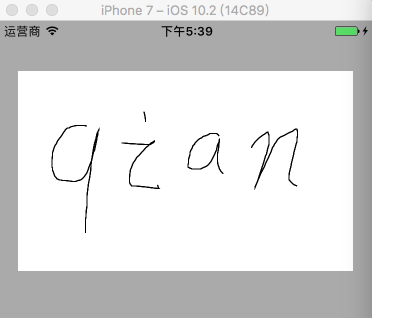
1、绘制画板 1.1 绘制简单画板 PaintBoardView.h @interface PaintBoardView : UIView @end PaintBoardView.m @interface PaintBoardView () /// 路径 @property (nonatomic, strong) UIBezierPath *path; /// 保存所有路径的数组 @property (nonatomic, strong) NSMutableArray *pathsArrayM; @end @implementation PaintBoardView /// 初始化 - (instancetype)initWithFrame:(CGRect)frame { if (self = [super initWithFrame:frame]) { self.backgroundColor = [UIColor whiteColor]; } return self; } /// 触摸开始 - (void)touchesBegan:(NSSet<UITouch *> *)touches withEvent:(nullable UIEvent *)event { // 获取触摸起始点位置 CGPoint startPoint = [touches.anyObject locationInView:self]; // 添加路径描绘起始点 [self.path moveToPoint:startPoint]; // 添加一条触摸路径描绘 [self.pathsArrayM addObject:self.path]; } /// 触摸移动 - (void)touchesMoved:(NSSet<UITouch *> *)touches withEvent:(nullable UIEvent *)event { // 获取触摸点位置 CGPoint touchPoint = [touches.anyObject locationInView:self]; // 添加路径描绘 [self.path addLineToPoint:touchPoint]; // 刷新视图 [self setNeedsDisplay]; } /// 触摸结束 - (void)touchesEnded:(NSSet<UITouch *> *)touches withEvent:(nullable UIEvent *)event { // 获取绘制结果 UIGraphicsBeginImageContextWithOptions(self.bounds.size, NO, 0); CGContextRef ctx = UIGraphicsGetCurrentContext(); [self.layer renderInContext:ctx]; UIImage *image = UIGraphicsGetImageFromCurrentImageContext(); UIGraphicsEndImageContext(); NSData *data = UIImagePNGRepresentation(image); [data writeToFile:@"/Users/JHQ0228/Desktop/Images/pic.png" atomically:YES]; } /// 触摸取消 - (void)touchesCancelled:(NSSet *)touches withEvent:(nullable UIEvent *)event { [self touchesEnded:touches withEvent:event]; } /// 绘制图形 - (void)drawRect:(CGRect)rect { for (UIBezierPath *path in self.pathsArrayM) { // 绘制路径 [path stroke]; } } /// 懒加载 - (UIBezierPath *)path { if (_path == nil) { _path = [UIBezierPath bezierPath]; } return _path; } - (NSMutableArray *)pathsArrayM { if (_pathsArrayM == nil) { _pathsArrayM = [NSMutableArray array]; } return _pathsArrayM; } @end ViewController.m // 创建画板 CGRect frame = CGRectMake(20, 50, self.view.bounds.size.width - 40, 200); PaintBoardView *paintBoard = [[PaintBoardView alloc] initWithFrame:frame]; [self.view addSubview:paintBoard]; 效果 1.2 绘制画板封装 具体实现代码见 GitHub 源码 QExtension QPaintBoardPath.h @interface QPaintBoardPath : UIBezierPath /// 线的颜色 @property (nonatomic, strong) UIColor *pathColor; /// 线的宽度 @property (nonatomic, assign) CGFloat pathWidth; @end QPaintBoardPath.m @implementation QPaintBoardPath @end QPaintBoardView.h @interface QPaintBoardView : UIView /// 画线的宽度,default is 1,max is 30 @property (nonatomic, assign) CGFloat paintLineWidth; /// 画笔的颜色,default is blackColor @property (nonatomic, strong) UIColor *paintLineColor; /// 画板的颜色,default is whiteColor @property (nonatomic, strong) UIColor *paintBoardColor; /** * 创建画板视图控件,获取绘画结果 * * @param frame 画板视图控件 frame * @param lineWidth 画笔的线宽,default is 1,max is 30 * @param lineColor 画笔的颜色,default is blackColor * @param boardColor 画板的颜色,default is whiteColor * @param result 绘画结果 * * @return 手势锁视图控件 */ + (instancetype)q_paintBoardViewWithFrame:(CGRect)frame lineWidth:(CGFloat)lineWidth lineColor:(nullable UIColor *)lineColor boardColor:(nullable UIColor *)boardColor paintResult:(void (^)(UIImage * _Nullable image))result; /** * 创建简单画板视图控件 * * @param frame 画板视图控件 frame * * @return 手势锁视图控件 */ + (instancetype)q_paintBoardViewWithFrame:(CGRect)frame; /** * 获取绘画结果 * * @return 绘画结果图片 */ - (UIImage * _Nullable)q_getPaintImage; /** * 清除绘画结果 */ - (void)q_clear; /** * 撤销绘画结果 */ - (void)q_back; @end QPaintBoardView.m #import "QPaintBoardPath.h" @interface QPaintBoardView () /// 路径 @property (nonatomic, strong, nullable) QPaintBoardPath *path; /// 保存所有路径的数组 @property (nonatomic, strong) NSMutableArray *pathsArrayM; /// 绘画结果 @property (nonatomic, copy) void (^resultBlock)(UIImage * _Nullable); /// 按钮工具条 @property (nonatomic, strong) UIView *toolView; /// 画笔设置视图 @property (nonatomic, strong) UIView *brushSetingView; /// 颜色选择视图 @property (nonatomic, strong) UIScrollView *colorSelectedView; /// 画板设置视图 @property (nonatomic, strong) UIScrollView *boardSetingView; /// 记录线的颜色 @property (nonatomic, strong) UIColor *lastPaintLineColor; /// 记录线的宽度 @property (nonatomic, assign) CGFloat lastPaintLineWidth; @end @implementation QPaintBoardView #pragma mark - 创建画板 /// 创建画板视图控件,获取绘画结果 + (instancetype)q_paintBoardViewWithFrame:(CGRect)frame lineWidth:(CGFloat)lineWidth lineColor:(nullable UIColor *)lineColor boardColor:(nullable UIColor *)boardColor paintResult:(void (^)(UIImage * _Nullable image))result { QPaintBoardView *paintBoardView = [[self alloc] init]; // CGRect tmpFrame = frame; // tmpFrame.size.height = frame.size.height + 44; paintBoardView.frame = frame; paintBoardView.paintLineWidth = (lineWidth > 30 ? 30 : lineWidth) ? : 1; paintBoardView.paintLineColor = lineColor ? : [UIColor blackColor]; paintBoardView.paintBoardColor = boardColor ? : [UIColor whiteColor]; paintBoardView.resultBlock = result; return paintBoardView; } /// 创建简单画板视图控件 + (instancetype)q_paintBoardViewWithFrame:(CGRect)frame { QPaintBoardView *paintBoardView = [[self alloc] initWithFrame:frame]; paintBoardView.paintLineWidth = 1; paintBoardView.paintLineColor = [UIColor blackColor]; paintBoardView.paintBoardColor = [UIColor whiteColor]; return paintBoardView; } #pragma mark - 自定义画板 /// 初始化,自定义画板界面 - (instancetype)init { if (self = [super init]) { self.clipsToBounds = YES; // 添加工具按钮视图 self.toolView = [[UIView alloc] init]; self.toolView.backgroundColor = [UIColor blackColor]; [self addSubview:self.toolView]; NSArray *imageNames = @[@"btn_brush", @"btn_board", @"btn_eraser", @"btn_back", @"btn_clear", @"btn_save"]; NSArray *selectedImageNames = @[@"btn_brush_pressed", @"btn_board_pressed", @"btn_eraser_pressed"]; for (NSUInteger i = 0; i < 6; i++) { UIButton *button = [UIButton buttonWithType:UIButtonTypeCustom]; button.tag = i; [button setBackgroundImage:[self q_getBundleImageWithName:imageNames[i]] forState:UIControlStateNormal]; [button addTarget:self action:@selector(toolButtonClick:) forControlEvents:UIControlEventTouchUpInside]; [self.toolView addSubview:button]; if (i < 3) { [button setBackgroundImage:[self q_getBundleImageWithName:selectedImageNames[i]] forState:UIControlStateSelected]; } } // 添加画笔设置视图 self.brushSetingView = [[UIView alloc] init]; self.brushSetingView.backgroundColor = [UIColor grayColor]; [self addSubview:self.brushSetingView]; [self sendSubviewToBack:self.brushSetingView]; UIView *widthBackView = [[UIView alloc] init]; widthBackView.layer.borderWidth = 1; widthBackView.layer.borderColor = [UIColor lightGrayColor].CGColor; UIView *widthView = [[UIView alloc] init]; [widthBackView addSubview:widthView]; [self.brushSetingView addSubview:widthBackView]; UISlider *widthSlider = [[UISlider alloc] init]; widthSlider.thumbTintColor = [UIColor orangeColor]; [widthSlider addTarget:self action:@selector(widthSliderClick:) forControlEvents:UIControlEventValueChanged]; [self.brushSetingView addSubview:widthSlider]; UIButton *colorSelectedBtn = [[UIButton alloc] init]; colorSelectedBtn.layer.borderWidth = 1; colorSelectedBtn.layer.borderColor = [UIColor lightGrayColor].CGColor; [colorSelectedBtn addTarget:self action:@selector(colorSelectedBtnClick:) forControlEvents:UIControlEventTouchUpInside]; [self.brushSetingView addSubview:colorSelectedBtn]; // 添加画笔颜色选择视图 self.colorSelectedView = [[UIScrollView alloc] init]; self.colorSelectedView.backgroundColor = [[UIColor grayColor] colorWithAlphaComponent:0.3]; self.colorSelectedView.showsHorizontalScrollIndicator = NO; [self addSubview:self.colorSelectedView]; [self sendSubviewToBack:self.colorSelectedView]; NSArray *colorArray = @[[UIColor blackColor], [UIColor whiteColor], [UIColor redColor], [UIColor greenColor], [UIColor blueColor], [UIColor cyanColor], [UIColor magentaColor], [UIColor orangeColor], [UIColor yellowColor], [UIColor darkGrayColor], [UIColor lightGrayColor], [UIColor brownColor], [UIColor grayColor], [UIColor purpleColor]]; for (NSUInteger i = 0; i < 14; i++) { UIButton *button = [UIButton buttonWithType:UIButtonTypeCustom]; button.layer.borderWidth = 1; button.layer.borderColor = [UIColor lightGrayColor].CGColor; [button setBackgroundColor:colorArray[i]]; [button addTarget:self action:@selector(colorSelectedClick:) forControlEvents:UIControlEventTouchUpInside]; [self.colorSelectedView addSubview:button]; } // 添加画板设置视图 self.boardSetingView = [[UIScrollView alloc] init]; self.boardSetingView.backgroundColor = [UIColor grayColor]; self.boardSetingView.showsHorizontalScrollIndicator = NO; [self addSubview:self.boardSetingView]; [self sendSubviewToBack:self.boardSetingView]; for (NSUInteger i = 0; i < 14; i++) { UIButton *button = [UIButton buttonWithType:UIButtonTypeCustom]; button.layer.borderWidth = 1; button.layer.borderColor = [UIColor lightGrayColor].CGColor; [button setBackgroundColor:colorArray[i]]; [button addTarget:self action:@selector(boardColorSelectedClick:) forControlEvents:UIControlEventTouchUpInside]; [self.boardSetingView addSubview:button]; } } return self; } /// 布局子控件 - (void)layoutSubviews { [super layoutSubviews]; if (self.subviews.count) { // 设置工具按钮视图 self.toolView.frame = CGRectMake(0, self.bounds.size.height - 44, self.bounds.size.width, 44); for (NSUInteger i = 0; i < 6; i++) { CGFloat margin = (self.bounds.size.width - 44 * 6) / 7; CGFloat x = margin + (margin + 44) * i; self.toolView.subviews[i].frame = CGRectMake(x, 0, 44, 44); } // 设置画笔设置视图 self.brushSetingView.frame = CGRectMake(0, self.bounds.size.height - 44, self.bounds.size.width, 60); self.brushSetingView.subviews[0].frame = CGRectMake(15, 15, 30, 30); self.brushSetingView.subviews[0].layer.cornerRadius = 15; self.brushSetingView.subviews[0].layer.masksToBounds = YES; CGFloat w = self.paintLineWidth; self.brushSetingView.subviews[0].subviews[0].frame = CGRectMake(15 - w / 2, 15 - w / 2, w, w); self.brushSetingView.subviews[0].subviews[0].layer.cornerRadius = w / 2; self.brushSetingView.subviews[0].subviews[0].layer.masksToBounds = YES; self.brushSetingView.subviews[0].subviews[0].backgroundColor = self.paintLineColor; self.brushSetingView.subviews[1].frame = CGRectMake(60, 15, self.bounds.size.width - 60 - 80, 32); UISlider *slider = self.brushSetingView.subviews[1]; slider.value = self.paintLineWidth / 30; self.brushSetingView.subviews[2].frame = CGRectMake(self.bounds.size.width - 60, 15, 50, 30); self.brushSetingView.subviews[2].backgroundColor = self.paintLineColor; // 设置画笔颜色选择视图 self.colorSelectedView.frame = CGRectMake(0, self.bounds.size.height - 44, self.bounds.size.width, 60); self.colorSelectedView.contentSize = CGSizeMake(14 * (50 + 20) + 20, 50); for (NSUInteger i = 0; i < 14; i++) { CGFloat x = 20 + (20 + 50) * i; self.colorSelectedView.subviews[i].frame = CGRectMake(x, 10, 50, 40); } // 设置画板设置视图 self.boardSetingView.frame = CGRectMake(0, self.bounds.size.height - 44, self.bounds.size.width, 60); self.boardSetingView.contentSize = CGSizeMake(14 * (50 + 20) + 20, 50); for (NSUInteger i = 0; i < 14; i++) { CGFloat x = 20 + (20 + 50) * i; self.boardSetingView.subviews[i].frame = CGRectMake(x, 10, 50, 40); } } } /// 工具按钮点击事件处理 - (void)toolButtonClick:(UIButton *)btn { switch (btn.tag) { case 0: { // 画笔设置 [self exitEraseState]; if (btn.isSelected == NO) { [self hideBoardSetingView]; [self showColorSelectedView]; [self showBrushSetingView]; } else { [self hideColorSelectedView]; [self hideBrushSetingView]; } break; } case 1: { // 画板设置 [self exitEraseState]; if (btn.isSelected == NO) { [self hideColorSelectedView]; [self hideBrushSetingView]; [self showBoardSetingView]; } else { [self hideBoardSetingView]; } break; } case 2: { // 擦除 [self hideBoardSetingView]; [self hideColorSelectedView]; [self hideBrushSetingView]; if (btn.selected == NO) { [self enterEraseState]; } else { [self exitEraseState]; } break; } case 3: { // 撤销 [self hideBoardSetingView]; [self hideColorSelectedView]; [self hideBrushSetingView]; [self q_back]; break; } case 4: { // 清除 [self hideBoardSetingView]; [self hideColorSelectedView]; [self hideBrushSetingView]; [self exitEraseState]; [self q_clear]; break; } case 5: { // 获取绘制结果 [self hideBoardSetingView]; [self hideColorSelectedView]; [self hideBrushSetingView]; [self exitEraseState]; if (self.resultBlock) { self.resultBlock([self q_getPaintImage]); } break; } default: break; } } /// 画笔线宽设置按钮点击事件处理 - (void)widthSliderClick:(UISlider *)slider { if (slider.value == 0) { self.paintLineWidth = 1; } else { self.paintLineWidth = slider.value * 30; } CGFloat w = self.paintLineWidth; self.brushSetingView.subviews[0].subviews[0].frame = CGRectMake(15 - w / 2, 15 - w / 2, w, w); self.brushSetingView.subviews[0].subviews[0].layer.cornerRadius = w / 2; } /// 画笔颜色选择按钮点击事件处理 - (void)colorSelectedBtnClick:(UIButton *)btn { if (btn.selected == NO) { [self showColorSelectedView]; } else { [self hideColorSelectedView]; } } /// 画笔颜色选择点击响应事件处理 - (void)colorSelectedClick:(UIButton *)btn { self.paintLineColor = btn.backgroundColor; self.brushSetingView.subviews[0].subviews[0].backgroundColor = btn.backgroundColor; self.brushSetingView.subviews[2].backgroundColor = btn.backgroundColor; } /// 画板颜色选择点击响应事件处理 - (void)boardColorSelectedClick:(UIButton *)btn { self.paintBoardColor = btn.backgroundColor; } /// 显示画笔设置视图 - (void)showBrushSetingView { UIButton *setBrushBtn = self.toolView.subviews[0]; if (setBrushBtn.selected == NO) { setBrushBtn.selected = YES; [UIView animateWithDuration:0.2 animations:^{ CGRect frame = CGRectMake(0, self.bounds.size.height - 44 - 60, self.bounds.size.width, 60); self.brushSetingView.frame = frame; }]; } } /// 隐藏画笔设置视图 - (void)hideBrushSetingView { UIButton *setBrushBtn = self.toolView.subviews[0]; if (setBrushBtn.selected) { setBrushBtn.selected = NO; [UIView animateWithDuration:0.2 animations:^{ CGRect frame = CGRectMake(0, self.bounds.size.height - 44, self.bounds.size.width, 60); self.brushSetingView.frame = frame; }]; } } // 显示画笔颜色选择视图 - (void)showColorSelectedView { UIButton *colorSelectedBtn = self.brushSetingView.subviews[2]; if (colorSelectedBtn.selected == NO) { colorSelectedBtn.selected = YES; [UIView animateWithDuration:0.2 animations:^{ CGRect frame = CGRectMake(0, self.bounds.size.height - 44 - 60 - 60, self.bounds.size.width, 60); self.colorSelectedView.frame = frame; }]; } } /// 隐藏画笔颜色选择视图 - (void)hideColorSelectedView { UIButton *colorSelectedBtn = self.brushSetingView.subviews[2]; if (colorSelectedBtn.selected) { colorSelectedBtn.selected = NO; [UIView animateWithDuration:0.2 animations:^{ CGRect frame = CGRectMake(0, self.bounds.size.height - 44, self.bounds.size.width, 60); self.colorSelectedView.frame = frame; }]; } } /// 显示画板设置视图 - (void)showBoardSetingView { UIButton *setBoardBtn = self.toolView.subviews[1]; if (setBoardBtn.selected == NO) { setBoardBtn.selected = YES; [UIView animateWithDuration:0.2 animations:^{ CGRect frame = CGRectMake(0, self.bounds.size.height - 44 - 60, self.bounds.size.width, 60); self.boardSetingView.frame = frame; }]; } } /// 隐藏画板设置视图 - (void)hideBoardSetingView { UIButton *setBoardBtn = self.toolView.subviews[1]; if (setBoardBtn.selected) { setBoardBtn.selected = NO; [UIView animateWithDuration:0.2 animations:^{ CGRect frame = CGRectMake(0, self.bounds.size.height - 44, self.bounds.size.width, 60); self.boardSetingView.frame = frame; }]; } } /// 进入擦除状态 - (void)enterEraseState { UIButton *setEraseBtn = self.toolView.subviews[2]; if (setEraseBtn.selected == NO) { setEraseBtn.selected = YES; self.lastPaintLineColor = self.paintLineColor; self.paintLineColor = self.paintBoardColor; self.lastPaintLineWidth = self.paintLineWidth; self.paintLineWidth = self.paintLineWidth + 5; } } /// 退出擦除状态 - (void)exitEraseState { UIButton *setEraseBtn = self.toolView.subviews[2]; if (setEraseBtn.isSelected) { setEraseBtn.selected = NO; self.paintLineColor = self.lastPaintLineColor; self.paintLineWidth = self.lastPaintLineWidth; } } #pragma mark - 绘制图案 /// 触摸开始 - (void)touchesBegan:(NSSet<UITouch *> *)touches withEvent:(nullable UIEvent *)event { if (self.subviews.count) { [self hideColorSelectedView]; [self hideBrushSetingView]; [self hideBoardSetingView]; } // 获取触摸起始点位置 CGPoint startPoint = [touches.anyObject locationInView:self]; // 添加路径描绘起始点 [self.path moveToPoint:startPoint]; // 记录线的属性 self.path.pathColor = self.paintLineColor; self.path.pathWidth = self.paintLineWidth; // 添加一条触摸路径描绘 [self.pathsArrayM addObject:self.path]; } /// 触摸移动 - (void)touchesMoved:(NSSet<UITouch *> *)touches withEvent:(nullable UIEvent *)event { // 获取触摸点位置 CGPoint touchPoint = [touches.anyObject locationInView:self]; // 添加路径描绘 [self.path addLineToPoint:touchPoint]; // 刷新视图 [self setNeedsDisplay]; } /// 触摸结束 - (void)touchesEnded:(NSSet<UITouch *> *)touches withEvent:(nullable UIEvent *)event { // 销毁 path self.path = nil; } /// 触摸取消 - (void)touchesCancelled:(NSSet *)touches withEvent:(nullable UIEvent *)event { [self touchesEnded:touches withEvent:event]; } /// 绘制图形,只要调用 drawRect 方法就会把之前的内容全部清空 - (void)drawRect:(CGRect)rect { for (QPaintBoardPath *path in self.pathsArrayM) { // 绘制路径 path.lineWidth = path.pathWidth; [path.pathColor setStroke]; path.lineCapStyle = kCGLineCapRound; path.lineJoinStyle = kCGLineJoinRound; [path stroke]; } } /// 获取绘画结果 - (UIImage * _Nullable)q_getPaintImage { UIImage *image = nil; CGSize boardSize = self.bounds.size; if (self.subviews.count) { boardSize.height = self.bounds.size.height - 44; } if (self.pathsArrayM.count) { UIGraphicsBeginImageContextWithOptions(boardSize, NO, 0); CGContextRef ctx = UIGraphicsGetCurrentContext(); [self.layer renderInContext:ctx]; image = UIGraphicsGetImageFromCurrentImageContext(); UIGraphicsEndImageContext(); } return image; } /// 清除绘画结果 - (void)q_clear { if (self.pathsArrayM.count) { [self.pathsArrayM removeAllObjects]; [self setNeedsDisplay]; } } /// 撤销绘画结果 - (void)q_back { if (self.pathsArrayM.count) { [self.pathsArrayM removeLastObject]; [self setNeedsDisplay]; } } /// 懒加载 - (QPaintBoardPath * _Nullable)path { // path 每次绘制完成后需要销毁,否则无法清除之前绘制的路径 if (_path == nil) { _path = [QPaintBoardPath bezierPath]; } return _path; } - (NSMutableArray *)pathsArrayM { if (_pathsArrayM == nil) { _pathsArrayM = [NSMutableArray array]; } return _pathsArrayM; } /// 设置属性值 - (void)setPaintBoardColor:(UIColor *)paintBoardColor { _paintBoardColor = paintBoardColor; self.backgroundColor = paintBoardColor; } /// 加载 bundle 中的图片 - (UIImage *)q_getBundleImageWithName:(NSString *)name { NSString *bundlePath = [[[NSBundle mainBundle] resourcePath] stringByAppendingPathComponent:@"QPaintBoardView.bundle"]; UIImage *image = [[UIImage imageWithContentsOfFile:[bundlePath stringByAppendingPathComponent:name]] imageWithRenderingMode:UIImageRenderingModeAlwaysOriginal]; return image; } @end 1、创建简单画板 // 创建简单画板 CGRect frame = CGRectMake(20, 50, self.view.bounds.size.width - 40, 200); QPaintBoardView *paintBoardView = [QPaintBoardView q_paintBoardViewWithFrame:frame]; // 可选属性值设置 paintBoardView.paintLineWidth = 5; // default is 1 paintBoardView.paintLineColor = [UIColor redColor]; // default is blackColor paintBoardView.paintBoardColor = [UIColor cyanColor]; // default is whiteColor [self.view addSubview:paintBoardView]; self.paintBoardView = paintBoardView; // 撤销绘画结果 [self.paintBoardView q_back]; // 清除绘画结果 [self.paintBoardView q_clear]; // 获取绘画结果 UIImage *image = [self.paintBoardView q_getPaintImage]; 效果 2、创建画板 // 创建画板 QPaintBoardView *paintBoard = [QPaintBoardView q_paintBoardViewWithFrame:self.view.bounds lineWidth:0 lineColor:nil boardColor:nil paintResult:^(UIImage * _Nullable image) { if (image) { NSData *data = UIImagePNGRepresentation(image); [data writeToFile:@"/Users/JHQ0228/Desktop/Images/pic.png" atomically:YES]; } }]; [self.view addSubview:paintBoard]; 效果