首页 文章 精选 留言 我的

精选列表

搜索[列存储],共10000篇文章
优秀的个人博客,低调大师

Ceph作为OpenStack后端存储

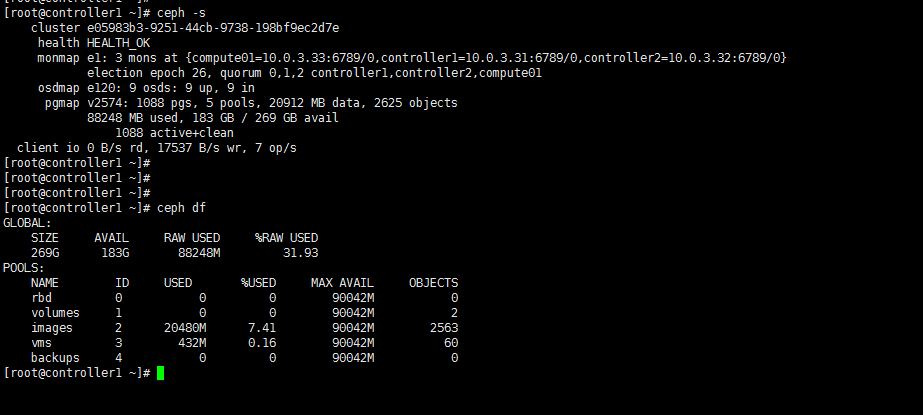
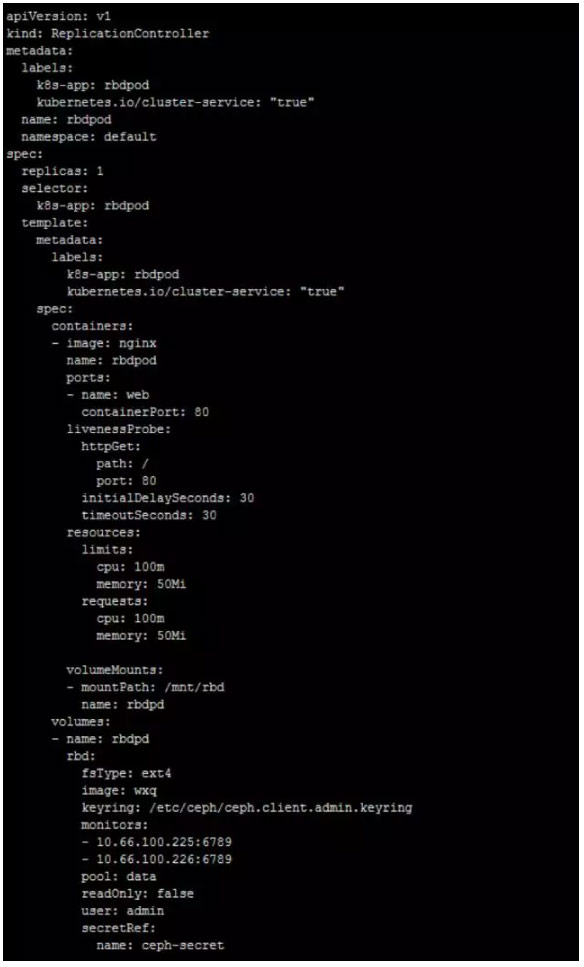
Total PGs = (Total_number_of_OSD * 100) /max_replication_count) 1、Create pool for OpenStack 1 2 3 4 5 pg=256 cephosdpoolcreatevolumes$pg #disk_pool cephosdpoolcreateimages$pg #image_pool cephosdpoolcreatevms$pg #host_pool cephosdpoolcreatebackups$pg #backup_pool 2、setup ceph client authentication 1 2 3 cephauthget-or-createclient.cindermon 'allowr' osd 'allowclass-readobject_prefixrbd_children,allowrwxpool=volumes,allowrwxpool=vms,allowrxpool=images' cephauthget-or-createclient.glancemon 'allowr' osd 'allowclass-readobject_prefixrbd_children,allowrwxpool=images' cephauthget-or-createclient.cinder-backupmon 'allowr' osd 'allowclass-readobject_prefixrbd_children,allowrwxpool=backups' 3、Add the keyringsfor client.cinder, client.glance, and client.cinder-backup to the appropriatenodes and change their ownership 1 2 3 4 cephauthget-or-createclient.glance| ssh {your-glance-api-server} sudo tee /etc/ceph/ceph .client.glance.keyring ssh {your-glance-api-server} sudo chownglance:glance /etc/ceph/ceph .client.glance.keyring cephauthget-or-createclient.cinder| ssh {your-volume-server} sudo tee /etc/ceph/ceph .client.cinder.keyring ssh {your-cinder-volume-server} sudo chowncinder:cinder /etc/ceph/ceph .client.cinder.keyring 4、Nodes running nova-compute need the keyring file for thenova-compute process 1 cephauthget-or-createclient.cinder| ssh {your-nova-compute-server} sudo tee /etc/ceph/ceph .client.cinder.keyring 5、Create a temporary copy of the secret key on the nodes runningnova-compute: 1 2 3 4 5 6 7 8 9 10 11 12 13 14 cephauthget-keyclient.cinder>client.cinder.key cephauthget-keyclient.cinder| ssh {your-compute-node} tee client.cinder.key uuidgen 4f859b95-406e-49f6-9ff8-d6e04f7ba1ef cat >secret.xml<<EOF <secretephemeral= 'no' private= 'no' > <uuid>4f859b95-406e-49f6-9ff8-d6e04f7ba1ef< /uuid > <usage type = 'ceph' > <name>client.cindersecret< /name > < /usage > < /secret > EOF sudo virshsecret-define-- file secret.xml sudo virshsecret- set -value--secrete05983be-9251-44cb-9738-198bf9ec2d7e--base64$( cat client.cinder.key)&& rm client.cinder.keysecret.xml 6、Configuring Glance 1 2 3 4 5 6 7 8 vi /etc/glance/glance-api .conf [DEFAULT] ... default_store=rbd rbd_store_user=glance rbd_store_pool=images show_image_direct_url=True ... 7、Configuring Cinder 1 2 3 4 5 6 7 8 9 10 11 vi /etc/cinder/cinder .conf [DEFAULT] ... volume_driver=cinder.volume.drivers.rbd.RBDDriver rbd_pool=volumes rbd_ceph_conf= /etc/ceph/ceph .conf rbd_flatten_volume_from_snapshot= false rbd_max_clone_depth=5 glance_api_version=2 rbd_user=cinder rbd_secret_uuid=e05983be-9251-44cb-9738-198bf9ec2d7e 8、Configuring Cinder Backup 1 2 3 4 5 6 7 8 9 10 11 vi /etc/cinder/cinder .conf [DEFAULT] ... backup_driver=cinder.backup.drivers.ceph backup_ceph_conf= /etc/ceph/ceph .conf backup_ceph_user=cinder-backup backup_ceph_chunk_size=134217728 backup_ceph_pool=backups backup_ceph_stripe_unit=0 backup_ceph_stripe_count=0 restore_discard_excess_bytes= true 9、Configuring Nova 1 2 3 4 5 6 7 8 9 10 11 12 vi /etc/nova/nova .conf [DEFAULT] ... libvirt_images_type=rbd libvirt_images_rbd_pool=vms libvirt_images_rbd_ceph_conf= /etc/ceph/ceph .conf rbd_user=cinder rbd_secret_uuid=e05983be-9251-44cb-9738-198bf9ec2d7e libvirt_inject_password= false libvirt_inject_key= false libvirt_inject_partition=-2 libvirt_live_migration_flag= "VIR_MIGRATE_UNDEFINE_SOURCE,VIR_MIGRATE_PEER2PEER,VIR_MIGRATE_LIVE,VIR_MIGRATE_PERSIST_DEST" 10、Restart OpenStack 1 2 3 serviceopenstack-glance-apirestart serviceopenstack-nova-computerestart serviceopenstack-cinder-volumerestart 10、Test 本文转自Jacken_yang 51CTO博客,原文链接:http://blog.51cto.com/linuxnote/1789924,如需转载请自行联系原作者

优秀的个人博客,低调大师

GlusterFS作为OpenStack后端存储

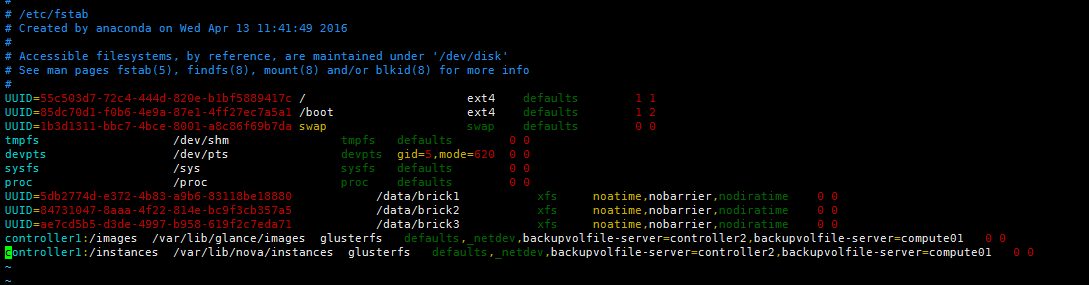
创建3个卷images、volumes、instances分别对接openstack的glance、cinder、nova组件 images卷用于存放OpenStack镜像 volumes卷用于存放OpenStack硬盘 instances卷用于存放OpenStack云主机 1、创建卷 1 2 3 4 5 6 7 8 9 10 11 12 13 14 glustervolumecreateimagesreplica3\ controller1: /data/brick1/image controller2: /data/brick1/image compute01: /data/brick1/image \ controller1: /data/brick2/image controller2: /data/brick2/image compute01: /data/brick2/image \ controller1: /data/brick3/image controller2: /data/brick3/image compute01: /data/brick3/image glustervolumecreatevolumesreplica3\ controller1: /data/brick1/volume controller2: /data/brick1/volume compute01: /data/brick1/volume \ controller1: /data/brick2/volume controller2: /data/brick2/volume compute01: /data/brick2/volume \ controller1: /data/brick3/volume controller2: /data/brick3/volume compute01: /data/brick3/volume glustervolumecreateinstancesreplica3\ controller1: /data/brick1/instance controller2: /data/brick1/instance compute01: /data/brick1/instance \ controller1: /data/brick2/instance controller2: /data/brick2/instance compute01: /data/brick2/instance \ controller1: /data/brick3/instance controller2: /data/brick3/instance compute01: /data/brick3/instance 2、启动卷 1 2 3 glustervolumestartimages glustervolumestartvolumes glustervolumestartinstances 3、添加images、instances到fstab自动挂载 1 2 controller1: /images /var/lib/glance/images glusterfsdefaults,_netdev,backupvolfile-server=controller2,backupvolfile-server=compute0100 controller1: /instances /var/lib/nova/instances glusterfsdefaults,_netdev,backupvolfile-server=controller2,backupvolfile-server=compute0100 mount -a挂载 上述挂载方式使用backupvolfile起到了高可用性,避免单点故障 nova、glance节点要挂载到instances、images的相关目录,根据实际服务部署情况调整,cinder不太一样,下边会说到。 4、设置相关权限 1 2 3 4 5 6 7 8 9 10 11 chown -Rnova.nova /var/lib/nova/instances chown -Rglance.glance /var/lib/glance/images chown -Rnova:nova /data/brick1/instance chown -Rnova:nova /data/brick2/instance chown -Rnova:nova /data/brick3/instance chown -Rglance:glance /data/brick1/image chown -Rglance:glance /data/brick2/image chown -Rglance:glance /data/brick3/image chown -Rcinder:cinder /data/brick1/volume chown -Rcinder:cinder /data/brick2/volume chown -Rcinder:cinder /data/brick3/volume nova要有instance、cinder要有volume、glance要有image的读写权限,根据节点上的服务,给相应的权限。 5、配置cinder 1 2 3 4 cp /etc/cinder/cinder .conf{,.bak} openstack-config-- set /etc/cinder/cinder .confDEFAULTvolume_drivercinder.volume.drivers.glusterfs.GlusterfsDriver openstack-config-- set /etc/cinder/cinder .confDEFAULTglusterfs_shares_config /etc/cinder/shares .conf openstack-config-- set /etc/cinder/cinder .confDEFAULTglusterfs_mount_point_base /var/lib/cinder/volumes 1 2 3 4 5 touch /etc/cinder/shares .conf vim /etc/cinder/shares .conf #添加以下内容 controller1: /volumes controller2: /volumes compute01: /volumes #设置相关权限 1 2 chown -Rcinder.cinder /etc/cinder/shares .conf chown -Rcinder:cinder /var/lib/cinder/ * 6、重启openstack相关服务 1 2 3 openstack-servicerestartnova openstack-servicerestartcinder openstack-servicerestartglance 7、验证cinder 本文转自Jacken_yang 51CTO博客,原文链接:http://blog.51cto.com/linuxnote/1826501,如需转载请自行联系原作者

资源下载

更多资源
腾讯云软件源

腾讯云软件源

为解决软件依赖安装时官方源访问速度慢的问题,腾讯云为一些软件搭建了缓存服务。您可以通过使用腾讯云软件源站来提升依赖包的安装速度。为了方便用户自由搭建服务架构,目前腾讯云软件源站支持公网访问和内网访问。

Nacos

Nacos

Nacos /nɑ:kəʊs/ 是 Dynamic Naming and Configuration Service 的首字母简称,一个易于构建 AI Agent 应用的动态服务发现、配置管理和AI智能体管理平台。Nacos 致力于帮助您发现、配置和管理微服务及AI智能体应用。Nacos 提供了一组简单易用的特性集,帮助您快速实现动态服务发现、服务配置、服务元数据、流量管理。Nacos 帮助您更敏捷和容易地构建、交付和管理微服务平台。

Rocky Linux

Rocky Linux

Rocky Linux(中文名:洛基)是由Gregory Kurtzer于2020年12月发起的企业级Linux发行版,作为CentOS稳定版停止维护后与RHEL(Red Hat Enterprise Linux)完全兼容的开源替代方案,由社区拥有并管理,支持x86_64、aarch64等架构。其通过重新编译RHEL源代码提供长期稳定性,采用模块化包装和SELinux安全架构,默认包含GNOME桌面环境及XFS文件系统,支持十年生命周期更新。

WebStorm

WebStorm

WebStorm 是jetbrains公司旗下一款JavaScript 开发工具。目前已经被广大中国JS开发者誉为“Web前端开发神器”、“最强大的HTML5编辑器”、“最智能的JavaScript IDE”等。与IntelliJ IDEA同源,继承了IntelliJ IDEA强大的JS部分的功能。

用户登录
用户注册