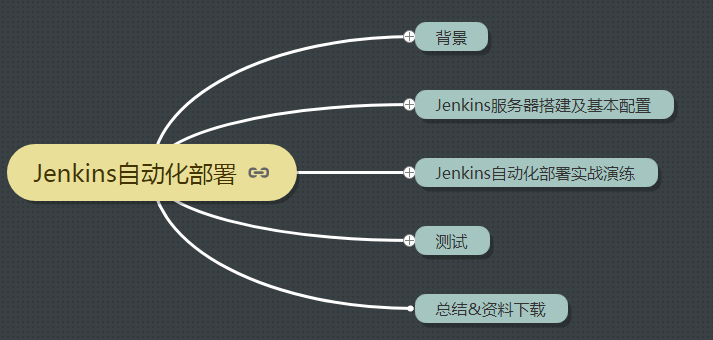
kafka_2.10-0.8.1.1.tgz的1或3节点集群的下载、安装和配置(图文详细教程)绝对干货
kafka_2.10-0.8.1.1.tgz的1节点集群 我这里是使用的是,kafka自带的zookeeper。 以及关于kafka的日志文件啊,都放在默认里即/tmp下,我没修改。保存默认的 1、 [hadoop@sparksinglenode kafka_2.10-0.8.1.1]$ jps 2625 Jps 2、 [hadoop@sparksinglenode kafka_2.10-0.8.1.1]$ bin/zookeeper-server-start.sh config/zookeeper.properties & 此刻,这时,会一直停在这,因为是前端运行。 另开一窗口, 3、 [hadoop@sparksinglenode kafka_2.10-0.8.1.1]$ bin/kafka-server-start.sh config/server.properties & 也是前端运行。 推荐做法!!! 但是,我这里,自己在kafka安装目录下,为了自己的方便,写了个startkafka.sh和startzookeeper.sh nohup bin/kafka-server-start.sh config/server.properties > kafka.log 2>&1 & nohup bin/zookeeper-server-start.sh config/zookeeper.properties > zookeeper.log 2>&1 & 注意还要,root用户来,附上执行权限。chmod +x ./startkafka.sh chmod +x ./startzookeeper.sh 这样,就会在kafka安装目录下,对应生出kafka.log和zookeeper.log。 1、[spark@sparksinglenode kafka_2.10-0.8.1.1]$ jps 5098 Jps 2、[spark@sparksinglenode kafka_2.10-0.8.1.1]$bash startzookeeper.sh [spark@sparksinglenode kafka_2.10-0.8.1.1]$ jps 5125 Jps 5109 QuorumPeerMain 3、[spark@sparksinglenode kafka_2.10-0.8.1.1]$bash startkafka.sh [spark@sparksinglenode kafka_2.10-0.8.1.1]$ jps 5155 Jps 5140 Kafka 5109 QuorumPeerMain [spark@sparksinglenode kafka_2.10-0.8.1.1]$ 我了个去,启动是多么方便! kafka_2.10-0.8.1.1.tgz的3节点集群 关于下载,和安装,解压,这些,我不多赘述了。见我的单节点博客。 root@SparkMaster:/usr/local/kafka/kafka_2.10-0.8.1.1/config# cat server.properties # Licensed to the Apache Software Foundation (ASF) under one or more # contributor license agreements. See the NOTICE file distributed with # this work for additional information regarding copyright ownership. # The ASF licenses this file to You under the Apache License, Version 2.0 # (the "License"); you may not use this file except in compliance with # the License. You may obtain a copy of the License at # # http://www.apache.org/licenses/LICENSE-2.0 # # Unless required by applicable law or agreed to in writing, software # distributed under the License is distributed on an "AS IS" BASIS, # WITHOUT WARRANTIES OR CONDITIONS OF ANY KIND, either express or implied. # See the License for the specific language governing permissions and # limitations under the License. # see kafka.server.KafkaConfig for additional details and defaults ############################# Server Basics ############################# # The id of the broker. This must be set to a unique integer for each broker.broker.id=0 ############################# Socket Server Settings ############################# # The port the socket server listens on port=9092 # Hostname the broker will bind to. If not set, the server will bind to all interfaces #host.name=localhost # Hostname the broker will advertise to producers and consumers. If not set, it uses the # value for "host.name" if configured. Otherwise, it will use the value returned from # java.net.InetAddress.getCanonicalHostName(). #advertised.host.name=<hostname routable by clients> # The port to publish to ZooKeeper for clients to use. If this is not set, # it will publish the same port that the broker binds to. #advertised.port=<port accessible by clients> # The number of threads handling network requests num.network.threads=2 # The number of threads doing disk I/O num.io.threads=8 # The send buffer (SO_SNDBUF) used by the socket server socket.send.buffer.bytes=1048576 # The receive buffer (SO_RCVBUF) used by the socket server socket.receive.buffer.bytes=1048576 # The maximum size of a request that the socket server will accept (protection against OOM) socket.request.max.bytes=104857600 ############################# Log Basics ############################# # A comma seperated list of directories under which to store log fileslog.dirs=/kafka-logs # The default number of log partitions per topic. More partitions allow greater # parallelism for consumption, but this will also result in more files across # the brokers. num.partitions=2 ############################# Log Flush Policy ############################# # Messages are immediately written to the filesystem but by default we only fsync() to sync # the OS cache lazily. The following configurations control the flush of data to disk. # There are a few important trade-offs here: # 1. Durability: Unflushed data may be lost if you are not using replication. # 2. Latency: Very large flush intervals may lead to latency spikes when the flush does occur as there will be a lot of data to flush. # 3. Throughput: The flush is generally the most expensive operation, and a small flush interval may lead to exceessive seeks. # The settings below allow one to configure the flush policy to flush data after a period of time or # every N messages (or both). This can be done globally and overridden on a per-topic basis. # The number of messages to accept before forcing a flush of data to disk #log.flush.interval.messages=10000 # The maximum amount of time a message can sit in a log before we force a flush #log.flush.interval.ms=1000 ############################# Log Retention Policy ############################# # The following configurations control the disposal of log segments. The policy can # be set to delete segments after a period of time, or after a given size has accumulated. # A segment will be deleted whenever *either* of these criteria are met. Deletion always happens # from the end of the log. # The minimum age of a log file to be eligible for deletion log.retention.hours=168 # A size-based retention policy for logs. Segments are pruned from the log as long as the remaining # segments don't drop below log.retention.bytes. #log.retention.bytes=1073741824 # The maximum size of a log segment file. When this size is reached a new log segment will be created. log.segment.bytes=536870912 # The interval at which log segments are checked to see if they can be deleted according # to the retention policies log.retention.check.interval.ms=60000 # By default the log cleaner is disabled and the log retention policy will default to just delete segments after their retention expires. # If log.cleaner.enable=true is set the cleaner will be enabled and individual logs can then be marked for log compaction. log.cleaner.enable=false ############################# Zookeeper ############################# # Zookeeper connection string (see zookeeper docs for details). # This is a comma separated host:port pairs, each corresponding to a zk # server. e.g. "127.0.0.1:3000,127.0.0.1:3001,127.0.0.1:3002". # You can also append an optional chroot string to the urls to specify the # root directory for all kafka znodes.zookeeper.connect=SparkMaster:2181,SparkWorker1:2181,SparkWorker2:2181 # Timeout in ms for connecting to zookeeper zookeeper.connection.timeout.ms=1000000 root@SparkMaster:/usr/local/kafka/kafka_2.10-0.8.1.1/config# SparkWorker1和SparkWorker2分别只把broker.id=0改成broker.id=1 ,broker.id=2。 即SparkMaster: broker.id=0 log.dirs=/kafka-logs zookeeper.connect=SparkMaster:2181,SparkWorker1:2181,SparkWorker2:2181 即SparkWorker1: broker.id=1 log.dirs=/kafka-logs zookeeper.connect=SparkMaster:2181,SparkWorker1:2181,SparkWorker2:2181 即SparkWorker2: broker.id=2 log.dirs=/kafka-logs zookeeper.connect=SparkMaster:2181,SparkWorker1:2181,SparkWorker2:2181 kafka的3节点如何启动 步骤一:先,分别在SparkMaster、SpakrWorker1、SparkWorker2节点上,启动zookeeper进程。 root@SparkMaster:/usr/local/kafka/kafka_2.10-0.8.1.1#bash startkafka.sh 其他,两台机器,一样的,不多赘述。 本文转自大数据躺过的坑博客园博客,原文链接:http://www.cnblogs.com/zlslch/p/6073192.html,如需转载请自行联系原作者