首页 文章 精选 留言 我的

精选列表

搜索[api-],共46篇文章
优秀的个人博客,低调大师

Google地图官方API-在地图上绘图(自定义符号)

符号介绍当您想在标记上使用基于矢量的图标或将图像添加到折线时,符号非常有用 。 标记支持栅格图像和矢量图像的使用。请参阅有关自定义标记图标的文档 。A 是可以显示在或对象上的基于矢量的图像 。符号的形状由使用SVG路径符号的路径定义 。虽然是唯一必需的属性,但该 对象支持多种属性,使您可以自定义视觉外观,例如笔触和填充的颜色和粗细。请参阅下面的属性列表。 SymbolMarkerPolylinepathSymbol 通过SymbolPath 该类可以使用几个预定义的符号。请参阅下面的列表。 符号的属性请注意,a的默认行为Symbol取决于它出现在标记还是折线上而略有不同。这些差异在下面的属性列表中描述。 A Symbol支持以下属性: path(必填)是定义符号形状的路径。您可以在其中使用预定义的路径之一,也可以使用 SVG路径符号定义自定义路径 。注意:折线上的矢量路径必须适合22x22px的正方形。如果路径中包括该正方形以外的点,则必须将符号的属性调整为分数值(例如0.2),以使生成的缩放点适合正方形。 google.maps.SymbolPathscaleanchor设置符号相对于标记或折线的位置。符号路径的坐标分别通过锚点的x和y坐标向左和向上转换。默认情况下,符号锚定在(0, 0)。位置用与符号路径相同的坐标系表示。fillColor是符号填充的颜色(即笔触边界的区域)。支持所有CSS3颜色,但扩展的命名颜色除外。对于标记上的符号,默认值为“黑色”。对于折线上的符号,默认值为相应折线的笔触颜色。fillOpacity定义符号填充的相对不透明度(即缺乏透明度)。值的范围是0.0(完全透明)到1.0(完全不透明)。默认值为0.0。rotation是旋转符号的角度,顺时针以度表示。默认情况下,符号标记的旋转度为0,折线上的符号旋转了其所处边缘的角度。在多段线上设置符号的旋转将固定符号的旋转,使其不再跟随直线的曲线。scale设置符号缩放的数量。对于符号标记,默认比例为1。缩放后,符号可以为任意大小。对于折线上的符号,默认比例为折线的笔划粗细。缩放后,符号必须位于以符号锚点为中心的22x22px正方形内。strokeColor是符号轮廓的颜色。支持所有CSS3颜色,但扩展的命名颜色除外。对于标记上的符号,默认值为“黑色”。对于折线上的符号,默认颜色是折线的笔触颜色。strokeOpacity确定符号笔划的相对不透明度(即缺乏透明度)。值的范围是0.0(完全透明)到1.0(完全不透明)。对于符号标记,默认值为1.0。对于折线上的符号,默认值为折线的笔触不透明度。strokeWeight定义符号轮廓的粗细。默认值为scale符号的。预定义符号Maps JavaScript API提供了一些内置符号,您可以通过该类将其添加到标记或折线中 。 SymbolPath 默认符号包括一个圆圈和两种类型的箭头。向前和向后箭头均可用。这对于折线特别有用,因为折线上的符号方向是固定的。正向被认为是在多义线的终点方向。 您可以使用任何默认符号选项来修改预定义符号的笔触或填充。 包括以下预定义符号: 名称 描述 例google.maps.SymbolPath.CIRCLE 一个圆圈。 google.maps.SymbolPath.BACKWARD_CLOSED_ARROW 向后所有方向都闭合的箭头。 google.maps.SymbolPath.FORWARD_CLOSED_ARROW 在所有侧面均闭合的向前箭头。 google.maps.SymbolPath.BACKWARD_OPEN_ARROW 在一侧打开的向后箭头。 google.maps.SymbolPath.FORWARD_OPEN_ARROW 一侧打开的向前箭头。 向标记添加符号要在标记上显示基于矢量的图标 Symbol,请将具有所需路径的对象文字传递 到标记的 icon属性。 下面的示例使用预定义的矢量路径之一创建一个图标。 // This example uses a symbol to add a vector-based icon to a marker.// The symbol uses one of the predefined vector paths ('CIRCLE') supplied by the// Google Maps JavaScript API. function initMap() { var map = new google.maps.Map(document.getElementById('map'), { zoom: 4, center: {lat: -25.363882, lng: 131.044922} }); var marker = new google.maps.Marker({ position: map.getCenter(), icon: { path: google.maps.SymbolPath.CIRCLE, scale: 10 }, draggable: true, map: map }); } 查看示例。 以下示例使用 SVG路径符号 为标记创建自定义图标。 // This example uses SVG path notation to add a vector-based symbol// as the icon for a marker. The resulting icon is a star-shaped symbol// with a pale yellow fill and a thick yellow border. function initMap() { var map = new google.maps.Map(document.getElementById('map'), { zoom: 4, center: {lat: -25.363882, lng: 131.044922} }); var goldStar = { path: 'M 125,5 155,90 245,90 175,145 200,230 125,180 50,230 75,145 5,90 95,90 z', fillColor: 'yellow', fillOpacity: 0.8, scale: 1, strokeColor: 'gold', strokeWeight: 14 }; var marker = new google.maps.Marker({ position: map.getCenter(), icon: goldStar, map: map });} 查看示例。 向折线添加符号要在折线上显示符号,请设置对象的icons[]属性PolylineOptions。该icons[]数组采用一个或多个对象文字,具有以下属性: IconSequence icon(required)是要在线上渲染的符号。offset确定距要渲染图标的行的起点的距离。该距离可以表示为线条长度的百分比(例如,“ 50%”),也可以表示为像素(例如,“ 50px”)。默认值为“ 100%”。repeat确定行中连续图标之间的距离。该距离可以表示为线条长度的百分比(例如,“ 50%”),也可以表示为像素(例如,“ 50px”)。要禁用重复图标,请指定“ 0”。默认值为“ 0”。注意:如果折线是测地线(也就是说,如果其geodesic属性设置为true)offset,repeat 则默认指定为米和米的距离。将像素值offset或 设置为repeat像素值将导致在屏幕上以像素为单位计算距离。结合使用符号和PolylineOptions类,您可以对地图上折线的外观和感觉进行大量控制。以下是您可以应用的一些自定义示例。 箭使用该IconSequence.offset属性可将箭头添加到折线的起点或终点。 // Define a symbol using a predefined path (an arrow)// supplied by the Google Maps JavaScript API.var lineSymbol = { path: google.maps.SymbolPath.FORWARD_CLOSED_ARROW}; // Create the polyline and add the symbol via the 'icons' property.var line = new google.maps.Polyline({ path: [{lat: 22.291, lng: 153.027}, {lat: 18.291, lng: 153.027}], icons: [{ icon: lineSymbol, offset: '100%' }], map: map}); 查看示例。 虚线通过将折线的不透明度设置为0,并以规则的时间间隔在该线上覆盖不透明的符号,可以实现虚线效果。 // Define a symbol using SVG path notation, with an opacity of 1.var lineSymbol = { path: 'M 0,-1 0,1', strokeOpacity: 1, scale: 4}; // Create the polyline, passing the symbol in the 'icons' property.// Give the line an opacity of 0.// Repeat the symbol at intervals of 20 pixels to create the dashed effect.var line = new google.maps.Polyline({ path: [{lat: 22.291, lng: 153.027}, {lat: 18.291, lng: 153.027}], strokeOpacity: 0, icons: [{ icon: lineSymbol, offset: '0', repeat: '20px' }], map: map}); 查看示例。 自定义路径自定义符号允许您向折线添加许多不同的形状。 // Define the custom symbols. All symbols are defined via SVG path notation.// They have varying stroke color, fill color, stroke weight,// opacity and rotation properties. var symbolOne = { path: 'M -2,0 0,-2 2,0 0,2 z', strokeColor: '#F00', fillColor: '#F00', fillOpacity: 1 }; var symbolTwo = { path: 'M -1,0 A 1,1 0 0 0 -3,0 1,1 0 0 0 -1,0M 1,0 A 1,1 0 0 0 3,0 1,1 0 0 0 1,0M -3,3 Q 0,5 3,3', strokeColor: '#00F', rotation: 45 }; var symbolThree = { path: 'M -2,-2 2,2 M 2,-2 -2,2', strokeColor: '#292', strokeWeight: 4 }; // Create the polyline and add the symbols via the 'icons' property. var line = new google.maps.Polyline({ path: [{lat: 22.291, lng: 153.027}, {lat: 18.291, lng: 153.027}], icons: [ { icon: symbolOne, offset: '0%' }, { icon: symbolTwo, offset: '50%' }, { icon: symbolThree, offset: '100%' } ], map: map }); 查看示例。 动画符号您可以通过使用DOM的window.setInterval()功能以固定间隔更改符号的偏移量来沿路径设置符号动画 。 // This example adds an animated symbol to a polyline. function initMap() { var map = new google.maps.Map(document.getElementById('map'), { center: {lat: 20.291, lng: 153.027}, zoom: 6, mapTypeId: 'terrain' }); // Define the symbol, using one of the predefined paths ('CIRCLE') // supplied by the Google Maps JavaScript API. var lineSymbol = { path: google.maps.SymbolPath.CIRCLE, scale: 8, strokeColor: '#393' }; // Create the polyline and add the symbol to it via the 'icons' property. var line = new google.maps.Polyline({ path: [{lat: 22.291, lng: 153.027}, {lat: 18.291, lng: 153.027}], icons: [{ icon: lineSymbol, offset: '100%' }], map: map }); animateCircle(line);} // Use the DOM setInterval() function to change the offset of the symbol// at fixed intervals.function animateCircle(line) { var count = 0; window.setInterval(function() { count = (count + 1) % 200; var icons = line.get('icons'); icons[0].offset = (count / 2) + '%'; line.set('icons', icons); }, 20);} 查看示例。


优秀的个人博客,低调大师

Java高并发秒杀Api-业务分析与DAO层构建2

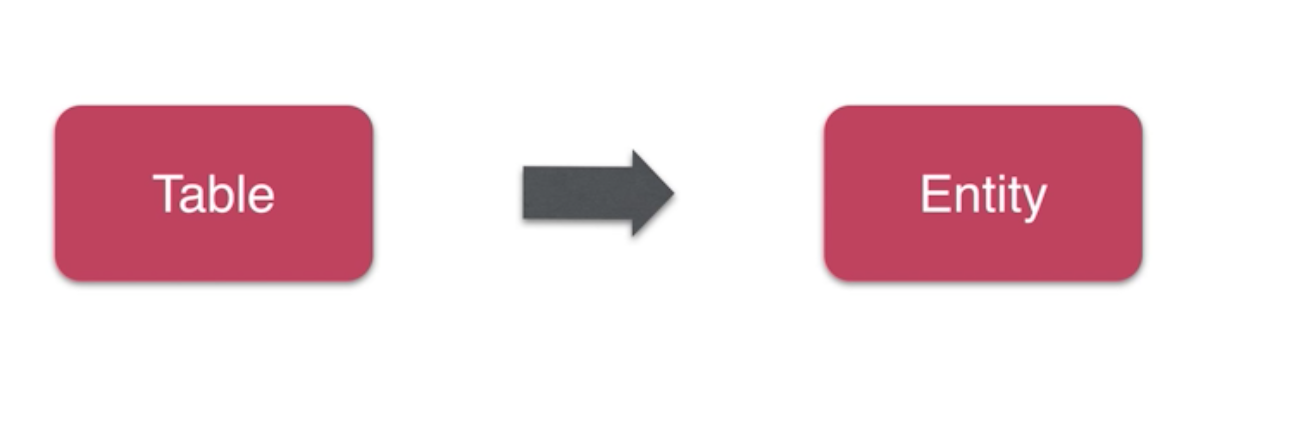
章节目录 DAO 设计编码 数据库设计与编码 DAO层实体和接口编码 基于mybatis实现DAO理论 基于mybatis实现DAO接口-1 mybatis整合Spring DAO层编码解析 Dao 设计编码 1.pom.xml 引入项目依赖的包 <project xmlns="http://maven.apache.org/POM/4.0.0" xmlns:xsi="http://www.w3.org/2001/XMLSchema-instance" xsi:schemaLocation="http://maven.apache.org/POM/4.0.0 http://maven.apache.org/maven-v4_0_0.xsd"> <modelVersion>4.0.0</modelVersion> <groupId>org.seckill</groupId> <artifactId>seckill</artifactId> <packaging>war</packaging> <version>1.0</version> <name>seckill Maven Webapp</name> <url>http://maven.apache.org</url> <dependencies> <dependency> <groupId>junit</groupId> <artifactId>junit</artifactId> <!--使用注解方式运行junit--> <version>4.11</version> <scope>test</scope> </dependency> <!--补全项目依赖--> <!--日志--> <!--1.日志 java日志,slf4j,log4j,logback,common-logging--> <!--2. slf4j 是规范、接口 日志实现 log4j,logback,common-logging 使用slf4j+logback --> <dependency> <groupId>org.slf4j</groupId> <artifactId>slf4j-api</artifactId> <version>1.7.12</version> </dependency> <dependency> <groupId>ch.qos.logback</groupId> <artifactId>logback-core</artifactId> <version>1.1.2</version> </dependency> <!--实现slf4j接口并实现,直接通过slf4j来进行日志记录--> <dependency> <groupId>ch.qos.logback</groupId> <artifactId>logback-classic</artifactId> <version>1.1.2</version> </dependency> <!--数据库依赖--> <dependency> <groupId>mysql</groupId> <artifactId>mysql-connector-java</artifactId> <version>5.1.35</version> <scope>runtime</scope> </dependency> <!--数据库连接池--> <dependency> <groupId>c3p0</groupId> <artifactId>c3p0</artifactId> <version>0.9.1.2</version> </dependency> <!--dao层依赖:MyBatis--> <dependency> <groupId>org.mybatis</groupId> <artifactId>mybatis</artifactId> <version>3.3.0</version> </dependency> <!--mybatis自身实现的spring依赖--> <dependency> <groupId>org.mybatis</groupId> <artifactId>mybatis-spring</artifactId> <version>1.2.3</version> </dependency> <!--servlet web相关依赖--> <dependency> <groupId>taglibs</groupId> <artifactId>standard</artifactId> <version>1.1.2</version> </dependency> <dependency> <groupId>jstl</groupId> <artifactId>jstl</artifactId> <version>1.2</version> </dependency> <dependency> <groupId>com.fasterxml.jackson.core</groupId> <artifactId>jackson-databind</artifactId> <version>2.5.4</version> </dependency> <dependency> <groupId>javax.servlet</groupId> <artifactId>javax.servlet-api</artifactId> <version>3.1.0</version> </dependency> <!--end java web 相关依赖--> <!--spring 依赖--> <dependency> <groupId>org.springframework</groupId> <artifactId>spring-core</artifactId> <version>4.1.7.RELEASE</version> </dependency> <dependency> <groupId>org.springframework</groupId> <artifactId>spring-beans</artifactId> <version>4.1.7.RELEASE</version> </dependency> <dependency> <groupId>org.springframework</groupId> <artifactId>spring-context</artifactId> <version>4.1.7.RELEASE</version> </dependency> <!--spring dao层依赖 --> <dependency> <groupId>org.springframework</groupId> <artifactId>spring-jdbc</artifactId> <version>4.1.7.RELEASE</version> </dependency> <!--spring 声明式事务--> <dependency> <groupId>org.springframework</groupId> <artifactId>spring-tx</artifactId> <version>4.1.7.RELEASE</version> </dependency> <!--spring web 相关依赖 servlet容器加载spring ioc spring aop 启动spring 的工厂--> <dependency> <groupId>org.springframework</groupId> <artifactId>spring-web</artifactId> <version>4.1.7.RELEASE</version> </dependency> <dependency> <groupId>org.springframework</groupId> <artifactId>spring-webmvc</artifactId> <version>4.1.7.RELEASE</version> </dependency> <!--junit相关依赖--> <dependency> <groupId>org.springframework</groupId> <artifactId>spring-test</artifactId> <version>4.1.7.RELEASE</version> </dependency> </dependencies> <build> <finalName>seckill</finalName> </build> </project> 2.数据库设计与编码 数据库脚本如下所示: --数据库初始化脚本 --创建数据库 CREATE DATABASE seckill; --使用数据库 use seckill; --创建秒杀库存表 CREATE TABLE seckill( `seckill_id` bigint not null AUTO_INCREMENT COMMENT '商品库存id', `name` VARCHAR (120) not null COMMENT '商品名称', `stock` int not null COMMENT '库存数量', `start_time` TIMESTAMP NOT NULL COMMENT '秒杀开始时间', `end_time` TIMESTAMP NOT NULL COMMENT '秒杀结束时间', `create_time` TIMESTAMP NOT NULL DEFAULT CURRENT_TIMESTAMP COMMENT '创建时间', PRIMARY KEY (seckill_id), key idx_start_time(start_time), key idx_end_time(end_time), key idx_create_time(create_time) ) ENGINE=InnoDB AUTO_INCREMENT=1000 DEFAULT CHARSET=utf8 COMMENT='秒杀库存表'; --初始化数据 INSERT INTO seckill(name,stock,start_time,end_time) VALUES ('1000元秒杀iphone x','100','2018-05-04 00:00:00','2018-05-05 00:00:00'), ('500元秒杀ipad x','200','2018-05-04 00:00:00','2018-05-05 00:00:00'), ('300元秒杀小米4','300','2018-05-04 00:00:00','2018-05-05 00:00:00'), ('200元秒杀小米note','400','2018-05-04 00:00:00','2018-05-05 00:00:00'); --秒杀成功明细表 CREATE TABLE success_killed( `seckill_id` bigint NOT NULL COMMENT '秒杀商品id', `user_phone` VARCHAR(11) NOT NULL COMMENT '用户手机号', `state` tinyint NOT NULL DEFAULT -1 COMMENT '状态标志:-1:无效 0:成功 1:已付款', `create_time` TIMESTAMP NOT NULL COMMENT '创建时间', PRIMARY KEY (seckill_id,user_phone),/*联合主键*/ key idx_create_time(create_time) ) ENGINE=InnoDB AUTO_INCREMENT=1000 DEFAULT CHARSET=utf8 COMMENT='秒杀成功明细表'; --连接数据库的控制台 mysql -u root -p 3.DAO层实体与接口编码 数据库与实体类映射 3.1MyBatis 实现DAO接口的方式 Mapper自动实现DAO接口 sql直接编写,注解sql(sql更改,原代码需要重新编译),xml方式,单独更新sql,源文件不需要重新编译。 API 编程方式自动实现DAO 接口 3.2 基于mybatis实现DAO接口-1 全局mybatis-conf.xml <?xml version="1.0" encoding="UTF-8"?> <!DOCTYPE configuration PUBLIC "-//mybatis.org//DTD Config 3.0//EN" "http://mybatis.org/dtd/mybatis-3-config.dtd"> <!--配置全局属性--> <configuration> <settings> <!-- changes from the defaults for testing --> <setting name="cacheEnabled" value="false" /> <!--使用jdbc 的getGeneratedKeys 获取数据库自增主键值--> <setting name="useGeneratedKeys" value="true" /> <!--使用列别名 替换列名 默认true 复制到对应的entity属性中 select name as tile from table --> <setting name="useColumnLable" value="true"/> <!--开启驼峰命名转化--> <setting name="mapUnderscoreCameCase" value="true"/> <!--REUSE 执行器会重用预处理语句--> <setting name="defaultExecutorType" value="REUSE" /> </settings> </configuration> SecKillDao.xml编写 <?xml version="1.0" encoding="UTF-8" ?> <!DOCTYPE mapper PUBLIC "-//mybatis.org//DTD Mapper 3.0//EN" "http://mybatis.org/dtd/mybatis-3-mapper.dtd"> <mapper namespace="org.seckill.dao.SecKillDao"> <!--目的:为DAO方法提供SQL语句配置 parameter-type不用给 #与$的区别 预编译 1.#{} 解析为一个 JDBC 预编译语句(prepared statement)的参数标记符。 会被解析为 ?占位符 动态SQL-会对SQL进行动态解析,解析为一个BoundSql对象 变量替换 2.${} 仅仅为一个纯粹的 string 替换,在动态 SQL 解析阶段将会进行变量替换 3.#{}的变量的替换是在 DBMS 中。 4.${} 在预编译之前已经被变量替换了,这会存在 sql 注入问题 5.表名是不能带''号的,所以使用${} 防止出现变量替换后表名带'' --> <update id="reduceStock"> <!--具体sql--> UPDATE seckill SET stock = stock - 1 WHERE seckill_id = #{secKillId} AND start_time <![CDATA[<=]]> #{killTime} AND end_time >= #{killTime} and stock > 0 </update> <select id="queryById" resultType="SecKill" parameterType="long"> SELECT seckill_id as seckillId,name,stock,start_time,end_time,create_time from seckill where seckill_id = #{secKillId} </select> <select id="queryAll" resultType="SecKill" parameterType="int"> SELECT seckill_id as seckillId,name,stock,start_time,end_time,create_time from seckill order by create_time desc limit #{offset},${limit} </select> </mapper> SuccessKilledDao.xml 编写 <?xml version="1.0" encoding="UTF-8" ?> <!DOCTYPE mapper PUBLIC "-//mybatis.org//DTD Mapper 3.0//EN" "http://mybatis.org/dtd/mybatis-3-mapper.dtd"> <mapper namespace="org.seckill.dao.SuccessKilledDao"> <insert id="insertSuccessKilled" > <!--如果出现重复,主键冲突,直接产生一个错误--> INSERT ignore INTO success_killed(seckill_id,user_phone) VALUES (#{secKillId},#{userPhone}) </insert> <select id="queryByIdWithSecKill" resultType="SuccessKilled" > <!--根据id查询SuccessKilled并携带SecKill实体--> <!--如何告诉mybatis 把结果映射到SuccessKilled的同时映射secKill 属性--> <!--可以自由控制SQL 优化等--> SELECT sk.seckill_id, sk.user_phone, sk.create_time, sk.state, sc.seckill_id as "secKill.seckill_id", sc.name as "secKill.name", sc.stock as "secKill.stock", sc.start_time as "secKill.start_time", sc.end_time as "sceKill.end_time", sc.create_time as "secKill.create_time" FROM success_killed sk INNER JOIN seckill sc on sk.seckill_id = sc.seckill_id WHERE sk.seckill_id = #{secKillId} </select> </mapper> entity实体层实现-SecKill、SuccessKilled package org.seckill.domain; import java.util.Date; /** * 秒杀-库存表 entity */ public class SecKill { private long seckillId; //秒杀-商品id private String name; //秒杀-商品名字 private int stock; //秒杀-商品库存 private Date startTime; //秒杀-开始时间 private Date endTime; //秒杀-结束时间 private Date createTime; //秒杀-商品新建时间 public long getSeckillId() { return seckillId; } public void setSeckillId(long seckillId) { this.seckillId = seckillId; } public String getName() { return name; } public void setName(String name) { this.name = name; } public int getStock() { return stock; } public void setStock(int stock) { this.stock = stock; } public Date getStartTime() { return startTime; } public void setStartTime(Date startTime) { this.startTime = startTime; } public Date getEndTime() { return endTime; } public void setEndTime(Date endTime) { this.endTime = endTime; } public Date getCreateTime() { return createTime; } public void setCreateTime(Date createTime) { this.createTime = createTime; } @Override public String toString() { return "SecKill{" + "seckillId=" + seckillId + ", name='" + name + '\'' + ", stock=" + stock + ", startTime=" + startTime + ", endTime=" + endTime + ", createTime=" + createTime + '}'; } } package org.seckill.domain; import java.util.Date; /** * 成功秒杀明细表-SuccessKilled */ public class SuccessKilled { private long secKillId; //秒杀-成功的商品id private String userPhone; //秒杀-成功的用户手机号 private short state; //秒杀-明细状态 private Date createTime; //秒杀-秒杀成功的时间 //one(被秒杀商品)-to-many(秒杀记录) private SecKill secKill; public long getSecKillId() { return secKillId; } public void setSecKillId(long secKillId) { this.secKillId = secKillId; } public String getUserPhone() { return userPhone; } public void setUserPhone(String userPhone) { this.userPhone = userPhone; } public short getState() { return state; } public void setState(short state) { this.state = state; } public Date getCreateTime() { return createTime; } public void setCreateTime(Date createTime) { this.createTime = createTime; } public SecKill getSecKill() { return secKill; } public void setSecKill(SecKill secKill) { this.secKill = secKill; } @Override public String toString() { return "SuccessKilled{" + "secKillId=" + secKillId + ", userPhone='" + userPhone + '\'' + ", state=" + state + ", createTime=" + createTime + '}'; } } DAO层接口功能声明-SecKillDao、SuccessKilledDao package org.seckill.dao; import org.seckill.domain.SecKill; import java.util.Date; import java.util.List; /** * 常用的操作 */ public interface SecKillDao { /** * 功能:减库存 * @param secKillId * @param killTime create_time? * @return 如果影响行数>1,表示更新的记录行数 */ int reduceStock(long secKillId,Date killTime); /** * 根据秒杀商品id查询秒杀商品详情 * @param secKillId * @return */ SecKill queryById(long secKillId); /** * 根据偏移量查询秒杀商品列表, * @param offset * @param limit * @return */ List<SecKill> queryAll(int offset,int limit); } package org.seckill.dao; import org.seckill.domain.SuccessKilled; public interface SuccessKilledDao { /** * 功能:新增用户秒杀明细 * @param secKillId * @param userPhone * @return 插入的行数,禁止插入表示插入失败 则返回0 */ int insertSuccessKilled(long secKillId,long userPhone); /** * 功能:根据明细id查询具体的秒杀明细并携带秒杀商品对象 * @param secKillId * @return */ SuccessKilled queryByIdWithSecKill(long secKillId); } MyBatis整合Spring 整合的目标: 更少的编码 更少的配置 足够的灵活性1.mybatis优点 更少的编码、只写接口、不写实现 2.DAO层接口声明能显示说明很多事情 轻量级显式接口声明 更少的配置-别名 image.png 使用spring 提供的package-scan 扫描实体包下的所有实体类。可以简写resultType 更少的配置-配置扫描 单独使用mybatis的场景下,配置文件扫描方式 <mapper resource="mapper/SecKillDao.xml">.... 使用spring 整合 mybatis 自动扫描配置文件,采用通配符的方式。 自动实现DAO接口,DAO接口的实现类是自动注入至Spring 容器 足够的灵活性 image.png 5.DAO层接口设计与SQL编写的反思 DAO - data access object 数据访问层的简称 这一层我们主要做的是核心数据操作的接口声明,以及SQL编写,并没有涉及到Service 业务逻辑层代码的编写。这样做的好处是什么呢? 主要有以下三点 代码分层,DAO层只关注于核心数据操作的接口声明&SQL编写 代码和SQL的分离,方便代码review 业务逻辑层主要做事务控制、事务中完成DAO层的代码组合与拼接。每一层都可以做单元测试。 接下来详解mybatis 与 spring 整合编码的过程

优秀的个人博客,低调大师

Java高并发秒杀Api-业务分析与DAO层构建3

章节目录 mybatis与spring整合过程 spring-dao.xml 配置 junit4 单元测试 1.mybatis与spring整合过程 1.1 spring-dao.xml 配置 <?xml version="1.0" encoding="UTF-8"?> <beans xmlns="http://www.springframework.org/schema/beans" xmlns:xsi="http://www.w3.org/2001/XMLSchema-instance" xmlns:context="http://www.springframework.org/schema/context" xsi:schemaLocation="http://www.springframework.org/schema/beans http://www.springframework.org/schema/beans/spring-beans.xsd http://www.springframework.org/schema/context http://www.springframework.org/schema/context/spring-context.xsd"> <!--配置整合mybatis--> <!--1:配置数据库相关参数--> <!-- 1:配置数据库相关参数properties的属性:${url} --> <context:property-placeholder location="classpath:jdbc.properties"/> <!--2.数据库连接池配置--> <bean id="dataSource" class="com.mchange.v2.c3p0.ComboPooledDataSource"> <!-- 配置连接池属性--> <property name="driverClass" value="${driver}" /> <property name="jdbcUrl" value="${url}" /> <property name="user" value="${username}" /> <property name="password" value="${password}" /> <!-- c3p0连接池的私有属性--> <property name="maxPoolSize" value="30" /> <property name="minPoolSize" value="10" /> <!-- 关闭连接后不自动commit--> <property name="autoCommitOnClose" value="false" /> <!-- 获取连接超时时间 30个连接用完--> <property name="checkoutTimeout" value="1000" /> <!-- 当获取连接失败重试次数--> <property name="acquireRetryAttempts" value="2" /> </bean> <!-- 约定大于配置--> <!-- 3:配置SqlSessionFactory对象--> <bean id="sqlSessionFactory" class="org.mybatis.spring.SqlSessionFactoryBean"> <!-- 注入数据库连接池--> <property name="dataSource" ref="dataSource" /> <!-- 配置MyBatis全局配置文件:mybatis-config.xml--> <property name="configLocation" value="classpath:mybatis-config.xml" /> <!-- 扫描entity包 使用别名--> <property name="typeAliasesPackage" value="org.seckill.domain" /> <!-- 扫描sql配置文件;mapper需要的xml文件--> <property name="mapperLocations" value="classpath:mapper/*.xml" /> </bean> <!--配置扫描Dao接口包,动态实现Dao接口 mapper 代理,并注入到Spring容器中 MapperScannerConfigurer--> <bean class="org.mybatis.spring.mapper.MapperScannerConfigurer"> <!--注入sqlSessionFactory,懒加载,用到的时候才加载--> <property name="sqlSessionFactoryBeanName" value="sqlSessionFactory"></property> <!--给出扫描DAO接口包--> <property name="basePackage" value="org.seckill.dao"></property> </bean> </beans> 2.junit 单元测试 SecKillDaoTest.java - 测试秒杀 package org.seckill.dao; import org.junit.Test; import org.junit.runner.RunWith; import org.seckill.domain.SecKill; import org.springframework.beans.factory.annotation.Autowired; import org.springframework.test.context.ContextConfiguration; import org.springframework.test.context.junit4.SpringJUnit4ClassRunner; import java.util.Date; import java.util.List; /** * 配置spring 与 junit 启动时加载Spring IOC容器 * spring-test,junit整合 * 告诉junit Spring配置文件位置 */ @RunWith(SpringJUnit4ClassRunner.class) @ContextConfiguration({"classpath:spring/spring-dao.xml"}) public class SecKillDaoTest { //注入Dao类实现 @Autowired private SecKillDao secKillDao; @Test public void queryById() throws Exception { long id = 1000; SecKill secKill = secKillDao.queryById(id); System.out.println(secKill.getName()); System.out.println(secKill); /** * 1000元秒杀iphone x SecKill{seckillId=1000, name='1000元秒杀iphone x', stock=100, startTime=Fri May 04 00:00:00 CST 2018, endTime=Sat May 05 00:00:00 CST 2018, createTime=Sat May 05 00:05:03 CST 2018 } */ } /** * @throws Exception */ @Test public void queryAll() throws Exception { // queryAll(offset,limit)->queryAll(arg0,arg1) List<SecKill> secKillList = secKillDao.queryAll(0, 100); for (SecKill secKill : secKillList) { System.out.println(secKill); } /** * SecKill{seckillId=1000, name='1000元秒杀iphone x', stock=100, startTime=Fri May 04 00:00:00 CST 2018, endTime=Sat May 05 00:00:00 CST 2018, createTime=Sat May 05 00:05:03 CST 2018} SecKill{seckillId=1001, name='500元秒杀ipad x', stock=200, startTime=Fri May 04 00:00:00 CST 2018, endTime=Sat May 05 00:00:00 CST 2018, createTime=Sat May 05 00:05:03 CST 2018} SecKill{seckillId=1002, name='300元秒杀小米4', stock=300, startTime=Fri May 04 00:00:00 CST 2018, endTime=Sat May 05 00:00:00 CST 2018, createTime=Sat May 05 00:05:03 CST 2018} SecKill{seckillId=1003, name='200元秒杀小米note', stock=400, startTime=Fri May 04 00:00:00 CST 2018, endTime=Sat May 05 00:00:00 CST 2018, createTime=Sat May 05 00:05:03 CST 2018} */ } @Test public void reduceStock() throws Exception { Date killTime = new Date(); int updateCount = secKillDao.reduceStock(1000L, killTime); System.out.println(updateCount); } } 测试秒杀明细 package org.seckill.dao; import org.junit.Test; import org.junit.runner.RunWith; import org.seckill.domain.SuccessKilled; import org.springframework.beans.factory.annotation.Autowired; import org.springframework.test.context.ContextConfiguration; import org.springframework.test.context.junit4.SpringJUnit4ClassRunner; @RunWith(SpringJUnit4ClassRunner.class) @ContextConfiguration("classpath:spring/spring-dao.xml") public class SuccessKilledDaoTest { @Autowired private SuccessKilledDao successKilledDao; @Test public void insertSuccessKilled() throws Exception { int successCount = successKilledDao.insertSuccessKilled(1001L, "15300815999"); System.out.println("insertCount=" + successCount); } @Test public void queryByIdWithSecKill() throws Exception { //1个用户只能查询到属于自己的一个秒杀明细 long id = 1001L; String phone = "15300815999"; SuccessKilled successKilled = successKilledDao.queryByIdWithSecKill(id, phone); System.out.println(successKilled); } } 接下来是service 层的构建

优秀的个人博客,低调大师

Java高并发秒杀Api-业务分析与DAO层构建1

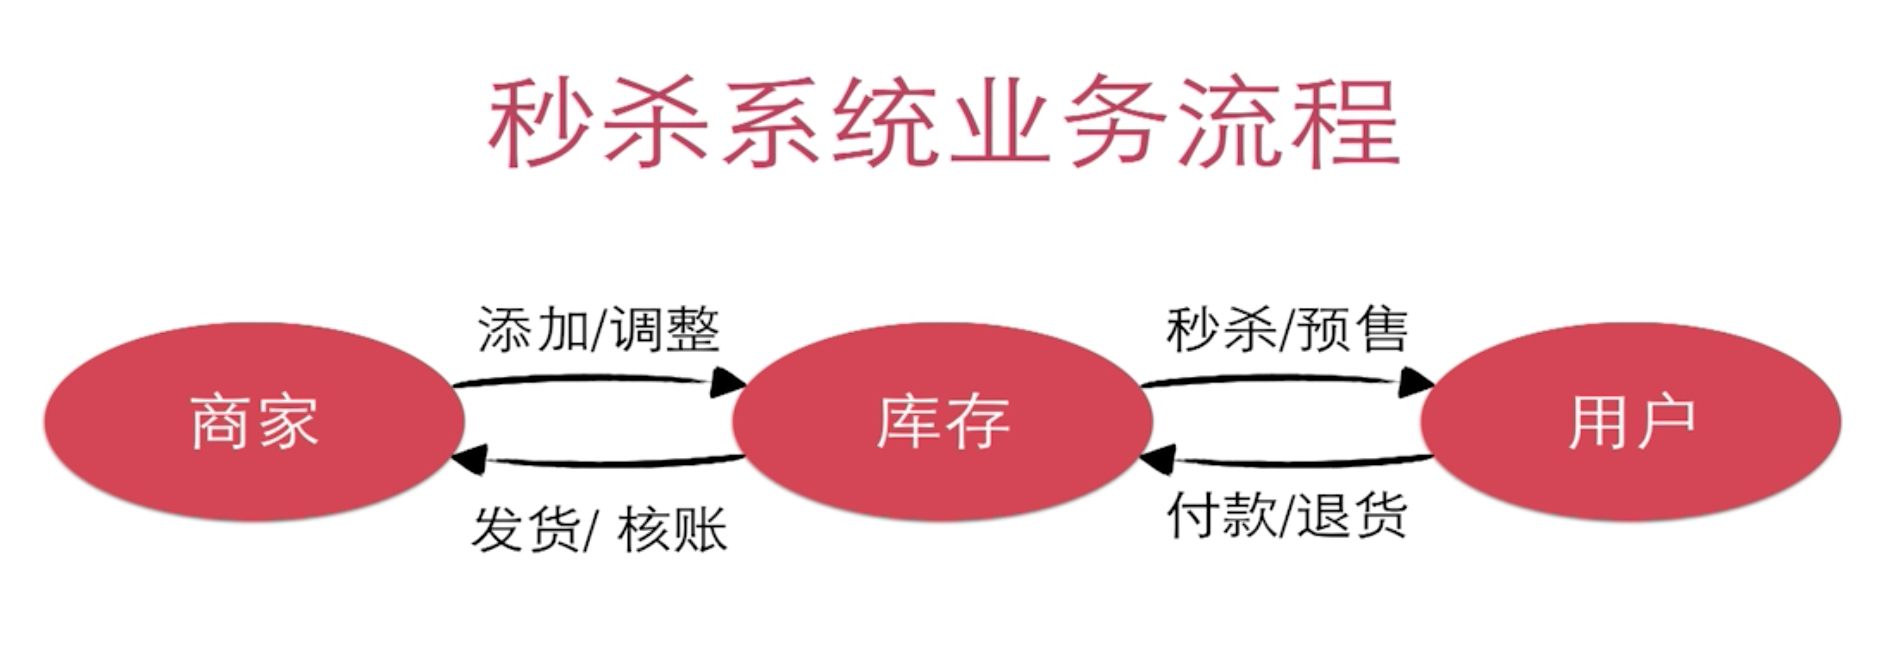
章节目录 1.为什么使用Spring+Spring MVC+Mybatis 2.秒杀业务特性 3.秒杀分析过程、优化思路 4.相关技术介绍 5.基于Maven创建项目 6.秒杀业务分析 7.秒杀事务的难点分析 8.实现秒杀的哪些功能 1.为什么使用Spring+Spring MVC+Mybatis 框架易于使用、轻量级 对业务代码侵入性低 成熟的社区与资料 2.秒杀业务特性 秒杀业务场景具有典型的"事务"特性 秒杀、红包类需求越来越常见,对竞争资源的访问 面试常问的问题 3.相关技术介绍 MySQL 表设计 SQL技巧 事务、行级锁 MyBatis DAO层设计与开发 MyBatis 合理使用 MyBatis 与 Spring整合 Spring Spring Ioc 整合Service Spring 声明式事务使用 Spring MVC Restful 接口设计与使用 框架运作流程 Controller 设计技巧 前端 交互设计 BootStrap Jquery 高并发 高并发点和高并发分析 优化思路并实现 4.基于Maven创建项目 1.maven命令创建web项目骨架 mvn archetype:generate -DgroupId=org.seckill -DartifactId=seckill - DarchetypeArtifactId=maven-archetype-webapp 5.秒杀业务分析 如下图所示: 秒杀业务系统流程分析 所以秒杀业务的核心是对库存的处理。 用户针对库存处理的业务分析用户的秒杀过程 需要减库存->记录购买明细->组成完整事务->数据持久化 如下图所示: 用户秒杀过程 用户购买行为 记录谁购买成功了->成功的时间及有效期->付款、发货信息 为什么需要事务 事务不完整导致的数据一致性问题 如上图所示 1.减了库存,但是没有用户的购买明细,那么就会出现50个商品,但是购买明 细小于50个,到时候发货会发现有些许商品滞留在仓库中,此种情况属于少卖 的情况。 2.记录了明细但是没有减库存,就会发现订单量比商品量要多,出现超卖的情 况,还有一种情况也会导致超卖,多个用户并发修改库存,加入库存量为1,这 个时候多个用户同时去减库存(经过库存量>0的验证),会导致库存为负数, 多个用户抢到同一个商品,这种情况下也会导致超卖发生。 数据落地方案 MySQL VS NoSQL NoSQL非关系型数据库在事务的支持上并没有关系型数据库可靠。 所以归根结底事务机制依然是目前最可靠的落地方案。 6.秒杀事务难点分析 6.1 难点问题-竞争 竞争问题-并发冲突修改 解决方案是采用数据库innodb引擎提供的 事务及 行级锁。 用户减库存的事务流程: begin; update 库存数量; insert 购买明细; commit; 行级锁 如下如所示: 行级锁 情景分析: 在事务执行过程中,mysql默认的repeateable read 隔离级别会在写操作发生的 行上加上行级锁(非记录加锁,而是在对应索引上加锁,上图中的update加锁 发生在id上),多个写请求并发更新同一行记录会产生如下问题: 因为行级锁在事务结束之后才能释放锁,可能会导致锁等待的发生。数据库吞吐率(事务处理能力)会降低。 所以秒杀的难点是什么?秒杀的难点是如何高效的处理竞争-如何在保证数据一致性的情况下高效的处理竞争 8.实现秒杀的哪些功能 1.秒杀接口暴露 浏览器插件获取秒杀接口,通过脚本去秒杀,保护秒杀接口的一种手段。 2.执行秒杀的操作 执行秒杀的业务逻辑 3.秒杀查询,商品详情页查询。 其实市面上最主要的几个秒杀思路是: 1.直接在数据库层面做秒杀 2.缓存中存储库存,用户秒杀请求是将缓存中库存与数据库中库存数据同时进行减库存的过程,保证数据一致性是一个难点。 3.缓存中存储有效的减库存操作,队列减库存的的请求依次顺序执行数据库减库存、生成订单明细事务(操作),如小米。

优秀的个人博客,低调大师

智能视觉人流量统计API-多人客流监测分析-全域人数统计接口功能介绍

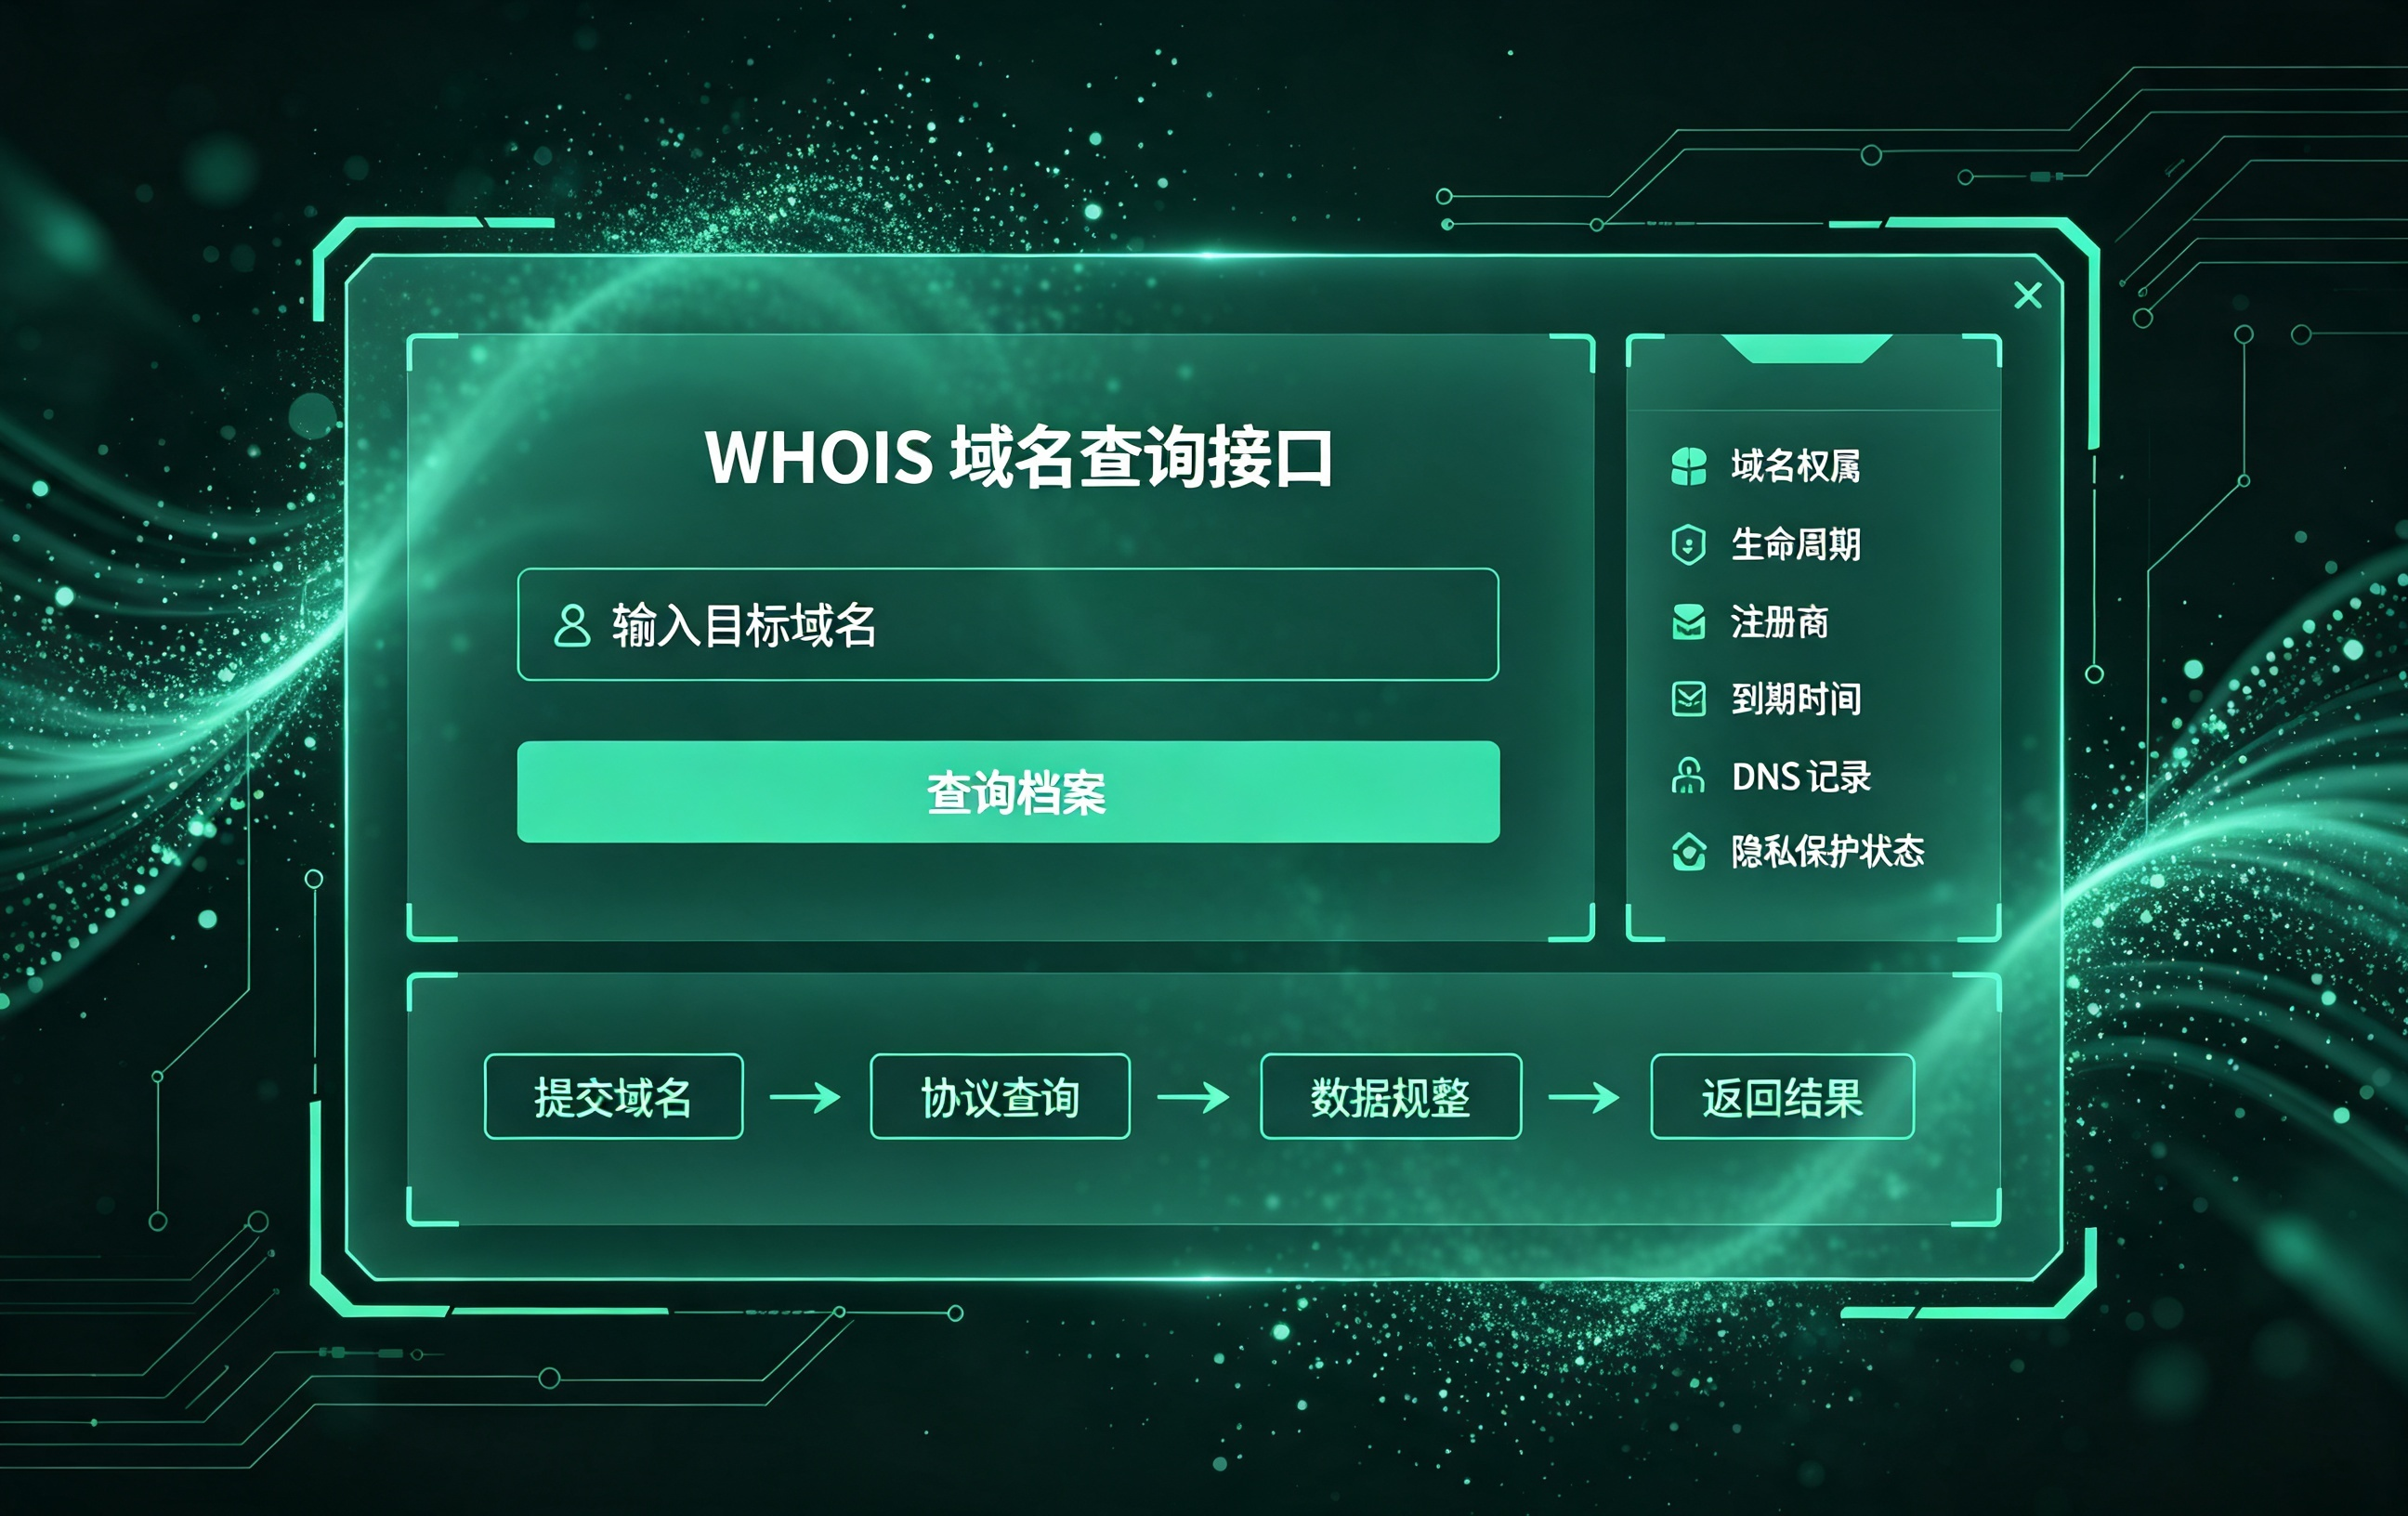
依托高精度人体视觉识别技术,可对监控画面进行实时人体检测与精准人流量统计,支持多人重叠、人体遮挡、高低俯拍、多角度人脸、大幅动作等复杂实景场景。系统可实时输出画面内人体数量、人员坐标位置等数据,有效解决传统人流量统计漏检、误检、抗干扰差的问题,具备强适配性与高稳定性,可全天候自动完成人员进出、区域驻留人数统计,为各场景客流监管、数据分析、智能运维提供精准的数据支撑。

资源下载

更多资源
腾讯云软件源

腾讯云软件源

为解决软件依赖安装时官方源访问速度慢的问题,腾讯云为一些软件搭建了缓存服务。您可以通过使用腾讯云软件源站来提升依赖包的安装速度。为了方便用户自由搭建服务架构,目前腾讯云软件源站支持公网访问和内网访问。

Spring

Spring

Spring框架(Spring Framework)是由Rod Johnson于2002年提出的开源Java企业级应用框架,旨在通过使用JavaBean替代传统EJB实现方式降低企业级编程开发的复杂性。该框架基于简单性、可测试性和松耦合性设计理念,提供核心容器、应用上下文、数据访问集成等模块,支持整合Hibernate、Struts等第三方框架,其适用范围不仅限于服务器端开发,绝大多数Java应用均可从中受益。

Rocky Linux

Rocky Linux

Rocky Linux(中文名:洛基)是由Gregory Kurtzer于2020年12月发起的企业级Linux发行版,作为CentOS稳定版停止维护后与RHEL(Red Hat Enterprise Linux)完全兼容的开源替代方案,由社区拥有并管理,支持x86_64、aarch64等架构。其通过重新编译RHEL源代码提供长期稳定性,采用模块化包装和SELinux安全架构,默认包含GNOME桌面环境及XFS文件系统,支持十年生命周期更新。

WebStorm

WebStorm

WebStorm 是jetbrains公司旗下一款JavaScript 开发工具。目前已经被广大中国JS开发者誉为“Web前端开发神器”、“最强大的HTML5编辑器”、“最智能的JavaScript IDE”等。与IntelliJ IDEA同源,继承了IntelliJ IDEA强大的JS部分的功能。

用户登录
用户注册