Android Studio 第四十九期 - Sqlite数据库四种写法
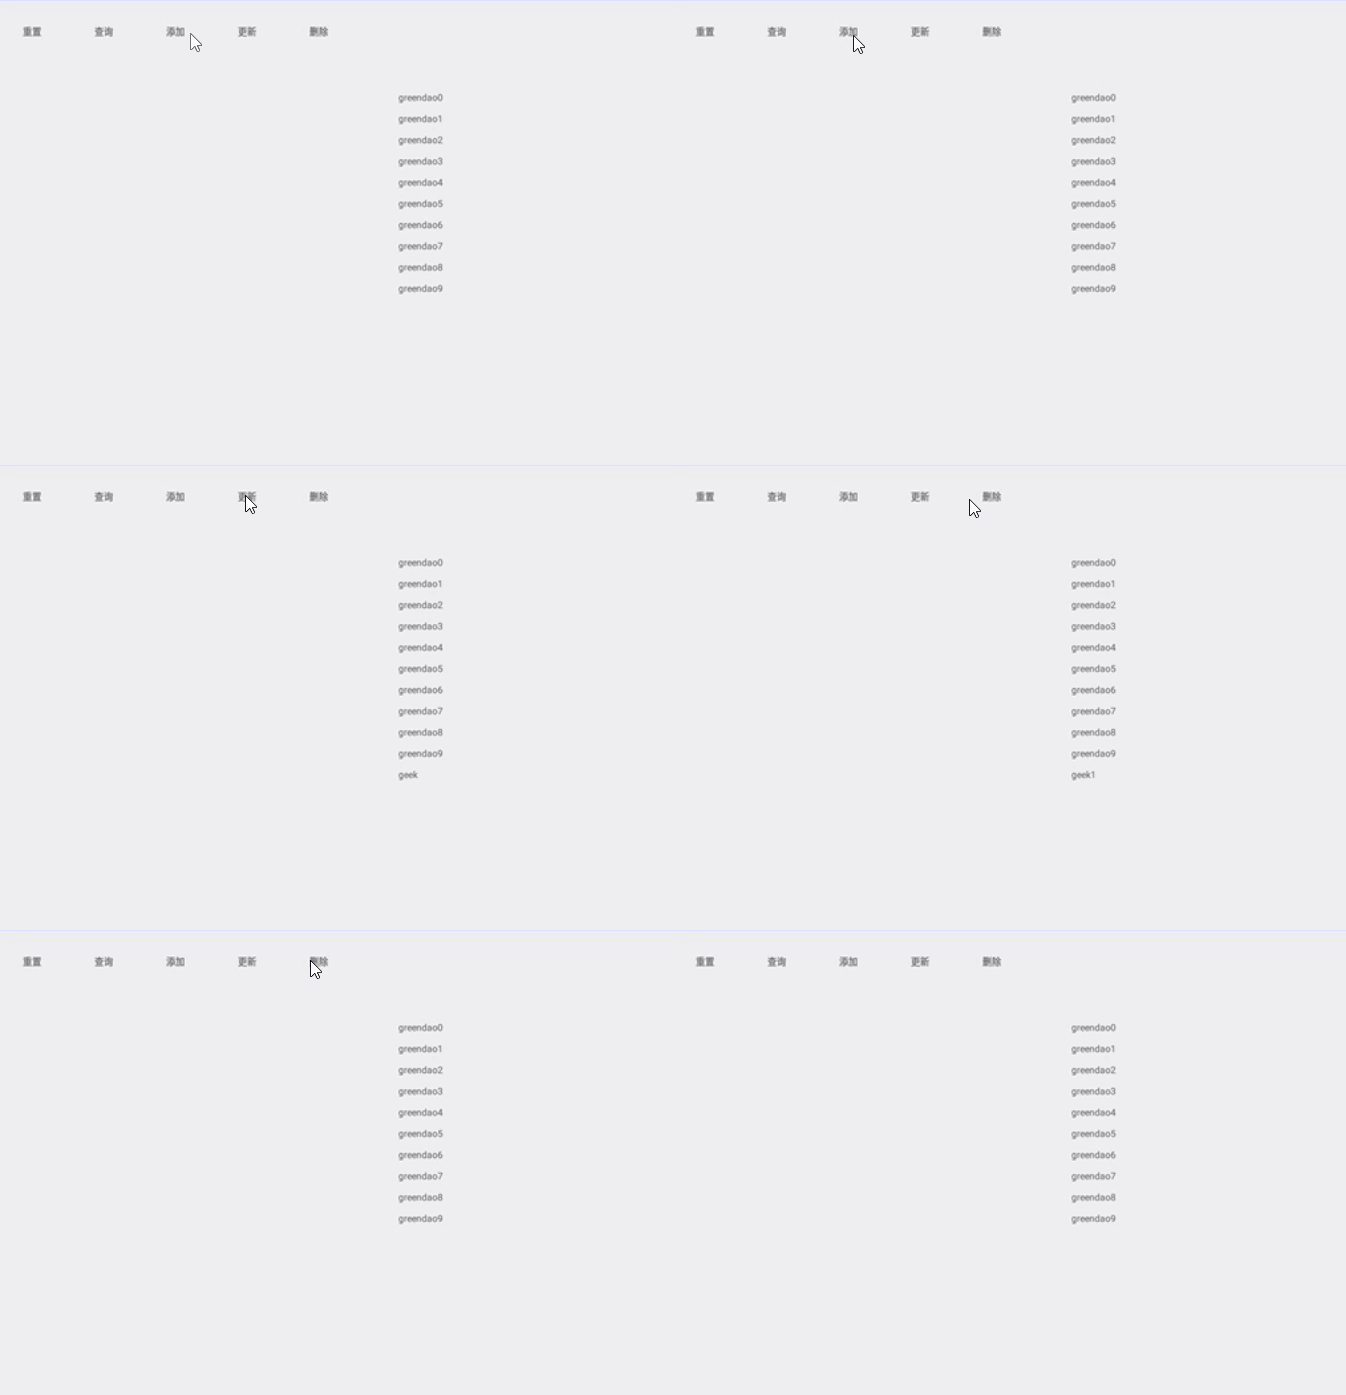
最近在看撸撸代码,他自己创了一种,网上有三种,分别是OpenDroid,greenDao,sugar,Sqlite原生写法,感觉都差不多,个人使用最优的是greenDao,下面开始介绍: 1.OpenDroid:优点是简单易懂,缺点是没有联合查询,DeleteAll细节操作: assets: 1 2 3 4 5 6 7 8 9 10 11 12 <?xmlversion= "1.0" encoding= "utf-8" ?> <open-droid> <namevalue= "Demo1" /> <versionvalue= "1" /> <mapping class = "com.example.p033_sqlite.domain.DemoUseBean" /> <!--<mapping class = "com.example.p033_sqlite.domain.DemoYuanBean" />--> <mapping class = "com.example.p033_sqlite.domain.Demo2Bean" /> <namevalue= "Demo2" /> <versionvalue= "1" /> <mapping class = "com.example.p033_sqlite.domain.DemoYuanBean" /> </open-droid> DemoApplication: 1 2 3 4 5 6 7 8 9 10 11 12 13 14 15 16 17 18 19 20 21 22 23 24 25 26 27 28 29 30 31 32 33 34 35 package com.example.p033_sqlite.applications; import android.app.Application; import android.content.Context; import com.example.opendroidlibrary.db.OpenDroidUtil; import com.example.opendroidyuanlibrary.db.OpenDroidYuanUtil; /** *Createdbyshiningon2016/11/100010. */ public class DemoApplication extends Application{ private static final StringTAG= "SFNationApplication" ; private static DemoApplicationsInstance= null ; public static ContextmContext; public static DemoApplicationget(){ if (sInstance== null ){ sInstance= new DemoApplication(); } return sInstance; } @Override public void onCreate(){ super .onCreate(); sInstance= this ; mContext=getApplicationContext(); OpenDroidUtil.setup(mContext); OpenDroidYuanUtil.setup(mContext); } } DemoUseBean: 1 2 3 4 5 6 7 8 9 10 11 12 13 14 15 16 17 18 19 20 21 22 23 24 25 26 27 28 29 30 31 32 33 34 35 36 package com.example.p033_sqlite.domain; import com.example.opendroidlibrary.db.OpenDroid; /** *Createdbygeekon2016/2/25. */ public class DemoUseBean extends OpenDroid{ private int text_id; private Stringtext_content; public DemoUseBean(){ } public DemoUseBean( int text_id,Stringtext_content){ this .text_id=text_id; this .text_content=text_content; } public int getText_id(){ return text_id; } public void setText_id( int text_id){ this .text_id=text_id; } public StringgetText_content(){ return text_content; } public void setText_content(Stringtext_content){ this .text_content=text_content; } } MainActivityUse: 1 2 3 4 5 6 7 8 9 10 11 12 13 14 15 16 17 18 19 20 21 22 23 24 25 26 27 28 29 30 31 32 33 34 35 36 37 38 39 40 41 42 43 44 45 46 47 48 49 50 51 52 53 54 55 56 57 58 59 60 61 62 63 64 65 66 67 68 69 70 71 72 73 74 75 76 77 78 79 80 81 82 83 84 85 86 87 88 89 90 91 92 93 94 95 96 97 98 99 100 101 102 103 104 105 106 107 108 109 110 111 112 113 114 115 116 117 118 119 120 121 122 123 124 125 126 127 128 129 130 131 132 133 134 135 136 137 138 139 140 141 142 143 144 145 146 147 148 149 150 151 152 153 154 155 156 157 158 159 160 161 162 163 164 165 166 167 168 169 170 171 172 173 174 175 176 177 178 179 180 181 182 183 184 185 186 187 188 189 190 191 package com.example.p033_sqlite.activity; import android.content.ContentValues; import android.os.Bundle; import android.support.v7.app.AppCompatActivity; import android.view.View; import android.widget.TextView; import com.example.opendroidlibrary.db.OpenDroid; import com.example.p033_sqlite.R; import com.example.p033_sqlite.domain.DemoUseBean; import java.util.List; public class MainActivityUse extends AppCompatActivity implements View.OnClickListener{ private TextViewtv1; private TextViewtv00; private TextViewtv0; private TextViewtv2; private TextViewtv3; private TextViewtv4; @Override protected void onCreate(BundlesavedInstanceState){ super .onCreate(savedInstanceState); setContentView(R.layout.activity_mainuser); tv1=(TextView)findViewById(R.id.tv1); tv00=(TextView)findViewById(R.id.tv00); tv0=(TextView)findViewById(R.id.tv0); tv2=(TextView)findViewById(R.id.tv2); tv3=(TextView)findViewById(R.id.tv3); tv4=(TextView)findViewById(R.id.tv4); tv00.setOnClickListener( this ); tv0.setOnClickListener( this ); tv2.setOnClickListener( this ); tv3.setOnClickListener( this ); tv4.setOnClickListener( this ); } private void get_data(){ Stringa= "" ; List<DemoUseBean>result1=OpenDroid.query.find(DemoUseBean. class ); for (DemoUseBeanres:result1){ System.out.println(res.getText_content()); a=a+res.getText_content()+ "\n\n" ; } tv1.setText(a); } @Override public void onClick(Viewv){ switch (v.getId()){ case R.id.tv00: delete_all_data(); for ( int i= 0 ;i< 10 ;i++){ DemoUseBeanstu= new DemoUseBean(); stu.setText_id(i); stu.setText_content( "opendroid" +i); stu.save(); } get_data(); break ; case R.id.tv0: select_data1(); get_data(); break ; case R.id.tv2: insert_data(); get_data(); break ; case R.id.tv3: update_data(); //update_data_contentvalue(); get_data(); break ; case R.id.tv4: //delete_data(); delete_which_data(); get_data(); break ; default : break ; } } private void update_data_contentvalue(){ /** *step6:使用ContentValues更新 */ ContentValuescv= new ContentValues(); cv.put( "9" , "geekcontentvalue" ); OpenDroid.update(DemoUseBean. class ,cv, "_id=?" , "9" ); DemoUseBeanresult=OpenDroid.query.find(DemoUseBean. class , 9 ); //System.out.println(result.getText_content()); } private void insert_data(){ /** *step1:插入一条数据,查询一条数据 */ DemoUseBeanstu= new DemoUseBean(); stu.setText_content( "geek100" ); stu.setText_id( 100 ); stu.save(); List<DemoUseBean>result=OpenDroid.query.where( "text_id=?" , "100" ).limit( 1 ).find(DemoUseBean. class ); System.out.println(); //result.getText_content() } private void update_data(){ /** *step5:更新数据 */ DemoUseBeanstu= new DemoUseBean(); stu.setText_content( "geek9" ); stu.setText_id( 9 ); stu.update( "text_id=?" , "9" ); List<DemoUseBean>result=OpenDroid.query.find(DemoUseBean. class ); for (DemoUseBeanres:result){ System.out.println(res.getText_content()); } } private void select_data1(){ /** *step2:查询所有记录 */ List<DemoUseBean>result=OpenDroid.query.find(DemoUseBean. class ); for (DemoUseBeanres:result){ System.out.println(res.getText_content()); } } private void select_datas(){ /** *step3:查询多条记录 */ List<DemoUseBean>result=OpenDroid.query.find(DemoUseBean. class , 1 , 5 , 10 ); for (DemoUseBeanres:result){ System.out.println(res.getId()+ ":" +res.getText_content()); } } private void select_which_data(){ /** *step4:条件查询 */ List<DemoUseBean>result=OpenDroid.query.columns( "stuName" , "stuAge" ) .where( "_id>?" , "5" ).order( "_idDESC" ).limit( 3 ) .find(DemoUseBean. class ); for (DemoUseBeanres:result){ System.out.println(res.getText_content()+ ":" +res.getText_id()); } } private void delete_data(){ /** *step7:特定删除 */ int length=OpenDroid.delete(DemoUseBean. class , 9 ); //intlength=OpenDroid.delete(DemoUseBean.class,1,2,3); System.out.println(length); } private void delete_which_data(){ /** *step8:使用条件删除 */ int length=OpenDroid.delete(DemoUseBean. class , "text_id=?" , "9" ); //intlength=OpenDroid.delete(DemoUseBean.class,"_id>?","2"); System.out.println(length); } private void delete_all_data(){ /** *step8:使用条件删除 */ int length=OpenDroid.delete(DemoUseBean. class , "_id>?" , "-1" ); System.out.println(length); } } 总结:这种方式用起来还是很舒服的,源码后面会给出来,你可以外连library,也可以打成aar,都行。 2.greenDao:优点网上大部分都使用,很叼,缺点是每次改变字段,都需要重新自动生成新的greenDao麻蛋真是费劲~ DemoApplication: 1 2 3 4 5 6 7 8 9 10 11 12 13 14 15 16 17 18 19 20 21 22 23 24 25 26 27 28 29 30 31 32 33 34 35 36 37 38 39 40 41 42 43 44 45 46 47 48 49 50 51 52 53 54 55 56 57 58 59 60 61 62 63 64 65 66 67 68 69 70 71 72 package com.example.p034_greendao_sqlite.application; import android.app.Application; import android.content.Context; import android.database.sqlite.SQLiteDatabase; import com.example.p034_greendao_sqlite.common.DBHelper; import com.example.p034_greendao_sqlite.greendao.DaoMaster; import com.example.p034_greendao_sqlite.greendao.DaoSession; /** *Createdbyshiningon2017/8/29. */ public class DemoApplication extends Application{ private static final StringTAG= "DemoApplication" ; private static DemoApplicationsInstance= null ; public static ContextmContext; private DaoMaster.DevOpenHelpermHelper; private SQLiteDatabasedb; private DaoMastermDaoMaster; private DaoSessionmDaoSession; public static DemoApplicationget(){ if (sInstance== null ){ sInstance= new DemoApplication(); } return sInstance; } @Override public void onCreate(){ super .onCreate(); sInstance= this ; mContext=getApplicationContext(); setDatabase(); } /** *设置greenDao */ private void setDatabase(){ DBHelperdevOpenHelper= new DBHelper( this ); mDaoMaster= new DaoMaster(devOpenHelper.getWritableDb()); mDaoSession=mDaoMaster.newSession(); //userDao=daoSession.getUserDao(); //通过DaoMaster的内部类DevOpenHelper,你可以得到一个便利的SQLiteOpenHelper对象。 //可能你已经注意到了,你并不需要去编写「CREATETABLE」这样的SQL语句,因为greenDAO已经帮你做了。 //注意:默认的DaoMaster.DevOpenHelper会在数据库升级时,删除所有的表,意味着这将导致数据的丢失。 //所以,在正式的项目中,你还应该做一层封装,来实现数据库的安全升级。 //mHelper=newDaoMaster.DevOpenHelper(this,"notes-db",null); //db=mHelper.getWritableDatabase(); ////注意:该数据库连接属于DaoMaster,所以多个Session指的是相同的数据库连接。 //mDaoMaster=newDaoMaster(db); //mDaoSession=mDaoMaster.newSession(); } public DaoSessiongetDaoSession(){ return mDaoSession; } public SQLiteDatabasegetDb(){ return db; } } DBHelper: 1 2 3 4 5 6 7 8 9 10 11 12 13 14 15 16 17 18 19 20 21 22 23 24 25 26 27 28 29 30 31 32 33 34 35 36 37 38 39 40 41 42 43 44 45 46 47 48 49 50 51 52 53 54 55 56 57 package com.example.p034_greendao_sqlite.common; import android.content.Context; import android.database.sqlite.SQLiteDatabase; import com.example.p034_greendao_sqlite.greendao.DaoMaster; import java.io.IOException; public class DBHelper extends DaoMaster.OpenHelper{ public static final StringDBNAME= "geek2017829133810.db" ; public DBHelper(Contextcontext){ super (context,DBNAME, null ); } @Override public void onUpgrade(SQLiteDatabasedb, int oldVersion, int newVersion){ super .onUpgrade(db,oldVersion,newVersion); //if(oldVersion>newVersion){//TODO存在BUG,卸载后进入ROM自带数据库的时候会出现数据库版本回退会走这段逻辑会出现崩溃 //runCMD("pmclearcom.example.p034_greendao_sqlite"); ////db.setVersion(oldVersion); ////MyLogUtil.d("DBOpenHelper--->onUpgrade-----oldVersion>newVersion"); //this.onCreate(db); //return; //} //if(newVersion==6){//版本2相对于版本1更改了FridgeStatus表,增加了sterilization_mode字段5taginfo增加字段foodStatus ////db.execSQL("droptableifexistsFridgeStatus"); ////db.execSQL("droptableifexistsRFIDDataStatus"); ////db.execSQL("droptableifexiststaginfo"); //} // //this.onCreate(db); } public static StringrunCMD(Stringcmd){ Stringresult= null ; try { String[]cmdx={ "/system/bin/sh" , "-c" ,cmd}; //filemust int ret=ShellExeUtil.execCommand(cmdx); result=String.valueOf(ret); } catch (IOExceptione){ result= "ERR.JE" ; } catch (OutOfMemoryErrore){ System.gc(); System.runFinalization(); result= "ERR.JE" ; } return result; } } MainActivity: 1 2 3 4 5 6 7 8 9 10 11 12 13 14 15 16 17 18 19 20 21 22 23 24 25 26 27 28 29 30 31 32 33 34 35 36 37 38 39 40 41 42 43 44 45 46 47 48 49 50 51 52 53 54 55 56 57 58 59 60 61 62 63 64 65 66 67 68 69 70 71 72 73 74 75 76 77 78 79 80 81 82 83 84 85 86 87 88 89 90 91 92 93 94 95 96 97 98 99 100 101 102 103 104 105 106 107 108 109 110 111 112 113 114 115 116 117 118 119 120 121 122 123 124 125 126 127 128 129 130 131 132 133 134 135 136 137 138 139 140 141 package com.example.p034_greendao_sqlite; import android.os.Bundle; import android.support.v7.app.AppCompatActivity; import android.view.View; import android.widget.TextView; import android.widget.Toast; import com.example.p034_greendao_sqlite.application.DemoApplication; import com.example.p034_greendao_sqlite.domain.User; import com.example.p034_greendao_sqlite.greendao.UserDao; import java.util.List; public class MainActivity extends AppCompatActivity implements View.OnClickListener{ private TextViewtv0; private TextViewtv_setting; private TextViewtv1; private TextViewtv2; private TextViewtv3; private TextViewtv4; private UserDaomUserDao; @Override protected void onCreate(BundlesavedInstanceState){ super .onCreate(savedInstanceState); setContentView(R.layout.activity_main); tv0=(TextView)findViewById(R.id.tv0); tv_setting=(TextView)findViewById(R.id.tv_setting); tv1=(TextView)findViewById(R.id.tv1); tv2=(TextView)findViewById(R.id.tv2); tv3=(TextView)findViewById(R.id.tv3); tv4=(TextView)findViewById(R.id.tv4); tv_setting.setOnClickListener( this ); tv1.setOnClickListener( this ); tv2.setOnClickListener( this ); tv3.setOnClickListener( this ); tv4.setOnClickListener( this ); mUserDao=DemoApplication.get().getDaoSession().getUserDao(); } @Override public void onClick(Viewv){ switch (v.getId()){ case R.id.tv_setting: //重置 deleteAllData(); for ( int i= 0 ;i< 10 ;i++){ Userstu= new User(); stu.setId(( long )i); stu.setName( "greendao" +i); stu.setAge(i+ "" ); stu.setSex( "男" +i); stu.setSalary(i+ "" +i); mUserDao.insert(stu); } queryData(); break ; case R.id.tv1: //查询 queryData(); break ; case R.id.tv2: //添加 insertData( 1001 ); queryData(); break ; case R.id.tv3: //更新 updateData( 1001 ); queryData(); break ; case R.id.tv4: //删除 deleteData( 1001 ); queryData(); break ; default : break ; } } //查 private void queryData(){ List<User>users=mUserDao.loadAll(); StringuserName= "" ; for ( int i= 0 ;i<users.size();i++){ userName+=users.get(i).getName()+ "\n\n" ; } tv0.setText(userName); //Toast.makeText(this,"查询全部数据==>"+userName,Toast.LENGTH_SHORT).show(); } //增 private void insertData( int i){ UserinsertData= new User( null ,i+ "" , "geek" , "100" , "男" , "100" ); mUserDao.insert(insertData); } //改 private void updateData( int i){ //UserupdateData=newUser(null,i+"","geek1","101","女","101"); //UserupdateData=newUser((long)i,"geek1","101","女","101"); //mUserDao.update(updateData); Useruser=mUserDao.queryBuilder() .where(UserDao.Properties.Userid.eq(i+ "" ) /*,UserDao.Properties.Name.like("%90%")*/ ).build().unique(); if (user== null ){ Toast.makeText(MainActivity. this , "用户不存在!" ,Toast.LENGTH_SHORT).show(); } else { user.setUserid(i+ "" ); user.setName( "geek1" ); user.setAge( "101" ); user.setSex( "女" ); user.setSalary( "101" ); mUserDao.update(user); } } //删 private void deleteData( int id){ Useruser=mUserDao.queryBuilder().where(UserDao.Properties.Userid.eq(id+ "" )).build().unique(); if (user== null ){ Toast.makeText(MainActivity. this , "用户不存在" ,Toast.LENGTH_SHORT).show(); } else { mUserDao.deleteByKey(user.getId()); } //UserupdateData=newUser((long)i,"geek1","101","女","101"); //mUserDao.deleteByKey((long)id); } //删全部 private void deleteAllData(){ mUserDao.deleteAll(); } } 总结:这种用的很普遍,还是不错的,推荐四颗星~ 3.sugar:优点是轻量级,缺点是Bean的格式转化后要对应规范: DemoBean: 1 2 3 4 5 6 7 8 9 10 11 12 13 14 15 16 17 18 19 20 21 22 23 24 25 26 27 28 29 30 31 32 33 34 35 36 37 38 39 40 41 42 43 44 45 46 47 48 49 50 51 52 53 54 55 56 57 58 59 60 61 62 63 package com.example.p035_sugar_sqlite.domain; import com.google.gson.annotations.Expose; import com.orm.SugarRecord; import java.io.Serializable; /** *Createdbygeekon2017年8月29日20:44:05. *<p> *Bean的属性名所采用驼峰命名法,那么大写的字母会在创建的表中字段转换成下划线。 *比如spuId这个属性对应的表中的字段名为spu_id *之所以实现Serializable是因为这个Bean在代码中不仅仅为SugarORM创建表而服务, *同时也是为了能在Android组件中传递(比如Handler中的message.obj)而用,所以这里和官网的直接继承自SugarRecord<T>不同,推荐大家用我这种方式 * *@Column(name="textID",unique=true)这个注解意思是说你想强制按照你的规定的名字来创建表中对应的字段名字,所以这里的skuId在Goods表中的字段名就不是默认的sku_id了,而是你自己给的sku_ID *@Expoes是来自于Gson的的一个注解,后面会说到 *@Ignore这个注解强调这个属性在表中不要创建对应的字段 *@SerializedName("id")采用@SerializedName注解,重新指定id的名称 */ public class DemoBean extends SugarRecord implements Serializable{ @Expose private int textid; @Expose private Stringtextcontent1; @Expose private Stringtextcontent2; public DemoBean(){ } public DemoBean( int textid,Stringtextcontent1,Stringtextcontent2){ this .textid=textid; this .textcontent1=textcontent1; this .textcontent2=textcontent2; } public int getTextid(){ return textid; } public void setTextid( int textid){ this .textid=textid; } public StringgetTextcontent1(){ return textcontent1; } public void setTextcontent1(Stringtextcontent1){ this .textcontent1=textcontent1; } public StringgetTextcontent2(){ return textcontent2; } public void setTextcontent2(Stringtextcontent2){ this .textcontent2=textcontent2; } } DemoApplication: 1 2 3 4 5 6 7 8 9 10 11 12 13 14 15 16 17 18 19 20 21 22 23 24 25 26 27 28 29 30 31 32 33 34 35 36 37 package com.example.p035_sugar_sqlite.application; import android.app.Application; import android.content.Context; import com.orm.SugarContext; /** *Createdbyshiningon2017/8/29. */ public class DemoApplication extends Application{ private static final StringTAG= "DemoApplication" ; private static DemoApplicationsInstance= null ; public static ContextmContext; public static DemoApplicationget(){ if (sInstance== null ){ sInstance= new DemoApplication(); } return sInstance; } @Override public void onCreate(){ super .onCreate(); sInstance= this ; mContext=getApplicationContext(); SugarContext.init(mContext); } @Override public void onTerminate(){ super .onTerminate(); SugarContext.terminate(); } } MainActivity: 1 2 3 4 5 6 7 8 9 10 11 12 13 14 15 16 17 18 19 20 21 22 23 24 25 26 27 28 29 30 31 32 33 34 35 36 37 38 39 40 41 42 43 44 45 46 47 48 49 50 51 52 53 54 55 56 57 58 59 60 61 62 63 64 65 66 67 68 69 70 71 72 73 74 75 76 77 78 79 80 81 82 83 84 85 86 87 88 89 90 91 92 93 94 95 96 97 98 99 100 101 102 103 104 105 106 107 108 109 110 111 112 113 114 115 116 117 118 119 120 121 122 123 124 125 126 127 128 129 130 131 132 133 134 135 136 137 138 package com.example.p035_sugar_sqlite; import android.os.Bundle; import android.support.v7.app.AppCompatActivity; import android.view.View; import android.widget.TextView; import com.example.p035_sugar_sqlite.domain.DemoBean; import java.util.List; public class MainActivity extends AppCompatActivity implements View.OnClickListener{ private TextViewtv0; private TextViewtv_setting; private TextViewtv1; private TextViewtv2; private TextViewtv3; private TextViewtv4; @Override protected void onCreate(BundlesavedInstanceState){ super .onCreate(savedInstanceState); setContentView(R.layout.activity_main); tv0=(TextView)findViewById(R.id.tv0); tv_setting=(TextView)findViewById(R.id.tv_setting); tv1=(TextView)findViewById(R.id.tv1); tv2=(TextView)findViewById(R.id.tv2); tv3=(TextView)findViewById(R.id.tv3); tv4=(TextView)findViewById(R.id.tv4); tv_setting.setOnClickListener( this ); tv1.setOnClickListener( this ); tv2.setOnClickListener( this ); tv3.setOnClickListener( this ); tv4.setOnClickListener( this ); ////find //List<Book>booklist=Book.find(Book.class,"number=?","510110"); //Log.i("sugertest","booklist"+booklist.size()); ////findWithQuery //List<Book>books=Book.findWithQuery(Book.class,"Select*fromBookwherenumber=?","java"); //Log.i("sugertest","books"+books.size()); } @Override public void onClick(Viewv){ switch (v.getId()){ case R.id.tv_setting: //重置 deleteAllData(); for ( int i= 0 ;i< 10 ;i++){ DemoBeanstu= new DemoBean(); //stu.text_id=i; //stu.text_content1="sugar"+i; //stu.text_content2="sugars"+i; stu.setTextid(i); stu.setTextcontent1( "sugar" +i); stu.setTextcontent2( "sugars" +i); stu.save(stu); } select_data(); break ; case R.id.tv1: //查询 select_data(); break ; case R.id.tv2: //添加 add_data(); select_data(); break ; case R.id.tv3: //更新 update_data(); select_data(); break ; case R.id.tv4: //删除 delete_data(); select_data(); break ; default : break ; } } private void select_data(){ //查询一条数据 //List<DemoBean>users=DemoBean.find(DemoBean.class,"text_id>?","-1"); List<DemoBean>users=DemoBean.listAll(DemoBean. class ); StringuserName= "" ; for ( int i= 0 ;i<users.size();i++){ userName+=users.get(i).getId()+ "" + users.get(i).getTextid()+ "" + users.get(i).getTextcontent1()+ "" + users.get(i).getTextcontent2()+ "\n\n" ; } tv0.setText(userName); //DemoBeanqueryBook=DemoBean.findById(DemoBean.class,1); //Log.i("sugertest","queryBook"+queryBook.toString()); } private void add_data(){ //增加一条数据 DemoBeanbook= new DemoBean(); book.setTextid( 101 ); book.setTextcontent1( "geek100" ); book.setTextcontent2( "geek200" ); long rec=book.save(); //Log.i("sugertest","rec"+String.valueOf(rec));//rec=2 } private void update_data(){ //更新一条数据 //List<DemoBean>book1=DemoBean.find(DemoBean.class,"text_id=?","101"); List<DemoBean>book1=DemoBean.findWithQuery(DemoBean. class , "Select*fromDemo_Beanwheretextid=?" , "9" ); book1.get( 0 ).setTextid( 9 ); book1.get( 0 ).setTextcontent1( "geek109" ); book1.get( 0 ).setTextcontent2( "geek109" ); book1.get( 0 ).save(); } private void delete_data(){ //删除一条数据 //DemoBeanbook2=DemoBean.findById(DemoBean.class,101); List<DemoBean>book2=DemoBean.find(DemoBean. class , "textid=?" , "101" ); book2.get( 0 ).delete(); } //删全部 private void deleteAllData(){ DemoBean.deleteAll(DemoBean. class ); } } 总结:还有一种就是直接写SQLite,这里就不做介绍了,大家都写了n遍了吧,不过后面的代码我会附上~relax~ 地址:https://github.com/geeklx/MyApplication p033_sqlite:OpenDroid p034_greendao_sqlite:greenDao p035_sugar_sqlite: sugar 另附图: 本文转自 吴雨声 51CTO博客,原文链接:http://blog.51cto.com/liangxiao/1961376,如需转载请自行联系原作者