首页 文章 精选 留言 我的

精选列表

搜索[登录],共10007篇文章
优秀的个人博客,低调大师

Django 搭建CMDB系统完整[1](用户登录)

***使用的mysql数据库,所以系统中要先安装mysql数据库 1、安装环境: pip install django python -m pip install --upgrade pip setuptools python -m pip install django pip install --upgrade pyls https://pypi.python.org/simple pip install MySQL-python pip install mysqlclient mkdir /dj cd /dj django-admin startproject cmdb cd cmdb python manage.py migrate cd cmdb vi settings.py 做如下更改 ALLOWED_HOSTS = ['*'] TEMPLATES = [ { 'BACKEND': 'django.template.backends.django.DjangoTemplates', 'DIRS': [os.path.join(BASE_DIR, 'templates')], 'APP_DIRS': True, 'OPTIONS': { 'context_processors': [ 'django.template.context_processors.debug', 'django.template.context_processors.request', 'django.contrib.auth.context_processors.auth', 'django.contrib.messages.context_processors.messages', ], }, }, ] DATABASES = { 'default': { 'ENGINE': 'django.db.backends.mysql', 'NAME': 'cmdb', 'USER': 'root', 'PASSWORD': 'xxxxxxx', 'HOST': '127.0.0.1', 'PORT': '3306', } } vi urls.py 做如下更改 from django.conf.urls import url from django.contrib import admin from cmdb import views from django.contrib.auth.views import * urlpatterns = [ url(r'^', login), ] vi views.py 做如下更改 from django.shortcuts import render_to_response def main_page(request): return render_to_response('main_page.html', {'user':request.user }) cd /dj/cmdb mkdir -p templates/registration cd templates vi main_page.html 做如下更改 <html> <head> <title>Django Bookmarks</title> </head> <body> <h1>Welcome to Django Bookmarks</h1> {% if user.username %} <p>Welcome {{ user.username }}! Here you can store and share bookmarks!</p> {% else %} <p>Welcome anonymous user! You need to <a href="/login/">login</a> before you can store and share bookmarks.</p> {% endif %} </body> </html> cd registration vi login.html 做如下更改 <html> <head> <title>Django Bookmarks - User Login</title> </head> <body> <h1>User Login</h1> {% if form.has_errors %} <p>Your username and password didn't match. Please try again.</p> {% endif %} <form method="post" action="."> <p><label for="id_username">Username:</label> {{ form.username }}</p> <p><label for="id_password">Password:</label> {{ form.password }}</p> <input type="hidden" name="next" value="/" /> {% csrf_token %} <input type="submit" value="login" /> </form> </body> </html>

优秀的个人博客,低调大师

android搞的一个登录界面

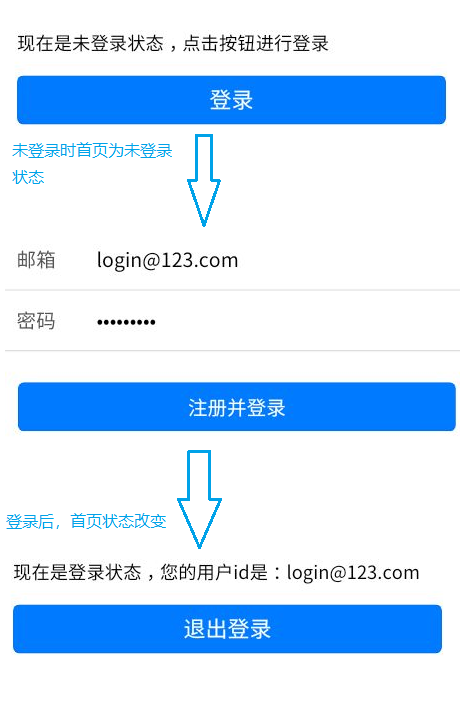
还是先上传图片把。设计的很丑,脏了大家的眼球了。实现的基本需求,没有详细的设计高度,宽度什么的。还没添加验证功能,待完善。 代码如下: 1 2 3 4 5 6 7 8 9 10 11 12 13 14 15 16 17 18 19 20 21 22 23 24 25 26 27 28 29 30 31 32 33 34 35 36 37 38 39 40 41 42 43 44 45 46 47 48 49 50 51 52 53 54 55 56 57 58 59 60 61 62 63 64 65 66 67 68 69 70 71 72 73 74 <? xml version="1.0" encoding="utf-8"?> < TableLayout xmlns:android="http://schemas.android.com/apk/res/android" android:layout_width="fill_parent" android:layout_height="fill_parent" android:orientation="vertical" > < TableRow android:id="@+id/tableRow1" android:layout_width="wrap_content" android:layout_height="wrap_content" > < TextView android:id="@+id/textView1" android:layout_width="wrap_content" android:layout_height="wrap_content" android:text="TextView" /> < EditText android:layout_width="fill_parent" android:layout_height="wrap_content" android:hint="请填写登陆账号" android:selectAllOnFocus="true" /> </ TableRow > < TableRow android:id="@+id/tableRow2" android:layout_width="wrap_content" android:layout_height="wrap_content" > < TextView android:id="@+id/textView2" android:layout_width="wrap_content" android:layout_height="wrap_content" android:text="密码" android:textSize="10pt" android:background="@drawable/image" /> < EditText android:layout_width="fill_parent" android:layout_height="wrap_content" android:password="true" /> </ TableRow > < TableRow android:id="@+id/tableRow3" android:layout_width="wrap_content" android:layout_height="wrap_content" > < TextView android:id="@+id/textView3" android:layout_width="fill_parent" android:layout_height="wrap_content" android:text="电话号码" android:textSize="10pt" android:background="@drawable/image" /> < EditText android:layout_height="wrap_content" android:layout_width="fill_parent" android:hint="请输入您的电话号码" android:selectAllOnFocus="true" android:phoneNumber="true" /> </ TableRow > < Button android:id="@+id/button1" android:layout_width="wrap_content" android:layout_height="wrap_content" android:text="注册" /> </ TableLayout > ============================================================================== 本文转自被遗忘的博客园博客,原文链接:http://www.cnblogs.com/rollenholt/archive/2012/05/17/2505925.html,如需转载请自行联系原作者

优秀的个人博客,低调大师

CentOS下结束其他ssh登录用户

限制SSH连接数与手动断开空闲连接也有必要之举,这里写出Linux下手动剔出其他用户的过程。 1、查看系统在线用户 [root@whh ~]# w 14:30:26 up 38 days, 21:22, 3 users, load average: 0.00, 0.01, 0.05 USER TTY FROM LOGIN@ IDLE JCPU PCPU WHAT root pts/0 162.16.16.155 14:30 0.00s 0.07s 0.05s w root pts/1 162.16.16.155 14:30 12.00s 0.01s 0.01s -bash root tty1 :0 05Dec13 38days 2:16 2:16 /usr/bin/Xorg :0 -nr -verbose -audit 4 -auth /var/run/gdm/auth-for-gdm-LrK8wg/database -noliste 2.查看哪个属于此时自己的终端(我开了两个连接) [root@whh ~]# who am i root pts/0 2017-11-13 14:30 (162.16.16.155) 3.pkill掉自己不适用的终端 [root@whh ~]# pkill -kill -t pts/1 4.查看当前终端情况 [root@linuxidc ~]# w 14:31:04 up 38 days, 21:23, 2 users, load average: 0.00, 0.01, 0.05 USER TTY FROM LOGIN@ IDLE JCPU PCPU WHAT root pts/0 162.16.16.155 14:30 0.00s 0.04s 0.01s w root tty1 :0 05Dec13 38days 2:16 2:16 /usr/bin/Xorg :0 -nr -verbose -audit 4 -auth /var/run/gdm/auth-for-gdm-LrK8wg/database -noliste [root@linuxidc ~]# 注意: 如果最后查看还是没有干掉,建议加上-9 强制杀死。 [root@whh ~]# pkill -9 -t pts/1

资源下载

更多资源
Mario

Mario

马里奥是站在游戏界顶峰的超人气多面角色。马里奥靠吃蘑菇成长,特征是大鼻子、头戴帽子、身穿背带裤,还留着胡子。与他的双胞胎兄弟路易基一起,长年担任任天堂的招牌角色。

腾讯云软件源

腾讯云软件源

为解决软件依赖安装时官方源访问速度慢的问题,腾讯云为一些软件搭建了缓存服务。您可以通过使用腾讯云软件源站来提升依赖包的安装速度。为了方便用户自由搭建服务架构,目前腾讯云软件源站支持公网访问和内网访问。

Spring

Spring

Spring框架(Spring Framework)是由Rod Johnson于2002年提出的开源Java企业级应用框架,旨在通过使用JavaBean替代传统EJB实现方式降低企业级编程开发的复杂性。该框架基于简单性、可测试性和松耦合性设计理念,提供核心容器、应用上下文、数据访问集成等模块,支持整合Hibernate、Struts等第三方框架,其适用范围不仅限于服务器端开发,绝大多数Java应用均可从中受益。

Rocky Linux

Rocky Linux

Rocky Linux(中文名:洛基)是由Gregory Kurtzer于2020年12月发起的企业级Linux发行版,作为CentOS稳定版停止维护后与RHEL(Red Hat Enterprise Linux)完全兼容的开源替代方案,由社区拥有并管理,支持x86_64、aarch64等架构。其通过重新编译RHEL源代码提供长期稳定性,采用模块化包装和SELinux安全架构,默认包含GNOME桌面环境及XFS文件系统,支持十年生命周期更新。

用户登录
用户注册