阿里云 ECS 部署 WordPress 博客
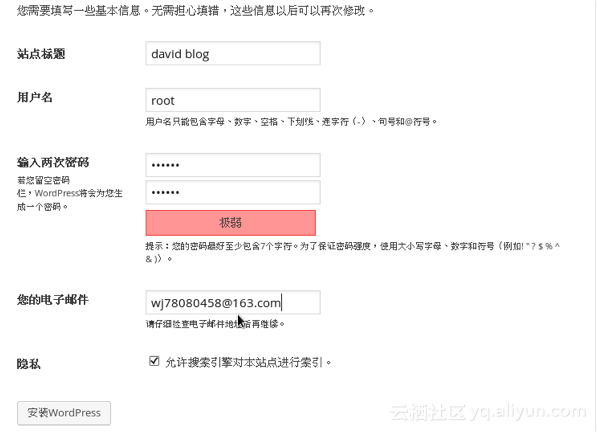
今天在 阿里云 ECS上 部署了一套 Lamp 系统,建了一个WordPress的网站,把操作过程记录下来,文中所列脚本可以直接应用。 安装Nginx 登录弹性云服务器。执行以下命令,下载对应当前系统版本的Nginx包。 wget http://nginx.org/packages/centos/7/noarch/RPMS/nginx-release-centos-7-0.el7.ngx.noarch.rpm 执行以下命令,建立Nginx的yum仓库。 rpm -ivh nginx-release-centos-7-0.el7.ngx.noarch.rpm 执行以下命令,安装Nginx。 yum -y install nginx 执行以下命令,启动Nginx并设置开机启动。 systemctl start nginx systemctl enable nginx 使用浏览器访问 “http://服务器IP地址”,显示如下页面,说明Nginx安装成功。点击放大 安装MySQL。 依次执行以下命令,安装MySQL。 rpm -Uvh http://dev.mysql.com/get/mysql57-community-release-el7-8.noarch.rpm yum -y install mysql-community-server 依次执行以下命令,启动MySQL服务并设置开机自启动。 systemctl start mysqld systemctl enable mysqld 执行以下命令,获取安装MySQL时自动设置的root用户密码。 grep 'temporary password' /var/log/mysqld.log 回显如下类似信息。 2018-08-29T07:27:37.541944Z 1 [Note] A temporary password is generated for root@localhost: 2YY?3uHUA?Ys 执行以下命令,并按照回显提示信息进行操作,加固MySQL。 mysql_secure_installation 接下来按照提示操作: Securing the MySQL server deployment. Enter password for user root: #输入上一步骤中获取的安装MySQL时自动设置的root用户密码 The existing password for the user account root has expired. Please set a new password. New password: #设置新的root用户密码 Re-enter new password: #再次输入密码 The 'validate_password' plugin is installed on the server. The subsequent steps will run with the existing configuration of the plugin. Using existing password for root. Estimated strength of the password: 100 Change the password for root ? ((Press y|Y for Yes, any other key for No) : N #是否更改root用户密码,输入N ... skipping. By default, a MySQL installation has an anonymous user, allowing anyone to log into MySQL without having to have a user account created for them. This is intended only for testing, and to make the installation go a bit smoother. You should remove them before moving into a production environment. Remove anonymous users? (Press y|Y for Yes, any other key for No) : Y #是否删除匿名用户,输入Y Success. Normally, root should only be allowed to connect from 'localhost'. This ensures that someone cannot guess at the root password from the network. Disallow root login remotely? (Press y|Y for Yes, any other key for No) : Y #禁止root远程登录,输入Y Success. By default, MySQL comes with a database named 'test' that anyone can access. This is also intended only for testing, and should be removed before moving into a production environment. Remove test database and access to it? (Press y|Y for Yes, any other key for No) : Y #是否删除test库和对它的访问权限,输入Y - Dropping test database... Success. - Removing privileges on test database... Success. Reloading the privilege tables will ensure that all changes made so far will take effect immediately. Reload privilege tables now? (Press y|Y for Yes, any other key for No) : Y #是否重新加载授权表,输入Y Success. All done! 安装PHP 依次执行以下命令,安装PHP 7和一些所需的PHP扩展。 rpm -Uvh https://mirror.webtatic.com/yum/el7/epel-release.rpm rpm -Uvh https://mirror.webtatic.com/yum/el7/webtatic-release.rpm yum -y install php70w-tidy php70w-common php70w-devel php70w-pdo php70w-mysql php70w-gd php70w-ldap php70w-mbstring php70w-mcrypt php70w-fpm 执行以下命令,验证PHP的安装版本。 php -v 回显如下类似信息: PHP 7.0.31 (cli) (built: Jul 20 2018 08:55:22) ( NTS ) Copyright (c) 1997-2017 The PHP Group Zend Engine v3.0.0, Copyright (c) 1998-2017 Zend Technologies 执行以下命令,启动PHP服务并设置开机自启动。 systemctl start php-fpm systemctl enable php-fpm 修改Nginx配置文件以支持PHP 执行以下命令打开配置文件“default.conf”。 vim /etc/nginx/conf.d/default.conf 按i键进入编辑模式。修改打开的“default.conf”文件。在所支持的主页面格式中添加php格式的主页,如下所示: location / { root /usr/share/nginx/html; index index.php index.html index.htm; } 取消如下内容的注释,并设置字体加粗部分为Nginx的默认路径,如下图所示: location ~ \.php$ { root html; fastcgi_pass 127.0.0.1:9000; fastcgi_index index.php; fastcgi_param SCRIPT_FILENAME /usr/share/nginx/html$fastcgi_script_name; include fastcgi_params; } 按Esc键退出编辑模式,并输入:wq保存后退出。执行以下命令,重新载入nginx的配置文件。 service nginx reload 浏览器访问测试 在/usr/share/nginx/html目录下创建“info.php”的测试页面。执行以下命令创建并打开“info.php”的测试文件。 vim /usr/share/nginx/html/info.php 按i键进入编辑模式。 修改打开的“info.php”文件,将如下内容写入文件。 <?php phpinfo(); ?> 按Esc键退出编辑模式,并输入:wq保存后退出。使用浏览器访问“http://服务器IP地址/info.php”,显示如下页面,说明环境搭建成功。点击放大 创建数据库 执行以下命令,并按照提示信息输入MySQL的root用户,登录到MySQL命令行。 mysql -u root -p 执行以下命令,创建一个新的数据库。 CREATE DATABASE wordpress; 其中,“wordpress”为数据库名,可以自行设置。 执行以下命令,为数据库创建用户并为用户分配数据库的完全访问权限。 GRANT ALL ON wordpress.* TO wordpressuser@localhost IDENTIFIED BY 'PASSWORD123'; 其中,“wordpressuser”为数据库用户名,“PASSWORD123”为对应的帐户密码,可以自行设置。 执行以下命令,退出MySQL命令行。 exit (可选)依次执行以下命令,验证数据库和用户是否已成功创建,并退出MySQL命令行。 mysql -u wordpressuser -p SHOW DATABASES; exit 其中,“wordpressuser”为刚刚创建的数据库用户名。 安装WordPress 从WordPress官网获取WordPress软件包并上传至/usr/share/nginx/html目录。命令行下载参考 wget http://wordpress.org/latest.tar.gz 由于WordPress官方网站被攻击,导致国内用户访问WordPress网站的时候会提示429 Too Many Requests错误,所以使用国内服务器的朋友很难从官网下载新版版本的WordPress安装包,这里给大家分享一下从官网下载下来的新版版的WordPress安装文件,有需要的可以自己下载了。 可以使用SCP的方式上传, scp /Users/bingyue/Downloads/wordpress-5.3.2.tar.gz root@33.44.55.66:/opt 后续操作软件包以“wordpress-5.3.2-zh_CN.tar.gz”为例。 执行以下命令,解压缩软件包。 tar -xvf wordpress-5.3.2-zh_CN.tar.gz 解压后生成一个“wordpress”的文件夹。 执行以下命令,设置解压后的文件权限。 chmod -R 777 wordpress 浏览器访问“http://服务器IP地址/wordpress”进入安装向导。