这里分享下我在日常开发中对 Gradle 的常用配置规则
一、版本号配置
当项目逐渐演进的过程中,主工程依赖的 Module 可能会越来越多,此时就需要统一配置各个 Module 的编译参数了
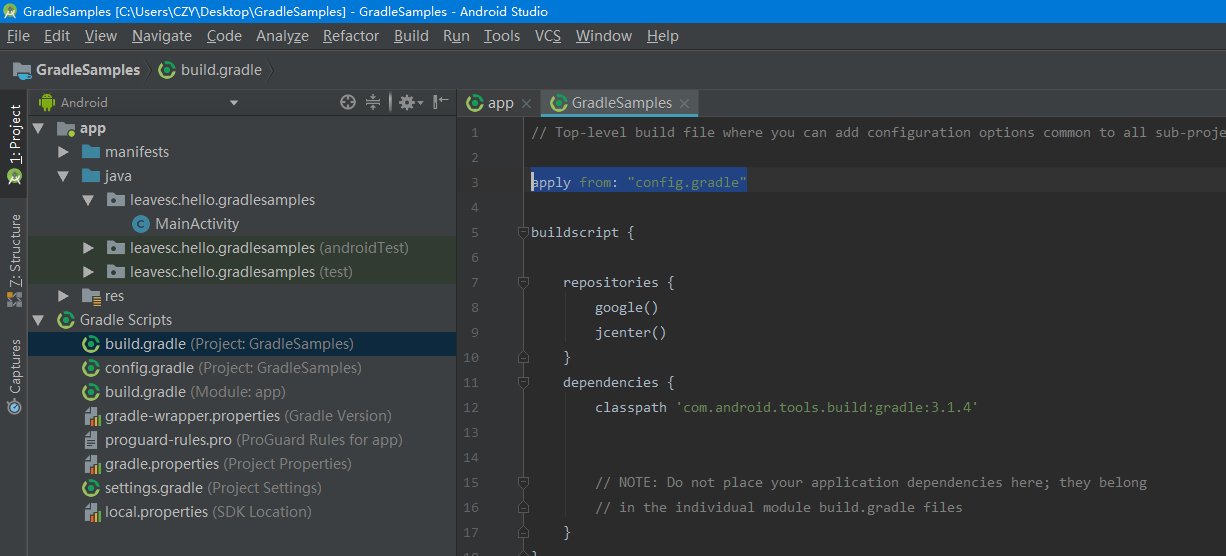
在工程的根目录下新建一个 gradle 文件,命名为 config.gradle,在此文件中统一声明工程的编译属性和依赖库的版本号
ext {
    compileSdkVersion = 28
    minSdkVersion = 15
    targetSdkVersion = 28
    versionCode = 1
    versionName = '1.0'

    dependencies = [
            appcompatV7     : 'com.android.support:appcompat-v7:28.0.0-rc02',
            constraintLayout: 'com.android.support.constraint:constraint-layout:1.1.3',
            junit           : 'junit:junit:4.12',
            testRunner      : 'com.android.support.test:runner:1.0.2',
            espressoCore    : 'com.android.support.test.espresso:espresso-core:3.0.2'
    ]

}
默认情况下,App Module 的 build.gradle 文件的默认配置如下所示
apply plugin: 'com.android.application'

android {
    compileSdkVersion 28
    defaultConfig {
        applicationId "leavesc.hello.gradlesamples"
        minSdkVersion 15
        targetSdkVersion 28
        versionCode 1
        versionName "1.0"
        testInstrumentationRunner "android.support.test.runner.AndroidJUnitRunner"
    }
    buildTypes {
        release {
            minifyEnabled false
            proguardFiles getDefaultProguardFile('proguard-android.txt'), 'proguard-rules.pro'
        }
    }
}

dependencies {
    implementation fileTree(dir: 'libs', include: ['*.jar'])
    implementation 'com.android.support:appcompat-v7:28.0.0-rc02'
    implementation 'com.android.support.constraint:constraint-layout:1.1.3'
    testImplementation 'junit:junit:4.12'
    androidTestImplementation 'com.android.support.test:runner:1.0.2'
    androidTestImplementation 'com.android.support.test.espresso:espresso-core:3.0.2'
}
这里将其改为引用 config.gradle 文件的形式
首先,需要在根目录下的 build.gradle 文件中应用 config.gradle 文件,这样在 Module 配置文件中才引用得到当中的属性值
此时就可以修改应用版本号以及依赖库的声明方式了
apply plugin: 'com.android.application'

def globalConfiguration = rootProject.ext
def presentationDependencies = globalConfiguration.dependencies

android {
    compileSdkVersion globalConfiguration["compileSdkVersion"]
    defaultConfig {
        applicationId "leavesc.hello.gradlesamples"
        minSdkVersion globalConfiguration["minSdkVersion"]
        targetSdkVersion globalConfiguration["targetSdkVersion"]
        versionCode globalConfiguration["versionCode"]
        versionName globalConfiguration["versionName"]
        testInstrumentationRunner "android.support.test.runner.AndroidJUnitRunner"
    }

    buildTypes {
        release {
            minifyEnabled false
            proguardFiles getDefaultProguardFile('proguard-android.txt'), 'proguard-rules.pro'
        }
    }
}

dependencies {
    implementation fileTree(include: ['*.jar'], dir: 'libs')
    implementation presentationDependencies.appcompatV7
    implementation presentationDependencies.constraintLayout
    testImplementation presentationDependencies.junit
    androidTestImplementation presentationDependencies.testRunner
    androidTestImplementation presentationDependencies.espressoCore
}
这样,即使以后工程中包含多个 Module ,只要配置的属性都是来自于 config.gradle 文件,就可以做到统一修改编译属性与依赖库版本了
二、签名属性配置
通常,应用的签名类型会分为 release 和 debug 两类,并分别使用不同的签名文件
为了安全考虑以及实现自动化打包,可以通过 gradle 来声明签名配置,包括签名文件路径、签名别名、签名密码等
在 local.properties 文件中声明签名文件路径以及签名密码
sdk.dir=C\:\\Software\\SDK
key.keyStorePath=..\\doc\\key.jks
key.keyAlias=leavesC
key.keyPassword=987654321
key.storePassword=123456789
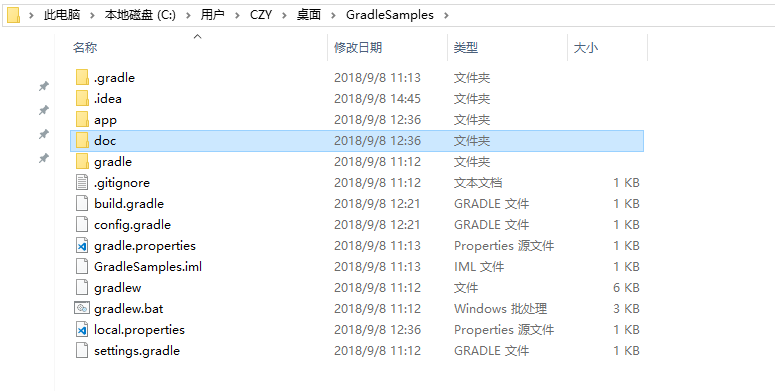
根据配置可知,签名文件是放在工程的 doc 文件夹内
通过代码获取到签名的各个配置项
Properties properties = new Properties()
properties.load(project.rootProject.file('local.properties').newDataInputStream())
def keyStorePath_ = properties.getProperty("key.keyStorePath")
def storePassword_ = properties.getProperty("key.storePassword")
def keyAlias_ = properties.getProperty("key.keyAlias")
def keyPassword_ = properties.getProperty("key.keyPassword")
def storeFile_ = file(keyStorePath_)
配置不同的签名属性以及 build 类型
    signingConfigs {
        release {
            storeFile storeFile_
            storePassword storePassword_
            keyAlias keyAlias_
            keyPassword keyPassword_
            v1SigningEnabled true
            v2SigningEnabled true
        }
        debug {
            storeFile storeFile_
            storePassword storePassword_
            keyAlias keyAlias_
            keyPassword keyPassword_
            v1SigningEnabled true
            v2SigningEnabled true
        }
    }

    buildTypes {
        debug {
            minifyEnabled false
            proguardFiles getDefaultProguardFile('proguard-android.txt'), 'proguard-rules.pro'
            signingConfig signingConfigs.debug
        }
        release {
            minifyEnabled true
            proguardFiles getDefaultProguardFile('proguard-android.txt'), 'proguard-rules.pro'
            signingConfig signingConfigs.release
        }
    }
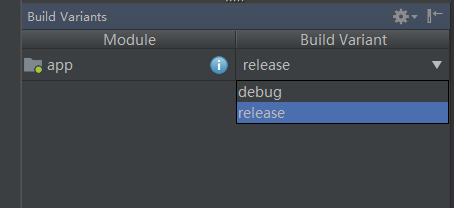
此处,我配置了两种不同的 buildType:debug、release,并对应不同的签名文件
以后只要选定不同的 Build Variant,即可打包具体签名的 Apk 文件
而 local.properties 文件可以保存到服务器来实现远程打包,从而保证了隐私安全
三、多渠道打包
有时候,为了方便进行精准营销,会有生成不同渠道包的要求,此时就需要在同个应用上打上不同的渠道ID(channelId),这可以通过 productFlavors 来实现
先在 AndroidManifest.xml 文件中配置占位符,appKey 即对应各个渠道的 ID 值
        <meta-data
            android:name="APP_KEY"
            android:value="${appKey}" />
在 gradle.properties 文件中声明需要的 ChannelId以及对应的 ApplicationId,在此文件中声明的属性可以直接在 build.gradle 中直接获取到
#默认配置
defaultApplicationId=leavesc.hello.gradlesamples
##各个渠道的配置
#应用宝
yingyongbaoChannelId="yingyongbao"
yingyongbaoApplicationId=leavesc.hello.gradlesamples.yingyongbao
yingyongbaoAppKey=appKey_yingyongbao
#豌豆荚
wandoujiaChannelId="wandoujia"
wandoujiaApplicationId=leavesc.hello.gradlesamples.wandoujia
wandoujiaAppKey=appKey_wandoujia
#小米
xiaomiChannelId="xiaomi"
xiaomiApplicationId=leavesc.hello.gradlesamples.xiaomi
xiaomiAppKey=appKey_xiaomi
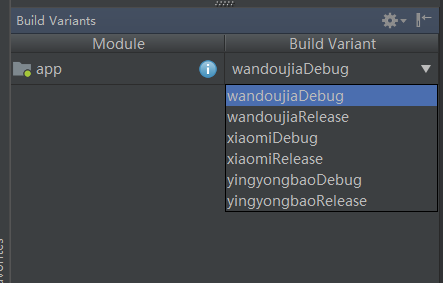
productFlavors 可以理解为是对同个产品的不同“风味要求”,可以根据配置项生成特定风味的产品(App)
例如,此处就为不同渠道设定了不同的 applicationId
buildConfigField 属性则用于在 BuildConfig.java 文件中生成特定类型的字段,此处就生成了一个类型为 String ,名为 channelId 的字段,用于方便在应用运行过程中判断当前应用的渠道类型
manifestPlaceholders 就是用于替换 AndroidManifest.xml 文件中的指定占位符了
    productFlavors {
        yingyongbao {
            applicationId yingyongbaoApplicationId
            buildConfigField "String", "channelId", yingyongbaoChannelId
            manifestPlaceholders = [appKey: yingyongbaoAppKey]
        }
        wandoujia {
            applicationId wandoujiaApplicationId
            buildConfigField "String", "channelId", wandoujiaChannelId
            manifestPlaceholders = [appKey: wandoujiaAppKey]
        }
        xiaomi {
            applicationId xiaomiApplicationId
            buildConfigField "String", "channelId", xiaomiChannelId
            manifestPlaceholders = [appKey: xiaomiAppKey]
        }
    }
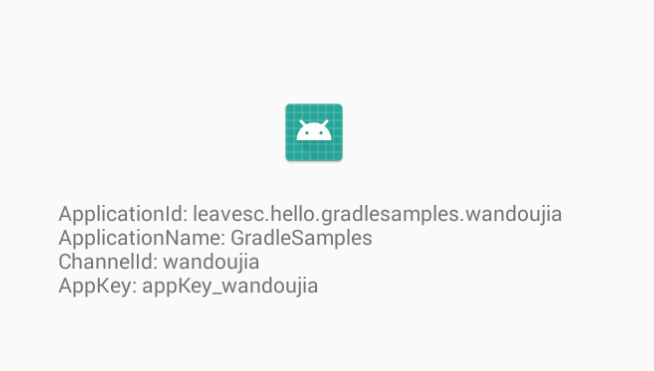
在主布局文件中展示当前应用的各项属性值
    @Override
    protected void onCreate(Bundle savedInstanceState) {
        super.onCreate(savedInstanceState);
        setContentView(R.layout.activity_main);
        StringBuilder sb = new StringBuilder();
        sb.append("ApplicationId: ");
        sb.append(getApplicationInfo().packageName);
        sb.append("\n");
        sb.append("ApplicationName: ");
        sb.append(getString(getApplicationInfo().labelRes));
        sb.append("\n");
        sb.append("ChannelId: ");
        sb.append(BuildConfig.channelId);
        sb.append("\n");
        try {
            ApplicationInfo appInfo = getPackageManager().getApplicationInfo(getPackageName(), PackageManager.GET_META_DATA);
            String appKey = appInfo.metaData.getString("APP_KEY");
            sb.append("AppKey: ");
            sb.append(appKey);
        } catch (PackageManager.NameNotFoundException e) {
            e.printStackTrace();
        }
        TextView tv_appInfo = findViewById(R.id.tv_appInfo);
        tv_appInfo.setText(sb);
        ImageView iv_log = findViewById(R.id.iv_log);
        iv_log.setImageResource(getApplicationInfo().icon);
    }
四、打包时指定 Apk 名字
为了方便标识各个测试包的版本已经打包时间,可以通过 Gradle 来指定生成的 Apk 文件的命名规则
例如,以下配置就根据 buildType、flavorName 和 编译时间 来命名 Apk 文件
    applicationVariants.all { variant ->
        def buildType = variant.buildType.name
        def flavorName = variant.flavorName
        def createTime = new Date().format("YYYY-MM-dd_hh_mm_ss", TimeZone.getTimeZone("GMT+08:00"))
        variant.outputs.all {
            outputFileName = flavorName + "_" + buildType + "_v" + defaultConfig.versionName + "_" + createTime + ".apk"
        }
    }
五、生成属性字段与资源文件值
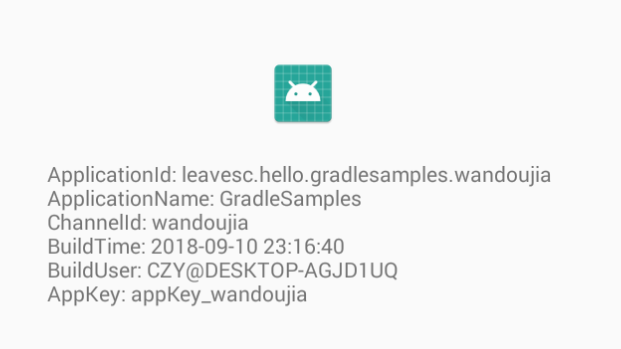
上边讲过,buildConfigField 属性可用于在 BuildConfig.java 文件中生成特定类型的字段,此处可以利用其来记录应用的编译时间
此外,也可以利用 resValue 来生成一个 ID 引用类型的 string 字符串
首先,声明两个方法,分别用于获取当前时间以及当前电脑的用户信息
static def buildTime() {
    return new Date().format("yyyy-MM-dd HH:mm:ss")
}

static def hostName() {
    return System.getProperty("user.name") + "@" + InetAddress.localHost.hostName
}
    defaultConfig {
        applicationId defaultApplicationId
        minSdkVersion globalConfiguration["minSdkVersion"]
        targetSdkVersion globalConfiguration["targetSdkVersion"]
        versionCode globalConfiguration["versionCode"]
        versionName globalConfiguration["versionName"]
        testInstrumentationRunner "android.support.test.runner.AndroidJUnitRunner"
        flavorDimensions '1'
        resValue "string", "build_host", hostName()
        buildConfigField "String", "build_time", "\"" + buildTime() + "\""
    }
用代码来获取这两个属性值
@Override
    protected void onCreate(Bundle savedInstanceState) {
        super.onCreate(savedInstanceState);
        setContentView(R.layout.activity_main);
        StringBuilder sb = new StringBuilder();
        sb.append("ApplicationId: ");
        sb.append(getApplicationInfo().packageName);
        sb.append("\n");
        sb.append("ApplicationName: ");
        sb.append(getString(getApplicationInfo().labelRes));
        sb.append("\n");
        sb.append("ChannelId: ");
        sb.append(BuildConfig.channelId);
        sb.append("\n");
        sb.append("BuildTime: ");
        sb.append(BuildConfig.build_time);
        sb.append("\n");
        sb.append("BuildUser: ");
        sb.append(getString(R.string.build_host));
        sb.append("\n");
        try {
            ApplicationInfo appInfo = getPackageManager().getApplicationInfo(getPackageName(), PackageManager.GET_META_DATA);
            String appKey = appInfo.metaData.getString("APP_KEY");
            sb.append("AppKey: ");
            sb.append(appKey);
        } catch (PackageManager.NameNotFoundException e) {
            e.printStackTrace();
        }
        TextView tv_appInfo = findViewById(R.id.tv_appInfo);
        tv_appInfo.setText(sb);
        ImageView iv_log = findViewById(R.id.iv_log);
        iv_log.setImageResource(getApplicationInfo().icon);
    }
六、替换资源文件
在多渠道打包时,除了需要在应用中打上特定的标签外,也可能需要使之使用不同的资源文件,例如应用图标和应用名称
此时可以以各个 productFlavor 的名称来命名相应的文件夹,并在其中放置相应的图标文件以及声明了应用名称的 string.xml 文件,这样在多渠道打包时,Gradle 就会自动引用相应的资源文件
上述所有的示例代码可以在这里获取:GradleSamples
更多的读书笔记可以看这里:一份关于 Java 、Kotlin 、 Android 的学习笔记