本文是「Zadig IDP 插件开发实战」系列的首篇。
在企业推行内部开发者平台(IDP)过程中,插件机制能够高效整合高频协作能力, 实现统一入口和体验。本篇以「GitLab MR 查看器」为例,逐步演示如何基于 Zadig 插件体系,从开发到上线构建自研代码仓视图,帮助开发者在统一平台完成任务切换与信息检索。
敬请关注后续内容,我们将陆续推出 监控告警查看器、项目管理面板等插件实战,助力工程团队高效协作。
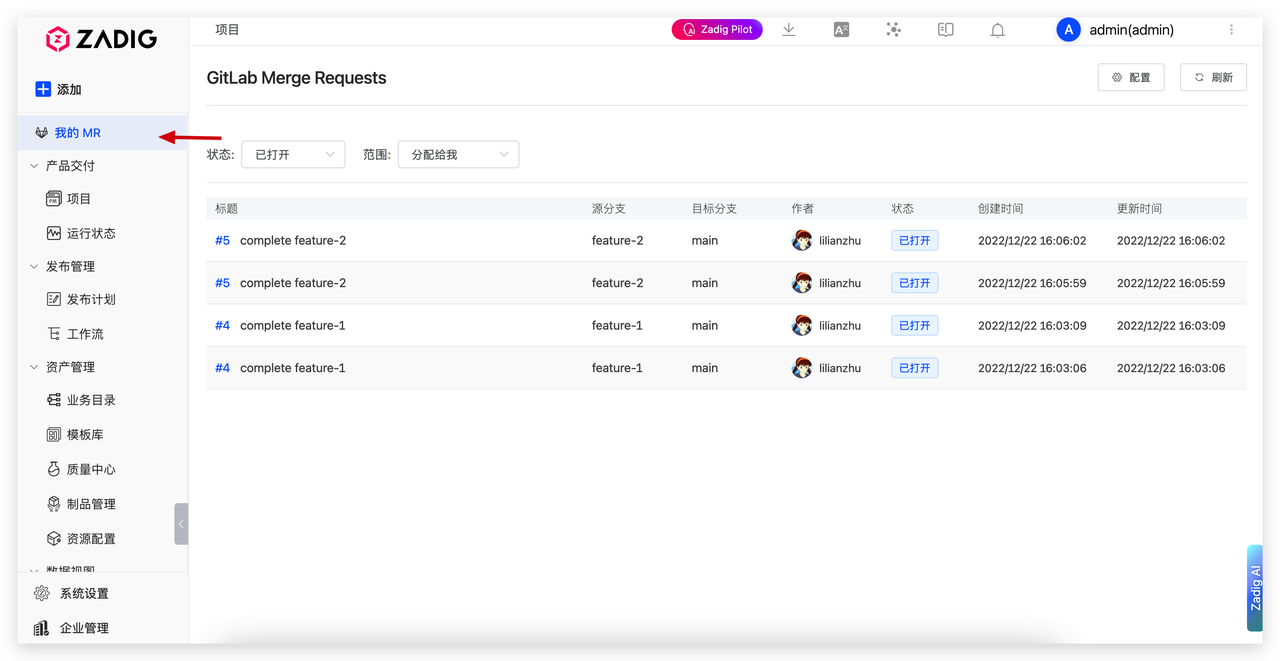
最终效果预览
当前实现的能力:
准备工作
本插件的初始开发耗时约 2 天,但您无需重复此过程。遵循本教程,可在 1-2 小时内快速完成,立即体验 Zadig 插件的便捷开发。
基础知识:
版本要求:
-
Node.js v20.0+
-
Yarn v4.0+
-
Zadig v4.0+
其他:
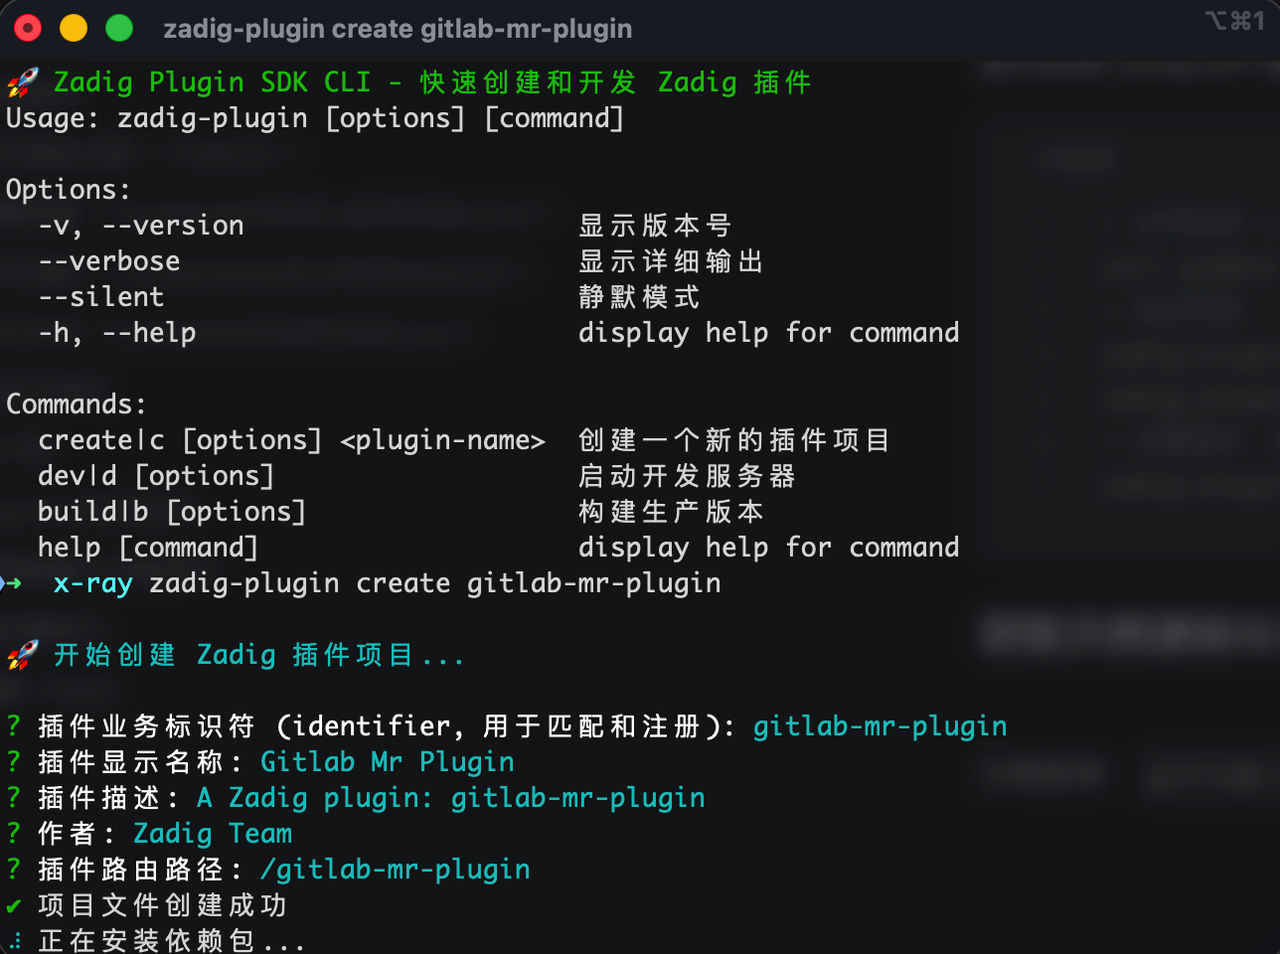
首先安装 Zadig IDP 插件开发 SDK,并根据提示初始化插件脚手架
# 全局安装 zadig-plugin-cli
yarn global add zadig-plugin-cli-dev
# 验证安装
zadig-plugin --version zadig-plugin --help
# 创建插件,默认创建 Page 类型
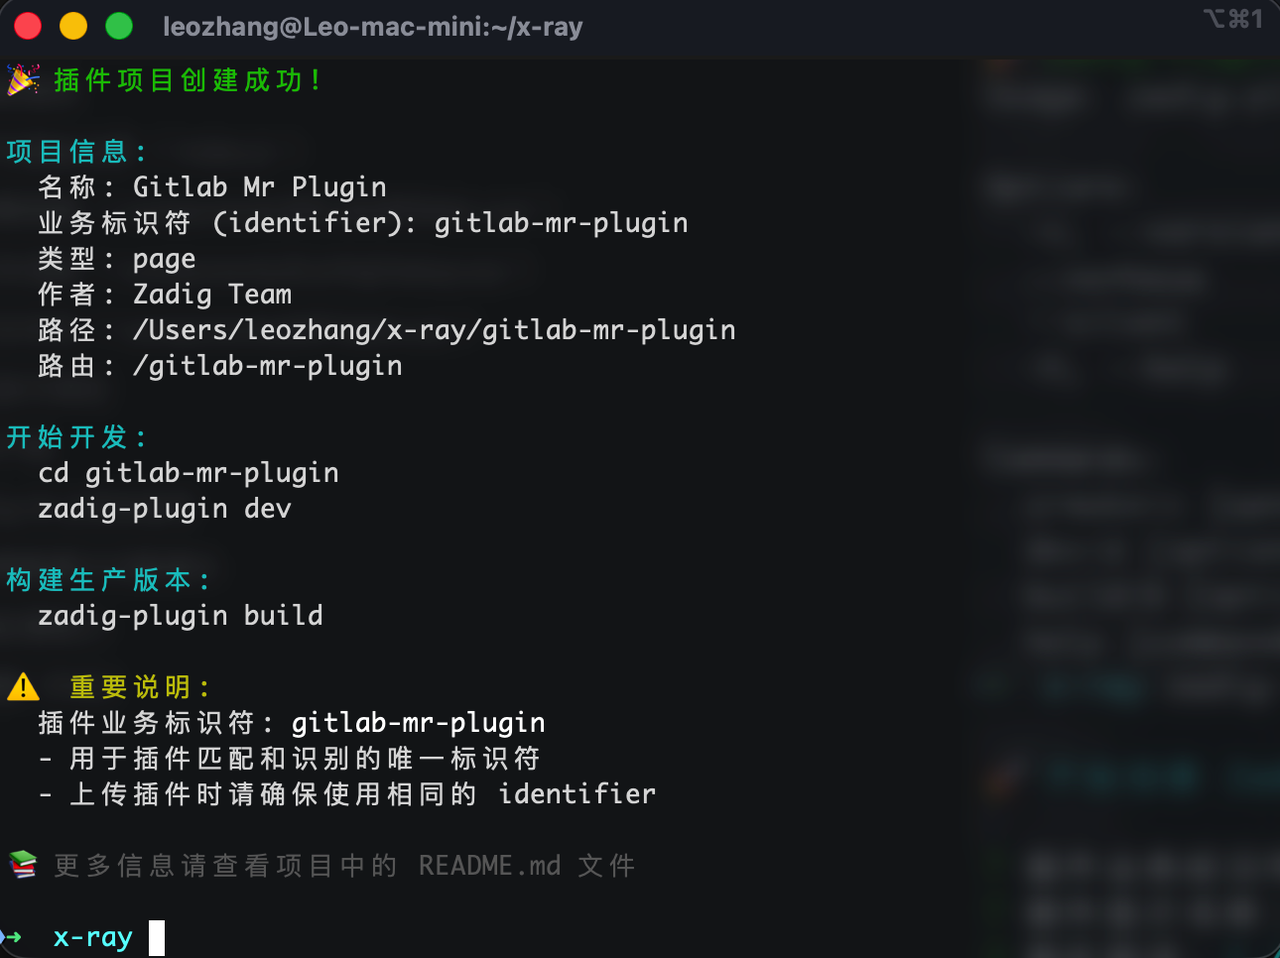
zadig-plugin create gitlab-mr-plugin
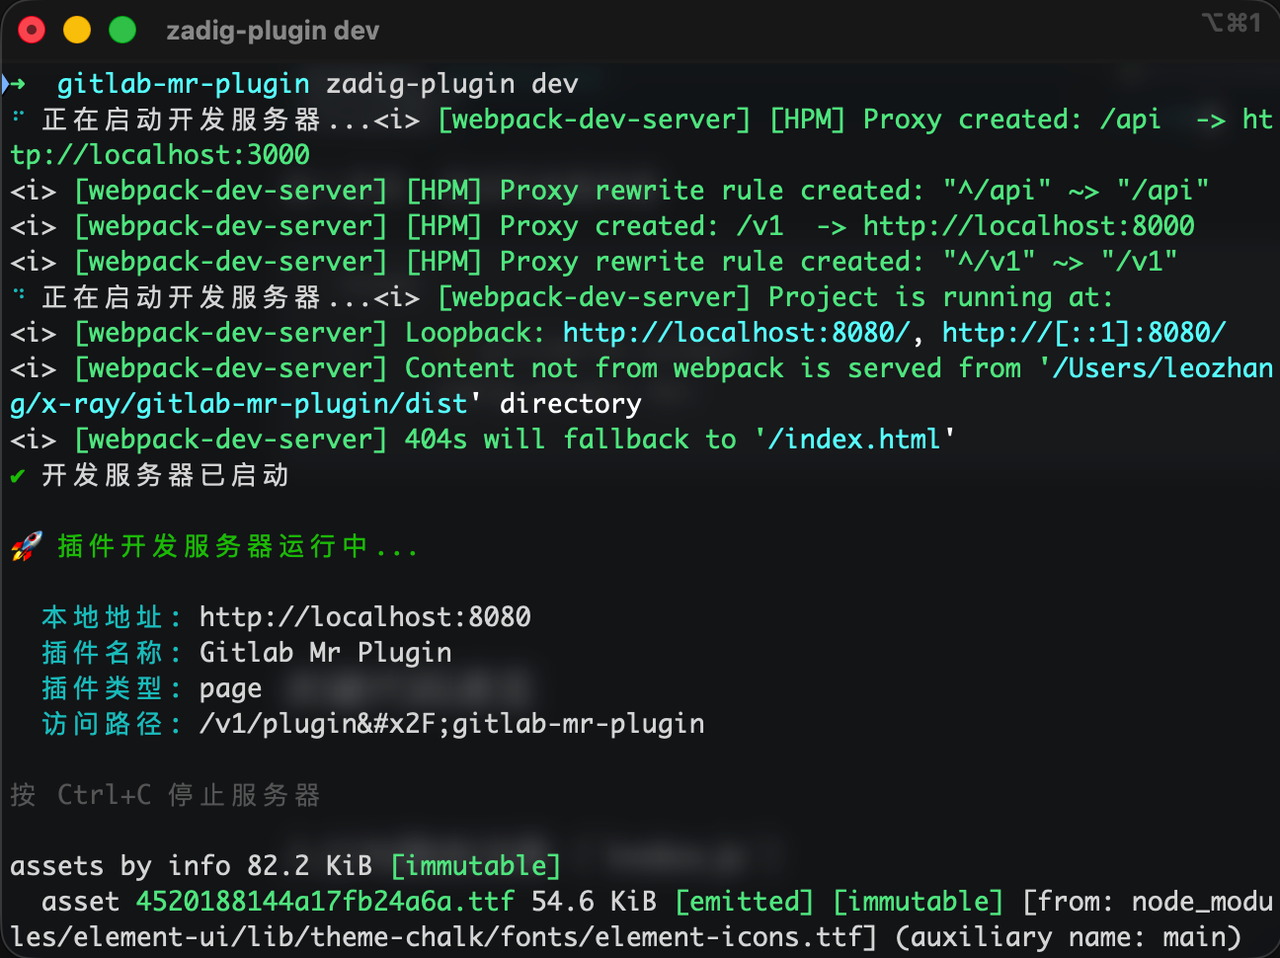
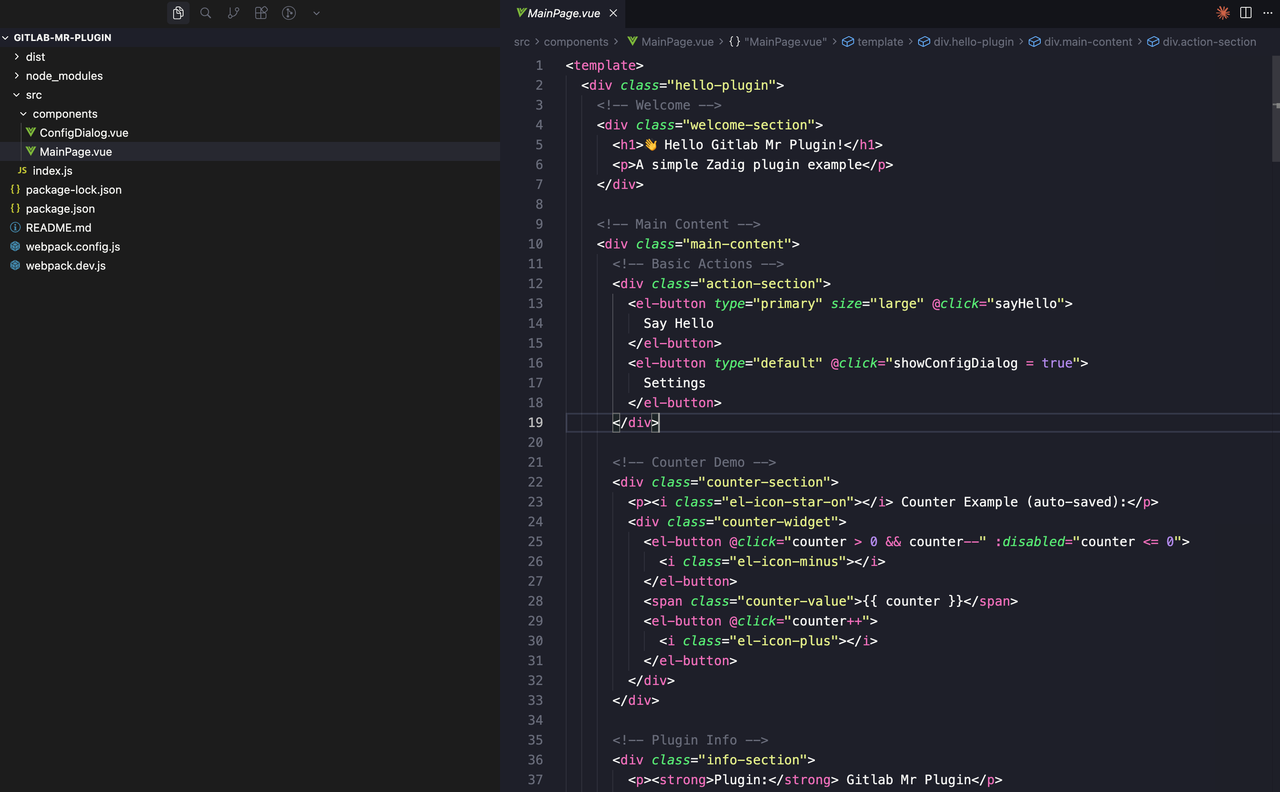
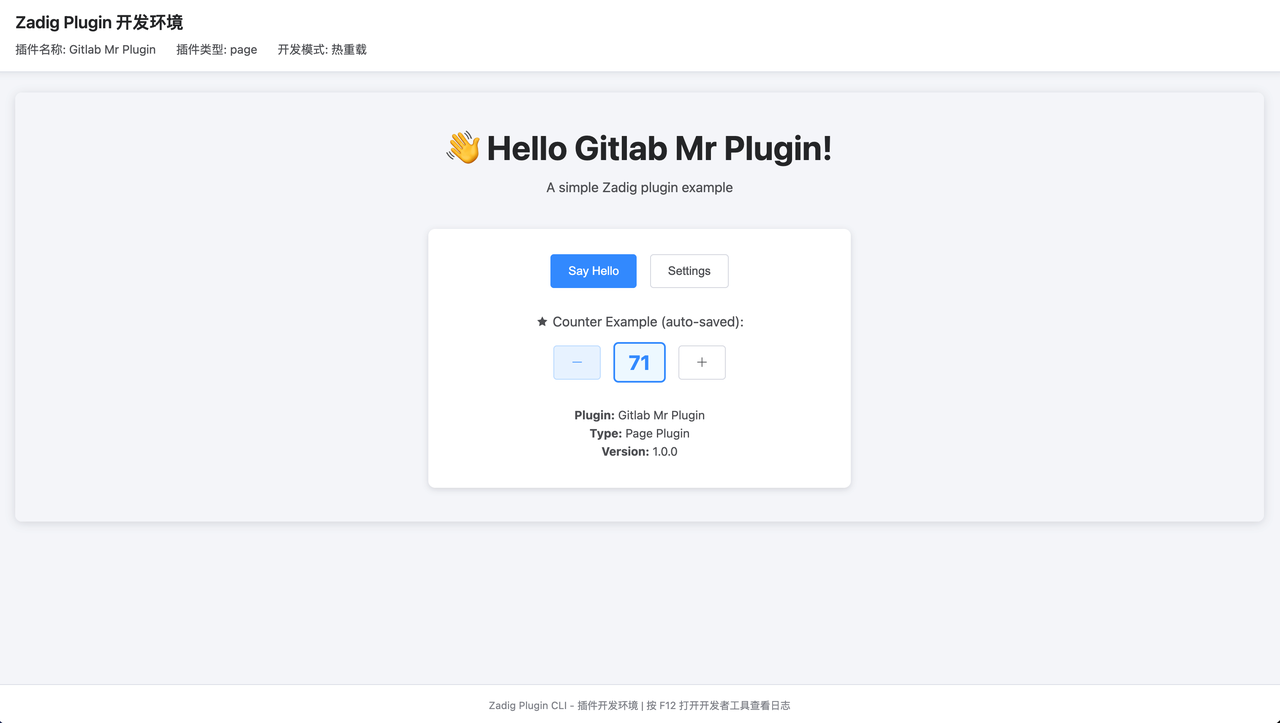
进入目录,启动开发服务器,默认会展示 Hello Plugin 页面,可以在此脚手架代码上进行修改。
cd gitlab-mr-plugin zadig-plugin dev
核心代码速览
入口与路由注册(index.js)
插件在挂载时注册主路由,并定义 manifest 元数据(identifier、name、route、type 等),默认由 SDK 默认生成,可以不做修改
// 路由注册(节选)
this.registerRoute({ path: '/', component: WrappedComponent, meta: { title: 'GitLab Merge Requests', icon: 'el-icon-s-cooperation' } })
// manifest(节选)
const manifest = { identifier: 'gitlab-mr-plugin', name: 'GitLab MR查看器', version: '1.0.0', description: '查看分配给我的GitLab Merge Request', type: 'page', route: '/gitlab-mr' }
主页面容器(components/GitLabMRMain.vue)
-
使用本地存储保存 gitlab_url 和 gitlab_token
-
fetchMergeRequests 基于 GitLab API 拉取 MR 列表,支持状态/范围/分页
-
「测试连接」会请求 /api/v4/user 验证 Token
<!-- 拉取 MR 列表(节选) -->
async fetchMergeRequests ()
{ if (!this.isConfigured) { this.showTokenDialog = true return }
const params = new URLSearchParams({ state: this.filterState === 'all' ? undefined : this.filterState, scope: this.filterScope === 'all' ? undefined : this.filterScope, page: this.currentPage, per_page: this.pageSize, sort: 'desc' })
Array.from(params.entries()).forEach(([k, v]) => { if (v === 'undefined' || v === undefined) params.delete(k) })
const response = await fetch(`${this.gitlabUrl}/api/v4/merge_requests?${params}`, { headers: { Authorization: `Bearer ${this.gitlabToken}`, 'Content-Type': 'application/json' } })
const data = await response.json()
this.mergeRequests = data
const totalHeader = response.headers.get('X-Total')
this.total = totalHeader ? parseInt(totalHeader) : data.length }
<!-- 测试连接(节选) -->
const response = await fetch(`${this.gitlabUrl}/api/v4/user`, { headers: { Authorization: `Bearer ${this.gitlabToken}`, 'Content-Type': 'application/json' } })
GitLab 配置(components/ConfigDialog.vue)
表格与交互(components/MRTable.vue)
-
根据 API 展示 MR 的基本信息
-
点击行跳转到 MR 详情
<!-- MR 展示(节选) --> <el-table :data="data" :loading="loading" @row-click="handleRowClick" style="width: 100%" stripe > <el-table-column prop="title" label="标题" min-width="300"> <template slot-scope="scope"> <div class="mr-title"> <span class="mr-iid">#{{ scope.row.iid }}</span> <span class="title-text">{{ scope.row.title }}</span> </div> </template> </el-table-column> <el-table-column label="源分支"> <template slot-scope="scope"> <span class="branch-name">{{ scope.row.source_branch }}</span> </template> </el-table-column> <el-table-column label="目标分支"> <template slot-scope="scope"> <span class="branch-name">{{ scope.row.target_branch }}</span> </template> </el-table-column> <el-table-column label="作者"> <template slot-scope="scope"> <div class="author-info"> <img v-if="scope.row.author.avatar_url" :src="scope.row.author.avatar_url" class="author-avatar" :alt="scope.row.author.name" /> <span class="author-name">{{ scope.row.author.name }}</span> </div> </template> </el-table-column> <el-table-column prop="state" label="状态" width="100"> <template slot-scope="scope"> <el-tag :type="getStateType(scope.row.state)" size="small"> {{ getStateText(scope.row.state) }} </el-tag> </template> </el-table-column> <el-table-column label="创建时间" width="160"> <template slot-scope="scope"> {{ formatDate(scope.row.created_at) }} </template> </el-table-column> <el-table-column label="更新时间" width="160"> <template slot-scope="scope"> {{ formatDate(scope.row.updated_at) }} </template> </el-table-column> </el-table>
构建与测试
可以通过 zadig-plugin dev 实时预览改动
调试建议:
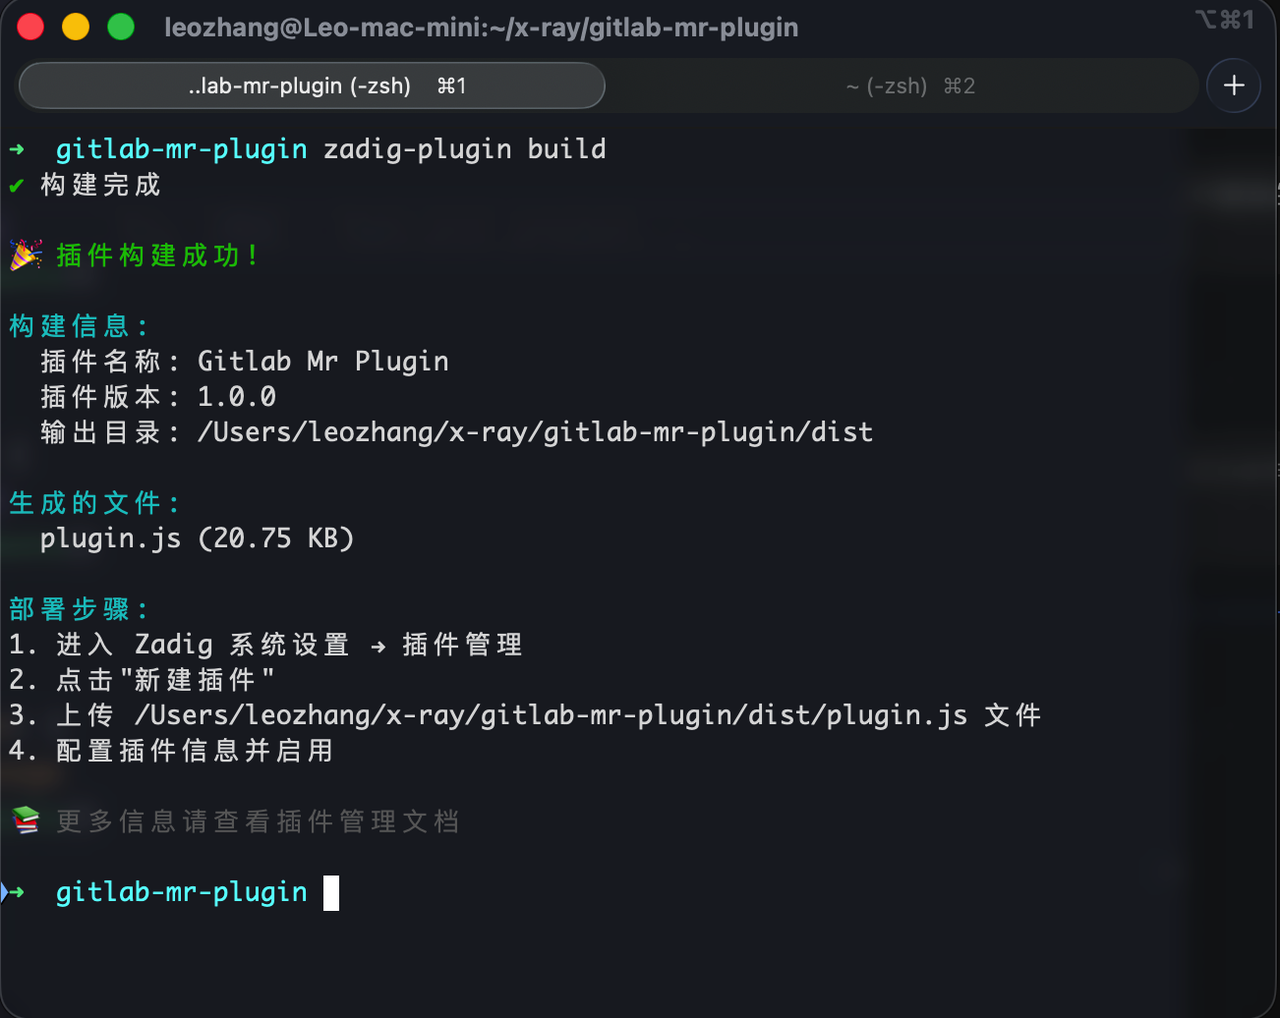
本地调试完成后可以构建生产版本:
# 构建生产版本
zadig run build
构建完成后,会在 dist/ 目录生成 plugin.js。这是上传到 Zadig 的最终产物。
在 Zadig 中上传并发布
-
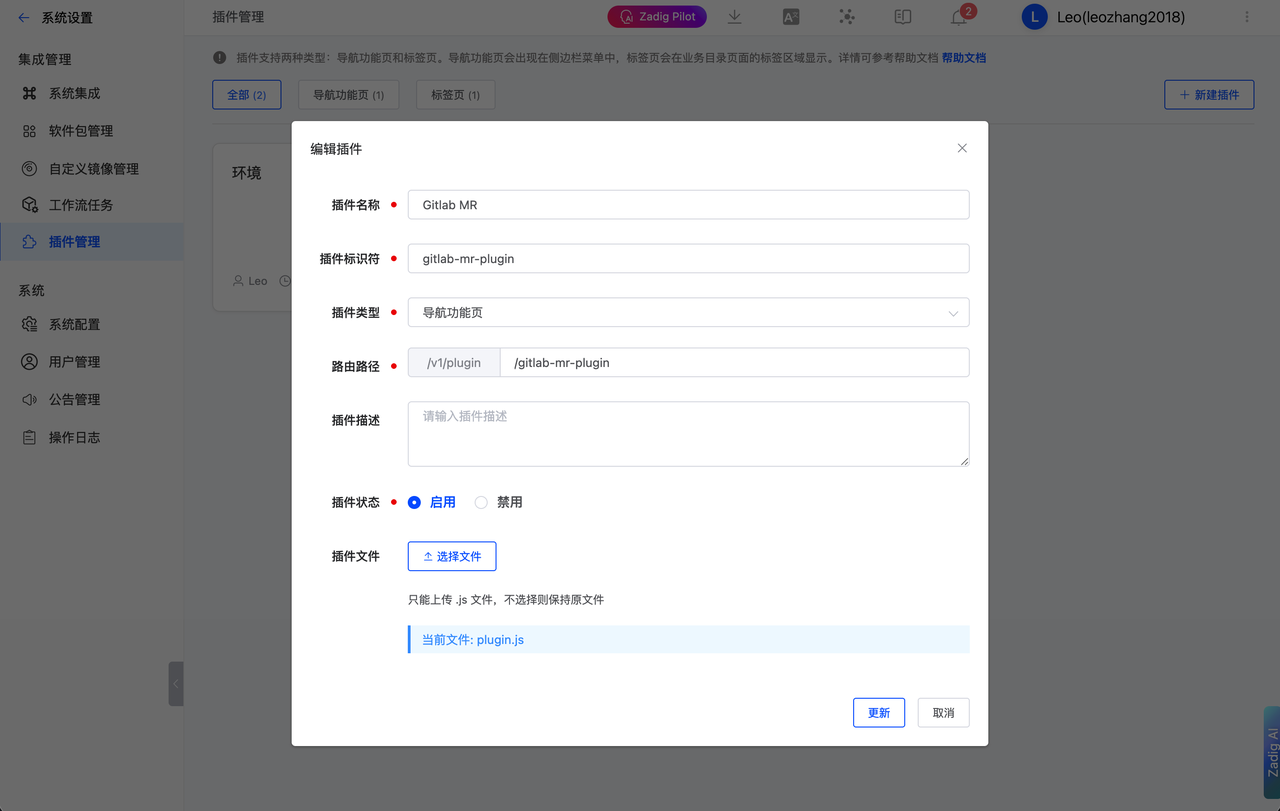
登录 Zadig → 进入「系统设置 → 插件管理」
-
点击「新建插件」,填写:
-
插件名称:GitLab MR 查看器
-
插件类型:导航功能页(Page)
-
路由路径: /gitlab-mr-plugin
-
插件描述:查看分配给我的 GitLab Merge Request
-
插件状态:启用
-
上传构建产物: dist/plugin.js
-
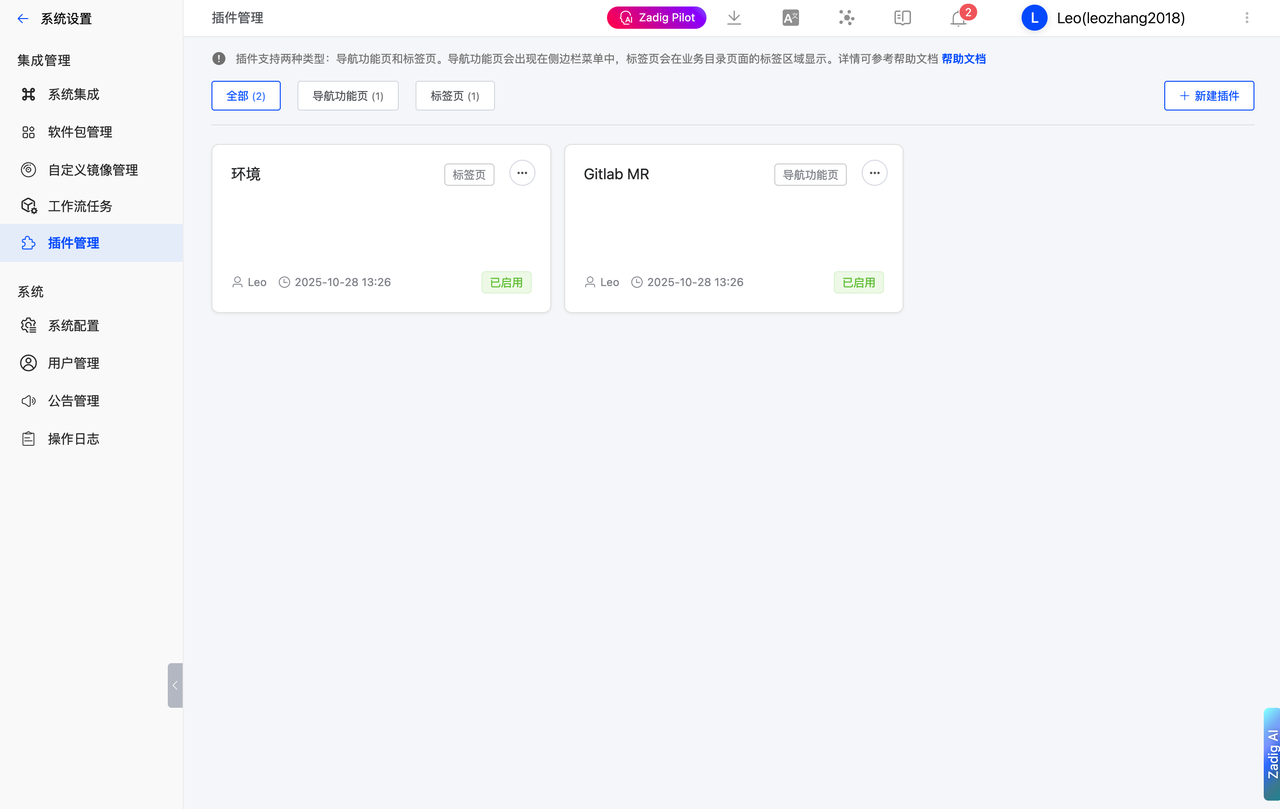
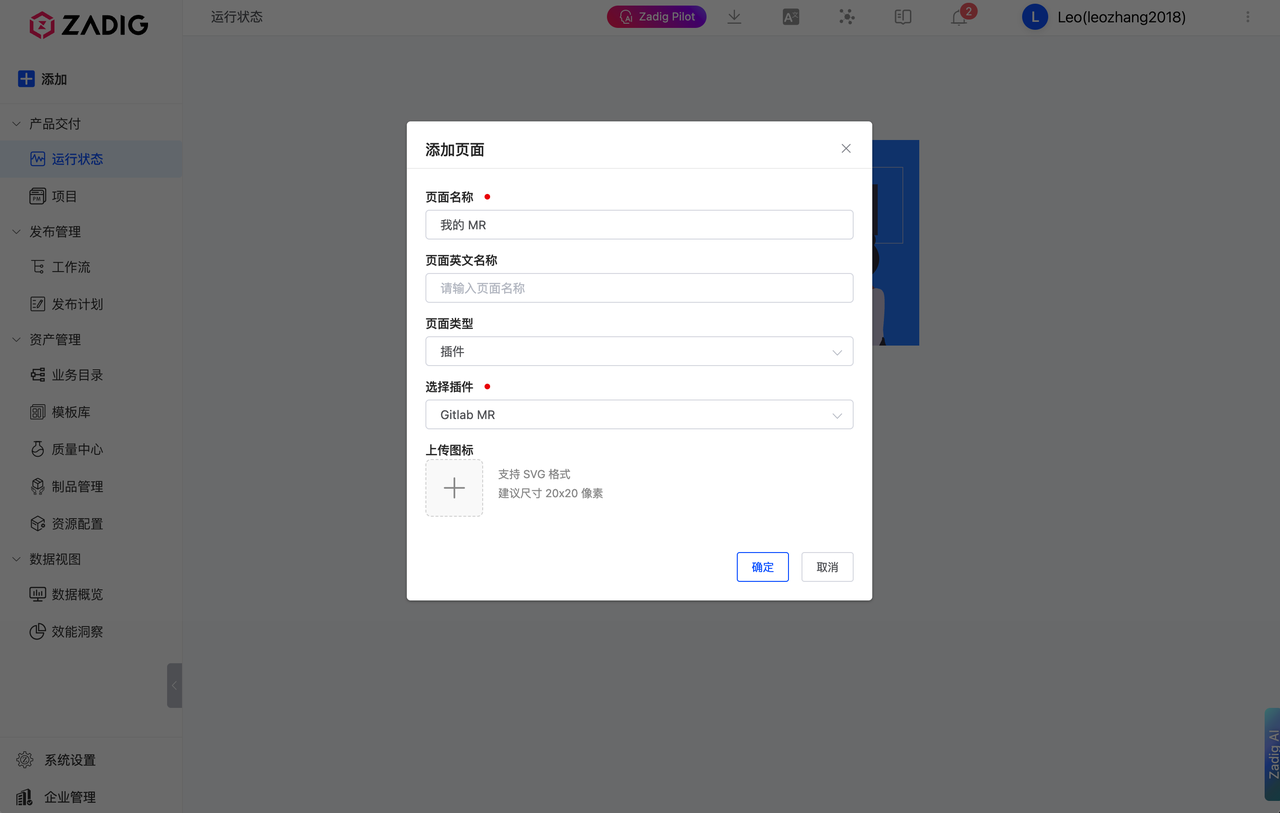
返回主页面侧边栏,点击添加页面,类型选择插件,选择刚创建的插件
使用配置与功能演示
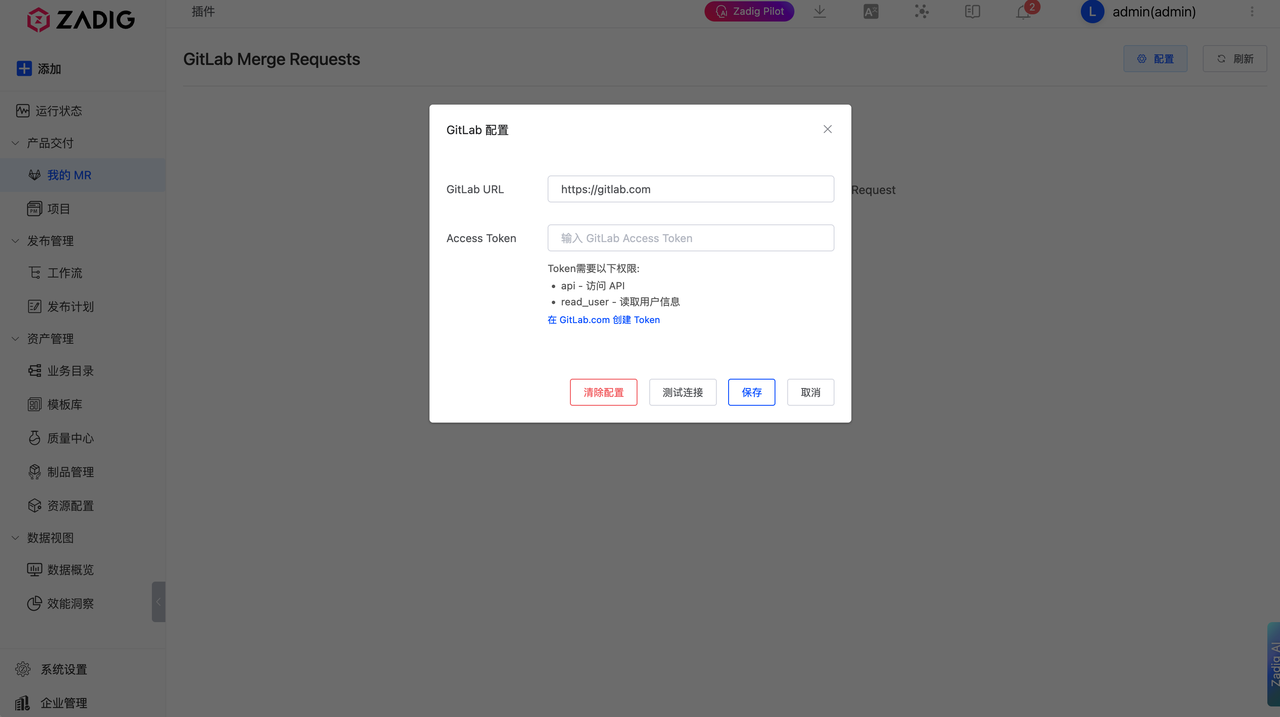
-
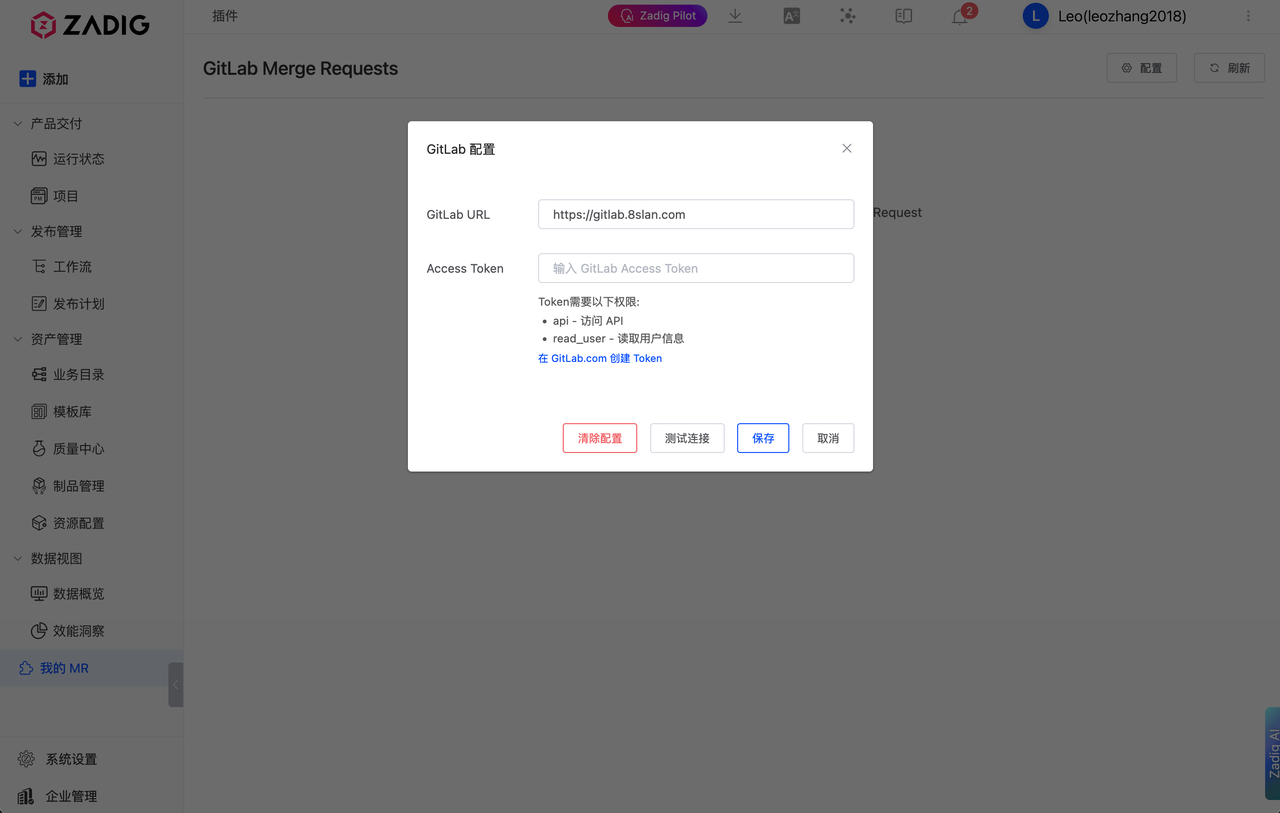
打开插件页面,点击右上角「配置」
-
填写:
-
GitLab URL:
-
Access Token:粘贴刚刚创建的 Token(具备 api、 read_user权限)
-
点击「测试连接」,验证通过后「保存」即可启用。
后续可迭代的能力
-
MR 详情内嵌:在插件内直接查看 MR 概览、变更文件、Diff(可先轻量展示,再逐步增强)。
-
审批与评论:支持在插件内添加评论、表情、建议变更;读取/提交 Approve/Request Changes。
-
标签/里程碑管理:快速为 MR 设定 Label、里程碑,形成轻量分类与追踪。
-
批量操作:对筛选结果的 MR 进行批量指派、加标签、订阅等。
🔜 结语与预告:
通过本示例,你可体验到 Zadig IDP 插件体系的灵活与开放:借助 SDK 快速开发,轻松接入内部系统、沉淀协作能力,让开发者在统一入口中高效工作。
📦 本文示例插件已开源
下一篇我们将带来
《如何在 Zadig 中构建通用 iFrame 集成插件》 —— 打造跨系统统一入口,实现研发协作与业务系统的一体化联动。
📌 欢迎关注我们,持续获取 Zadig IDP 实战系列的最新动态与深度解析!