首页 文章 精选 留言 我的

精选列表

搜索[设置],共10000篇文章
优秀的个人博客,低调大师

开源无代码 / 低代码平台 NocoBase 发布 V0.15,全新的插件设置中心

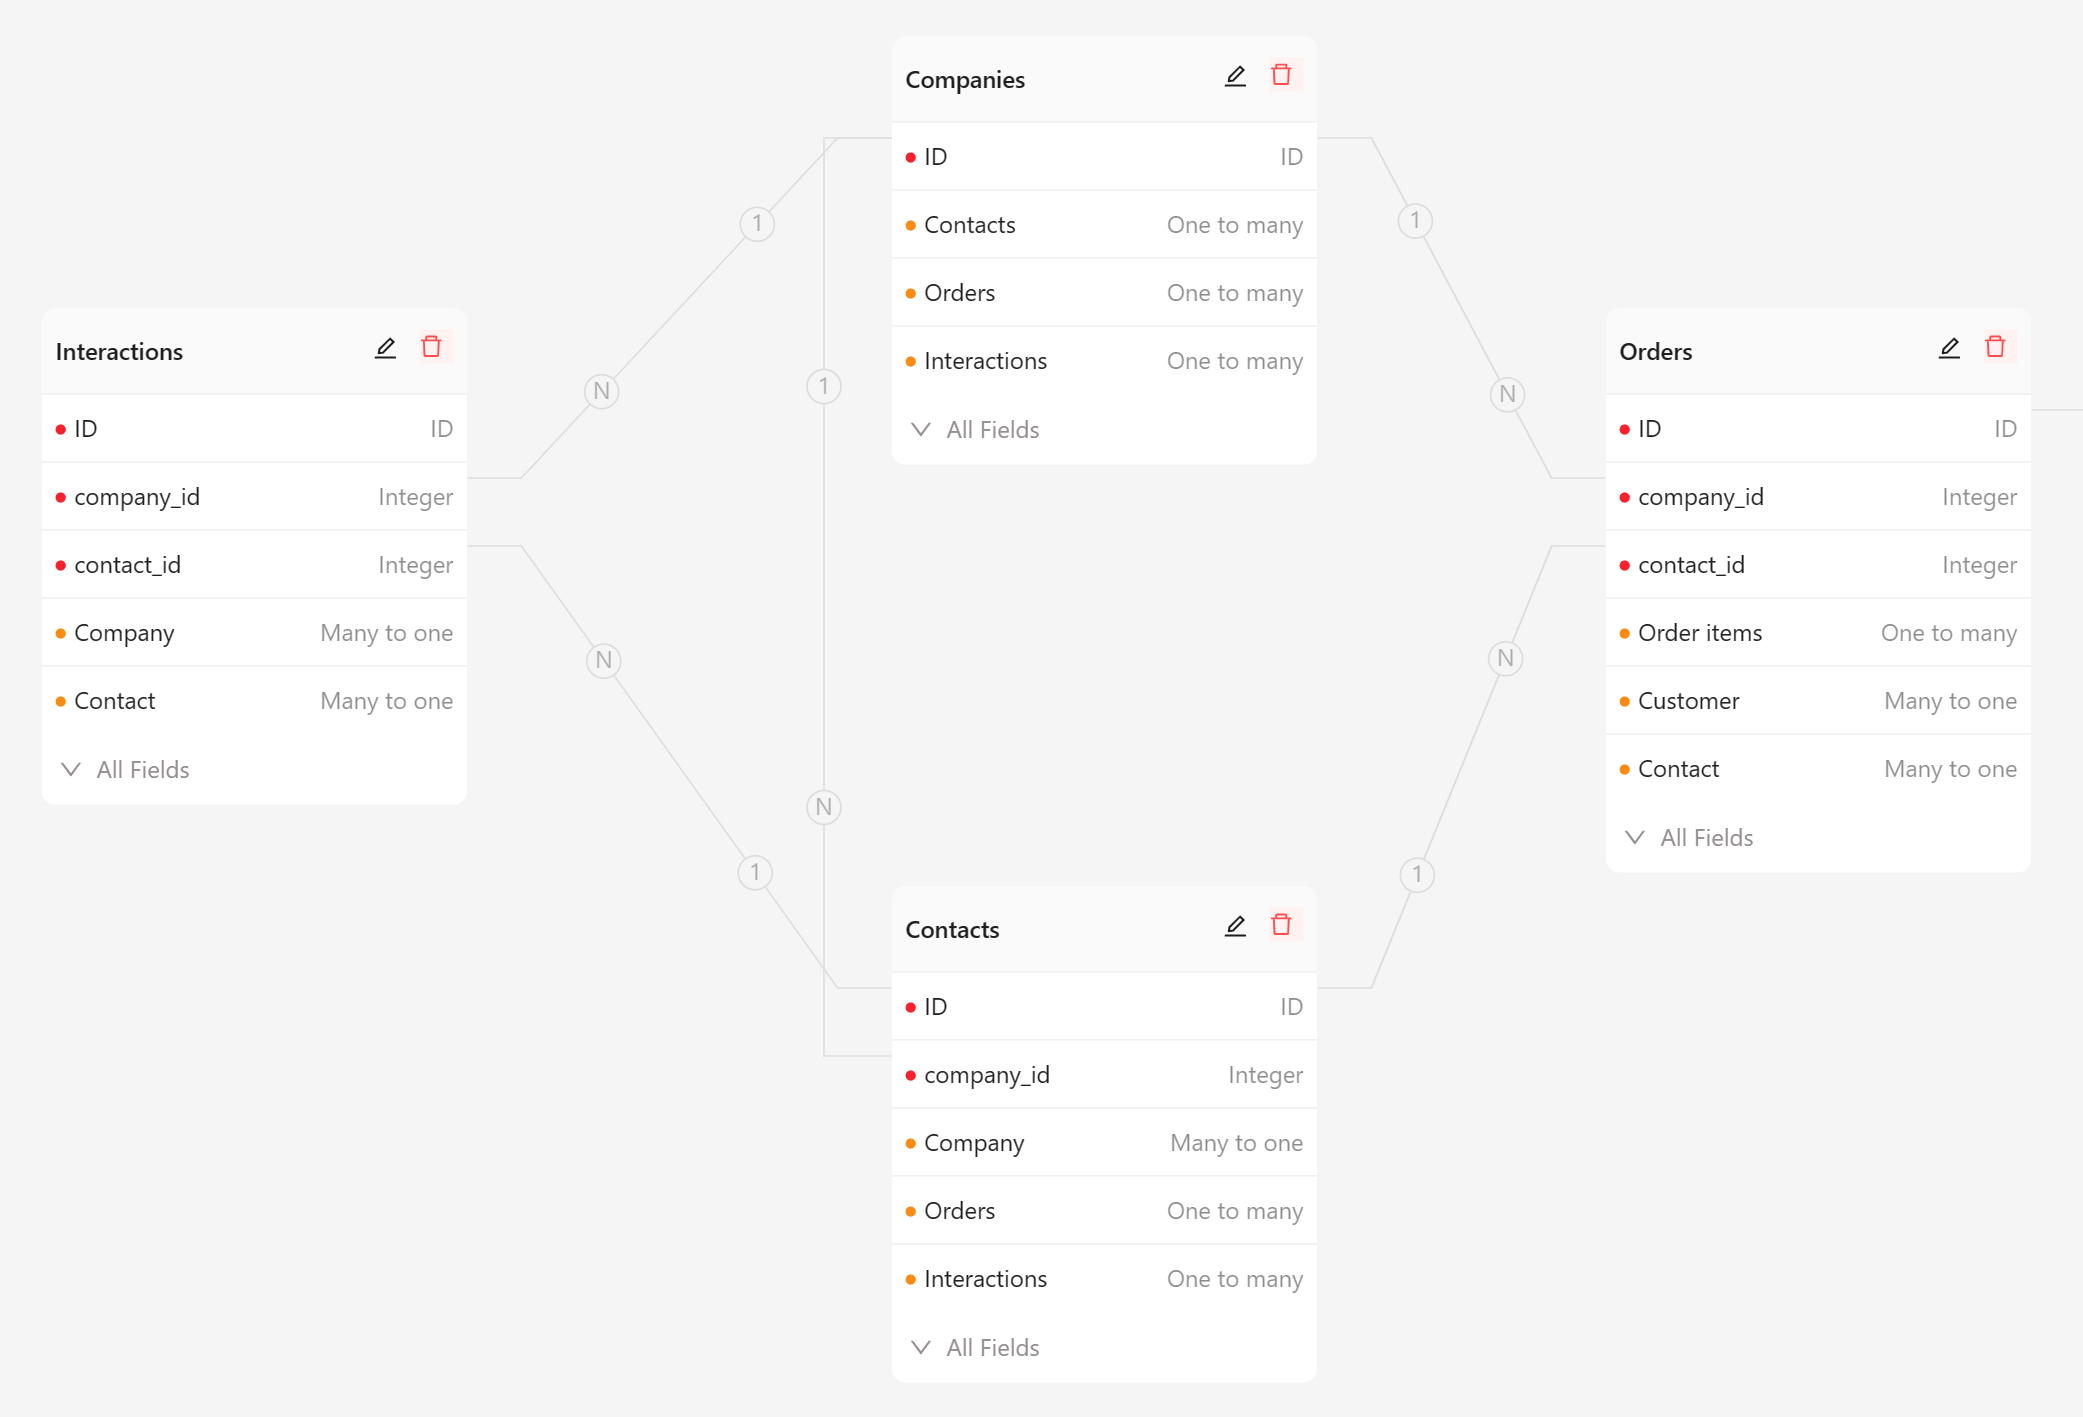
NocoBase 是什么 NocoBase 是一个极易扩展的开源无代码开发平台。 不必投入几年时间、数百万资金研发,花几分钟时间部署 NocoBase,马上拥有一个私有、可控、极易扩展的无代码开发平台。 与众不同之处 1. 模型驱动,“数据结构”与“使用界面”分离 多数以表单、表格或者流程驱动的无代码产品都是在使用界面上直接创建数据结构,比如 Airtable 在表格里新增一列就是新增一个字段。这样的好处是使用简单,不足是功能和灵活性受限,难以满足较复杂场景的需求。 NocoBase 采用数据结构与使用界面分离的设计思路,可以为数据表创建任意数量、任意形态的区块(数据视图),每个区块里可以定义不同的样式、文案、操作。这样既兼顾了无代码的简单操作,又具备了原生开发的灵活性。 2. 所见即所得 NocoBase 可以开发复杂和有特色的业务系统,但这并不意味着需要复杂和专业的操作。只需一次点击,就可以在使用界面上显示出配置选项,具备系统配置权限的管理员可以用所见即所得的操作方式,直接配置用户的使用界面。 3. 功能即插件 NocoBase 采用插件化架构,所有新功能都可以通过开发和安装插件来实现,扩展功能就像在手机上安装 APP 一样简单。 新特性 不兼容的变化 插件配置页面注册方式 以前使用 SettingsCenterProvider 注册插件配置页面,现在需要通过插件化注册。 案例 1:原页面仅有一个 Tab 的情况 当页面仅有一个 Tab 时,新版本的 Tab 会删掉,仅保留页面的标题和图标。 const HelloProvider = React.memo(props => { return ( <SettingsCenterProvider settings={{ hello: { title: "Hello", icon: "ApiOutlined", tabs: { tab1: { title: "Hello tab", component: HelloPluginSettingPage, }, }, }, }} > {props.children} SettingsCenterProvider> ); }); 现在需要改为: class HelloPlugin extends Plugin { async load() { this.app.pluginSettingsManager.add("hello", { title: "Hello", // 原 title icon: "ApiOutlined", // 原 icon Component: HelloPluginSettingPage, // 原 tab component aclSnippet: "pm.hello.tab1", // 权限片段,保证权限的 code 和之前的一致,如果是新插件,不需要传这个参数 }); } } 也就是删除了 tab1 的 Hello Tab。 其中参数 aclSnippet 的 pm.hello.tab1 对应原来的 settings 对象的 key: <SettingsCenterProvider settings={{ hello: { // 这里的 hello 对应 `pm.hello.tab1` 中的 `hello` tabs: { tab1: { // 这里的 tab1 对应 `pm.hello.tab1` 中的 tab1 }, }, }, }} >SettingsCenterProvider> 案例 2:原页面有多个 Tab 的情况 const HelloProvider = React.memo(props => { return ( <SettingsCenterProvider settings={{ hello: { title: "Hello", icon: "ApiOutlined", tabs: { tab1: { title: "Hello tab1", component: HelloPluginSettingPage1, }, tab2: { title: "Hello tab2", component: HelloPluginSettingPage2, }, }, }, }} > {props.children} SettingsCenterProvider> ); }); 现在需要改为: import { Outlet } from "react-router-dom"; class HelloPlugin extends Plugin { async load() { this.app.pluginSettingsManager.add("hello", { title: "Hello", // 原 title icon: "ApiOutlined", // 原 icon Component: Outlet, }); this.app.pluginSettingsManager.add("hello.tab1", { title: "Hello tab1", // 原 tab1 title Component: HelloPluginSettingPage1, // 原 tab1 component }); this.app.pluginSettingsManager.add("hello.tab2", { title: "Hello tab2", // 原 tab2 title Component: HelloPluginSettingPage1, // 原 tab2 component }); } } 获取 pluginSettingsManager 对应的路由信息 const baseName = app.pluginSettingsManager.getRouteName("hello"); // admin.settings.hello const basePath = app.pluginSettingsManager.getRoutePath("hello"); // /admin/settings/hello 如果插件配置页面内部有链接跳转的话,需要进行相应的更改,例如: navigate("/admin/settings/hello/1"); navigate("/admin/settings/hello/2"); // 可以更改为 const basePath = app.pluginSettingsManager.getRoutePath("hello"); navigate(`${basePath}/1`); navigate(`${basePath}/2`); 更多信息,请参考 插件配置页面。 更新记录 完整的更新记录,请参考 更新记录。 v0.15.0-alpha.2 - 2023-11-13 Merged fix: antd table ref bug #3029 fix: improve plugin settings code #3028 fix: plugin settings manager Component optional & delete isBookmark #3027 fix(plugin-workflow): fix workflow title in binding workflow configuration not showing #3026 Commits chore(versions): 😊 publish v0.15.0-alpha.2 b597aec chore: update changelog 9dae34a v0.15.0-alpha.1 - 2023-11-13 Merged refactor: plugin settings manager #2712 fix: fix regular of variable #3024 fix: should load association data in subform #3020 fix: association field in reference block failed to append #2998 fix: relational data should be loaded correctly on first render #3016 feat: plugin-mock-collections #2988 Update pull_request_template.md #3013 fix: should lazy load association data in subform #3012 fix(import): remove commas from numbers #3011 fix(static-server): directoryListing: false #3010 fix(theme): text color of page header right side #3008 fix: menu failed to design while menu title is empty string #2999 fix(plugin-workflow): add missed component #3007 fix: detail block has no data #3003 refactor(plugin-workflow): allow to use function for values when creating node #3002 fix(plugin-workflow): fix configuration drawer close logic #3001 chore: add aria label for workflow table #2995 fix: select item can not be selected in connecting data blocks #2993 chore: optimize error message #2992 refactor(plugin-workflow): change to function #2991 fix(plugin-workflow): fix loop scope variable #2989 chore: optimize error message #2985 fix(formula-field): formula field failed to real-time evaluating and support sub-form #2983 fix: association select should not clearing after config data scope #2984 fix(plugin-workflow): fix node form values when closed #2978 fix: button of details is not refresh when updating record #2977 fix: docs ci #2976 fix: avoid infinite loop #2974 feat: drop table with cascade option #2973 fix: client docs #2965 fix(variable): compat $date #2971 fix: add child action should omit children data #2969 chore: destory collection in share collection plugin #2968 fix: application bug #2958 perf: avoid page lag or stuttering #2964 fix: percent field component should support decimal point #2966 refactor: remove useless code #2961 test: client ui test #2736 fix: import action should not visible when view collection not editable #2957 refactor(plugin-workflow): add exports for client #2960 fix(plugin-workflow): fix canvas style #2959 fix(plugin-workflow): fix variables and form changed #2955 test(custom-request): update test case, avoid failed #2954 fix: create collection report error #2953 fix: target collection pointed to by tableoid is incorrect #2952 feat(plugin-workflow): add zoomer for workflow canvas #2951 feat(map-plugin): supports connecting each point into a line #2216 fix(calendar): render data of next month is incorrect #2942 fix(custom-request): parsed not working when the value of the variable is of type o2m. #2926 fix: improve local storage options #2943 Commits chore(versions): 😊 publish v0.15.0-alpha.1 29457cb chore: update changelog 3b2ad2f fix: env APPEND_PRESET_LOCAL_PLUGINS 5c93750

优秀的个人博客,低调大师

探究微软设置CPU限制和提高运行门槛的动机

在 Windows 11 首个预览版发布之后,虽然微软对 CPU 升级限制和最低设备要求进行了澄清,但依然存在模糊点。微软表示只有第 8 代英特尔芯片、Ryzen 2000 系列以上芯片才能升级 Windows 11 系统。那么之前的设备难道真的就无法运行 Windows 11 了吗?事实可能并非如此。 首先,从此前偷跑的 ISO 镜像以及当前 Windows Insider 分发的 Build 22000.51 镜像,Windows 11 在第 7 代处理器和更低的设备上也运行良好。当从 ISO 镜像安装的时候,Windows 11 绕过 TPM 2.0 限制是非常简单的,只需将一个.dll替换成Windows 10中的一个。根据Albacore在Twitter上的说法,如果你进行清洁安装,Windows 11 甚至不检查 CPU 世代。 对于那些想知道纯净安装 Windows 11 的最低硬件要求是什么(当你从USB启动安装时) 3686MB内存 2个CPU核心 1 GHz基本速度 TPM 1.2 支持 Secure Boot 的固件 如果你是在虚拟机或部署服务器,所有的检查都会被跳过。纯净安装的时候不会检查 CPU。 那么微软为何要对 CPU 代数进行限制? 那么微软为何要这么麻烦呢?首先,CPU代数限制与TPM完全无关,它是为了 "经验原因",正如操作系统安全总监大卫·韦斯顿所指出的:“CPU 是出于经验的原因。和 TPM 的要求是不相关的”。 在过去,只要他们的电脑符合最低规格(大多数第四代、第五代、第六代和第七代设备都符合,只要它们以某种方式启用 TPM),就可以由用户决定他们是否想要一个“伟大的体验”。对于用户来说,如果因为他们完美的第六代设备不符合 CPU 限制而不得不花 1500 美元以上购买一台新机器,这真的是一种“伟大的体验”吗? 那么为何微软从一开始就引起了这些不安,外媒推测原因可能有两个 a:让很多人感到不安,然后升级设备 最被消费者接纳的说法就是微软想迫使用户购买新机器。当然,这对OEM厂商和微软来说都不是一件坏事,但如果有的话,Windows 11可以让人们在Windows 10上停留更长时间。 b:为了运行 Android 应用程序或者其他后续功能 第二种可能涉及到 HVCI,这是一个管理程序的安全措施。它可能会影响到像 Windows Subsystem for Android 这样的东西,它被用来在 Windows 11 上运行 Android 应用程序。如果 Android 应用在旧版 CPU 上表现不佳,微软确实可能非常不愿意允许出现不合格的体验。 而另一个可能性是,微软仍对 Windows 11 有后续的发展计划,这些计划目前并未被披露,需要更现代的 CPU 来运行。从事Azure工作的微软资深人士Carmen Crincoli(他在Twitter上明确表示,他 "代表(他)自己,而不是微软")在Twitter上说,“他的目标是创造一条前进的道路,使生态系统在几年后处于更强大的地位”。 如果ARM上的Windows和Android的Windows子系统、HVCI,以及Windows 11和Windows 10之间的密切关系是这些硬件限制的原因,为什么不直接说出来?即使有最好的意图,有时微软也无法摆脱自己的方式。 【责任编辑:未丽燕 TEL:(010)68476606】

优秀的个人博客,低调大师

SAP BSP, Java Web Project,Android和微信小程序的初始页面设置

CRM Webclient UI Component controller的context DO_INIT_CONTEXT: 然后是Window controller的DO_INIT_CONTEXT: 最后才是view controller的DO_INIT_CONTEXT: Android 微信小程序 (1) onLoad 生命周期函数--监听页面加载(2) onReady 生命周期函数--监听页面初次渲染完成(3) onShow 生命周期函数--监听页面显示(4) onHide 生命周期函数--监听页面隐藏(5) onUnload 生命周期函数--监听页面卸载 打开小程序后会依次执行onLoad,onReady和onShow方法. 前后台切换会分别执行onHide和onShow方法 本文来自云栖社区合作伙伴“汪子熙”,了解相关信息可以关注微信公众号"汪子熙"。

优秀的个人博客,低调大师

Android写的一个设置图片查看器,可以调整透明度

先来看看效果吧: main.xml代码如下: 1 <?xml version="1.0" encoding="utf-8"?> 2 <LinearLayout xmlns:android="http://schemas.android.com/apk/res/android" 3 android:layout_width="fill_parent" 4 android:layout_height="fill_parent" 5 android:orientation="vertical" > 6 7 <LinearLayout 8 android:layout_width="match_parent" 9 android:layout_height="wrap_content" > 10 11 <Button 12 android:id="@+id/button1" 13 android:layout_width="wrap_content" 14 android:layout_height="wrap_content" 15 android:text="增大透明度" /> 16 17 <Button 18 android:id="@+id/button2" 19 android:layout_width="wrap_content" 20 android:layout_height="wrap_content" 21 android:text="减小透明度" /> 22 23 <Button 24 android:id="@+id/button3" 25 android:layout_width="wrap_content" 26 android:layout_height="wrap_content" 27 android:text="下一张" /> 28 </LinearLayout> 29 <!-- 定义显示整体图片的ImageView --> 30 31 <ImageView 32 android:id="@+id/imageView1" 33 android:layout_width="wrap_content" 34 android:layout_height="wrap_content" 35 android:background="#0000ff" 36 android:scaleType="fitCenter" 37 android:src="@drawable/shuangta" /> 38 <!-- 定义显示局部图片的ImageView --> 39 40 <ImageView 41 android:id="@+id/imageView2" 42 android:layout_width="wrap_content" 43 android:layout_height="wrap_content" 44 android:layout_marginTop="10dp" 45 android:background="#0000ff" /> 46 47 </LinearLayout> 其中java代码为: 1 package android.demo; 2 3 import android.app.Activity; 4 import android.graphics.Bitmap; 5 import android.graphics.BitmapFactory; 6 import android.graphics.drawable.BitmapDrawable; 7 import android.os.Bundle; 8 import android.view.MotionEvent; 9 import android.view.View; 10 import android.view.View.OnClickListener; 11 import android.view.View.OnTouchListener; 12 import android.widget.Button; 13 import android.widget.ImageView; 14 15 public class AndroidDemo5Activity extends Activity { 16 // 定义一个访问图片的数组 17 int[] images = new int[] { R.drawable.lijiang, R.drawable.qiao, 18 R.drawable.shuangta, R.drawable.shui, R.drawable.xiangbi, 19 R.drawable.ic_launcher, }; 20 // 定义当前显示的图片 21 int currentImage = 2; 22 // 定义图片的初始透明度 23 private int alpha = 255; 24 25 @Override 26 protected void onCreate(Bundle savedInstanceState) { 27 // TODO Auto-generated method stub 28 super.onCreate(savedInstanceState); 29 setContentView(R.layout.main); 30 final Button plusButton = (Button) findViewById(R.id.button1); 31 final Button minuxButton = (Button) findViewById(R.id.button2); 32 final Button nextButton = (Button) findViewById(R.id.button3); 33 34 final ImageView imageview1 = (ImageView) findViewById(R.id.imageView1); 35 final ImageView imageview2 = (ImageView) findViewById(R.id.imageView2); 36 37 // 定义查看下一张图片的时间监听器 38 nextButton.setOnClickListener(new OnClickListener() { 39 40 @Override 41 public void onClick(View v) { 42 if (currentImage >= 5) { 43 currentImage = -1; 44 } 45 BitmapDrawable bitmap = (BitmapDrawable) imageview1 46 .getDrawable(); 47 // 如果图片还没有回收,先强制回收图片 48 if (!bitmap.getBitmap().isRecycled()) { 49 bitmap.getBitmap().recycle(); 50 } 51 // 改变ImageView的图片 52 imageview1.setImageBitmap(BitmapFactory.decodeResource( 53 getResources(), images[++currentImage])); 54 } 55 }); 56 57 // 定义改变图片透明度的方法 58 OnClickListener listener = new OnClickListener() { 59 60 @Override 61 public void onClick(View v) { 62 if (v == plusButton) { 63 alpha += 20; 64 } 65 if (v == minuxButton) { 66 alpha -= 20; 67 } 68 if (alpha > 255) { 69 alpha = 255; 70 } 71 if (alpha <= 0) { 72 alpha = 0; 73 } 74 // 改变图片的透明度 75 imageview1.setAlpha(alpha); 76 77 } 78 }; 79 80 // 为2个按钮添加监听器 81 plusButton.setOnClickListener(listener); 82 minuxButton.setOnClickListener(listener); 83 imageview1.setOnTouchListener(new OnTouchListener() { 84 85 @Override 86 public boolean onTouch(View arg0, MotionEvent arg1) { 87 // TODO Auto-generated method stub 88 BitmapDrawable bitmapDeaw = (BitmapDrawable) imageview1 89 .getDrawable(); 90 // 获取第一个图片显示框中的位图 91 Bitmap bitmap = bitmapDeaw.getBitmap(); 92 double scale = bitmap.getWidth(); 93 // 或许需要显示图片的开始点 94 int x = (int) (arg1.getX() * scale); 95 int y = (int) (arg1.getY() * scale); 96 if (x + 120 > bitmap.getWidth()) { 97 x = bitmap.getWidth() - 120; 98 } 99 if (y + 120 > bitmap.getHeight()) { 100 y = bitmap.getHeight() - 120; 101 } 102 103 // 显示图片的指定区域 104 imageview2.setImageBitmap(Bitmap.createBitmap(bitmap, x, y, 105 120, 120)); 106 imageview2.setAlpha(alpha); 107 return false; 108 } 109 }); 110 } 111 112 } ============================================================================== 本文转自被遗忘的博客园博客,原文链接:http://www.cnblogs.com/rollenholt/archive/2012/05/17/2506331.html,如需转载请自行联系原作者

优秀的个人博客,低调大师

ES不设置副本是非常脆弱的,整个文章告诉了你为什么

Delaying Shard Allocation As discussed way back inScale Horizontally, Elasticsearch will automatically balance shards between your available nodes, both when new nodes are added and when existing nodes leave. Theoretically, this is the best thing to do. We want to recover missing primaries by promoting replicas as soon as possible. We also want to make sure resources are balanced evenly across the cluster to prevent hotspots. In practice, however, immediately re-balancing can cause more problems than it solves. For example, consider this situation: Node 19 loses connectivity to your network (someone tripped on the power cable) Immediately, the master notices the node departure. It determines what primary shards were on Node 19 and promotes the corresponding replicas around the cluster After replicas have been promoted to primary, the master begins issuing recovery commands to rebuild the now-missing replicas. Nodes around the cluster fire up their NICs and start pumping shard data to each other in an attempt to get back to green health status This process will likely trigger a small cascade of shard movement, since the cluster is now unbalanced. Unrelated shards will be moved between hosts to accomplish better balancing Meanwhile, the hapless admin who kicked out the power cable plugs it back in.Node 19 reboots and rejoins the cluster. Unfortunately, the node is informed that its existing data is now useless; the data being re-allocated elsewhere. So Node 19 deletes its local data and begins recovering a different set of shards from the cluster (which then causes a new minor re-balancing dance). If this all sounds needless and expensive, you’re right. It is, butonly when you know the node will be back soon. If Node 19 was truly gone, the above procedure is exactly what we want to happen. To help address these transient outages, Elasticsearch has the ability to delay shard allocation. This gives your cluster time to see if nodes will rejoin before starting the re-balancing dance. Changing the default delay By default, the cluster will wait one minute to see if the node will rejoin. If the node rejoins before the timer expires, the rejoining node will use its existing shards and no shard allocation occurs. This default time can be changed either globally, or on a per-index basis, by configuring thedelayed_timeoutsetting: PUT /_all/_settings { "settings": { "index.unassigned.node_left.delayed_timeout": "5m" } } By using the_allindex name, we can apply this setting to all indices in the cluster The default time is changed to 5 minutes The setting is dynamic and can be changed at runtime. If you would like shards to allocate immediately instead of waiting, you can setdelayed_timeout: 0. Delayed allocation won’t prevent replicas from being promoted to primaries. The cluster will still perform promotions as necessary to get the cluster back toyellowstatus. The allocation of the now-missing replicas will be the only process that is delayed Auto-cancellation of shard relocation What happens if the node comes backafterthe timeout expires, but before the cluster has finished moving shards around? In this case, Elasticsearch will check to see if the on-disk data matches the current "live" data in the primary shard. If the two shards are identical — meaning there have been no new documents, updates or deletes — the master will cancel the on-going rebalancing and restore the on-disk data. This is done since recovery of on-disk data will always be faster than transferring over the network, and since we can guarantee the shards are identical, the process is a win-win. If the shards have diverged (e.g. new documents have been indexed since the node went down), the recovery process will continue as normal. The rejoining node will delete it’s local, out-dated shards and obtain a new set. 本文转自张昺华-sky博客园博客,原文链接:http://www.cnblogs.com/bonelee/p/7444495.html,如需转载请自行联系原作者

资源下载

更多资源
腾讯云软件源

腾讯云软件源

为解决软件依赖安装时官方源访问速度慢的问题,腾讯云为一些软件搭建了缓存服务。您可以通过使用腾讯云软件源站来提升依赖包的安装速度。为了方便用户自由搭建服务架构,目前腾讯云软件源站支持公网访问和内网访问。

Nacos

Nacos

Nacos /nɑ:kəʊs/ 是 Dynamic Naming and Configuration Service 的首字母简称,一个易于构建 AI Agent 应用的动态服务发现、配置管理和AI智能体管理平台。Nacos 致力于帮助您发现、配置和管理微服务及AI智能体应用。Nacos 提供了一组简单易用的特性集,帮助您快速实现动态服务发现、服务配置、服务元数据、流量管理。Nacos 帮助您更敏捷和容易地构建、交付和管理微服务平台。

Sublime Text

Sublime Text

Sublime Text具有漂亮的用户界面和强大的功能,例如代码缩略图,Python的插件,代码段等。还可自定义键绑定,菜单和工具栏。Sublime Text 的主要功能包括:拼写检查,书签,完整的 Python API , Goto 功能,即时项目切换,多选择,多窗口等等。Sublime Text 是一个跨平台的编辑器,同时支持Windows、Linux、Mac OS X等操作系统。

WebStorm

WebStorm

WebStorm 是jetbrains公司旗下一款JavaScript 开发工具。目前已经被广大中国JS开发者誉为“Web前端开发神器”、“最强大的HTML5编辑器”、“最智能的JavaScript IDE”等。与IntelliJ IDEA同源,继承了IntelliJ IDEA强大的JS部分的功能。

用户登录
用户注册