首页 文章 精选 留言 我的

精选列表

搜索[多模态],共10000篇文章
优秀的个人博客,低调大师

Android 类似淘宝的多商品订单评价

前言 近期在做一个商城类项目,需要实现对一个订单里的多个商品分别评价的功能(类似于淘宝的评价),花费了一点时间把效果做了出来,并在这里分享出来也权当做了记录,图个日后使用方便。 效果图 设计原理 设计原理 因为每个订单可能有多个商品,所以我直接用一个RecyclerView来展示多个商品,这里主要的难点在于Item的布局。 设计原理 EvaluationView和EvaluationChoiceImageView是两个自定义View,分别用来选择评价类型和选择评价图片的。 EvaluationView内部原理比较简单主要是在LinearLayout内部嵌套了EvaluationItem。 EvaluationChoiceImageView的内部原理主要是使用FlowLayout(流式布局),然后将选择的图片添加到FlowLayout中,FlowLayout的好处就是它能够实现自动换行。 另外EvaluationChoiceImageView可以通过添加监听事件来进行相应的操作 //当点击选择图片的时候(这里一般通过调用addImage()方法进行添加图片操作) itemRegularevaluationEvaluationchoiceimageview.setOnClickAddImageListener(new EvaluationChoiceImageView.OnClickAddImageListener() { @Override public void onClickAddImage() { itemRegularevaluationEvaluationchoiceimageview.addImage("图片的路径地址"); } }); //当点击右上方叉号的时候触发此事件(一般用来删除数据) itemRegularevaluationEvaluationchoiceimageview.setOnClickDeleteImageListener(new EvaluationChoiceImageView.OnClickDeleteImageListener() { @Override public void onClickDeleteImage(int position) { //position是删除图片的位置 } }); //当点击图片的时候触发此事件(一般用来查看图片) itemRegularevaluationEvaluationchoiceimageview.setOnClickImageListener(new EvaluationChoiceImageView.OnClickImageListener() { @Override public void onClickImage(int position) { //position是查看图片的位置 } }); 代码解释 这里首先是创建一个EvaluationBean用来存放每个商品需要提交的信息。 public class EvaluationBean { //这里还可以加上其他的信息比如商品的Id private int evaluatinType=1;//默认好评 private String evaluationContent;//评价内容 private List<File> evaluationImages;//评价图片集合 public EvaluationBean() { if(evaluationImages==null){ evaluationImages=new ArrayList<>(); } } public int getEvaluatinType() { return evaluatinType; } public void setEvaluatinType(int evaluatinType) { this.evaluatinType = evaluatinType; } public String getEvaluationContent() { return evaluationContent; } public void setEvaluationContent(String evaluationContent) { this.evaluationContent = evaluationContent; } public List<File> getEvaluationImages() { return evaluationImages; } public void setEvaluationImages(List<File> evaluationImages) { this.evaluationImages = evaluationImages; } @Override public String toString() { return "EvaluationBean{" + "evaluatinType=" + evaluatinType + ", evaluationContent='" + evaluationContent + '\'' + ", evaluationImages=" + evaluationImages + '}'; } } 然后再建立一个存放EvaluationBean的集合,集合的大小与订单中商品的数量相同。 private void initDatas() { // 添加测试数据(简单的添加图片地址模拟订单) if(mTempDatas==null){ mTempDatas=new ArrayList<>(); for (int x=0;x<4;x++){ mTempDatas.add(""+x); } } if(evaluationBeans==null){ evaluationBeans=new ArrayList<>(); } for(int x=0;x<mTempDatas.size();x++){ EvaluationBean evaluationBean=new EvaluationBean(); evaluationBean.setEvaluatinType(1); evaluationBeans.add(evaluationBean); } } 最后将选择好的数据通过遍历集合的方式传到服务器。 for (EvaluationBean evaluationBean:evaluationBeans){ Log.e("测试",evaluationBean.toString()); HashMap<String,String> parama=new HashMap<>(); parama.put("evaluationType",evaluationBean.getEvaluatinType()+""); parama.put("evaluationContent",evaluationBean.getEvaluationContent()); HashMap<String, RequestBody> pics=new HashMap<>(); for (File file:evaluationBean.getEvaluationImages()){ pics.put(file.getName(),RequestBody.create(MediaType.parse("image/*"), file)); } RetrofitUtils.getInstance().getApiServier(Api.class) .submitEvaluation(parama,pics) .subscribeOn(Schedulers.io()) .observeOn(AndroidSchedulers.mainThread()) .subscribe(new Consumer<ResultBean>() { @Override public void accept(ResultBean resultBean) throws Exception { } }, new Consumer<Throwable>() { @Override public void accept(Throwable throwable) throws Exception { } }); } 大体流程就是这样,更加详细的实现可以看一下我的代码(GitHub传送门) 个人技术博客:https://myml666.github.io/

优秀的个人博客,低调大师

ECS容器网络最佳实践-多网卡方案

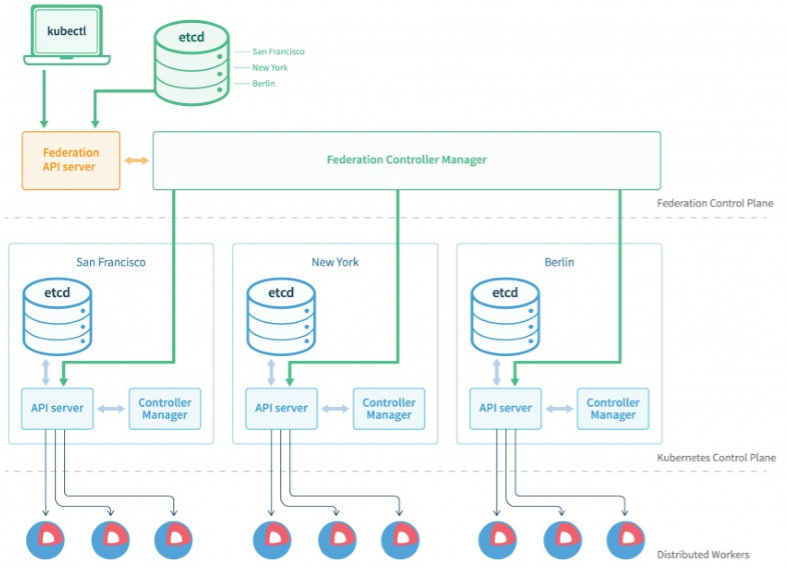
概述 容器是相比于虚拟机(Virtual Machine,VM)更轻便,部署更方便快捷的一种虚拟化技术。 Docker是目前主流的容器引擎,支持Linux,Windows等多种平台,同时支持Kubernetes(K8S), Swarm及Rocket(RKT)等主流Docker编排系统。常见的容器网络支持Bridge,Overlay,Host及用户自定义网络等多种模型,K8S等系统依赖于容器网络接口(Container Network Interface, CNI)插件来完成网络管理,常见的有Calico/Flannel等知名CNI插件。本文将介绍一些容器网络的基本知识,基于阿里云的弹性网络接口(Elastic Network Interface, ENI)技术实现了ECS容器网络的高性能,易部署及维护, 具有强隔离的高安全容器网络。

优秀的个人博客,低调大师

Android 使用 FFmpeg命令行(多包)

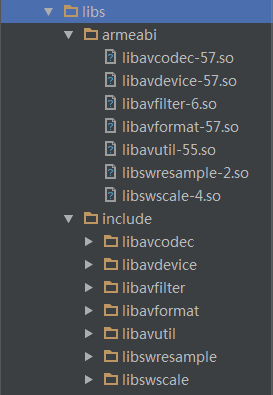
1. 新建项目,导入.so文件 将之前编译生成的多个.so文件及inclulde文件夹下的头文件拷贝到/app/libs文件夹下,拷贝后目录结果如下: 图1.png 2. 配置/app/src/main目录下新建jni文件夹 图2.png 3. 创建FFmpegCmd.java类 package com.mazaiting.ffmpegcmdtest; /** * FFmpeg命令行操作 * @author mazaiting * @date 2018/1/12 */ public class FFmpegCmd { static { System.loadLibrary("avcodec-57"); System.loadLibrary("avdevice-57"); System.loadLibrary("avfilter-6"); System.loadLibrary("avformat-57"); System.loadLibrary("avutil-55"); System.loadLibrary("swresample-2"); System.loadLibrary("swscale-4"); System.loadLibrary("FfmpegCmd"); } public static int execute(String[] commands) { return run(commands); } public native static int run(String[] commands); } 4. 配置/app/build.gradle文件 1). 在android节点下的defaultConfig目录下新增 ndk { moduleName "ffmpegcmd" abiFilters "armeabi" } 2). 在android节点下新增,如果已有则替换这段 sourceSets { main { jniLibs.srcDirs = ['src/main/libs'] jni.srcDirs=[] } } 5. 生成jni的头文件 javah命令配置, 运行命令完成后,在jni文件夹下生成com_mazaiting_ffmpegcmdtest_FFmpegCmd.h文件 图3.png 6. 配置jni目录 将ffmpeg源码中的ffmpeg.h, ffmpeg.c, ffmpeg_opt.c, ffmpeg_filter.c,cmdutils.c, cmdutils.h, cmdutils_common_opts.h,config.h 赋值到jni目录下,并在 jni 目录新建文件 Android.mk Application.mk com_mazaiting_ffmpegcmdtest_FFmpegCmd.c。 7. 修改ffmpeg源码 1). 编辑ffmpeg.c,把 int main(int argc, char **argv) 改名为 int run(int argc, char **argv) 编辑ffmpeg.h, 在文件末尾(在#endif前面)添加函数申明: int run(int argc, char **argv) 2). 编辑cmdutils.c中的exit_program函数,删掉函数中原来的内容, 添加 return ret;并修改函数的返回类型为int。 长这样: int exit_program(int ret) { return ret; } 编辑cmdutils.h中exit_program的申明,把返回类型修改为int。 int exit_program(int ret); 8. 其他文件 1). com_mazaiting_ffmpegcmdtest_FFmpegCmd.c #include "com_mazaiting_ffmpegcmdtest_FFmpegCmd.h" #include "ffmpeg.h" #include <android/log.h> #define LOGI(FORMAT, ...) __android_log_print(ANDROID_LOG_INFO,"ffmpeg",FORMAT,##__VA_ARGS__); #define LOGE(FORMAT, ...) __android_log_print(ANDROID_LOG_ERROR,"ffmpeg",FORMAT,##__VA_ARGS__); JNIEXPORT jint JNICALL Java_com_mazaiting_ffmpegcmdtest_FFmpegCmd_run (JNIEnv *env, jclass cls, jobjectArray commands) { int argc = (*env)->GetArrayLength(env, commands); char *argv[argc]; LOGE("Kit argc %d\n", argc); int i; for (i = 0; i < argc; i++) { jstring js = (jstring)(*env)->GetObjectArrayElement(env, commands, i); argv[i] = (char *) (*env)->GetStringUTFChars(env, js, 0); LOGE("Kit argv %s\n", argv[i]); } return run(argc, argv); } 2). Android.mk LOCAL_PATH := $(call my-dir) # FFmpeg library include $(CLEAR_VARS) # 打印当前路径 $(warning $(LOCAL_PATH)) # .so文件名称,去除前缀lib和-后的内容 LOCAL_MODULE := avcodec # .so文件 LOCAL_SRC_FILES := libavcodec-57.so # 已编译好的库使用PREBUILT_SHARED_LIBRARY include $(PREBUILT_SHARED_LIBRARY) # FFmpeg library include $(CLEAR_VARS) LOCAL_MODULE := avdevice LOCAL_SRC_FILES := libavdevice-57.so include $(PREBUILT_SHARED_LIBRARY) # FFmpeg library include $(CLEAR_VARS) LOCAL_MODULE := avfilter LOCAL_SRC_FILES := libavfilter-6.so include $(PREBUILT_SHARED_LIBRARY) # FFmpeg library include $(CLEAR_VARS) LOCAL_MODULE := avformat LOCAL_SRC_FILES := libavformat-57.so include $(PREBUILT_SHARED_LIBRARY) # FFmpeg library include $(CLEAR_VARS) LOCAL_MODULE := avutil LOCAL_SRC_FILES := libavutil-55.so include $(PREBUILT_SHARED_LIBRARY) # FFmpeg library include $(CLEAR_VARS) LOCAL_MODULE := swresample LOCAL_SRC_FILES := libswresample-2.so include $(PREBUILT_SHARED_LIBRARY) # FFmpeg library include $(CLEAR_VARS) LOCAL_MODULE := swscale LOCAL_SRC_FILES := libswscale-4.so include $(PREBUILT_SHARED_LIBRARY) # Program # module名称 include $(CLEAR_VARS) LOCAL_MODULE := FfmpegCmd # module中的源文件 LOCAL_SRC_FILES := com_mazaiting_ffmpegcmdtest_FFmpegCmd.c ffmpeg.c ffmpeg_opt.c cmdutils.c ffmpeg_filter.c # ffmpeg源码路径 LOCAL_C_INCLUDES += C:/Users/Administrator/Desktop/ffmpeg-3.3.6 LOCAL_LDLIBS := -llog -lz # 链接的动态库文件 LOCAL_SHARED_LIBRARIES := avcodec avdevice avfilter avformat avutil swresample swscale # 编译生成的库使用BUILD_SHARED_LIBRARY include $(BUILD_SHARED_LIBRARY) 3). Application.mk APP_MODULES := FfmpegCmd APP_ABI := armeabi APP_PLATFORM := android-14 # 去除原子性编译 APP_LDFLAGS := -latomic 9. 编译FfmpegCmd.so文件 编译之前先将/app/libs文件夹内的ffmpeg中拷贝的.so文件拷贝到jni文件夹一份,此时jni文件夹内的所有文件如图4,使用ndk-build命令编译(图5)。 图4.png 图5.png 10. 编译成功 编译成功后在main目录下生成libs和obj文件夹,将/libs/armeabi/下的libFfmpegcmd.so或者/obj/local/armeabi/objs/下的libFfmpegcmd.so文件复制到/app/libs/armeabi/目录下,此时在java文件中即可成功使用ffmpeg。 图6.png 11. 使用 1). 在AndroidManifest.xml添加权限 <uses-permission android:name="android.permission.READ_EXTERNAL_STORAGE"/> <uses-permission android:name="android.permission.WRITE_EXTERNAL_STORAGE"/> 2). activity_main.xml <?xml version="1.0" encoding="utf-8"?> <RelativeLayout xmlns:android="http://schemas.android.com/apk/res/android" xmlns:tools="http://schemas.android.com/tools" android:id="@+id/activity_main" android:layout_width="match_parent" android:layout_height="match_parent" tools:context="com.mazaiting.ffmpegcmdtest.MainActivity"> <Button android:onClick="start" android:layout_width="wrap_content" android:layout_height="wrap_content" android:text="合成"/> </RelativeLayout> 3). MainActivity.java public class MainActivity extends AppCompatActivity { private static final String TAG = "MainActivity"; private boolean isRun = false; /**视频源路径*/ private String videoUrl = "/storage/emulated/0/input.mp4"; /**图片路径*/ private String imageUrl = "/storage/emulated/0/image.png"; /**视频输出路径*/ private String outputUrl = "/storage/emulated/0/output.mp4"; @Override protected void onCreate(Bundle savedInstanceState) { super.onCreate(savedInstanceState); setContentView(R.layout.activity_main); } public void start(View view){ if (!isRun) { new Thread(mRunnable).start(); isRun = true; } else { Toast.makeText(this, "正在运行", Toast.LENGTH_SHORT).show(); } } /** * 添加水印任务 */ Runnable mRunnable = new Runnable() { @Override public void run() { String[] commands = new String[10]; commands[0] = "ffmpeg"; commands[1] = "-i"; commands[2] = videoUrl; commands[3] = "-i"; commands[4] = imageUrl; commands[5] = "-filter_complex"; commands[6] = "overlay=(main_w-overlay_w)/2:(main_h-overlay_h)/2"; commands[7] = "-codec:a"; commands[8] = "copy"; commands[9] = outputUrl; Log.e(TAG, "run: 开始执行"); FFmpegCmd.execute(commands); Log.e(TAG, "run: 执行结束"); isRun = false; } }; } 12. 运行结果 图7.png


优秀的个人博客,低调大师

MapReduce的一对多连接操作

问题描述: 一个trade table表 product1"trade1 product2"trade2 product3"trade3 一个pay table表 product1"pay1 product2"pay2 product2"pay3 product1"pay4 product3"pay5 product3"pay6 建立两个表之间的连接,该两表是一对多关系的 如下: trade1pay1 trade1pay4 trade2pay2 ... 思路: 为了将两个表整合到一起,由于有相同的第一列,且第一个表与第二个表是一对多关系的。 这里依然采用分组,以及组内排序,只要保证一方最先到达reduce端,则就可以进行迭代处理了。 为了保证第一个表先到达reduce端,可以为定义一个组合键,包含两个值,第一个值为product,第二个值为0或者1,来分别代表第一个表和第二个表,只要按照组内升序排列即可。 具体代码: 自定义组合键策略 1 2 3 4 5 6 7 8 9 10 11 12 13 14 15 16 17 18 19 20 21 22 23 24 25 26 27 28 29 30 31 32 33 34 35 36 37 38 39 40 41 42 package whut.onetomany; import java.io.DataInput; import java.io.DataOutput; import java.io.IOException; import org.apache.hadoop.io.WritableComparable; public class TextIntPair implements WritableComparable{ //product1 0/1 private String firstKey; //product1 private int secondKey; //0,1;0代表是trade表,1代表是pay表 //只需要保证trade表在pay表前面就行,则只需要对组顺序排列 public String getFirstKey() { return firstKey; } public void setFirstKey(String firstKey) { this .firstKey = firstKey; } public int getSecondKey() { return secondKey; } public void setSecondKey( int secondKey) { this .secondKey = secondKey; } @Override public void write(DataOutput out) throws IOException { out.writeUTF(firstKey); out.writeInt(secondKey); } @Override public void readFields(DataInput in) throws IOException { // TODO Auto-generated method stub firstKey=in.readUTF(); secondKey=in.readInt(); } @Override public int compareTo(Object o) { // TODO Auto-generated method stub TextIntPair tip=(TextIntPair)o; return this .getFirstKey().compareTo(tip.getFirstKey()); } } 分组策略 1 2 3 4 5 6 7 8 9 10 11 12 13 14 15 package whut.onetomany; import org.apache.hadoop.io.WritableComparable; import org.apache.hadoop.io.WritableComparator; public class TextComparator extends WritableComparator{ protected TextComparator() { super (TextIntPair. class , true ); //注册比较器 } @Override public int compare(WritableComparable a, WritableComparable b) { // TODO Auto-generated method stub TextIntPair tip1=(TextIntPair)a; TextIntPair tip2=(TextIntPair)b; return tip1.getFirstKey().compareTo(tip2.getFirstKey()); } } 组内排序策略:目的是保证第一个表比第二个表先到达 1 2 3 4 5 6 7 8 9 10 11 12 13 14 15 16 17 18 19 20 21 22 23 24 25 26 27 package whut.onetomany; import org.apache.hadoop.io.WritableComparable; import org.apache.hadoop.io.WritableComparator; //分组内部进行排序,按照第二个字段进行排序 public class TextIntComparator extends WritableComparator { public TextIntComparator() { super (TextIntPair. class , true ); } //这里可以进行排序的方式管理 //必须保证是同一个分组的 //a与b进行比较 //如果a在前b在后,则会产生升序 //如果a在后b在前,则会产生降序 @Override public int compare(WritableComparable a, WritableComparable b) { // TODO Auto-generated method stub TextIntPair ti1=(TextIntPair)a; TextIntPair ti2=(TextIntPair)b; //首先要保证是同一个组内,同一个组的标识就是第一个字段相同 if (!ti1.getFirstKey().equals(ti2.getFirstKey())) return ti1.getFirstKey().compareTo(ti2.getFirstKey()); else return ti1.getSecondKey()-ti2.getSecondKey(); //0,-1,1 } } 分区策略: 1 2 3 4 5 6 7 8 9 10 package whut.onetomany; import org.apache.hadoop.io.Text; import org.apache.hadoop.mapreduce.Partitioner; public class PartitionByText extends Partitioner<TextIntPair, Text> { @Override public int getPartition(TextIntPair key, Text value, int numPartitions) { // TODO Auto-generated method stub return (key.getFirstKey().hashCode()&Integer.MAX_VALUE)%numPartitions; } } MapReduce 1 2 3 4 5 6 7 8 9 10 11 12 13 14 15 16 17 18 19 20 21 22 23 24 25 26 27 28 29 30 31 32 33 34 35 36 37 38 39 40 41 42 43 44 45 46 47 48 49 50 51 52 53 54 55 56 57 58 59 60 61 62 63 64 65 66 67 68 69 70 71 72 73 74 75 76 77 78 79 80 81 82 83 84 85 86 87 88 89 90 91 92 93 94 95 96 97 98 99 100 101 102 103 104 105 106 package whut.onetomany; import java.io.IOException; import java.util.Iterator; import org.apache.hadoop.conf.Configuration; import org.apache.hadoop.conf.Configured; import org.apache.hadoop.fs.Path; import org.apache.hadoop.io.LongWritable; import org.apache.hadoop.io.Text; import org.apache.hadoop.mapreduce.Job; import org.apache.hadoop.mapreduce.Mapper; import org.apache.hadoop.mapreduce.Mapper.Context; import org.apache.hadoop.mapreduce.Reducer; import org.apache.hadoop.mapreduce.lib.input.FileInputFormat; import org.apache.hadoop.mapreduce.lib.input.FileSplit; import org.apache.hadoop.mapreduce.lib.input.MultipleInputs; import org.apache.hadoop.mapreduce.lib.output.FileOutputFormat; import org.apache.hadoop.util.GenericOptionsParser; import org.apache.hadoop.util.Tool; import org.apache.hadoop.util.ToolRunner; public class JoinMain extends Configured implements Tool { public static class JoinMapper extends Mapper<LongWritable, Text, TextIntPair, Text> { private TextIntPair tp= new TextIntPair(); private Text val= new Text(); @Override protected void map(LongWritable key, Text value, Context context) throws IOException, InterruptedException { // TODO Auto-generated method stub //获取要处理的文件的名称 FileSplit file=(FileSplit)context.getInputSplit(); String fileName=file.getPath().toString(); //获取输入行分隔 String line=value.toString(); String[] lineKeyValue=line.split( "\"" ); String lineKey=lineKeyValue[ 0 ]; String lineValue=lineKeyValue[ 1 ]; tp.setFirstKey(lineKey); //判断是否是trade文件 if (fileName.indexOf( "trade" )>= 0 ) { tp.setSecondKey( 0 ); val.set(lineValue); } //判断是否是pay文件 else if (fileName.indexOf( "pay" )>= 0 ) { tp.setSecondKey( 1 ); val.set(lineValue); } context.write(tp, val); } } public static class JoinReducer extends Reducer<TextIntPair, Text, Text, Text> { @Override protected void reduce(TextIntPair key, Iterable<Text> values, Context context) throws IOException, InterruptedException { Iterator<Text> valList=values.iterator(); //注意这里一定要写成string不可变,写成Text有问题 //Text trade=valList.next(); String tradeName=valList.next().toString(); while (valList.hasNext()) { Text pay=valList.next(); context.write( new Text(tradeName), pay); } } } @Override public int run(String[] args) throws Exception { Configuration conf=getConf(); Job job= new Job(conf, "JoinJob" ); job.setJarByClass(JoinMain. class ); //ToolRunner已经利用GenericOptionsParser解析了命令行中的参数 //并且将其存放在数组中,传递给该run()方法了 FileInputFormat.addInputPath(job, new Path(args[ 0 ])); FileInputFormat.addInputPath(job, new Path(args[ 1 ])); //输入文件必须以,隔开 //FileInputFormat.addInputPaths(job, args[0]); FileOutputFormat.setOutputPath(job, new Path(args[ 2 ])); job.setMapperClass(JoinMapper. class ); job.setReducerClass(JoinReducer. class ); //设置分区方法 job.setPartitionerClass(PartitionByText. class ); //设置分组排序 job.setGroupingComparatorClass(TextComparator. class ); job.setSortComparatorClass(TextIntComparator. class ); job.setMapOutputKeyClass(TextIntPair. class ); job.setMapOutputValueClass(Text. class ); job.setOutputKeyClass(Text. class ); job.setOutputValueClass(Text. class ); job.waitForCompletion( true ); int exitCode=job.isSuccessful()? 0 : 1 ; return exitCode; } public static void main(String[] args) throws Exception { // TODO Auto-generated method stub int code=ToolRunner.run( new JoinMain(), args); System.exit(code); } } 注意: 一般有些地方没有定义组内排序策略,但是经过多次测试,发现无法保证第一个表在第二个表之前到达,则这里就自定义了组内排序策略。版本号为Hadoop1.1.2 本文转自 zhao_xiao_long 51CTO博客,原文链接:http://blog.51cto.com/computerdragon/1287744

资源下载

更多资源
Mario

Mario

马里奥是站在游戏界顶峰的超人气多面角色。马里奥靠吃蘑菇成长,特征是大鼻子、头戴帽子、身穿背带裤,还留着胡子。与他的双胞胎兄弟路易基一起,长年担任任天堂的招牌角色。

Spring

Spring

Spring框架(Spring Framework)是由Rod Johnson于2002年提出的开源Java企业级应用框架,旨在通过使用JavaBean替代传统EJB实现方式降低企业级编程开发的复杂性。该框架基于简单性、可测试性和松耦合性设计理念,提供核心容器、应用上下文、数据访问集成等模块,支持整合Hibernate、Struts等第三方框架,其适用范围不仅限于服务器端开发,绝大多数Java应用均可从中受益。

Sublime Text

Sublime Text

Sublime Text具有漂亮的用户界面和强大的功能,例如代码缩略图,Python的插件,代码段等。还可自定义键绑定,菜单和工具栏。Sublime Text 的主要功能包括:拼写检查,书签,完整的 Python API , Goto 功能,即时项目切换,多选择,多窗口等等。Sublime Text 是一个跨平台的编辑器,同时支持Windows、Linux、Mac OS X等操作系统。

WebStorm

WebStorm

WebStorm 是jetbrains公司旗下一款JavaScript 开发工具。目前已经被广大中国JS开发者誉为“Web前端开发神器”、“最强大的HTML5编辑器”、“最智能的JavaScript IDE”等。与IntelliJ IDEA同源,继承了IntelliJ IDEA强大的JS部分的功能。

用户登录
用户注册