首页 文章 精选 留言 我的

精选列表

搜索[多云部署],共10000篇文章
优秀的个人博客,低调大师

Influxdb的部署以及运行cadvisor

环境为CentOS7.4 1.安装influxdb1.7 mkdir -p /home/influxdb/ cd /home/influxdb wget https://dl.influxdata.com/influxdb/releases/influxdb-1.7.8_linux_amd64.tar.gz tar xf influxdb-1.7.8_linux_amd64.tar.gz cd /home/influxdb/influxdb-1.7.8-1/ mkdir data log meta wal cd /home/influxdb/influxdb-1.7.8-1/etc/influxdb cp influxdb.conf influxdb.conf.bak 2.目录解释 /usr/bin/ influxd //influxdb服务器 influx //influxdb命令行客户端 influx_inspect //查看工具 influx_stress //压力测试工具 influx_tsm //数据库转换工具(将数据库从b1或bz1格式转换为tsm1格式) /var/lib/influxdb/ data //存放最终存储的数据,文件以.tsm结尾 meta //存放数据库元数据 wal //存放预写日志文件 /var/log/influxdb/ influxd.log //日志文件 /etc/influxdb/ influxdb.conf //配置文件 /var/run/influxdb/ influxd.pid //PID文件 3.修改配置文件 [root@es_data02 influxdb]# egrep -v "^#|^$|#" influxdb.conf [meta] dir = "/home/influxdb/influxdb-1.7.8-1/meta" [data] dir = "/home/influxdb/influxdb-1.7.8-1/data" wal-dir = "/home/influxdb/influxdb-1.7.8-1/wal" series-id-set-cache-size = 100 [coordinator] [retention] enabled = true check-interval = "30m" [shard-precreation] [monitor] [http] [logging] [subscriber] [[graphite]] [[collectd]] [[opentsdb]] [[udp]] [continuous_queries] [tls] 4.启动 cd /home/influxdb/influxdb-1.7.8-1/logs nohup /home/influxdb/influxdb-1.7.8-1/usr/bin/influxd -config /home/influxdb/influxdb-1.7.8-1/etc/influxdb/influxdb.conf & 注:默认情况下,InfluxDB 使用以下网络端口: TCP 端口 8083 用于 InfluxDB 的管理面板(1.3版本之后无web界面); TCP 端口 8086 用于通过 InfluxDB 的 HTTP API 进行客户端到服务器的通信; 5.登录 cd /home/influxdb/influxdb-1.7.8-1/usr/bin [root@es_data02 bin]# ./influx Connected to http://localhost:8086 version 1.7.8 InfluxDB shell version: 1.7.8 > show databases; name: databases name ---- _internal 默认用户名密码为 root [root@es_data02 bin]# ./influx -username root -password root Connected to http://localhost:8086 version 1.7.8 InfluxDB shell version: 1.7.8 > 6.InfluxDB重要概念 database: 数据库如之前创建的数据库 cadvisor。 timestamp: 时间戳,因为 InfluxDB 是时序数据库,它的数据里面都有一列名为 time 的列,存储记录生成时间。如 rx_bytes 中的 time 列,存储的就是时间戳。 fields: 包括 field key,field value 和 field set 几个概念。field key 是字段名,在 rx_bytes 表中,字段名为 value。field value 是字段值,如 17858781633,1359398 等。而 field set 是字段集合,由 field key 和 field value构成如 rx_bytes 中的字段集合如下: value = 17858781633 value tags: 包括 tag key, tag value, tag set 几个概念。tag key 是标签名,在 rx_bytes 表中 container_name,game,machine,namespace,type 都是标签。tag value 就是标签的值了。tag set 就是标签集合,由 tag key 和 tag value 构成。InfluxDB 中标签是可选的,不过标签是有索引的。如果查询中经常用的字段,建议设置为标签而不是字段。标签相当于传统数据库中有索引的列。 retention policy: 数据保留策略,cadvisor 的保留策略为 cadvisor_retention,存储 30 天,副本为 1。一个数据库可以有多个保留策略。 measurement: 类似传统数据看的表,是字段,标签以及 time 列的集合。 series: 共享同一个 retention policy,measurement 以及 tag set 的数据集合。 7.增删改查 创建数据库 cadvisor > create database cadvisor; 创建用户和设置密码 > CREATE USER cadvisor WITH PASSWORD 'cadvisor'; 授权数据库给指定用户 > GRANT ALL PRIVILEGES ON cadvisor TO cadvisor; 创建默认的数据保留策略,设置保存时间 30 天,副本为1 > CREATE RETENTION POLICY "cadvisor_retention" ON "cadvisor" DURATION 30d REPLICATION 1 DEFAULT; 显示表 > show databases; name: databases name ---- _internal > use cadvior; > show MEASUREMENTS; name: measurements name ---- cpu_usage_per_cpu cpu_usage_system cpu_usage_total cpu_usage_user fs_limit fs_usage load_average memory_usage memory_working_set rx_bytes rx_errors tx_bytes tx_errors 查询内存使用 > select * from memory_usage order by time desc limit 5; name: memory_usage time container_name machine value ---- -------------- ------- ----- 1570606022314528492 /system.slice/systemd-user-sessions.service e1510f5156f6 0 1570606022165528044 /system.slice/rhel-import-state.service e1510f5156f6 0 1570606022130190231 /system.slice e1510f5156f6 164671488 1570606022030381573 /user.slice e1510f5156f6 518492160 1570606021889689198 /system.slice/telegraf.service e1510f5156f6 1859584 8.集成cadvisor docker pull google/cadvisor:latest docker run -d --name cadvisor -p 8080:8080 --volume=/:/rootfs:ro --volume=/var/run:/var/run:ro --volume=/sys:/sys:ro --volume=/var/lib/docker/:/var/lib/docker:ro --volume=/dev/disk/:/dev/disk:ro google/cadvisor -storage_driver=influxdb -storage_driver_db=cadvisor -storage_driver_user=root -storage_driver_password=root -storage_driver_host=192.168.1.8:8086 启动 cadvisor 容器,并使用 influxdb 为存储(cadvisor 数据库名, 数据访问账号密码 root, 地址为本地 8086 端口,别用 127.0.0.1 连不上) docker pull google/cadvisor:latest docker run -d \ --volume=/:/rootfs:ro \ --volume=/var/run:/var/run:rw \ --volume=/sys:/sys:ro \ --volume=/var/lib/docker/:/var/lib/docker:ro \ --volume=/dev/disk/:/dev/disk:ro \ --publish=8080:8080 \ --detach=true \ --name=cadvisor \ -storage_driver=influxdb \ -storage_driver_db=cadvisor \ -storage_driver_user=root \ -storage_driver_password=root \ -storage_driver_host=172.16.131.211:8086 或者 docker run -d --name cadvisor -p 8080:8080 --volume=/:/rootfs:ro --volume

优秀的个人博客,低调大师

docker-compose部署php项目

原文章地址:https://www.jikeyuan.cn/a/15.html1.制定特定扩展的PHP镜像sudo mkdir -p /www/dockersudo cd /www/dockersudo vi DockerfileFROM php:7.2-fpm-alpine MAINTAINER diaocheweide RUN sed -i 's/dl-cdn.alpinelinux.org/mirrors.aliyun.com/g' /etc/apk/repositories RUN apk update && apk add --no-cache --virtual .build-deps \ $PHPIZE_DEPS \ curl-dev \ imagemagick-dev \ libtool \ libxml2-dev \ postgresql-dev \ sqlite-dev \ libmcrypt-dev \ freetype-dev \ libjpeg-turbo-dev \ libpng-dev \ && apk add --no-cache \ curl \ imagemagick \ mysql-client \ postgresql-libs \ && pecl install imagick \ && pecl install mcrypt-1.0.1 \ && docker-php-ext-install zip \ && docker-php-ext-install pdo_mysql \ && docker-php-ext-install opcache \ && docker-php-ext-install mysqli \ && docker-php-ext-enable mcrypt \ && docker-php-ext-enable imagick \ && docker-php-ext-install \ curl \ mbstring \ pdo \ pdo_mysql \ pdo_pgsql \ pdo_sqlite \ pcntl \ tokenizer \ xml \ zip \ && docker-php-ext-install -j"$(getconf _NPROCESSORS_ONLN)" iconv \ && docker-php-ext-configure gd --with-freetype-dir=/usr/include/ --with-jpeg-dir=/usr/include/ \ && docker-php-ext-install -j"$(getconf _NPROCESSORS_ONLN)" gd \ && pecl install -o -f redis \ && rm -rf /tmp/pear \ && docker-php-ext-enable redis \ && rm -r /var/cache/apk/* EXPOSE 90002.编写yml文件sudo vi docker-compose.ymlversion: '3.1' services: nginx: image: nginx container_name: nginx restart: always ports: - "80:80" - "443:443" volumes: - /www/data/nginx/conf.d:/etc/nginx/conf.d - /www/default:/www/default networks: csl: ipv4_address: 172.18.0.2 php: image: php:7.2-fpm-alpine-dcwd container_name: php7.2 restart: always volumes: - /www/default:/www/default networks: csl: ipv4_address: 172.18.0.3 mysql5: image: mysql:5.7 container_name: mysql5 restart: always ports: - "3306:3306" environment: MYSQL_ROOT_PASSWORD: thisyourpassword volumes: - /www/data/mysql/mysql5:/var/lib/mysql #- /www/data/mysql/mysql5/conf/my.cnf:/etc/my.cnf #- /www/data/mysql/mysql5/init:/docker-entrypoint-initdb.d networks: csl: ipv4_address: 172.18.0.4 mysql8: image: mysql:8 container_name: mysql8 restart: always environment: MYSQL_ROOT_PASSWORD: thisyourpassword volumes: - /www/data/mysql/mysql8:/var/lib/mysql networks: csl: ipv4_address: 172.18.0.5 networks: csl: driver: bridge ipam: config: - subnet: 172.18.0.0/16 3.配置default.conf文件,拷贝这一步请参考上一篇文章sudo vi /www/data/nginx/default.conf server { listen 80; server_name localhost; #charset koi8-r; #access_log /var/log/nginx/host.access.log main; location / { root /www/default; index index.php index.html index.htm; } #error_page 404 /404.html; # redirect server error pages to the static page /50x.html # error_page 500 502 503 504 /50x.html; location = /50x.html { root /usr/share/nginx/html; } # proxy the PHP scripts to Apache listening on 127.0.0.1:80 # #location ~ \.php$ { # proxy_pass http://127.0.0.1; #} # pass the PHP scripts to FastCGI server listening on 127.0.0.1:9000 # location ~ \.php$ { root /www/default; fastcgi_pass php7.2:9000;#php容器名或者php容器ip fastcgi_index index.php; fastcgi_param SCRIPT_FILENAME $document_root$fastcgi_script_name; include fastcgi_params; } # deny access to .htaccess files, if Apache's document root # concurs with nginx's one # #location ~ /\.ht { # deny all; #} } 4.修改mysql允许远程连接并新建数据库docker exec -it mysql5 bashmysql -u root -puse mysql;update user set host='%' where user='root';flush privileges;5.创建并且启动容器docker-compose up -d6.新建index.php测试mysql连接<?php $con = mysqli_connect("172.18.0.4", "root", "thisyourpassword", "shop");if ($con) { echo '连接 MYSQL 成功'; } else { echo "连接 MySQL 失败: " . mysqli_connect_error(); } mysqli_close($con);

优秀的个人博客,低调大师

【Android电量】Battery Historian环境部署

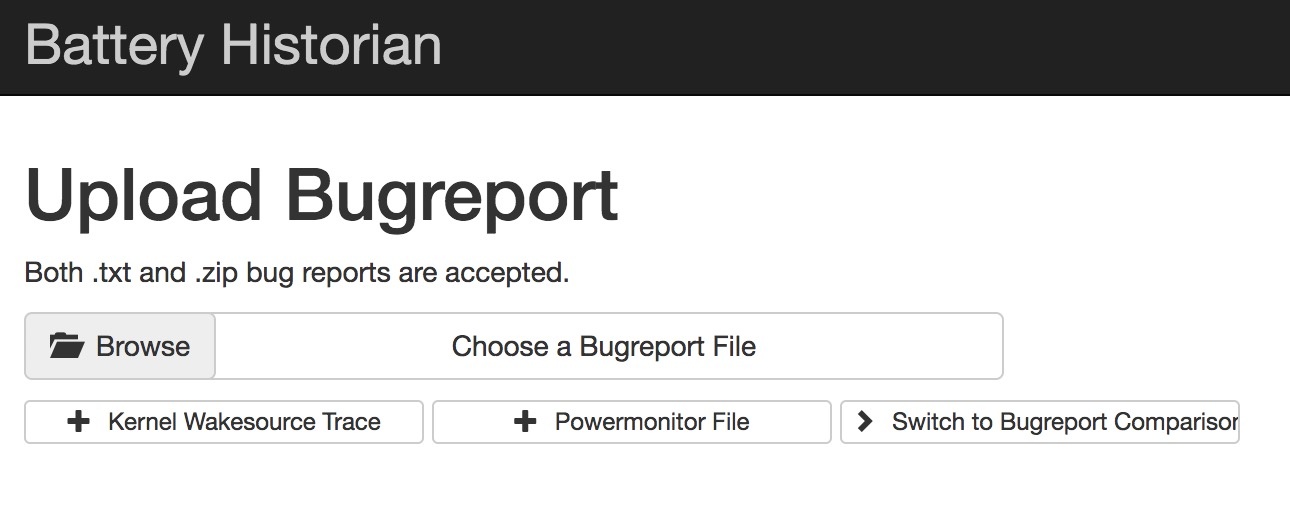
1、Install Docker Desktop for Mac (ps: Requires Apple Mac OS Sierra 10.12 or above.)手动下载安装 https://docs.docker.com/docker-for-mac/install/ 使用 Homebrew 安装 brew cask install docker(推荐) 2、Run the Battery Historian image. 使用命令 docker run -d -p 9999:9999 bhaavan/battery-historian 加载启动镜像 (有问题的镜像,不要用) docker run -p 9998:9998 gcr.io/android-battery-historian/stable:3.0 --port 9998 (亲测可用镜像) didi@localhost  ~  docker run -p 9998:9998 gcr.io/android-battery-historian/stable:3.0 --port 9998 Unable to find image 'gcr.io/android-battery-historian/stable:3.0' locally 3.0: Pulling from android-battery-historian/stable c62795f78da9: Pull complete d4fceeeb758e: Pull complete 5c9125a401ae: Pull complete 0062f774e994: Pull complete 6b33fd031fac: Pull complete a6bd6e1d0bdb: Pull complete 76cf9d0635af: Pull complete 856d20d533e0: Pull complete e63a73f6a528: Pull complete 1a75578c9353: Pull complete 24f3649604d9: Pull complete 10f637765748: Pull complete e06a9fa76cf2: Pull complete Digest: sha256:265a37707f8cf25f2f85afe3dff31c760d44bb922f64bbc455a4589889d3fe91 Status: Downloaded newer image for gcr.io/android-battery-historian/stable:3.0 2019/04/15 12:46:23 Listening on port: 9998 2019/04/15 12:48:19 Trace starting analysisServer processing for: GET 2019/04/15 12:48:19 Trace finished analysisServer processing for: GET 2019/04/15 12:48:20 Trace starting analysisServer processing for: GET 2019/04/15 12:48:20 Trace finished analysisServer processing for: GET 2019/04/15 12:48:27 Trace starting analysisServer processing for: POST 2019/04/15 12:48:27 Trace starting reading uploaded file. 2330165 bytes 2019/04/15 12:48:28 failed to extract battery info: could not find battery time info in bugreport 2019/04/15 12:48:28 failed to extract time information from bugreport dumpstate: open /usr/lib/go-1.6/lib/time/zoneinfo.zip: no such file or directory 2019/04/15 12:48:28 Trace started analyzing "bugreport-ALP-AL00-HUAWEIALP-AL00-2019-04-15-14-31-10.zip~bugreport-ALP-AL00-HUAWEIALP-AL00-2019-04-15-14-31-10/bugreport-ALP-AL00-HUAWEIALP-AL00-2019-04-15-14-31-10.txt" file. 2019/04/15 12:48:28 Trace finished processing checkin. 2019/04/15 12:48:28 Trace finished processing summary data. 2019/04/15 12:48:28 Trace finished generating Historian plot. 2019/04/15 12:48:28 Trace finished analyzing "bugreport-ALP-AL00-HUAWEIALP-AL00-2019-04-15-14-31-10.zip~bugreport-ALP-AL00-HUAWEIALP-AL00-2019-04-15-14-31-10/bugreport-ALP-AL00-HUAWEIALP-AL00-2019-04-15-14-31-10.txt" file. 2019/04/15 12:48:29 Trace ended analyzing file. 2019/04/15 12:48:29 Trace finished analysisServer processing for: POST didi@localhost  /usr/local/Cellar/go/1.12.4/src/github.com/google/battery-historian   master  docker ps -all CONTAINER ID IMAGE COMMAND CREATED STATUS PORTS NAMES c19bb05d9198 bhaavan/battery-historian "/bin/sh -c 'go run …" 19 minutes ago Up 19 minutes 0.0.0.0:9999->9999/tcp sad_shaw didi@localhost  /usr/local/Cellar/go/1.12.4/src/github.com/google/battery-historian   master  didi@localhost  /usr/local/Cellar/go/1.12.4/src/github.com/google/battery-historian   master  docker images REPOSITORY TAG IMAGE ID CREATED SIZE bhaavan/battery-historian latest 9a3a9fd0ca2f 2 years ago 922MB 3、Open BHRun historian and visit http://localhost:9999 4、Upload Report Both .txt and .zip bug reports are accepted. To take a bug report from your Android device, you will need to enable USB debugging under Settings > System > Developer Options To obtain a bug report from your development device running Android 7.0 and higher: $ adb bugreport bugreport.zip didi@localhost  ~  adb bugreport bugreport.zip /data/user_de/0/com.android.shell/files/bugreports/bugreport-ALP-AL00-HUAWEIALP-AL00-2019-04-15-11-08-01.zip: 1 file pulled. 23.2 MB/s (2295220 bytes in 0.094s) // 手机本地 didi@localhost  ~  adb pull /data/user_de/0/com.android.shell/files/bugreports/bugreport-ALP-AL00-HUAWEIALP-AL00-2019-04-15-12-08-32.zip /Users/didi/Documents/ # 导出到电脑 /data/user_de/0/com.android.shell/files/bugreports/bugreport-ALP-AL00-HUAWEIALP-AL00-2019-04-15-12-08-32.zip: 1 file pulled. 24.1 MB/s (2415380 bytes in 0.096s) For devices 6.0 and lower: $ adb bugreport > bugreport.txt 5、Start analyzing! Timeline: System stats: App stats:

资源下载

更多资源
Mario

Mario

马里奥是站在游戏界顶峰的超人气多面角色。马里奥靠吃蘑菇成长,特征是大鼻子、头戴帽子、身穿背带裤,还留着胡子。与他的双胞胎兄弟路易基一起,长年担任任天堂的招牌角色。

Nacos

Nacos

Nacos /nɑ:kəʊs/ 是 Dynamic Naming and Configuration Service 的首字母简称,一个易于构建 AI Agent 应用的动态服务发现、配置管理和AI智能体管理平台。Nacos 致力于帮助您发现、配置和管理微服务及AI智能体应用。Nacos 提供了一组简单易用的特性集,帮助您快速实现动态服务发现、服务配置、服务元数据、流量管理。Nacos 帮助您更敏捷和容易地构建、交付和管理微服务平台。

Rocky Linux

Rocky Linux

Rocky Linux(中文名:洛基)是由Gregory Kurtzer于2020年12月发起的企业级Linux发行版,作为CentOS稳定版停止维护后与RHEL(Red Hat Enterprise Linux)完全兼容的开源替代方案,由社区拥有并管理,支持x86_64、aarch64等架构。其通过重新编译RHEL源代码提供长期稳定性,采用模块化包装和SELinux安全架构,默认包含GNOME桌面环境及XFS文件系统,支持十年生命周期更新。

WebStorm

WebStorm

WebStorm 是jetbrains公司旗下一款JavaScript 开发工具。目前已经被广大中国JS开发者誉为“Web前端开发神器”、“最强大的HTML5编辑器”、“最智能的JavaScript IDE”等。与IntelliJ IDEA同源,继承了IntelliJ IDEA强大的JS部分的功能。


用户登录
用户注册