一、Nginx+uWSGI+Django部署生产环境
原理
为什么还要Nginx
Django有个runserver直接起了一个WebServer,为什么还要Nginx起一个WebServer呢?
- Nginx的性能比Django自带的WebServer要好
大家是否想过,我们用Python写的程序(Django是Python写的),想要被WEB访问是不是还要有一个Python写的WEB Server?
就拿Nginx举例他是什么写的?C写的,代码上不同!!!
常见的Python HTTP服务器
| Name |
Version |
http1.1 |
Flavour |
Repo |
Community |
| uWSGI |
Trunk(253) |
Yes |
processor/thread |
repo |
Mailing List |
| Gunicorn |
0.6.4 |
No |
processor/thread |
GIT |
#gunicorn |
| wsgiref |
Py 2.6.4 |
No |
processor/thread |
SVN |
Mailing List |
| Twisted |
10.0.0 |
Yes |
processor/thread |
SVN |
Community |
| Tornado |
0.9.6 |
Yes |
lightweight threads |
Mercurial |
Mailinglist |
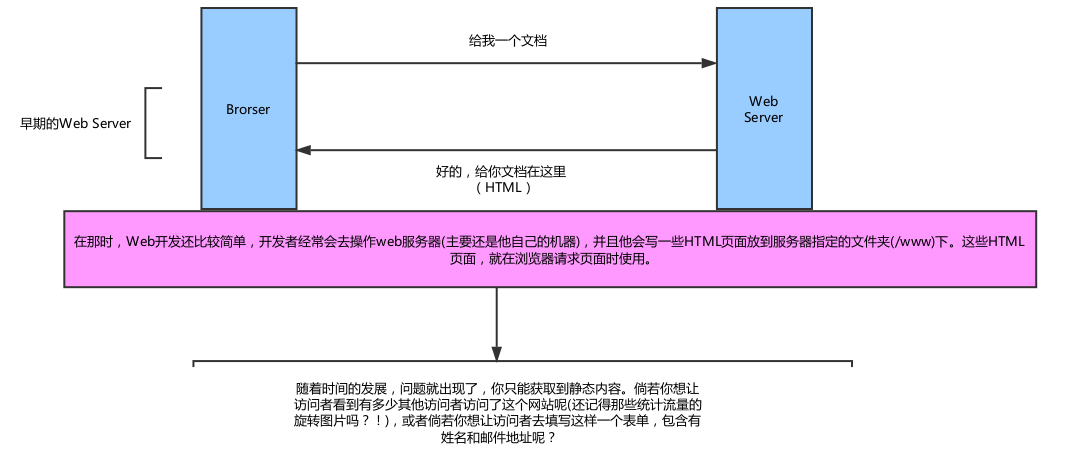
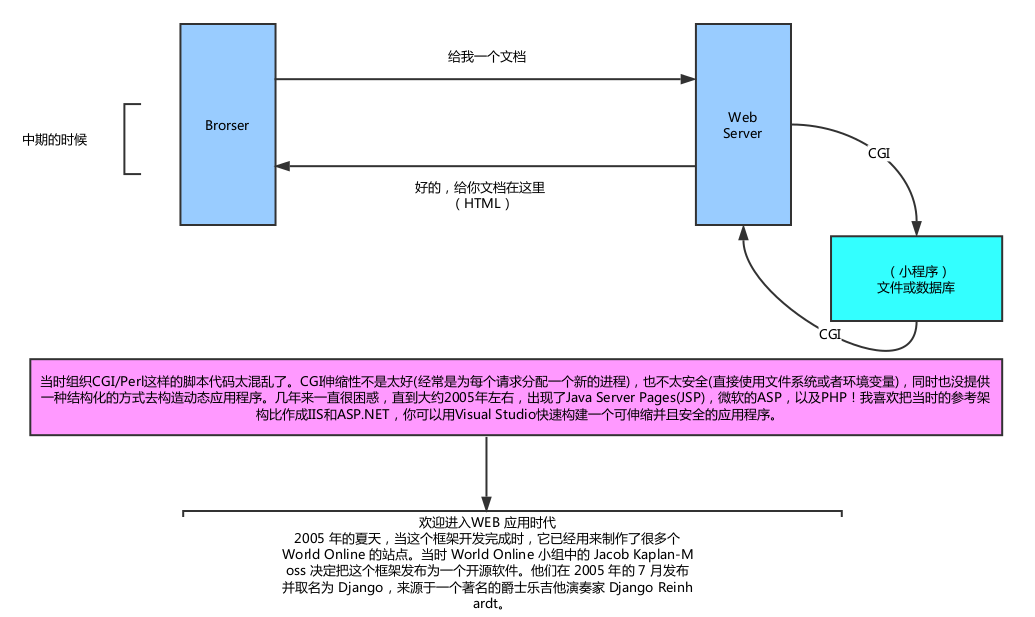
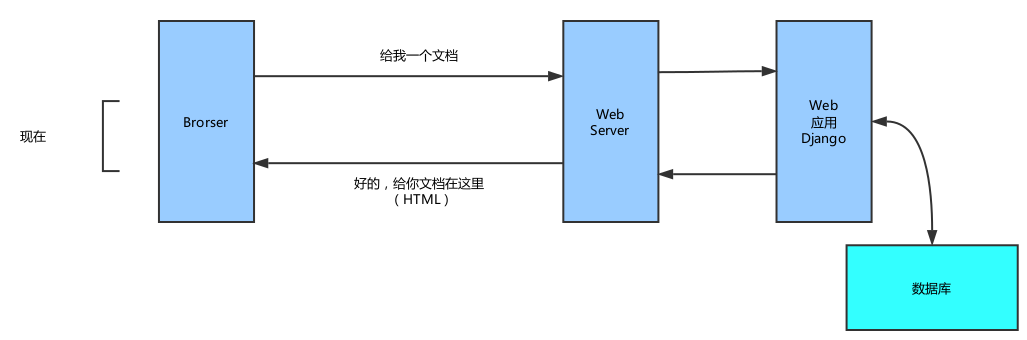
什么是WEB 应用以及WEB 发展史
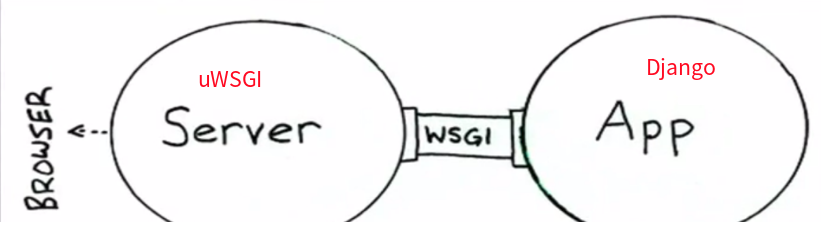
什么是WSGI?
WSGI,全程 Web Server Gateway Interface,或者Python Web Server Gateway Interface,是为Python语言定义的Web服务器和Web 应用程序或者框架之间的一种简单接口.自从WSGI被开发出来以后,许多其他语言中也出现类似接口
WSGI就是一种标准.譬如,一个德国人和一个法国人聊天,他们要想聊天可以通过过一个标准的国际语言:英语~
哪些框架自带了WSGI Server
很多框架都自带了WSGI Server,比如Flask,webpy,Django,CherryPy等等.当然性能都不好,都不行,自带的web server 更多的时候是我们测试的时候使用,发布时则使用生产环境的WSGI server或者联合nginx 做 uwsgi
概念总结
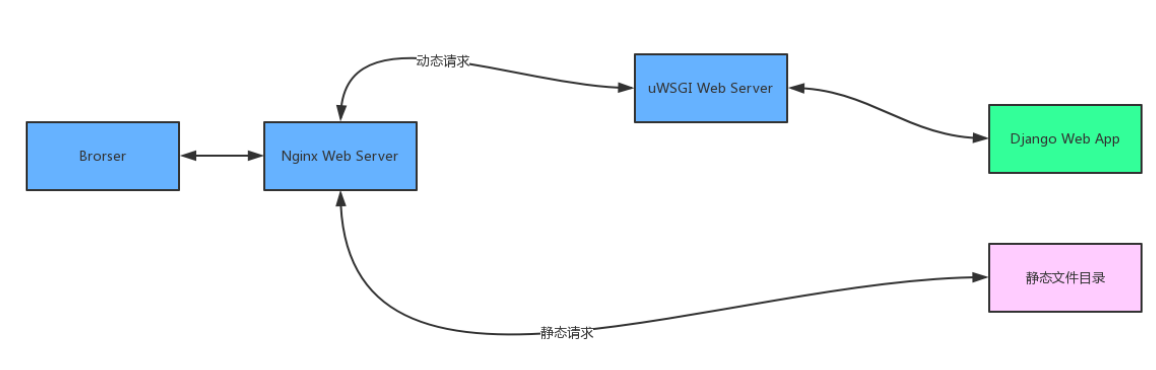
WSGI是一种Web服务器网关接口.它是一个Web服务器(如Nginx)与应用服务器(uWSGI服务器)通信的一种规范.
uWSGI是一个Web服务器,它实现了WSGI协议、uwsgi、http等协议.Nginx中HttpUwsgiModule的作用是与uWSGI服务器进行交换
特别注意WSGI/uwsgi/uWSGI这三个概念的区别
- WSGI我们已经清楚是一种通信协议
- uwsgi同WSGI一样是一种通信协议
- 而uWSGI是实现了uwsgi和WSGI两种协议的Web服务器
为什么有了uWSGI还需要Nginx?因为Nginx具备优秀的静态内容处理能力,然后将动态内容转发给uWSGI服务器,这样可以达到很好的客户端响应
二、部署
1. 通过ssh连接你的远程服务器
ssh 用户名@ip地址
2. 检查和更新系统软件
sudo apt update && upgrade
3. 安装pip3
export WORKON_HOME=$HOME/.virtualenvs
export VIRTUALENVWRAPPER_PYTHON=/usr/bin/python3
source /usr/local/bin/virtualenvwrapper.sh
4. 创建虚拟环境(安装相关的python包)
5. 安装Nginx
sudo apt-get install nginx
6.上传项目
7. 安装 uwsgi
pip install uwsgi
8. 测试uwsgi
uwsgi --http :8000 --module test1.wsgi
9. 静态文件配置(可以先跳过,进行下一步配置nginx)
10. 配置nginx
10.1 在项目目录下面新建一个文件夹conf,用于存放一些我们的配置文件
[站外图片上传中...(image-cb4a1d-1540135016670)]
10.2 创建一个配置文件test1_nginx.conf
# the upstream component nginx needs to connect to
upstream django {
# server unix:///path/to/your/mysite/mysite.sock; # for a file socket
server 127.0.0.1:8000; # for a web port socket (we'll use this first)
}
# configuration of the server

server {
# the port your site will be served on
listen      80;
# the domain name it will serve for
server_name 你的外网ip ; # substitute your machine's IP address or FQDN
charset     utf-8;

# max upload size
client_max_body_size 75M;   # adjust to taste

# Django media
location /media  {
    alias /home/ubuntu/test1/static/media;  # 指向django的media目录
}

location /static {
    alias /home/ubuntu/test1/static; # 指向django的static目录
}

# Finally, send all non-media requests to the Django server.
location / {
    uwsgi_pass  django;
    include     uwsgi_params; # the uwsgi_params file you installed
}
}
10.3 将配置文件加入到nginx的启动配置文件中(当然你也可以把文件直接拷贝进去)
sudo ln -s /home/ubuntu/test1/conf/test1_nginx.conf /etc/nginx/conf.d
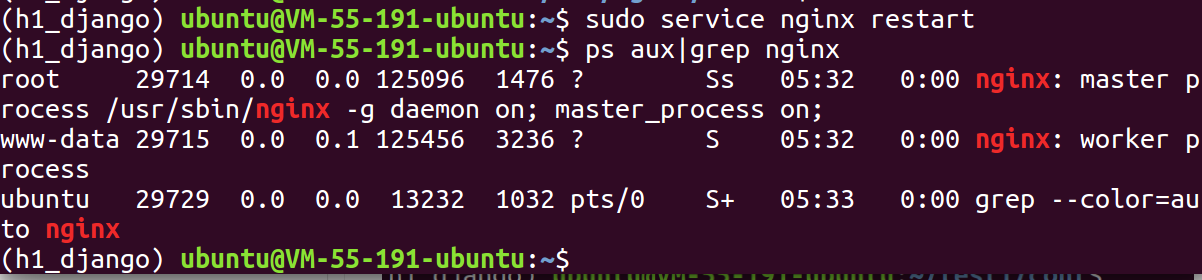
10.4 重启nginx
10.5 拉取所有需要的static file到同一个目录
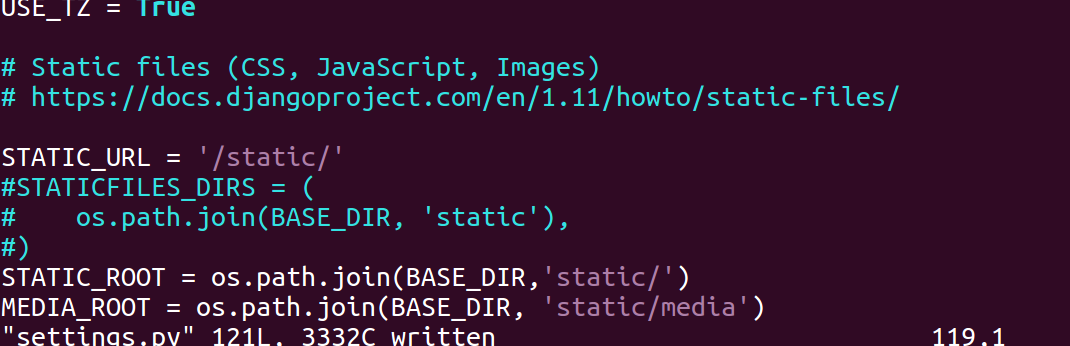
在django的settings文件中加一句
STATIC_ROOT = os.path.join(BASE_DIR,'static/')
运行命令
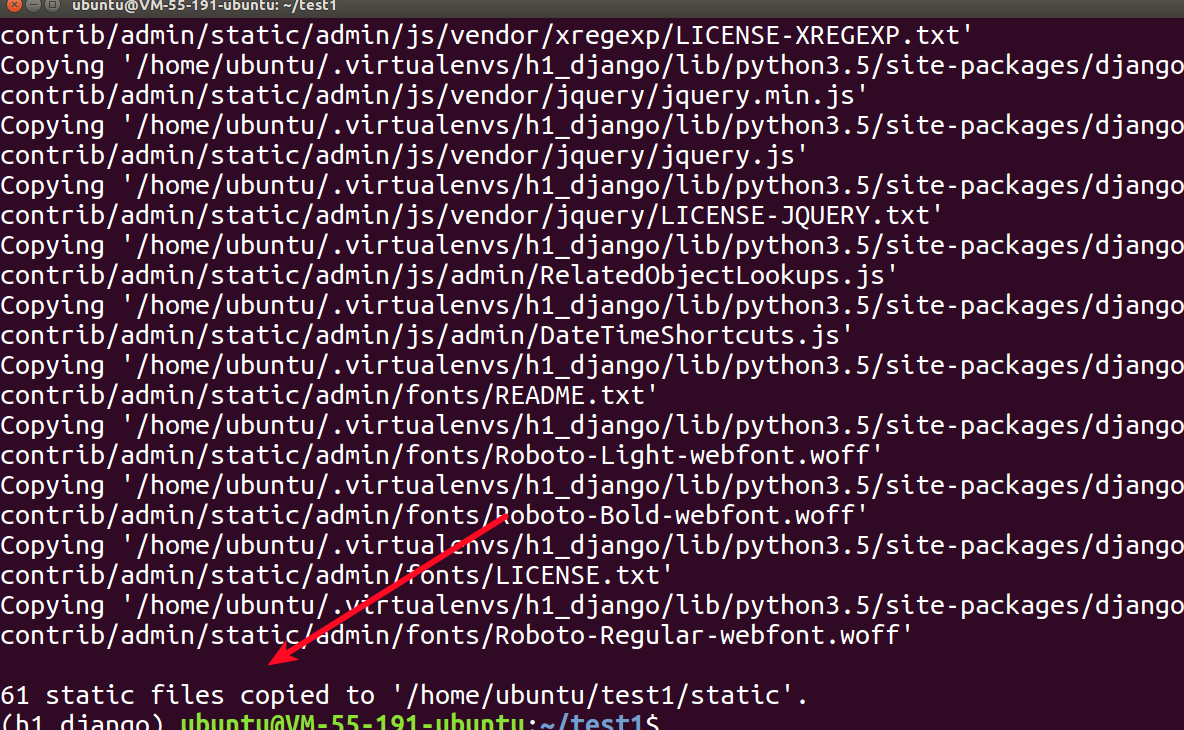
python manage.py collectstatic
11. 配置uwsgi
11.1 新建uwsgi配置文件叫uwsgi.ini文件(我们依旧保存到conf目录下面)
    # mysite_uwsgi.ini file
    [uwsgi]

    # Django-related settings
    # the base directory (full path)
    chdir           = /home/ubuntu/test1
    # Django's wsgi file
    module          = test1.wsgi
    # the virtualenv (full path)

    # process-related settings
    # master
    master          = true
    # maximum number of worker processes
    processes       = 10
    # the socket (use the full path to be safe
    socket          = 127.0.0.1:8000
    # ... with appropriate permissions - may be needed
    # chmod-socket    = 664
    # clear environment on exit
    vacuum          = true
    virtualenv = /home/ubuntu/.virtualenvs/h1_django

    #logto = /tmp/mylog.log
注:
chdir: 表示需要操作的目录,也就是项目的目录
module: wsgi文件的路径
processes: 进程数
virtualenv:虚拟环境的目录
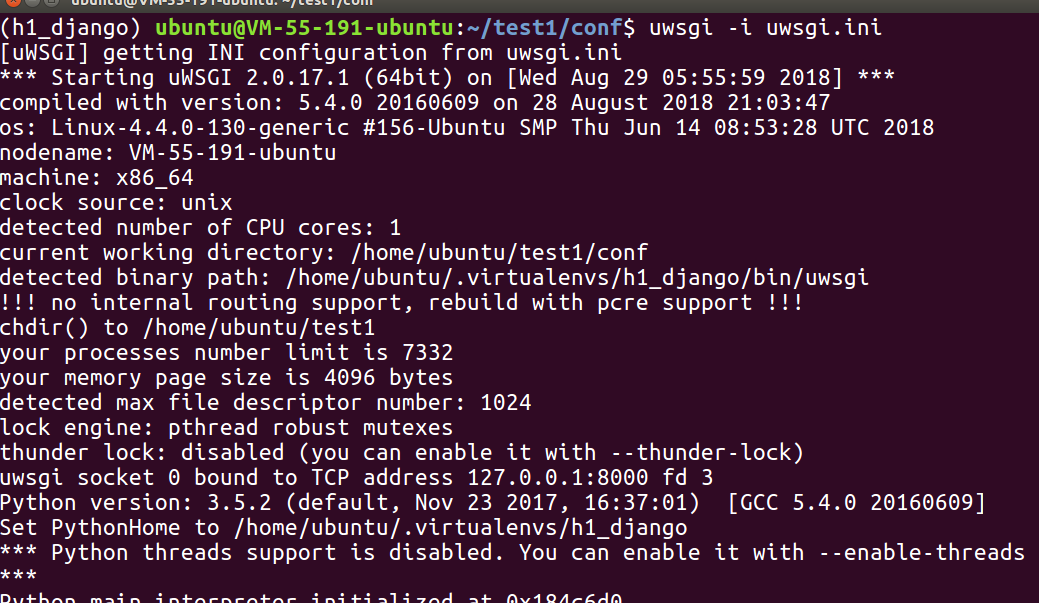
uwsgi -i 你的目录/home/ubuntu/test1/conf/uwsgi.ini
如果想后台启动加一个&
uwsgi -i 你的目录/home/ubuntu/test1/conf/uwsgi.ini &
12. 拉起项目