原文:
Android项目实战(十九):Android Studio 优秀插件: Parcelable Code Generator
Android Studio 优秀插件系列:
Android Studio 优秀插件(一):GsonFormat
-----------------------------------------------------------------------------
Parcelable , 这个词大家应该不陌生吧,用于序列化对象的一个接口
不清楚的可以看一下这篇博客:Intent传递对象的两种方法
-----------------------------------------------------------------------------
这里假设我们已经会使用 Parcelable 序列化一个对象了~~
那么大家会发现 Parcelable 使用起来有些复杂,因为我们要自己复写 几个方法,而且当类的属性比较多的时候,我们就会难受了,又要注意不写错属性名,又要注意写对属性的类型,又要花不少的时间做重复的事情。
那么因为 Parcelable 有使用它的优势,我们又不能放弃,那该怎么办么?
Android Studio 提供给了我们 一个插件用来简化 给一个类 实现 Parcelable 接口的流程。
-----------------------------------------------------------------------------
现在学习下如何使用这个插件:
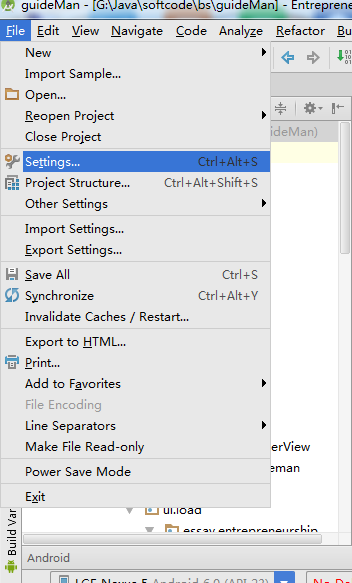
1、Android Studio 打开一个项目,点击左上角 File -->Settings... 进行设置
![]()
2、选择插件Plugins , 搜索Parcel,如果你没有下载过这个插件,那么搜索框下面会显示“Nothing to show.Click Browse to....”
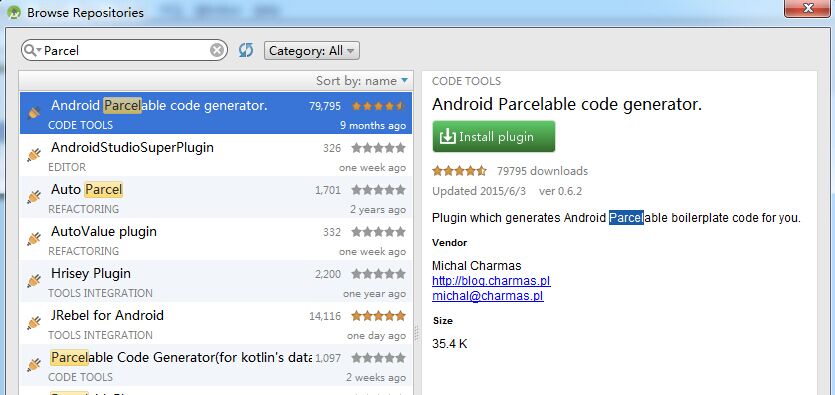
3、那就点击蓝色字体的 Browse 吧 ,这个时候会出现如下图的界面,我们只需要在左边选中arcel然后点击右面 绿色按钮 "Install plugin" 就可以了
![]()
4、完成了上面三个步骤,就可以使用Parcelable Code Generator插件了
怎么用呢,
(1)创建一个类文件,类名是看你需求自定义写的,添加上你需要的属性
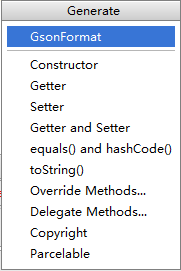
(2)快捷键 alt+insert ,会出现如下选择框,选择Parcelable 即可
![]()
然后我们就看到代码,是不是比我们手动写要快的许多
public class People implements Parcelable {


    private int id;
    private String url;
    private int width;
    private int height;
    private int likeCount;
    private String description;
    private int time;
    private int replyCount;
    private int floorCount;
    private int likeUserCount;
    private int age;
    private String name;
    private String school;
    private int type;
    private String sax;
    private int userid;


    @Override
    public int describeContents() {
        return 0;
    }

    @Override
    public void writeToParcel(Parcel dest, int flags) {
        dest.writeInt(this.id);
        dest.writeString(this.url);
        dest.writeInt(this.width);
        dest.writeInt(this.height);
        dest.writeInt(this.likeCount);
        dest.writeString(this.description);
        dest.writeInt(this.time);
        dest.writeInt(this.replyCount);
        dest.writeInt(this.floorCount);
        dest.writeInt(this.likeUserCount);
        dest.writeInt(this.age);
        dest.writeString(this.name);
        dest.writeString(this.school);
        dest.writeInt(this.type);
        dest.writeString(this.sax);
        dest.writeInt(this.userid);
    }

    public People() {
    }

    protected People(Parcel in) {
        this.id = in.readInt();
        this.url = in.readString();
        this.width = in.readInt();
        this.height = in.readInt();
        this.likeCount = in.readInt();
        this.description = in.readString();
        this.time = in.readInt();
        this.replyCount = in.readInt();
        this.floorCount = in.readInt();
        this.likeUserCount = in.readInt();
        this.age = in.readInt();
        this.name = in.readString();
        this.school = in.readString();
        this.type = in.readInt();
        this.sax = in.readString();
        this.userid = in.readInt();
    }

    public static final Parcelable.Creator<People> CREATOR = new Parcelable.Creator<People>() {
        public People createFromParcel(Parcel source) {
            return new People(source);
        }

        public People[] newArray(int size) {
            return new People[size];
        }
    };
}