写在前面
说来也巧,之前有一次无意间留意到简书好像没有做文章总阅读量的统计(准确的说法应该叫展示),刚好最近有时间,趁这个机会就用Python写了这么个功能,既是学习也是练手。
展示效果
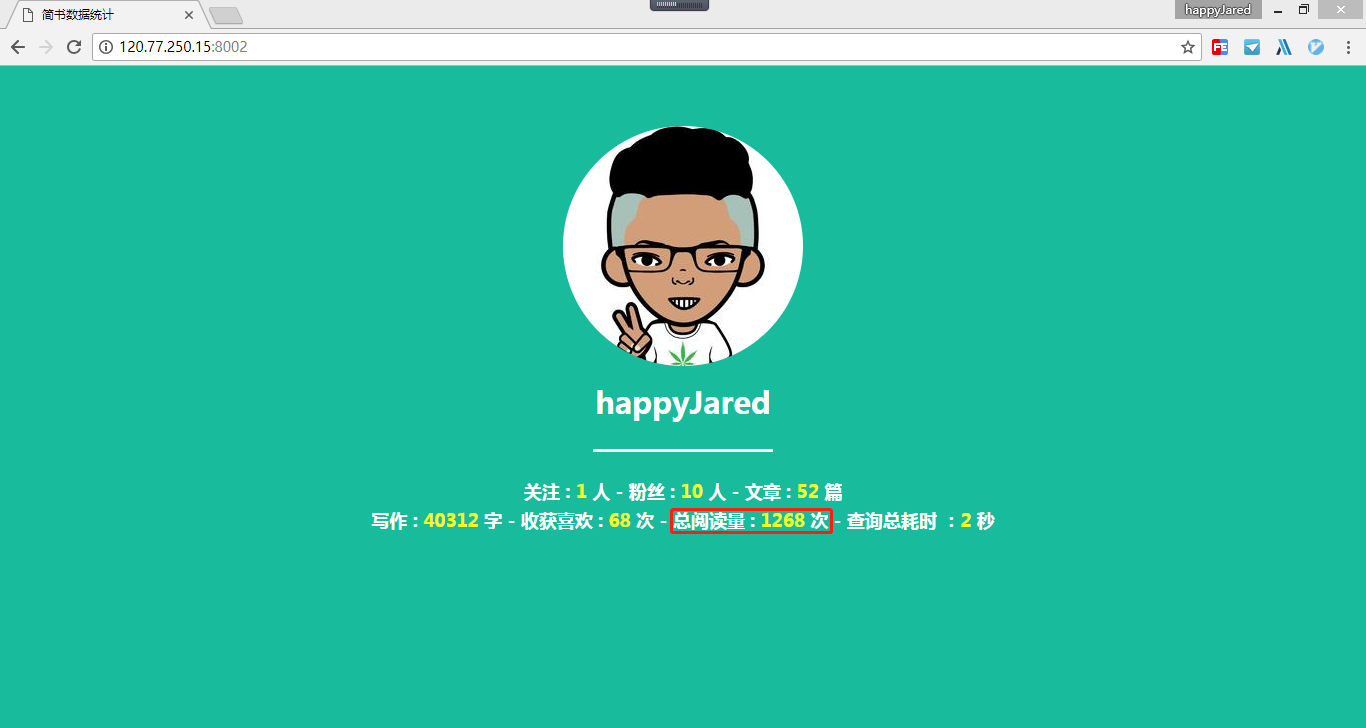
再继续往下之前,先贴两张图看看最终的效果。第一张图片展示的是个人简书爬取后的数据,第二张可是大名鼎鼎简叔的简书数据。
![个人简书数据]()
个人简书数据
!['简叔'简书数据]()
'简叔'简书数据
两图一对比,果然这数量和质量都不是一个等级的,不过后生会继续努力的。写了两个多月的博客了,没想到也有一千多的阅读量了,这是算喜还是算忧呢?哈哈,总之感觉还是蛮欣慰的。
环境说明
- python v3.6.4
- webpy v0.40-dev1
- 要求有一定的Python基础
开发搭建
项目中用到的第三方module主要包括Requests、BeautifulSoup和Numpy,因为另外两个安装都比较顺利,所以这里只记录一下安装BeautifulSoup和遇到的问题。
pip安装
    pip install beautifulsoup4 # 安装Beautifulsoup
    pip install beautifulsoup4 upgrade # 升级Beautifulsoup
    pip uninstall beautifulsoup4 # 卸载Beautifulsoup
直接下载
地址:https://www.crummy.com/software/BeautifulSoup/bs4/download/ 。下载好后把解压文件夹下的bs4文件夹直接拷贝到python安装目录的Lib下即可。(如果此方法无效,请尝试重新进入解压文件夹下,使用命令python setup.py build和python setup.py install,然后再拷贝复制bs4文件夹)
问题还原
本以为安装好Beautifulsoup后就可以了,没想到在实际运行的时候出现了下面这个问题,如果你在使用的过程中也出现了同样的问题,可以参考如下解决过程。
You are trying to run the Python 2 version of Beautiful Soup under Python 3. This will not work.'<>'You need to convert the code, either by installing it (python setup.py install) or by running 2to3 (2to3 -w bs4).
说明: bs4需要通过python自带的工具2to3.py转化为python3下的文件,这个工具在python安装目录的Tools\scripts中(PS:其他库出现这种情况应该也可以这样解决)。具体命令:python D:\python36\Tools\scripts\2to3.py -w bs4,如果该命令出现执行错误的情况,可以尝试进入python安装目录下的Lib\bs4中再执行。
其它问题
1.使用webpy过程中,当渲染的模板 ( 大多是html ) 中带有中文的时候,出现了如下错误:
File "D:\python36\lib\site-packages\web\template.py", line 1052, in _load_template return Template(open(path).read(), filename=path, **self._keywords)
UnicodeDecodeError: 'gbk' codec can't decode byte 0x80 in position 298: illegal multibyte sequence
解决办法:直接点进去这个template.py,然后修改代码return Template(open(path).read(), filename=path, **self._keywords)为return Template(open(path, encoding='utf-8').read(), filename=path, **self._keywords),也就是添加encoding='utf-8',详细可以查看这个GitHub PR。
2.页面请求后显示IndentationError,错误信息如下:
Traceback (most recent call last):
  File "D:\python36\lib\site-packages\web\application.py", line 257, in process
    return self.handle()
  File "D:\python36\lib\site-packages\web\application.py", line 248, in handle
    return self._delegate(fn, self.fvars, args)
  File "D:\python36\lib\site-packages\web\application.py", line 488, in _delegate
    return handle_class(cls)
  File "D:\python36\lib\site-packages\web\application.py", line 466, in handle_class
    return tocall(*args)
  File "D:/PyCharmProjects/jianshu\webCount.py", line 16, in GET
    return render.data(read_count)
  File "D:\python36\lib\site-packages\web\template.py", line 1070, in __getattr__
    t = self._template(name)
  File "D:\python36\lib\site-packages\web\template.py", line 1067, in _template
    return self._load_template(name)
  File "D:\python36\lib\site-packages\web\template.py", line 1052, in _load_template
    return Template(open(path, encoding='utf-8').read(), filename=path, **self._keywords)
  File "D:\python36\lib\site-packages\web\template.py", line 903, in __init__
    code = self.compile_template(text, filename)
  File "D:\python36\lib\site-packages\web\template.py", line 970, in compile_template
    compiled_code = compile(code, filename, 'exec')
  File "templates\data.html", line 32
    extend_(['<header class="text-white text-center" style="padding-top: 5rem;">\n'])
          ^
IndentationError: expected an indented block

Template traceback:
    File 'templates\\data.html', line 32
        None
说明:模板渲染中,如果使用了webpy内置的python语法函数,那就有一定的格式要求,这种错误信息就是提示要注意缩进,语法定义和html之间保持缩进即可,参考如下:
$if read_count.exit:
    # 这两行之间的缩进是必需的
    <header class="text-white text-center" style="padding-top: 5rem;">
    </header>
$else:
    <b>uid: $read_count.uid is not exit !</b>
3.页面请求后显示SyntaxError,错误信息如下:
Traceback (most recent call last):
  File "D:\python36\lib\site-packages\web\application.py", line 257, in process
    return self.handle()
  File "D:\python36\lib\site-packages\web\application.py", line 248, in handle
    return self._delegate(fn, self.fvars, args)
  File "D:\python36\lib\site-packages\web\application.py", line 488, in _delegate
    return handle_class(cls)
  File "D:\python36\lib\site-packages\web\application.py", line 466, in handle_class
    return tocall(*args)
  File "D:/PyCharmProjects/jianshu\webCount.py", line 16, in GET
    return render.data(read_count)
  File "D:\python36\lib\site-packages\web\template.py", line 1070, in __getattr__
    t = self._template(name)
  File "D:\python36\lib\site-packages\web\template.py", line 1067, in _template
    return self._load_template(name)
  File "D:\python36\lib\site-packages\web\template.py", line 1052, in _load_template
    return Template(open(path, encoding='utf-8').read(), filename=path, **self._keywords)
  File "D:\python36\lib\site-packages\web\template.py", line 903, in __init__
    code = self.compile_template(text, filename)
  File "D:\python36\lib\site-packages\web\template.py", line 970, in compile_template
    compiled_code = compile(code, filename, 'exec')
  File "templates\data.html", line 31
    def with (read_count)
           ^
SyntaxError: invalid syntax

Template traceback:
    File 'templates\\data.html', line 31
        None
说明:碰到这种错误提示,需要检查是否将渲染参数(对象)的定义放到了模板的最顶部,参考如下:
$def with (read_count)
# 上面这段定义要在最顶部

<html lang="zh-CN">
<head>
# 省略这部分信息
</head>
<body>
# 省略这部分信息
</body>
</html>
程序代码
一些必要的说明在编码的时候我就写在注释里了,大家还是直接看代码吧。
- readCount.py:核心功能是抓取简书用户的数据
import math
import time
import numpy
import requests
import multiprocessing
from bs4 import BeautifulSoup


# 简书用户的文章阅读总量统计
class ReadCount(object):
    # 数据初始化
    def __init__(self, uid):
        self.headers = {
            'User-Agent': 'Mozilla/5.0 (Windows NT 6.3; WOW64) AppleWebKit/537.36 (KHTML, like Gecko) '
                          'Chrome/66.0.3359.139 Safari/537.36'
        }
        # uid
        self.uid = uid
        # 昵称
        self.nickname = ''
        # 头像
        self.avatar = ''
        # 总发表文章数
        self.articles = 0
        # 文章总阅读数
        self.total_reading = 0
        # 关注人数
        self.watch = 0
        # 粉丝人数
        self.fans = 0
        # 写作字数
        self.words = 0
        # 收货喜欢数
        self.likes = 0
        # 查询总耗时
        self.time = 0
        # 用户是否存在的标志
        self.exit = True

    # 判断用户是否存在。存在则抓取并统计数据,否则修改exit标志
    def count(self):
        start = time.time()
        url = 'https://www.jianshu.com/u/' + self.uid
        # print(url)
        resp = requests.get(url, headers=self.headers)
        if resp.status_code == 200:
            bs = BeautifulSoup(resp.content, 'html.parser', from_encoding='UTF-8')

            # 头像
            avatar = bs.find(class_='avatar')
            self.avatar = 'https:' + avatar.img['src']

            # 昵称
            nickname = bs.find(class_='name')
            self.nickname = nickname.text

            meta_block = bs.find_all(class_='meta-block')
            # 关注数
            self.watch = int(meta_block[0].a.p.text)
            # 粉丝数
            self.fans = int(meta_block[1].a.p.text)
            # 总发表文章数
            self.articles = int(meta_block[2].a.p.text)
            # 写作字数
            self.words = int(meta_block[3].p.text)
            # 收获喜欢数
            self.likes = int(meta_block[4].p.text)
            if self.articles != 0:
                # print(self.articles)
                meta = bs.find_all(class_='meta')
                # 每页展示文章数
                page_articles = len(meta)
                # print(page_articles)
                # 文章展示总页数
                pages = int(math.ceil(self.articles / page_articles)) + 1
                # 用多线程统计
                cpu_count = multiprocessing.cpu_count()
                # print(cpu_count)
                pool = multiprocessing.Pool(cpu_count)
                # 从第一页开始
                page = range(1, pages)
                # 包含每页阅读量的列表
                page_reading_list = pool.map(self.page_count, page)
                # print(page_reading_list)
                self.total_reading = numpy.sum(page_reading_list)
                # print('用户:%s 总发表文章数为:%d , 文章总阅读量为: %s' % (input_uid, self.articles, self.total_reading))
        else:
            self.exit = False
            # print('用户:%s 不存在' % input_uid)
        end = time.time()
        self.time = int(end - start)

    # 每页的阅读量统计
    def page_count(self, page):
        url = 'https://www.jianshu.com/u/' + self.uid + '?page=' + str(page)
        # print(url)
        resp = requests.get(url, headers=self.headers)
        bs = BeautifulSoup(resp.content, 'html.parser', from_encoding='UTF-8')
        divs = bs.find_all(class_='meta')
        page_reading = 0
        for div in divs:
            page_reading += int(div.a.text)
        return page_reading
- webCount.py:web支持和入口类,包括调用
readCount并进行数据渲染
import web
import readCount

# 第一个是映射规则,第二个是具体匹配的类
urls = ('/(.*)', 'Hello')

# 指定模板所在的位置
render = web.template.render('templates/')


class Hello:
    @staticmethod
    def GET(uid):
        if not uid:
            uid = '000a530f461c'
        read_count = readCount.ReadCount(uid)
        read_count.count()
        # data是渲染模板的名称
        return render.data(read_count)


if __name__ == "__main__":
    app = web.application(urls, globals())
    app.run()
$def with (read_count)

<html lang="zh-CN">
<head>
    <meta charset="UTF-8">
    <meta name="viewport"
          content="width=device-width, user-scalable=no, initial-scale=1.0, maximum-scale=1.0, minimum-scale=1.0">
    <meta http-equiv="X-UA-Compatible" content="ie=edge">
    <title>简书数据统计</title>
    <!-- Bootstrap -->
    <link href="https://cdn.bootcss.com/bootstrap/3.3.7/css/bootstrap.min.css" rel="stylesheet">
    <!-- Custom styles for this template -->
    <link href="https://blackrockdigital.github.io/startbootstrap-freelancer/css/freelancer.min.css" rel="stylesheet">
    <style>
        .self-text {
            color: rgba(255, 254, 21, 0.96);
        }
        .self-text2 {
            color: rgba(255, 58, 2, 0.96);
        }
        .self-a {
            color: rgba(255, 58, 2, 0.96);
            font-size: 2.5rem;
            text-underline: none;
        }
    </style>
    <!-- HTML5 shim 和 Respond.js 是为了让 IE8 支持 HTML5 元素和媒体查询(media queries)功能 -->
    <!-- 警告:通过 file:// 协议(就是直接将 html 页面拖拽到浏览器中)访问页面时 Respond.js 不起作用 -->
    <!--[if lt IE 9]>
    <script src="https://cdn.bootcss.com/html5shiv/3.7.3/html5shiv.min.js"></script>
    <script src="https://cdn.bootcss.com/respond.js/1.4.2/respond.min.js"></script>
    <![endif]-->
</head>
<body class="bg-primary">
<header class="text-white text-center" style="padding-top: 5rem;">
$if read_count.exit:
    <div class="container">
        <img class="img-fluid mb-5 d-block mx-auto img-circle" src="$read_count.avatar" alt="avatar">
        <h2 class="mb-0">$read_count.nickname</h2>
        <hr class="star-light">
        <h4 class="font-weight-light mb-0">
            关注 : <span class="self-text">$read_count.watch</span> 人 -
            粉丝 : <span class="self-text">$read_count.fans</span> 人 -
            文章 : <span class="self-text">$read_count.articles</span> 篇 <p></p>
            写作 : <span class="self-text">$read_count.words</span> 字 -
            收获喜欢 : <span class="self-text">$read_count.likes</span> 次 -
            总阅读量 : <span class="self-text2">$read_count.total_reading</span> 次 -
            查询总耗时 :<span class="self-text2">$read_count.time</span> 秒
        </h4>
    </div>
$else:
    <h1 class="self-text2">404</h1>
    <hr class="star-light">
    <h4>用户不存在 , 您可以尝试下搜下面这些人</h4><br>
    <h4 class="font-weight-light mb-0">
        <a class="self-a" href="/000a530f461c">a. happyJared</a> -
        <a class="self-a" href="/y3Dbcz">b. 简叔</a> -
        <a class="self-a" href="/d9edcb44e2f2">c. 简黛玉</a> -
        <a class="self-a" href="/1441f4ae075d">d. 彭小六</a>
    </h4>
</header>
</body>
</html>
启动测试
webpy启动的命令是:python webCount.py {port}。其中,端口不是必须的,默认是运行在8080。以上程序已经跑在个人的服务器上,测试地址是:http://120.77.250.15:8002/{uid} ,这里uid是用户的唯一标志(非必填有默认值),你也可以通过在个人主页的地址栏中获取自己的。
结尾总结
不得不感慨,Python能做的领域确实很广,关键是代码量又少。像写个自动化脚本,It can;写个小爬虫,It can;写个web应用,It can;...这也是为什么一直想把Python当做我的第二门编程语言。这次写这个简书小爬虫也是一波三折,来来回回也折腾了差不多一天时间,还是基础不够扎实,代码不够熟练。写完代码后也有仔细想过,觉得有机会有时间的话还可以做得更细一点,就像大数据分析一样,同样也是一个个用户数据慢慢堆起来的,所以目前来看还可以考虑扩展以下几点:
- 获得用户加入简书的时间(假设以第一篇文章发表时间为参考)
- 通过用户发表的总文章数,获取用户平均每年、每月发表多少文章数
- 最高阅读量、打赏数、喜欢数、留言量的文章
- 统计用户获得的总打赏笔数
- 当前用户发表文章最活跃的时间段
- 至今为止加入简书多少天
- 最后一次发表文章的时间
- 评论总数
- ......
如果真完成了以上的扩展,像我的话肯定会趁机再扩展学习下Python的图表库,像matplotlib;或者使用ECharts、HighCharts、D3这样的前端报表库,相信这样会让这些数据显得更加的生动。大概也就这么多吧,本人目前也已经辞职近一个月了(时间过得真TM快,转眼就毕业了),刚好最近也在着手准备找下一份工作,按计划会先写一个招聘平台(主要是拉钩和Boss)的关键字筛选小爬虫,也算是帮助筛选一部分的求职公司,我瞄准的关键字是:“健身房”,就是不知道真的有没有这么幸运,感兴趣的敬请期待。
注:以上所有程序代码已经发布到我的GitHub仓库