WebSocket简介 WebSocket 是一种在单个TCP连接上进行全双工通信的协议
WebSocket 使得客户端和服务器之间的数据交换变得更加简单,并且允许服务端主动向客户端推送数据。(HTTP协议的缺陷:通信只能由客户端发起)
使用WbeSocket,浏览器和服务器只需要完成一次握手,两者之间就可以创建持久性连接(长连接),并进行双向数据传输,并且能够实时的进行通讯
聊天室通讯还可以采用轮询的方式实现。所谓轮询就是客户端在特定时间间隔,由浏览器向服务器发送请求获得最新数据,这样会浪费很多带宽等资源
特点:
建立在 TCP 协议之上,服务器端的实现比较容易。
与 HTTP 协议有着良好的兼容性。默认端口也是80和443,并且握手阶段采用 HTTP 协议,因此握手时不容易屏蔽,能通过各种 HTTP 代理服务器。
协议标识符是ws(如果加密,则为wss),服务器网址就是 URL。
使用WebSocket()构造函数来构造一个WebSocket
//注意是ws协议,不存在跨域问题,可以在本地启node服务户进行测试,在需要的时候换上后端服务器地址即可 var ws = new WebSocket('ws://localhost:8080' );API(常用):
[WebSocket.onclose]
用于指定连接关闭后的回调函数。
[WebSocket.onerror]
用于指定连接失败后的回调函数。
[WebSocket.onmessage]
用于指定当从服务器接受到信息时的回调函数。
[WebSocket.onopen]
用于指定连接成功后的回调函数。
[WebSocket.close([code[, reason\]])]
关闭当前链接。
code和reason可选
code状态码 reason可读字符串,解释关闭原因
[WebSocket.send(data)]
对要传输的数据进行排队。
SocketIO 为了兼容所有浏览器,SocketIO将WebSocket、AJAX和其它的通信方式全部封装成了统一的通信接口
Socket.IO 由两部分组成:
一个服务端用于集成 (或挂载) 到 Node.JS HTTP 服务器:
socket.io
一个加载到浏览器中的客户端:
socket.io-client
引入socket.io-client,可以创建一个全局的实例,便于在所有文件中使用
我个人认为socket.io的最大优点就在于可以自定义事件
通过emit发送消息,通过on监听事件
//引入http标准模块,CommonJS模块 const http = require ("http" );const fs = require ("fs" );const ws = require ("socket.io" );//创建一个web服务 const server = http.createServer(function (request,response )200 ,{"Content-type" :"text/html;charset=UTF-8" // 读取文件 const html = fs.readFileSync("index.html" )//基于创建的服务开启socket实例 const io = ws(server)//检测连接事件 "connection" ,function (socket )let nmae = '' ;//加入群聊 "join" ,function (message )console .log(message)//广播给其它客户端看(boradcast,除了自己以外的所有人) 'joinNoticeOther' ,{name :name,action :'加入了群聊' ,count :count//接收客户端所发送的消息 "message" ,function (message )console .log(message)//向所有客户端广播该消息 "message" ,message)//监听到断开链接 "disconnect" ,function (//发送广播 某用户离开了群聊 "disconnection" ,{name :name,count :count聊天室搭建 本次demo采用vue+WebSocket +java进行开发
创建实例 //从store中取出用户的id和name this .userId = this .$store.getters.userInfo.userId;this .name = this .$store.getters.userInfo.realName;//根据用户的id建立各自的长连接 this .ws = new WebSocket("ws://192.168.0.87:12137/websocket/" + this .userIdthis .ws.onopen = function (evt ) //绑定连接事件 if (evt.isTrusted) {//获取当前人数 (res )=> {"#count" ).text(res);console .log("Connection open ..." );var _this = this ;this .scrollToBottom();//滚动到底部 this .$nextTick(() =>".chat-container" ).scrollTop($(".chat-container" )[0 ].scrollHeight);断开连接 弹框提示,选择是否重连。重连时需要先手动断开连接
当发送的文件出错或者过大,可能会导致断开连接
当离开当前路由,组件销毁的时候,需要手动断开连接
// 断开连接回调事件 function (evt ) (res )=> {"#count" ).text(res);if (evt.code === 1009 ) {"发送的图片或者文件过大,请重新选择!" ;true ;//连接失败后的回调 function (evt ) console .log("Connection error." );if (evt.code === 1009 ) {"连接失败,点击确定按钮尝试重连" ;true ;//点击弹出框确定按钮后 this .dialogVisible = false ;this .tipText = "出现未知错误,请点击确定按钮尝试重连" ;this .reconnet = true ;let _this = this ;if (this .reconnet) {// window.location.reload(); 可以通过刷新页面来实现,但是体验很差 this .ws.close();//手动关闭后再重新连接 this .init(); //重连方法在init里 false ;//组件销毁时,需要断开连接 this .ws.close();console .log("断开连接" )富文本聊天框 有很多富文本编辑器插件包括TinyMCE、Ckeditor、UEditor(百度)、wangEditor等
本项目中不需要用到太多功能,所有选择自己实现一个简单的富文本编辑器
可以粘贴文字或图片,对文本框中的图片进行压缩,展示的图片不压缩
选择文件发送,点击文件可以获取url,可以下载或是预览
传统的输入框都是使用 <textarea> 来制作的,它的优势是非常简单,但最大的缺陷却是无法展示图片。为了能够让输入框能够展示图片(富文本化),我们可以采用设置了 contenteditable="true" 属性的 <div> 来实现这里面的功能
<div处理粘贴事件
任何通过“复制”或者 control + c 所复制的内容(包括屏幕截图)都会储存在剪贴板,在粘贴的时候可以在输入框的 onpaste 事件里面监听到。
而剪贴板的的内容则存放在 DataTransferItemList 对象中,可以通过 e.clipboardData.items 访问到:
//定义粘贴函数 const onPaste = (e, type ) => {// 如果剪贴板没有数据则直接返回 if (!(e.clipboardData && e.clipboardData.items)) {return ;// 用Promise封装便于将来使用 return new Promise ((resolve, reject ) => {// 复制的内容在剪贴板里位置不确定,所以通过遍历来保证数据准确 for (let i = 0 , len = e.clipboardData.items.length; i < len; i++) {const item = e.clipboardData.items[i];// 文本格式内容处理 if (item.kind === "string" ) {(str ) => {compressedDataUrl : str });// 文件格式内容处理 else if (item.kind === "file" ) {const pasteFile = item.getAsFile();const imgEvent = {target : {files : [pasteFile],else {new Error ("不支持粘贴该类型" ));chooseImg对粘贴的图片或选择的图片进行处理,将其转化为base64字符串
canvas的toDataURL的方法只能保存img/png或者img/jpeg格式的,如果格式不对话默认转成img/png
我开始想着把默认格式的img/png替换成img/gif,来展示gif图 但实际上不行,因为toDataURL只转换了一帧
暂时没想到好的办法将gif图转成base64
/** function toPreviewer (dataUrl, cb ) /** function compress (img, fileType, maxWidth, type ) let canvas = document .createElement("canvas" );let ctx = canvas.getContext("2d" );const proportion = img.width / img.height;let width = img.width;let height = img.height;//根据type来判断,是否对图片进行压缩 if (type) {//压缩后用于展示于输入框中 "#fff" ;0 , 0 , canvas.width, canvas.height);0 , 0 , width, height);const base64data = canvas.toDataURL(fileType, 0.75 );//替换 if (fileType === "image/gif" ) {let regx = /(?<=data:image).*?(?=;base64)/ ;let base64dataGif = base64data.replace(regx, "/gif" );null ;return base64dataGif;else {null ;return base64data;/** function chooseImg (e, cb, maxsize = 300 * 1024 ) const file = e.target.files[0 ];if (!file || !/\/(?:jpeg|jpg|png|gif)/i .test(file.type)) {console .log("图片格式错误!" );return ;const reader = new FileReader();function (const result = this .result;let img = new Image();function (const compressedDataUrl = compress(img, file.type, maxsize / 1024 , true );const noCompressRes = compress(img, file.type, maxsize / 1024 , false );null ;获取光标和设置光标的位置,便于插入内容
/** const getCursorPosition = (element ) => {let caretOffset = 0 ;const doc = element.ownerDocument || element.document;const win = doc.defaultView || doc.parentWindow;const sel = win.getSelection();if (sel.rangeCount > 0 ) {const range = win.getSelection().getRangeAt(0 );const preCaretRange = range.cloneRange();return caretOffset;/** const setCursorPosition = (element, cursorPosition ) => {const range = document .createRange();const sel = window .getSelection();//在vue的methods中 //粘贴内容至文本框 async onPaste(e) {const result = await onPaste(e, true );this .resultOfBase64 = result.noCompressRes;const imgRegx = /^data:image\/png|jpg|jpeg|gif;base64,/ ;if (imgRegx.test(result.compressedDataUrl)) {document .execCommand("insertImage" , false , result.compressedDataUrl);else {document .execCommand("insertText" , false , result.compressedDataUrl);//获取光标位置 this .cursorPosition = getCursorPosition(this .editor);这里来了解一下document.execCommand这个API
当一个HTML文档切换到设计模式时,document暴露 execCommand可编辑内容区域的元素。
参数:
aCommandName:一个 DOMString ,命令的名称,比如代码中的insertImage就是代表插入图片,insertText就是代表插入文本
aShowDefaultUI:一个 Boolean, 是否展示用户界面,一般为 false。Mozilla 没有实现。
aValueArgument:一些命令(例如insertImage)需要额外的参数(insertImage需要提供插入image的url),默认为null。
发送消息 //存this let _this = this ;this .ws.onmessage = function (message ) console .log(message);// console.log(_this.name); var data = message.data;//第一次连接成功的时候,后台发送的数据是字符串 if (data !== "连接成功" ) {var result = JSON .parse(data);let html = "" ;let answer = "" ;let date = new Date ();let nowTime = date.getHours() + ":" + date.getMinutes();//将需要的数据,push到一个数组里,在页面上通过遍历数组渲染 if (result) {nowTime : nowTime,name : result.name, msg : result.msg,id : result.id,elImg : result.elImg,//图片标识 //消息分为三种类型,文本、图片、文件 //文件的地址 //发送消息 const value =typeof e === "string" /[\n\r]$/ , "" )/[\n\r]$/ , "" );const imgRegx = /^data:image\/png|jpg|jpeg|gif;base64,/ ;const imgFlag = imgRegx.test(this .resultOfBase64);// console.log("resultOfBase64:" + this.resultOfBase64) let imgValue = "" ;if (imgFlag && value !== "" ) {//判断是图片并且输入框中内容不为空 this .resultOfBase64.replace(/[\n\r]$/ , "" );this .type = 2 ;else if (value && url) {//通过url来区分是文件还是文本 this .type = 3 ;else if (value) {this .type = 1 ;if (value) {const message = {id : this .userId,name : this .name,msg : value,elImg : imgValue,type : this .type, //1--文本 2--图片 3--文件 // console.log(JSON.stringify(message)); // 通过socket发送消息 this .ws.send(JSON .stringify(message));if (typeof e === "string" ) {document .getElementById("msg" ).innerHTML = "" ;document .getElementById("msg" ).innerText = "" ;else {"" ;"" ;this .resultOfBase64 = "" ;this .editFlag = true ;选择图片
<div class "sendFile" ><i class ="el-icon-picture" > </i > <input type ="file" id ="file" title ="选择图片" accept ="image/png, image/jpeg, image/gif, image/jpg" change ="getFile" click ="getFocus" 选择文件
文件框是自己写的div和样式,直接放在输入框中会导致输入错位,所以选择直接调用submit方法发送
class "upload-demo chooseFile" "http://192.168.0.232:9001/zuul/web/file/simpleUpload" "onChange" <i class ="el-icon-folder-opened" > </i > </el-upload > //自动获取焦点 document .getElementById("msg" ).focus();//选择文件的onchange事件 if (e.status == "success" ) {this .fileName = e.response.data.name;this .fileUrl = "uploadBaseUrl" + e.response.data.url;this .getCursor();this .getFocus();document .execCommand("insertHTML" ,false ,` <div class="fileBox">${this .fileName} </div> this .editFlag = true ;var edit = document .getElementById("msg" );//调用submit方法直接发送,不显示再输入框中 this .submit(edit.innerHTML, this .fileUrl);else if (e.status == "fail" ) {this .$message.error("发送文件失败,请重试!" );//文件预览或下载 //TOOD(window.open...) console .log(url);通过type判断,当前的文件类型,用不同的方式进行渲染
文本直接采用v-html解析
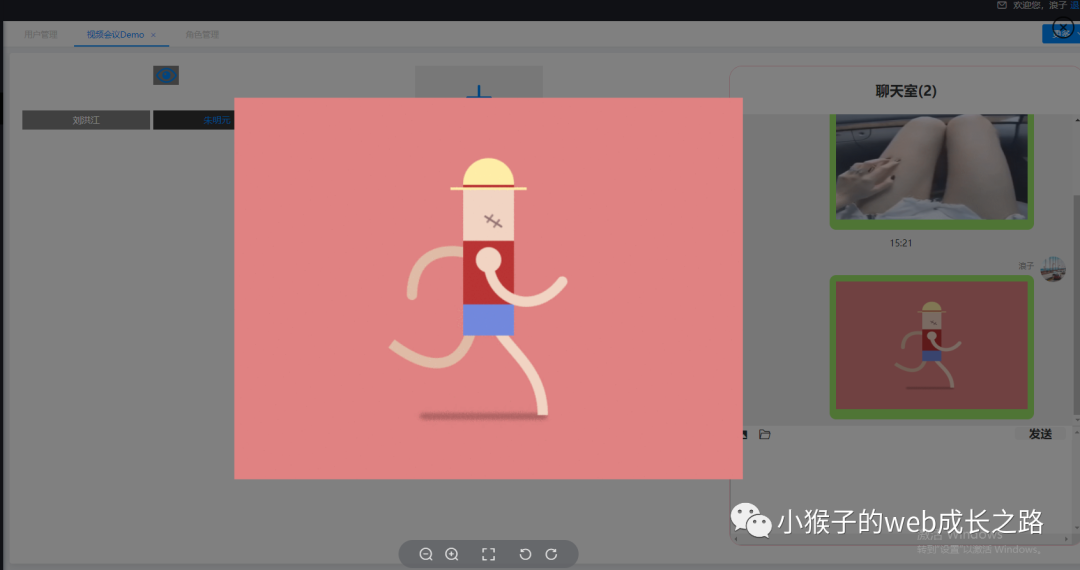
图片采用elementUI中的el-image渲染,点击可以预览没压缩的图片,也就是初始图片
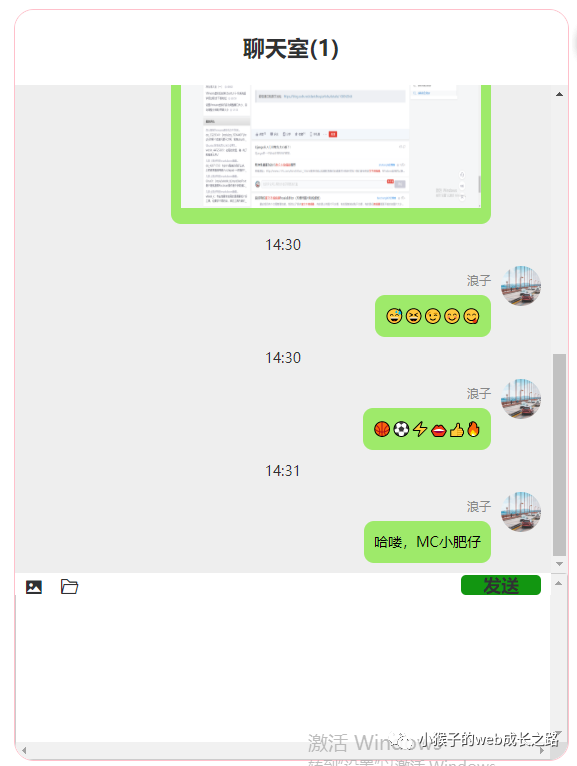
文件也采用v-html渲染,加入点击事件
<div class "chat-container" ><div class ="userMessage" v-for ="(item,index) in messageList" :key ="index" > <div class ="time" > {{item.nowTime}}</div > <div :class ="userId === item.id ? 'message-self':'message-other'" > <div class ="message-container" > <div class ="icon" v-if ="userId !== item.id" > <img :src ="userIcon" /> </div > <div class ="message-content" > <div class ="speaker-name" > {{item.name}}</div > <div class ="message" v-if ="item.type===1" v-html ="item.msg" > </div > <div class ="message" v-else-if ="item.type === 2 " > <el-image style ="width: 300px; height: 200px" :src ="item.elImg" :preview-src-list ="[item.elImg]" :lazy ="true" </el-image > </div > <div class ="message PreviewFile" v-else-if ="item.type===3" v-html ="item.msg" click ="PreviewFile(item.url)" </div > </div > <div class ="icon" v-if ="userId === item.id" > <img :src ="userIcon" /> </div > </div > </div > </div > </div > 效果图大致如下: