上一章节我们简单介绍了下 Identity 框架中的 [Authorize] 和 [AllowAnonymous],但在章节的末尾,我一直费解的是为什么不是提示 401 未授权而是报错
后来我想了想,想了想,终于想起来了,我们在创建 HelloWorld 项目的时候没有勾选验证用户选项
如果你的电脑是 Windows,是否还记得下面这张图
![]()
对,我们选择的就是 不进行身份验证
哎,早知如此,何必当初,算了,算了,我们想一些办法进行补救吧。
如果你使用 Visual Studio 创建一个新的 ASP.NET Core 应用程序时,如果设置了身份验证。那么就可以跳过接下来的设置了。
不过呢,我建议你继续往下学习,说不定,哪天,用得着呢
本章节,我们将学习如何安装和配置 Identity 框架,其实只要做一点点的配置
配置 Identity 事项
因为我们的 HelloWorld 是从一个空的项目模板开始的,所以我们将头开始配置 Identity 框架,这也是了解和学习其它项目模板的最好的方法,如果我们没有仔细研究各种配置,那么可能会产生很多困惑
首先,我们要安装两个依赖项目 Microsoft.AspNetCore.Identity 和 Microsoft.AspNetCore.Identity.EntityFramework,前者一般情况下都内置了,后者会随着安装 Entity Frawework 一起安装
如果你在依赖项里没有找到它们,那就使用 NuGet 安装呗,反正装起来也不麻烦
对了,忘记说了,因为你的项目可能不使用 Entity Frawework,那么可以单独安装 Microsoft.AspNetCore.Identity.EntityFramework
当这两个依赖项安装完成后,我们就可以创建一个用户类,用于包含我们想要存储的有关用户的所有信息
对于我们的应用程序,我们将继承 Identity 框架提供的基类,使用该类提供所有基本要素,如用户名属性和存储散列密码
![]()
我们也会修改 HelloWorldDBContext 类继承自 Identity 框架的 IdentityDb 类而非 Microsoft.EntityFrameworkCore 命名空间下的 DbContext。IdentityDb 类提供了 EF 框架存储用户信息所需的所有东西
一旦我们设置好了 User 类和 DBContext,接着就需要在 Startup 类的 ConfigureServices 方法中添加 Identity 服务,就像使用 MVC 时需要添加服务一样,使用 Identity 时也需要添加服务
我们需要注册的 Identity 服务有两项:UserStore 服务和 SignInManager 服务,这些服务会在需要的时候注入我们的控制器,以便在需要的时候创建用户和发送 cookies
最后,还需要在 Startup 类中的 Configure 方法中添加中间件 Identity,这个中间件可以读取 cookie 信息并创建用户身份,而且可以保证未授权时返回的是一个普通的页面和不适 401 空白页面
配置 Identity
刚刚,我们已经把配置 Identity 需要做的事情了解清楚了,接下来我们就一步一步来实现吧
-
安装依赖 Microsoft.AspNetCore.Identity 和 Microsoft.AspNetCore.Identity.EntityFramework,这个就不多讲了,忽略
-
在 Models 目录下添加一个用户类 User,添加过程也不详细介绍了,添加完成后默认的代码如下
using System;
namespace HelloWorld.Models
{
    public class User
    {
        public User()
        {
        }
    }
}
-
修改 User.cs 引入命名空间 Microsoft.AspNetCore.Identity,并修改 User 类继承自 IdentityUser,修改完成后 User.cs 代码如下
using System;

using Microsoft.AspNetCore.Identity;

namespace HelloWorld.Models
{
    public class User: IdentityUser
    {
        public User()
        {
        }
    }
}
-
我们近距离观察下 IdentityUser ,将鼠标指针移到 IdentityUser 上,然后按 F12 ( windows ) 或 COMMAND + D ( macOS ),可以跳转到 IdentityUser 的元数据界面,显示如下
为了方便查看,我们删除了原来代码中的所有注释
using System;

namespace Microsoft.AspNetCore.Identity
{
    public class IdentityUser : IdentityUser<string>
    {
        public IdentityUser ();public IdentityUser (string userName): this ();
    }
}
我们可以看到 IdentityUser 继承自接收一个字符串范型的 IdentityUser,它使用用户名作为唯一标识
所以,我们也可以自定义个一个 IdentityUser 继承自接收一个整型 ( int ) 范型的 IdentityUser,可以使用 ID 作为唯一标识
-
我们可以将鼠标移动到 IdentityUser<string> 上,然后按 F12 ( windows ) 或直接点击它可以跳转到 IdentityUser<TKey> 的元数据界面,显示如下
为了方便查看,我们删除了原来代码中的所有注释
using System;
using System.Runtime.CompilerServices;

namespace Microsoft.AspNetCore.Identity
{
    public class IdentityUser<TKey> where TKey : IEquatable
    {
        public virtual TKey Id {get;set;}
        public virtual string UserName {get;set;}
        public virtual string NormalizedUserName {get;set;}
        public virtual string Email {get;set;}
        public virtual string NormalizedEmail {get;set;}
        public virtual bool EmailConfirmed {get;set;}
        public virtual string PasswordHash {get;set;}
        public virtual string SecurityStamp {get;set;}
        public virtual string ConcurrencyStamp {get;set;} = ((object)Guid.NewGuid ()).ToString ();
        public virtual string PhoneNumber {get;set;}
        public virtual bool PhoneNumberConfirmed {get;set;}
        public virtual bool TwoFactorEnabled {get;set;}
        public virtual DateTimeOffset? LockoutEnd {get;set;}
        public virtual bool LockoutEnabled {get;set;}
        public virtual int AccessFailedCount {get;set;}

        public IdentityUser ();
        public IdentityUser (string userName): this ();

        public override string ToString ();
    }
}
我们可以看到默认的与用户相关的所有信息,包括
- 可以使用,但在我们的
HelloWorld 项目中并不会使用的字段
- Identity 框架可以跟踪用户失败的登录尝试次数,并可锁定该帐户一段时间
- 用于存储 PasswordHash 和 PhoneNumber 的字段,我们最感兴趣的莫过于 PasswordHash 和 UserName
- 我们也会隐式地使用用户主键和 ID 属性,主要用于查询指定用户
-
经过近距离观察了上面两个类和结构,我们知道了我们的 User 类的一些信息,接下来我们需要确保 HelloWorldDBContext 包含了 User 类。
双击打开 HelloWorldDBContext.cs,修改 HelloWorldDBContext 继承自 IdentityDbContext 而不是 DBContext
为了使用 IdentityDbContext,我们需要引入命名空间 Microsoft.AspNetCore.Identity.EntityFrameworkCore
修改完成后,HelloWorldDBContext.cs 代码如下
using System;
using Microsoft.EntityFrameworkCore;
using Microsoft.AspNetCore.Identity.EntityFrameworkCore;

namespace HelloWorld.Models
{
    public class HelloWorldDBContext:IdentityDbContext<User>
    {
        public HelloWorldDBContext(){}

        public HelloWorldDBContext(DbContextOptions<HelloWorldDBContext> options)
            : base(options)
        {

        }
        public DbSet<Employee> Employees { get; set; }
    }
}
-
因为 IdentityDbContext 位于命名空间 Microsoft.AspNetCore.Identity.EntityFrameworkCore 下,所以我们给 User 添加的任何额外的属性都会保存到数据库中
IdentityDbContext 自带了 DbSets,这不仅用于存储用户,还提供了有关用户角色和用户声明的信息
-
User 类基本就这样了,我们也不再添加额外信息,而且也成功配置了 HelloWorldDBContext 使用 Identity 框架,接下来是时候在 Startup 类中的 Configure 和 ConfigureServices 两个方法中配置 Identity 框架
-
首先我们要配置的是 ConfigureServices() 方法,需要添加 Identity 服务和所有依赖的相关服务
public void ConfigureServices(IServiceCollection services) { services.AddMvc(); services.AddEntityFrameworkSqlite().AddDbContext<HelloWorldDBContext>(options => options.UseSqlite(Configuration["database:connection"])); services.AddIdentity<User, IdentityRole>().AddEntityFrameworkStores<HelloWorldDBContext>(); }
AddIdentity() 方法需要传递两个范型参数: 用户实体的类型和角色实体的类型,这两个范型类型分别是我们刚刚创建的 User 类和一个用户角色类,我们默认使用 Microsoft.AspNetCore.Identity 命名空间下的 IdentityRole
所以为了使用 IdentityRole 类,我们需要引入命名空间 Microsoft.AspNetCore.Identity;
为了在 Identity 框架中使用 EF 框架,我们需要使用 AddEntityFrameworkStores() 方法来使用 EF 框架存储数据,AddEntityFrameworkStores() 会自动配置 UserStore 这样的服务,用于创建用户和验证其密码
-
接下来是配置 Identity 中间件
插入 Identity 中间件的位置非常重要,如果在管道中插入中间件的时间太晚,它将永远没有机会处理请求
但如果要在 MVC 控制器中进行授权检查,又需要在 MVC 框架之前插入 Identity 中间件,以确保 cookie 和 401 错误得到成功处理
public void Configure(IApplicationBuilder app, IHostingEnvironment env)
{
    if (env.IsDevelopment())
    {
        app.UseDeveloperExceptionPage();
    }

    app.UseFileServer();

    app.UseAuthentication();

    app.UseMvc(ConfigureRoute);

}
配置完成后,我们的 Startup.cs 中的完整代码如下
using System;
using System.IO; using System.Collections.Generic; using System.Linq; using System.Threading.Tasks; using Microsoft.AspNetCore.Builder; using Microsoft.AspNetCore.Hosting; using Microsoft.AspNetCore.Http; using Microsoft.AspNetCore.Routing; using Microsoft.Extensions.DependencyInjection; using Microsoft.Extensions.Configuration; using Microsoft.AspNetCore.Identity; using Microsoft.EntityFrameworkCore; using HelloWorld.Models; namespace HelloWorld { public class Startup { public Startup() { var builder = new ConfigurationBuilder() .SetBasePath(Directory.GetCurrentDirectory()) .AddJsonFile("AppSettings.json"); Configuration = builder.Build(); } public IConfiguration Configuration { get; set; } // This method gets called by the runtime. Use this method to add services to the container. // For more information on how to configure your application, visit https://go.microsoft.com/fwlink/?LinkID=398940 public void ConfigureServices(IServiceCollection services) { services.AddMvc(); services.AddEntityFrameworkSqlite().AddDbContext<HelloWorldDBContext>(options => options.UseSqlite(Configuration["database:connection"])); services.AddIdentity<User, IdentityRole>().AddEntityFrameworkStores<HelloWorldDBContext>(); } // This method gets called by the runtime. Use this method to configure the HTTP request pipeline. public void Configure(IApplicationBuilder app, IHostingEnvironment env) { if (env.IsDevelopment()) { app.UseDeveloperExceptionPage(); } app.UseFileServer(); app.UseAuthentication(); app.UseMvc(ConfigureRoute); } private void ConfigureRoute(IRouteBuilder routeBuilder) { //Home/Index routeBuilder.MapRoute("Default", "{controller=Home}/{action=Index}/{id?}"); } } }
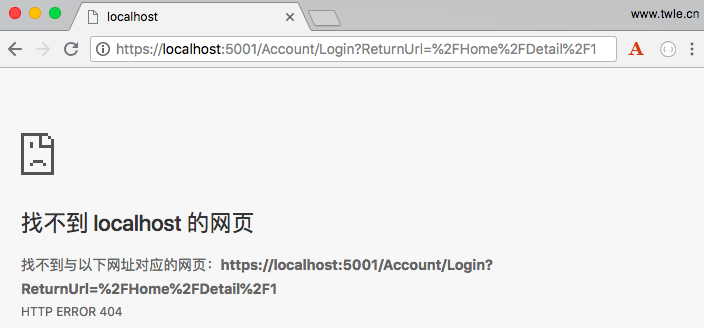
重启应用程序,刷新浏览器,可以看到访问任何一个员工的详情页面时会提示跳转到一个登录界面
![]()
当然,目前这个登录我们还没实现,等到下一章节吧
好累,这一章节总算完成了
不知大家有没有发现,我们用了这么大的篇幅讲了这么多内容,可真正写的代码不超过 50 行