Linux的企业-Hadoop(namenode,yarn 的高可用)Hbase 分布式部署
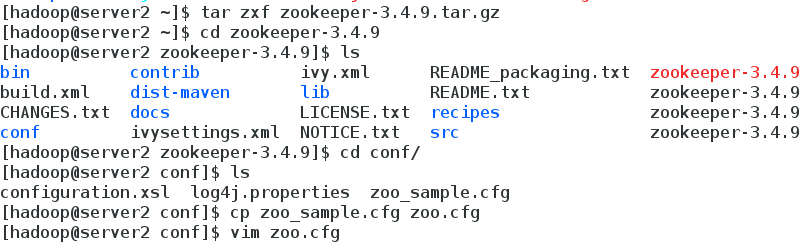
接上篇后续配置 一.配置环境 redhat6.5 server1 172.25.29(50).1 hadoop master nfs server2 172.25.29(50).2 zookeeper nfs server3 172.25.29(50).3 zookeeper nfs server4 172.25.29(50).4 zookeeper nfs server5 172.25.29(50).5 高可用备机 nfs 使用 nfs 共享同步配置文件,之前配置好java运行环境 二.Hadoop name node节点高可用配置 1.配置Zookeeper 集群,至少三台 2.在各节点启动zookeeper发现服务 3.Hadoop 配置 编辑 hdfs-site.xml 文件: <configuration> <!-- 指定 hdfs 的 nameservices 为 masters,和 core-site.xml 文件中的设置保持一 致 --> <property> <name>dfs.nameservices</name> <value>masters</value> </property> <!-- masters 下面有两个 namenode 节点,分别是 h1 和 h2 (名称可自定义) --> <property> <name>dfs.ha.namenodes.masters</name> <value>h1,h2</value> </property> <!-- 指定 h1 节点的 rpc 通信地址 --> <property> <name>dfs.namenode.rpc-address.masters.h1</name> <value>172.25.29.1:9000</value> </property> <!-- 指定 h1 节点的 http 通信地址 --> <property> <name>dfs.namenode.http-address.masters.h1</name> <value>172.25.29.1:50070</value> </property> <!-- 指定 h2 节点的 rpc 通信地址 --> <property> <name>dfs.namenode.rpc-address.masters.h2</name> <value>172.25.29.5:9000</value> </property> <!-- 指定 h2 节点的 http 通信地址 --> <property> <name>dfs.namenode.http-address.masters.h2</name> <value>172.25.29.5:50070</value> </property> <!-- 指定 NameNode 元数据在 JournalNode 上的存放位置 --> <property> <name>dfs.namenode.shared.edits.dir</name> <value>qjournal://172.25.29.2:8485;172.25.29.3:8485;172.25.29.4:8485/masters</value> </property> <!-- 指定 JournalNode 在本地磁盘存放数据的位置 --> <property> <name>dfs.journalnode.edits.dir</name> <value>/tmp/journaldata</value></property> <!-- 开启 NameNode 失败自动切换 --> <property> <name>dfs.ha.automatic-failover.enabled</name> <value>true</value> </property> <!-- 配置失败自动切换实现方式 --> <property> <name>dfs.client.failover.proxy.provider.masters</name> <value>org.apache.hadoop.hdfs.server.namenode.ha.ConfiguredFailoverProxyProvid er</value> </property> <!-- 配置隔离机制方法,每个机制占用一行--> <property> <name>dfs.ha.fencing.methods</name> <value> sshfence shell(/bin/true) </value> </property> <!-- 使用 sshfence 隔离机制时需要 ssh 免密码 --> <property> <name>dfs.ha.fencing.ssh.private-key-files</name> <value>/home/hadoop/.ssh/id_rsa</value> </property> <!-- 配置 sshfence 隔离机制超时时间 --> <property> <name>dfs.ha.fencing.ssh.connect-timeout</name> <value>30000</value> </property> </configuration> 4.主机之间设置免密 5.格式化之前删除tmp下的数据,以免影响后面的操作 6.在三个 DN 上依次启动 journalnode(第一次启动 hdfs 必须先启动 journalnode) 7.格式化 HDFS 集群 8.启动 hdfs 集群 9.web登陆172.25.29.1:50070 测试:关闭server1的name node进程,master切换到5上 server1 kill -9 3184 server1宕掉,server5接管 三.Hadoop yarn 的高可用 1.在hadoop/etc/hadoop下编辑 mapred-site.xml 文件 2.在hadoop/etc/hadoop下编辑 yarn-site.xml 文件 <configuration> <!-- 配置可以在 nodemanager 上运行 mapreduce 程序 --> <property> <name>yarn.nodemanager.aux-services</name> <value>mapreduce_shuffle</value> </property> <!-- 激活 RM 高可用 --> <property> <name>yarn.resourcemanager.ha.enabled</name> <value>true</value> </property><!-- 指定 RM 的集群 id --> <property> <name>yarn.resourcemanager.cluster-id</name> <value>RM_CLUSTER</value> </property> <!-- 定义 RM 的节点--> <property> <name>yarn.resourcemanager.ha.rm-ids</name> <value>rm1,rm2</value> </property> <!-- 指定 RM1 的地址 --> <property> <name>yarn.resourcemanager.hostname.rm1</name> <value>172.25.29.1</value> </property> <!-- 指定 RM2 的地址 --> <property> <name>yarn.resourcemanager.hostname.rm2</name> <value>172.25.29.5</value> </property> <!-- 激活 RM 自动恢复 --> <property> <name>yarn.resourcemanager.recovery.enabled</name> <value>true</value> </property> <!-- 配置 RM 状态信息存储方式,有 MemStore 和 ZKStore--> <property> <name>yarn.resourcemanager.store.class</name> <value>org.apache.hadoop.yarn.server.resourcemanager.recovery.ZKRMStateStore</ value> </property> <!-- 配置为 zookeeper 存储时,指定 zookeeper 集群的地址 --> <property> <name>yarn.resourcemanager.zk-address</name> <value>172.25.29.2:2181,172.25.29.3:2181,172.25.29.4:2181</value> </property> </configuration> 3.启动 yarn 服务 server5 RM2 上需要手动启动 4.测试 在server1上 kill -9 3593 进程,master切换到server5上 四.Hbase 分布式部署 1.hbase 配置 指定 java 目录 指定 hadoop 目录,否则 hbase无法识别 hdfs 集群配置 2.vim hbase-site.xml <configuration> <!-- 指定 region server 的共享目录,用来持久化 HBase。这里指定的 HDFS 地址 是要跟 core-site.xml 里面的 fs.defaultFS 的 HDFS 的 IP 地址或者域名、端口必须一致。 --> <property> <name>hbase.rootdir</name> <value>hdfs://masters/hbase</value> </property> <!-- 启用 hbase 分布式模式 --> <property> <name>hbase.cluster.distributed</name> <value>true</value> </property> <!-- Zookeeper 集群的地址列表,用逗号分割。默认是 localhost,是给伪分布式用 的。要修改才能在完全分布式的情况下使用。 --> <property> <name>hbase.zookeeper.quorum</name> <value>172.25.29.2,172.25.29.3,172.25.29启动 hbase.4</value> </property> <!-- 指定数据拷贝 2 份,hdfs 默认是 3 份。 --> <property> <name>dfs.replication</name> <value>2</value> </property> <!-- 指定 hbase 的 master --> <property><name>hbase.master</name> <value>h1</value> </property> </configuration> 3.启动 hbase 4.备节点手动运行 5.查看配置结果 本文转自一百个小排 51CTO博客,原文链接:http://blog.51cto.com/anfishr/1975957,如需转载请自行联系原作者