相关笔记:
CentOS7源码编译安装nginx+php7.2+mysql5.7并使用systemctl管理
CentOS6.9源码编译安装nginx+php7+mysql环境
CentOS6.9yum安装nginx+php7+mysql环境
1.安装nginx
设置nginx安装源
vim /etc/yum.repos.d/nginx.repo
输入如下配置
[nginx]
name=nginx repo
baseurl=http://nginx.org/packages/centos/$releasever/$basearch/
gpgcheck=0
enabled=1
查看nginx版本
yum list nginx
nginx.x86_64              1:1.14.2-1.el7_4.ngx
安装nginx
yum -y install nginx
查看安装版本和configure参数
[root@jmsiteos7 ~]# nginx -v
nginx version: nginx/1.14.2
[root@jmsiteos7 ~]# nginx -V
nginx version: nginx/1.14.2
built by gcc 4.8.5 20150623 (Red Hat 4.8.5-28) (GCC)
built with OpenSSL 1.0.2k-fips  26 Jan 2017
TLS SNI support enabled
configure arguments: --prefix=/etc/nginx --sbin-path=/usr/sbin/nginx --modules-path=/usr/lib64/nginx/modules --conf-path=/etc/nginx/nginx.conf --error-log-path=/var/log/nginx/error.log --http-log-path=/var/log/nginx/access.log --pid-path=/var/run/nginx.pid --lock-path=/var/run/nginx.lock --http-client-body-temp-path=/var/cache/nginx/client_temp --http-proxy-temp-path=/var/cache/nginx/proxy_temp --http-fastcgi-temp-path=/var/cache/nginx/fastcgi_temp --http-uwsgi-temp-path=/var/cache/nginx/uwsgi_temp --http-scgi-temp-path=/var/cache/nginx/scgi_temp --user=nginx --group=nginx --with-compat --with-file-aio --with-threads --with-http_addition_module --with-http_auth_request_module --with-http_dav_module --with-http_flv_module --with-http_gunzip_module --with-http_gzip_static_module --with-http_mp4_module --with-http_random_index_module --with-http_realip_module --with-http_secure_link_module --with-http_slice_module --with-http_ssl_module --with-http_stub_status_module --with-http_sub_module --with-http_v2_module --with-mail --with-mail_ssl_module --with-stream --with-stream_realip_module --with-stream_ssl_module --with-stream_ssl_preread_module --with-cc-opt='-O2 -g -pipe -Wall -Wp,-D_FORTIFY_SOURCE=2 -fexceptions -fstack-protector-strong --param=ssp-buffer-size=4 -grecord-gcc-switches -m64 -mtune=generic -fPIC' --with-ld-opt='-Wl,-z,relro -Wl,-z,now -pie'
启动nginx
systemctl start nginx
查看nginx状态
systemctl status nginx
● nginx.service - nginx - high performance web server
   Loaded: loaded (/usr/lib/systemd/system/nginx.service; disabled; vendor preset: disabled)
   Active: active (running) since 四 2019-01-03 13:36:25 CST; 11s ago
     Docs: http://nginx.org/en/docs/
  Process: 7376 ExecStart=/usr/sbin/nginx -c /etc/nginx/nginx.conf (code=exited, status=0/SUCCESS)
 Main PID: 7377 (nginx)
   CGroup: /system.slice/nginx.service
           ├─7377 nginx: master process /usr/sbin/nginx -c /etc/nginx/nginx.conf
           └─7378 nginx: worker process

1月 03 13:36:25 jmsiteos7 systemd[1]: Starting nginx - high performance web server...
1月 03 13:36:25 jmsiteos7 systemd[1]: Started nginx - high performance web server.
设置开机启动
systemctl enable nginx
Created symlink from /etc/systemd/system/multi-user.target.wants/nginx.service to /usr/lib/systemd/system/nginx.service.
nginx详细配置请移步(nginx的configure参数,配置文件,虚拟主机配置,信号控制)
2.安装mysql
设置mysql5.7安装源
rpm -Uvh http://dev.mysql.com/get/mysql57-community-release-el7-9.noarch.rpm
安装mysql
yum -y install mysql-community-server
启动mysql
systemctl start mysqld
设置开机启动
systemctl enable mysqld
mysql安装完成之后,在/var/log/mysqld.log文件中给root生成了一个默认密码。通过下面的方式找到root默认密码,然后登录mysql进行修改
cat /var/log/mysqld.log | grep "A temporary password is generated for root"
2019-01-03T05:41:47.164940Z 1 [Note] A temporary password is generated for root@localhost: zMnep.TsF3tE
zMnep.TsF3tE便是root密码,修改root密码
mysql -uroot -pzMnep.TsF3tE
mysql: [Warning] Using a password on the command line interface can be insecure.
Welcome to the MySQL monitor.  Commands end with ; or \g.
Your MySQL connection id is 4
Server version: 5.7.24

Copyright (c) 2000, 2018, Oracle and/or its affiliates. All rights reserved.

Oracle is a registered trademark of Oracle Corporation and/or its
affiliates. Other names may be trademarks of their respective
owners.

Type 'help;' or '\h' for help. Type '\c' to clear the current input statement.

mysql> ALTER USER 'root'@'localhost' IDENTIFIED BY 'jmsite.cn';
ERROR 1819 (HY000): Your password does not satisfy the current policy requirements
mysql> ALTER USER 'root'@'localhost' IDENTIFIED BY 'Jmsite.cn:80';
Query OK, 0 rows affected (0.00 sec)

mysql> exit
Bye
设置编码
vim /etc/my.cnf
如下设置
[mysqld]
character_set_server=utf8
init_connect='SET NAMES utf8'
重启mysql
systemctl restart mysqld
3.安装php7.2
设置centos7的php7安装源
rpm -Uvh https://dl.fedoraproject.org/pub/epel/epel-release-latest-7.noarch.rpm
rpm -Uvh https://mirror.webtatic.com/yum/el7/webtatic-release.rpm
安装php7.2和各种扩展
yum install php72w php72w-cli php72w-common php72w-devel php72w-embedded php72w-fpm php72w-gd php72w-mbstring php72w-mysqlnd php72w-opcache php72w-pdo php72w-xml
启动php
systemctl start php-fpm
设置开机启动
systemctl enable php-fpm
4.配置nginx支持php
修改配置
vim /etc/nginx/conf.d/default.conf
server段中去掉下面的注释,并更改成如下配置
        location ~ \.php$ {
        root           /usr/share/nginx/html;
        fastcgi_pass   127.0.0.1:9000;
        fastcgi_index  index.php;
        fastcgi_param SCRIPT_FILENAME $document_root$fastcgi_script_name;
        include        fastcgi_params;
    }
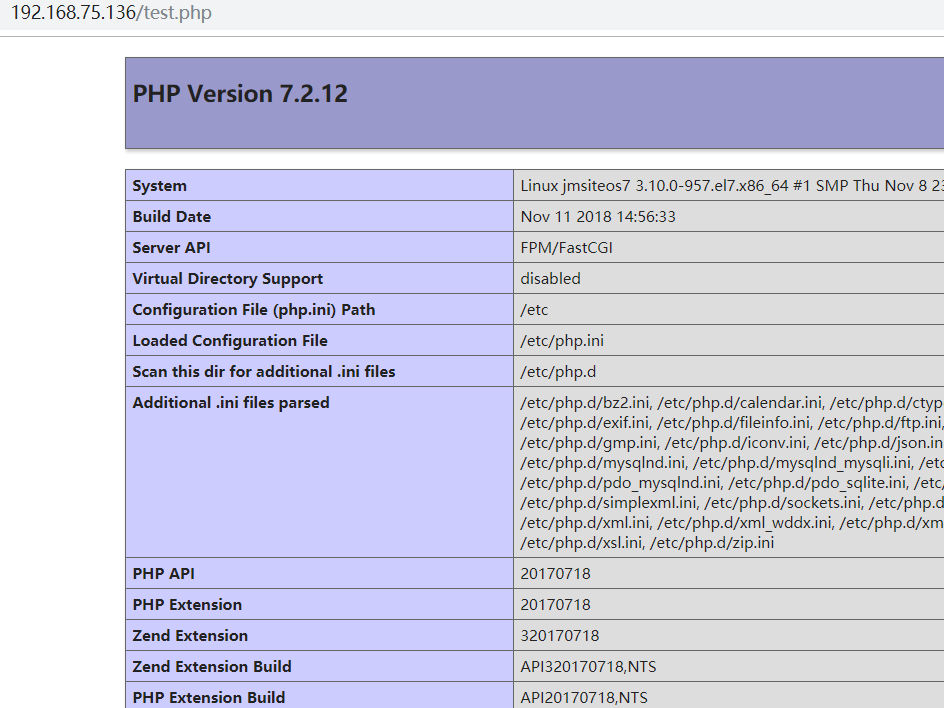
创建测试php文件
vim /usr/share/nginx/html/test.php
写入下面的php代码
<?php
phpinfo();
?>
重新加载nginx配置
systemctl reload nginx
浏览器输入:你的ip地址/test.php
![]()
原文地址:https://www.jmsite.cn/blog-304.html