Android常用工具类的封装
文章思路参考自刘桂林前辈巧用第三方快速开发AndroidApp,由衷感谢。
https://coding.imooc.com/class/81.html
这是自己在学习过程中用到的工具类,希望能帮到你,相关代码已经上传到Github的Util文件夹内
https://github.com/13531982270/BlogDemo
Log封装类
为什么要封装Log,这是因为我们每次输入Log的时候,每次都要输入TAG,例如这样:
Log.d("tonjie","要输出的内容");
即便我们可以在一个类中声明常量TAG,private static final String TAG = "tonjies";也仍然需要输入常量,而且很多时候我都是调试完程序,在程序没有问题的情况下就把Log删除的,所以练习时的简便就是我需要的,那么废话不多说,直接看代码吧!
public class L {

    //TAG
    public static String TAG = "tonjies";

    //5个等级 DIWE

    public static void d(String text) {
        Log.d(TAG, text + "");
    }

    public static void i(String text) {
        Log.i(TAG, text + "");
    }

    public static void w(String text) {
        Log.w(TAG, text + "");
    }

    public static void e(String text) {
        Log.e(TAG, text + "");
    }

}
怎么样,相当简单的代码吧!我们只是把每次都要输入的TAG,提取出来,并把该值设置成默认的值罢了,让我们来看看怎么使用
//┏┓ ┏┓
//┏┛┻━━━┛┻┓
//┃ ┃
//┃ ━ ┃
//┃ ┳┛ ┗┳ ┃
//┃ ┃
//┃ ┻ ┃
//┃ ┃
//┗━┓ ┏━┛
//┃ ┃ 神兽保佑
//┃ ┃ 代码无BUG!
//┃ ┗━━━┓
//┃ ┣┓
//┃ ┏┛
//┗┓┓┏━┳┓┏┛
// ┃┫┫ ┃┫┫
//
public class MainActivity extends AppCompatActivity {
@Override
protected void onCreate(Bundle savedInstanceState) {
super.onCreate(savedInstanceState);
setContentView(R.layout.activity_main);
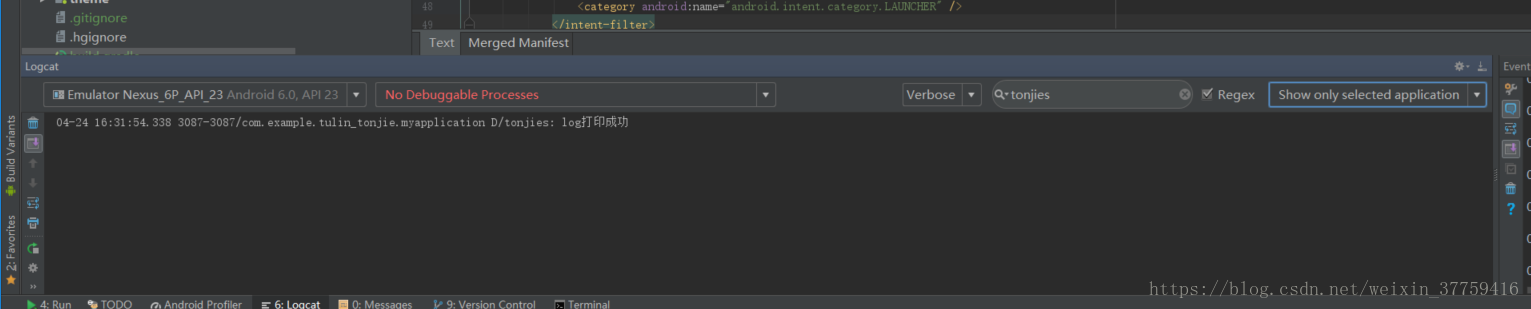
L.d("log打印成功");
}
}
我们输入L.d("你好,世界"),运行程序,输入tonjies,观察Logo,果然成功了,怎么样,只输入两个字母的Log是不是稍微方便一点了
这样封装可能会出现一个问题,就是在不经意用了太多的L工具类,导致输出的东西太乱,这时候我们可以选中L类,右键Find Usages,或者使用快捷键Alt+F7,在下边的find窗口查看我们都在哪里使用过,把不需要的注释或者删除掉
sharedPreferences封装类:
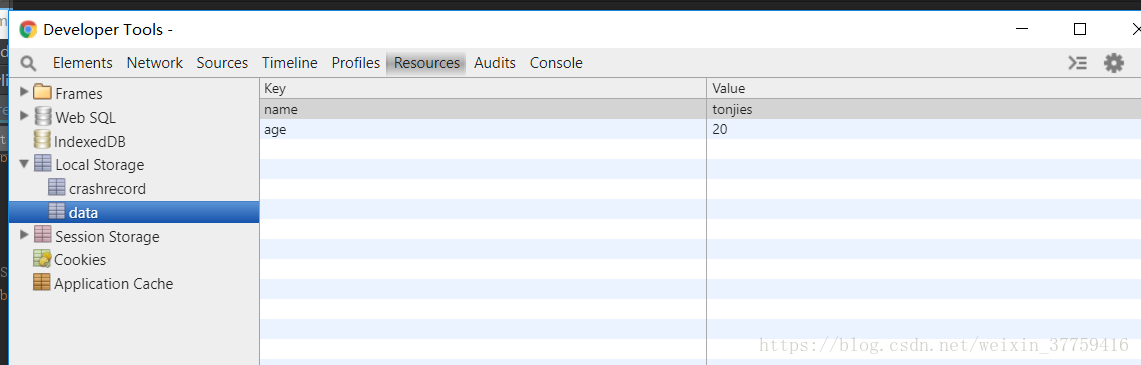
关于SharedPreferences的用法就不赘述了,详情请查看第一行代码第6.4节,强烈推荐使用科学的方法查看数据库文件,如facebook的stetho,这里封装的目的和封装Log一样,同样是为了简化操作,让我们先来看看原本的用法
SharedPreferences.Editor editor=getSharedPreferences("data",MODE_PRIVATE).edit();
editor.putString("name","tonjies");
editor.putInt("age",20);
editor.apply();
SharedPreferences preferences = getSharedPreferences("data", MODE_PRIVATE);
String name = preferences.getString("name", "");
int age = preferences.getInt("age", 18);
L.d("name:" + name);
L.d("age" + age);
使用stetho工具查看:
封装类:
/**
 * Created by 舍长 on 2018/2/10.
 * SharedPreferences 封装类
 */

public class ShareUtils {

    public static final String NAME = "config";


    /**
     * 存储String类型的值
     * @param mContext this
     * @param key      key值
     * @param value    要存储的String值
     */
    public static void putString(Context mContext, String key, String value) {
        SharedPreferences sharedPreferences = mContext.getSharedPreferences(NAME, Context.MODE_PRIVATE);
        sharedPreferences.edit().putString(key, value).commit();
    }

    /**
     * 获取String类型的值
     * @param mContext this
     * @param key      key
     * @param defValue 默认值
     * @return
     */
    public static String getString(Context mContext, String key, String defValue) {
        SharedPreferences sharedPreferences = mContext.getSharedPreferences(NAME, Context.MODE_PRIVATE);
        return sharedPreferences.getString(key, defValue);
    }


    /**
     * 存储Int类型的值
     * @param mContext this
     * @param key      key
     * @param value    要存储的Int值
     */
    public static void putInt(Context mContext, String key, int value) {
        SharedPreferences sharedPreferences = mContext.getSharedPreferences(NAME, Context.MODE_PRIVATE);
        sharedPreferences.edit().putInt(key, value).commit();
    }


    /**
     * 获取Int类型的值
     * @param mContext this
     * @param key      key
     * @param defValue 默认值
     * @return
     */
    public static int getInt(Context mContext, String key, int defValue) {
        SharedPreferences sharedPreferences = mContext.getSharedPreferences(NAME, Context.MODE_PRIVATE);
        return sharedPreferences.getInt(key, defValue);
    }


    /**
     * 存储Boolean类型的值
     * @param mContext this
     * @param key      key
     * @param value    要存储Boolean值
     */
    public static void putBoolean(Context mContext, String key, boolean value) {
        SharedPreferences sharedPreferences = mContext.getSharedPreferences(NAME, Context.MODE_PRIVATE);
        sharedPreferences.edit().putBoolean(key, value).commit();
    }

    /**
     * 获取Boolean类型的值
     * @param mContext this
     * @param key      key
     * @param defValue 默认值
     * @return
     */
    public static boolean getBoolean(Context mContext, String key, Boolean defValue) {
        SharedPreferences sharedPreferences = mContext.getSharedPreferences(NAME, Context.MODE_PRIVATE);
        return sharedPreferences.getBoolean(key, defValue);
    }

    //删除 单个 key
    public static void deleShare(Context context, String key) {
        SharedPreferences sharedPreferences = context.getSharedPreferences(NAME, Context.MODE_PRIVATE);
        sharedPreferences.edit().remove(key).commit();
    }

    //删除全部 key
    public static void deleAll(Context context) {
        SharedPreferences sharedPreferences = context.getSharedPreferences(NAME, Context.MODE_PRIVATE);
        sharedPreferences.edit().clear().commit();
    }
}
我们把可复用的SharedPreferences类名和方法提取出来,并把不同的context对象,想要存储的值 ,想要去除去除的key字段值 , 默认值等传入,看看具体的用法吧!
//取出String类型
final String string = ShareUtils.getString(ShareActivity.this, "name", "没有值可以取出来");
 L.d(string);
//取出int类型
final int age2= ShareUtils.getInt(ShareActivity.this, "age", 18);
L.d(age2+"");
自定义字体封装类:
老规矩了,先看看原本应该如何实现
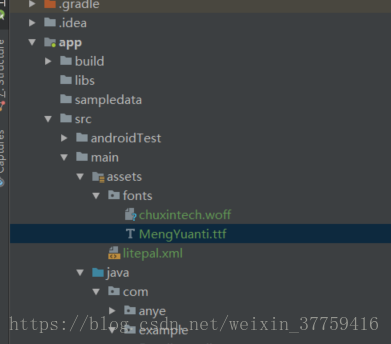
在src-main-asset(需要自己创建)-fonts(自己创建)-添加字体-MengYuanti.ttf
private void type() {
     Typeface typeface=Typeface.createFromAsset(getAssets(),"fonts/MengYuanti.ttf");
     txtB.setTypeface(typeface);
 }
封装类:
/**
 * Created by 舍长 on 2018/4/27.
 */

public class FontSetting {
    public FontSetting() {
    }

    public static void setFont(Context context, TextView textView, String fontsPath) {
        try {
            Typeface fromAsset = Typeface.createFromAsset(context.getAssets(), fontsPath);
            textView.setTypeface(fromAsset);
        } catch (Exception e) {
            L.d("找不到文件资源!");
            Toast.makeText(context, "服务器出错啦!", Toast.LENGTH_SHORT).show();
        }
    }
}
我们添加了setFont方法,并try...catch了一下,为什么要进行异常处理呢,因为如果我们的fontPath路径fontsPath错误了,比如"fonts/MengYuanti.ttf"变为了"fonts/engYuanti.ttf",程序会跑出java.lang.RuntimeException:异常,程序会崩溃、所以我们进行异常捕获,并且告诉用户,是服务器出现了异常,这样用户的投诉就会让服务器人员去背,完美!
具体使用:
/**
 * Created by 舍长 on 2018/4/5.
 * 描述: Android字体设置
 */

public class FontActivity extends WinBaseActivity {
    @BindView(R.id.txt_01)
    TextView txt01;

    @Override
    protected void onCreate(@Nullable Bundle savedInstanceState) {
        super.onCreate(savedInstanceState);
        setContentView(R.layout.switch_item_layout);
        ButterKnife.bind(this);
        FontSetting.setFont(FontActivity.this,txt01,"fonts/chuxintech.woff");
    }
}
好了,这三个小工具类就实现到这里了,相关代码已经上传到Github的androidToolPractive文件夹了,如果关于本篇文章有什么疑问,欢迎留言,感谢您的观看。