SocketIo+SpringMvc实现文件的上传下载
socketIo不仅可以用来做聊天工具,也可以实现局域网(当然你如果有外网也可用外网)内实现文件的上传和下载,下面是代码的效果演示:
GIT地址: https://github.com/fengcharly/sockeio-springMvcUpload.git
部分代码如下:
服务端的代码:
ChuanServer:
import java.io.*;
import java.net.ServerSocket;
import java.net.Socket;
import java.nio.channels.FileChannel;

public class ChuanServer {
    public static void protServer(String po) throws IOException {
              int port = Integer.parseInt(po);
        ServerSocket serverSocket = new ServerSocket(port);
        while (true) {
            final Socket clientSocket = serverSocket.accept();

            new Thread() {
                @Override
                public void run() {
                    try {
                        BufferedReader br = new BufferedReader(
                                new InputStreamReader(clientSocket.getInputStream(), "GBK")
                        );

                        InputStream is = clientSocket.getInputStream();

                        PrintStream pr = new PrintStream(
                                clientSocket.getOutputStream()
                        );

                        pr.println("我是服务端");

                        String str = br.readLine();
                        System.out.println("br.readLine():" + str);
                        System.out.println("服务端来接收了!!");
                        out(is, str);
                    } catch (Exception e) {
                        e.printStackTrace();
                    }
                }
            }.start();


        }

    }


    public static void out(InputStream is, String str) throws IOException {
        FileOutputStream fo = new FileOutputStream("C:\\Users\\Administrator\\Desktop\\upload\\" + str);

        BufferedInputStream bi = new BufferedInputStream(is);
        BufferedOutputStream bo = new BufferedOutputStream(fo);
        int len = 0;
        while ((len=bi.read())!=-1){
            bo.write(len);
        }

        bi.close();
        bo.close();


    }
}
这里我固定了上传后保存的路径为:"C:\Users\Administrator\Desktop\upload\"
PortController:
import org.springframework.stereotype.Controller;
import org.springframework.ui.Model;
import org.springframework.web.bind.annotation.RequestMapping;
import socket.ChuanServer;
import java.io.IOException;

@Controller
public class PortController {
    @RequestMapping("/port")
    public  String port(String port,Model model){
        model.addAttribute("port",port);
        try {
            ChuanServer.protServer(port);
        } catch (IOException e) {
            e.printStackTrace();
        }
        return "success";
    }
}
再来看下上传的客户端的代码:
UpLoadController:
@Controller
@RequestMapping("/")
public class UpLoadController {

    @Autowired
    private UpService upService;


    private String zhuan="";

    @RequestMapping("/upload")
    public String upload(@RequestParam(value = "file", required = false) MultipartFile file,
                         HttpServletRequest request, @RequestParam("iphost") String iphost,@RequestParam("port") String port,Model model) throws IOException {

        String fileName = file.getOriginalFilename();

        InputStream is = file.getInputStream();

        upService.upload(fileName,is,iphost,port);
        return "success";
    }

}
UpServiceImpl:
@Service
public class UpServiceImpl  implements UpService {

    @Override
    public void upload(String fileName, InputStream is, String iphost, String port) {
        getClientSocket(is, fileName, iphost, port);
    }

//建立socket通信

    public void getClientSocket(InputStream is, String fileName, String iphost, String port) {
        int po = Integer.parseInt(port);
        try {
            Socket socket = new Socket(iphost, po);
            BufferedReader br = new BufferedReader(
                    new InputStreamReader(socket.getInputStream(), "UTF-8")
            );

            PrintStream pr = new PrintStream(
                    socket.getOutputStream()
            );

            OutputStream os = socket.getOutputStream();

            System.out.println("客户端给你传文件了!");
            System.out.println("文件名为:" + fileName);

            //读取服务器返回的消息
            String str = br.readLine();
            System.out.println("服务器发来的消息为:" + str);


            pr.println(fileName);


            in(is, os);
            pr.close();
            br.close();
            System.out.println("客户端已关闭");

        } catch (Exception e) {
            e.printStackTrace();
        }


    }

    //上传文本
    public static void in(InputStream is, OutputStream os) throws IOException {
        //BIO
        BufferedInputStream bi = new BufferedInputStream(is);
        BufferedOutputStream bo = new BufferedOutputStream(os);
        int len = 0;
        while ((len=bi.read())!=-1){
            bo.write(len);
            System.out.println(len);
        }

        bi.close();
        bo.close();
    }

}
这里相应的访问路径为:
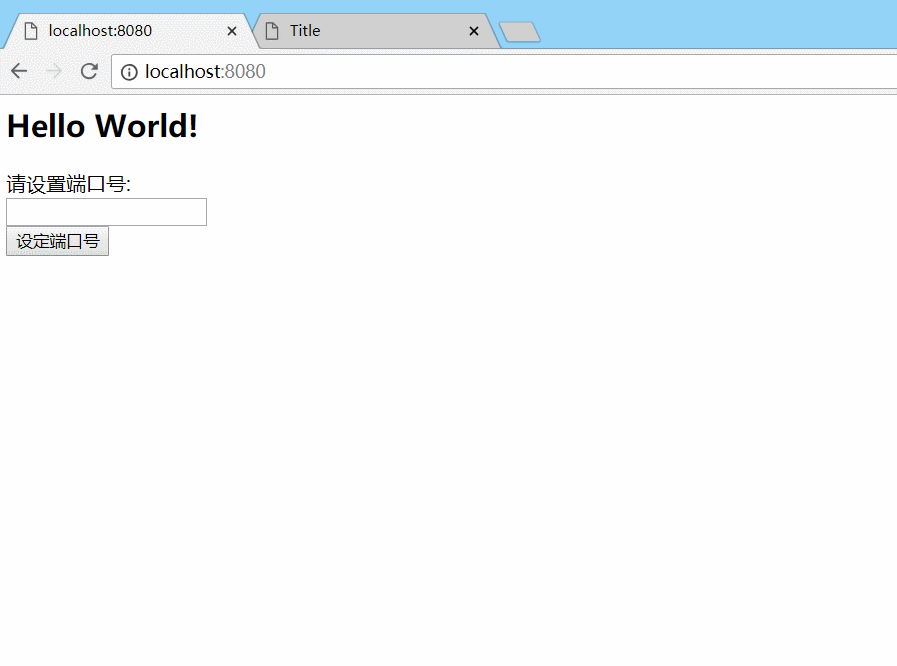
服务端:http://localhost:8080/
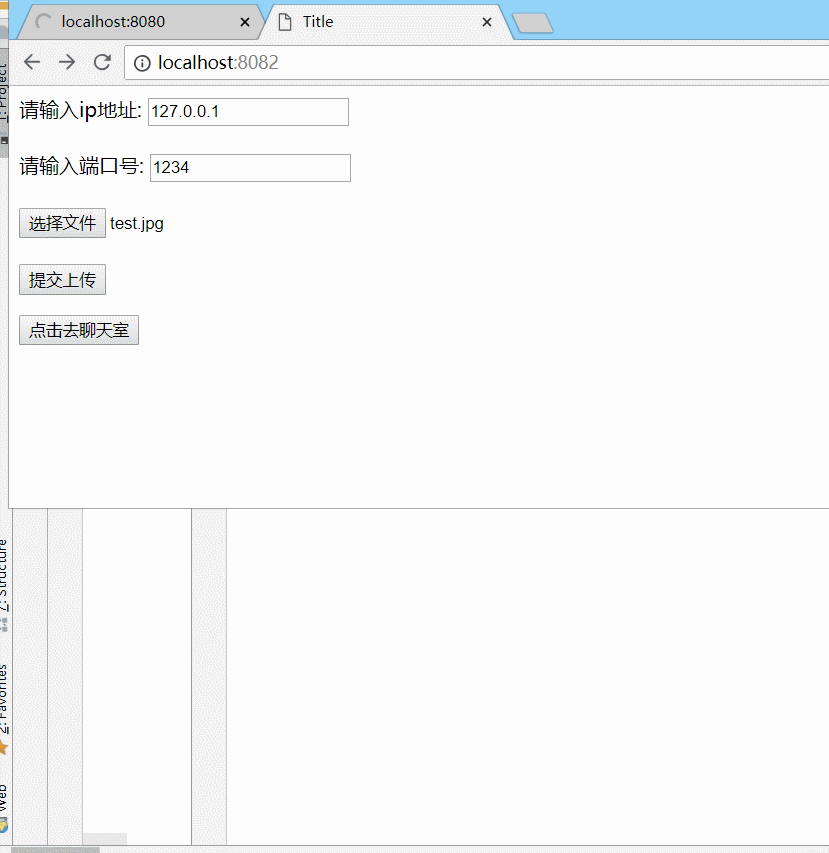
客户端:http://localhost:8082/upload
完整项目GIT地址:
注意: https://github.com/fengcharly/sockeio-springMvcUpload.git
传输过程中的我们用的是系统提供的BufferedInputStream和BufferedOutputStream缓冲流来传输文件,相对而言传输小文件比较合适,大文件比较慢,可以进一步优化,传输过程中传输速度如下: