步骤(分为两步)
一.设置通知栏样式(如果不设置则默认使用自带的),这里官方给了三种方式:
1.基础(定制声音、震动、闪灯等 Notification 样式):
BasicPushNotificationBuilder builder = new BasicPushNotificationBuilder(MainActivity.this);
builder.statusBarDrawable = R.drawable.jpush_notification_icon;
builder.notificationFlags = Notification.FLAG_AUTO_CANCEL
    | Notification.FLAG_SHOW_LIGHTS;  //设置为自动消失和呼吸灯闪烁
builder.notificationDefaults = Notification.DEFAULT_SOUND
    | Notification.DEFAULT_VIBRATE
    | Notification.DEFAULT_LIGHTS;  // 设置为铃声、震动、呼吸灯闪烁都要
//注意这里的 1 ,以后会有用
JPushInterface.setPushNotificationBuilder(1, builder);
2.定制带按钮的Notification样式(3.0.0及以上版本sdk才支持该样式,且该样式在某些与Android原生系统有差异的机型上无法正常显示):
MultiActionsNotificationBuilder builder = new MultiActionsNotificationBuilder(PushSetActivity.this);
//添加按钮,参数(按钮图片、按钮文字、扩展数据)
builder.addJPushAction(R.drawable.jpush_ic_richpush_actionbar_back, "first", "my_extra1");
builder.addJPushAction(R.drawable.jpush_ic_richpush_actionbar_back, "second", "my_extra2");
builder.addJPushAction(R.drawable.jpush_ic_richpush_actionbar_back, "third", "my_extra3");
//注意这里设置的2,以后会有用
JPushInterface.setPushNotificationBuilder(2, builder);
3.高级自定义:
CustomPushNotificationBuilder builder = new
            CustomPushNotificationBuilder(this,
            R.layout.customer_notitfication_layout,
            R.id.icon,
            R.id.title,
            R.id.text);
    // 指定定制的 Notification Layout
    builder.statusBarDrawable = R.mipmap.ic_launcher;
    // 指定最顶层状态栏小图标
    builder.layoutIconDrawable = R.mipmap.flag;
    // 指定下拉状态栏时显示的通知图标,同时也注意这里的3,因为能否显示自定义的这些通知样式全靠这些标记
    JPushInterface.setPushNotificationBuilder(3, builder);
二.如何显示你所设置的通知:
通过极光推送的后台发送通知你会发现你所设置的样式不起作用,那么如何让它起作用呢?这里有两种方式可以实现:
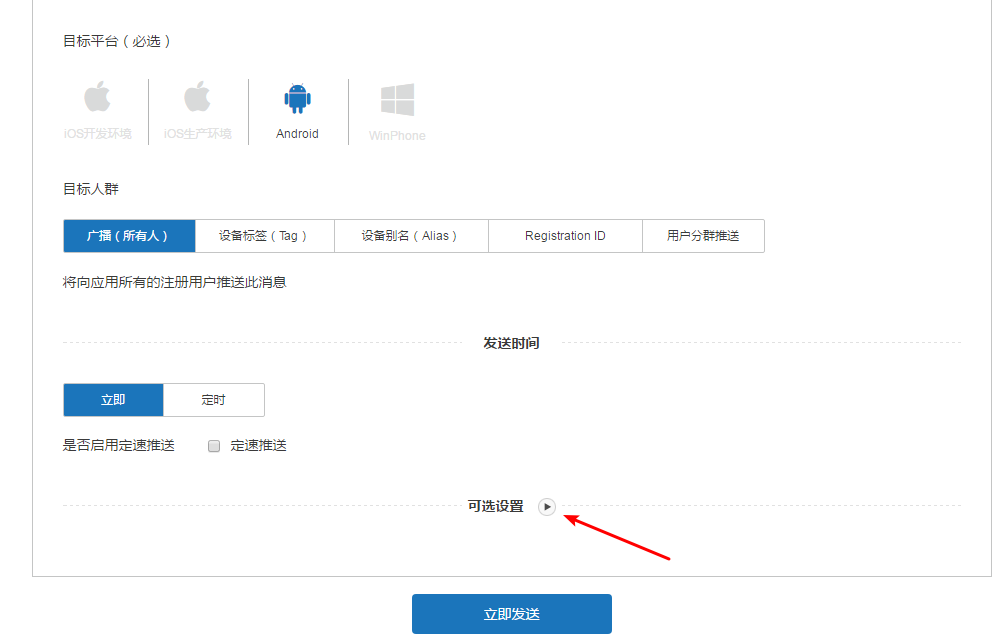
1.通过配置后台数据:
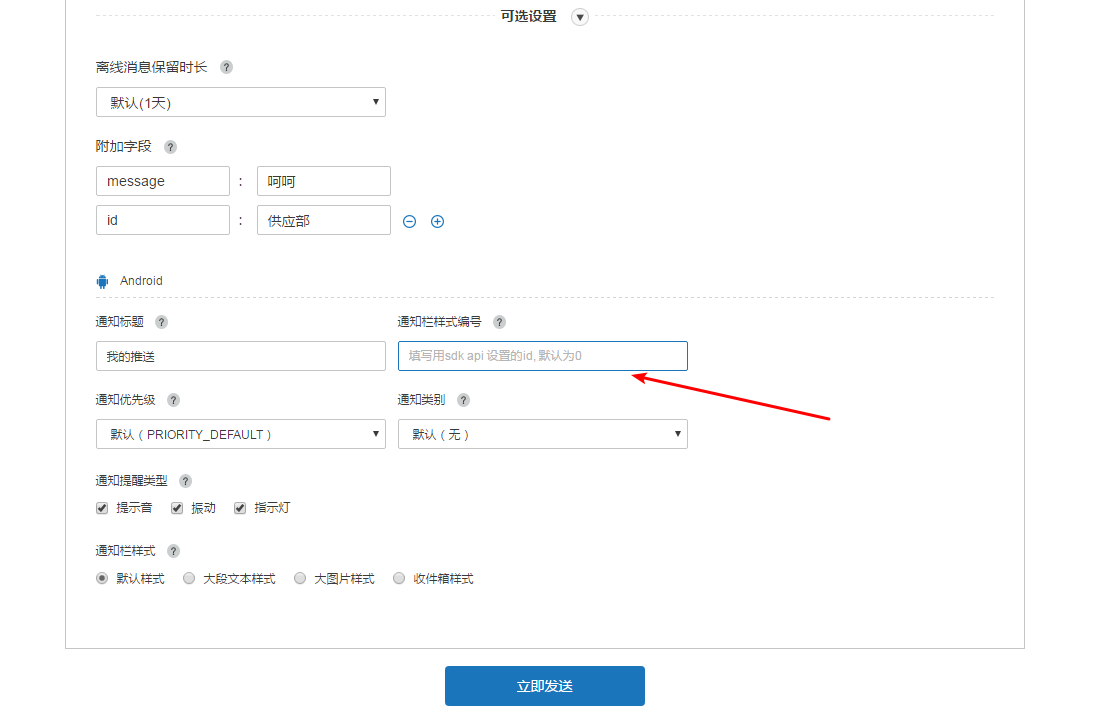
1).在极光推送后台发送通知时点击可选设置按钮
2).在通知栏样式编号那里填写上面我所强调需要注意的标记,即可显示你设置的通知栏样式
2.通过代码修改默认通知栏样式:
CustomPushNotificationBuilder builder = new
            CustomPushNotificationBuilder(this,
            R.layout.customer_notitfication_layout,
            R.id.icon,
            R.id.title,
            R.id.text);
    // 指定定制的 Notification Layout
    builder.statusBarDrawable = R.mipmap.ic_launcher;
    // 指定最顶层状态栏小图标
    builder.layoutIconDrawable = R.mipmap.flag;
    // 指定下拉状态栏时显示的通知图标
    JPushInterface.setPushNotificationBuilder(1, builder);
    JPushInterface.setDefaultPushNotificationBuilder(builder);
三.获取通知的信息
1.编写接收消息的Receiver
public class JiguangReceiver extends BroadcastReceiver {
    private NotificationManager nm;
    @Override
    public void onReceive(Context context, Intent intent) {
        if (null == nm) {
            nm = (NotificationManager) context.getSystemService(Context.NOTIFICATION_SERVICE);
        }
        Bundle bundle = intent.getExtras();
        if (JPushInterface.ACTION_NOTIFICATION_OPENED.equals(intent.getAction())) {
            openNotification(context,bundle);
        }
    }
    //    点击通知栏信息启动Activity
    private void openNotification(Context context, Bundle bundle) {
        Intent mIntent = new Intent(context, Test1Activity.class);
        mIntent.putExtras(bundle);
        mIntent.setFlags(Intent.FLAG_ACTIVITY_NEW_TASK);
        context.startActivity(mIntent);
    }
}
2.在AndroidManifest.xml文件中注册Receiver
 <receiver
        android:name=".JiguangReceiver"
        android:enabled="true">
        <intent-filter>
            <action android:name="cn.jpush.android.intent.NOTIFICATION_RECEIVED" />
            <action android:name="cn.jpush.android.intent.NOTIFICATION_OPENED" />
            <action android:name="cn.jpush.android.intent.NOTIFICATION_CLICK_ACTION" />
            <action android:name="cn.jpush.android.intent.CONNECTION" />
            <category android:name="com.itfitness.jiguang" />
        </intent-filter>
    </receiver>
3.在点击通知打开的Activity中展示信息
public class Test1Activity extends AppCompatActivity {

    private TextView textView;

    @Override
    protected void onCreate(@Nullable Bundle savedInstanceState) {
        super.onCreate(savedInstanceState);
        setContentView(R.layout.test_layout);
        textView = findViewById(R.id.tv);
        Bundle extras = getIntent().getExtras();
        textView.setText(extras.getString(JPushInterface.EXTRA_EXTRA));
    }
}
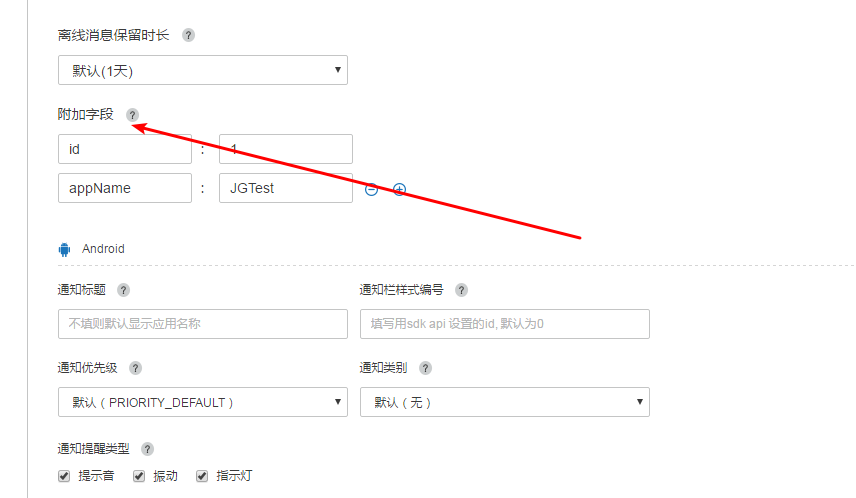
四.效果展示
1.添加字段