在上一篇 Android 基础动画之补间动画详解 主要介绍了补间动画的基本属性以及补间动画在Android起始设计之初带来的一些问题。本篇文章主要介绍的是Android的帧动画。
帧动画,我们从字面意思来理解,帧:就是影像动画中最小单位的单幅影像画面,相当于电影胶片上的每一格镜头。 一帧就是一副静止的画面,连续的帧就形成动画,如电视图象等。简单点说就是类似幻灯片播放的那种效果,因此帧动画的本质就是将一张张的图片,通过代码对这些图片进行连续的活动(这样就形成了动画)
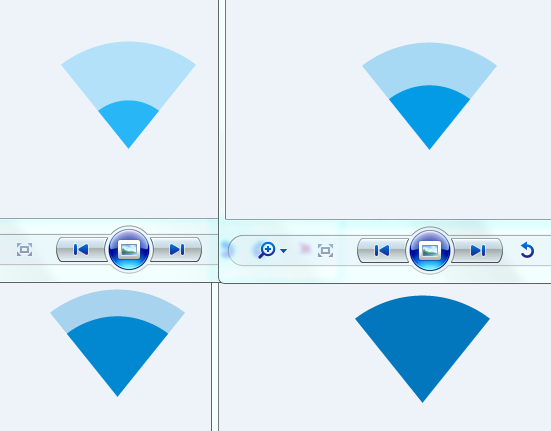
假设现在有这样一个效果如图,这个动画就类似手机WIFI连接信号,从一格到满格
那么,使用帧动画的方式该如何实现该效果?
-
xml方式实现
文件名:anim_list.xml (文件存放路径: main/res/drawable)
anim_list.xml
 <?xml version="1.0" encoding="utf-8"?>
 <animation-list
 xmlns:android="http://schemas.android.com/apk/res/android"
 android:oneshot="false">
 <item
     android:drawable="@drawable/anim_1"
     android:duration="200"/>
 <item
     android:drawable="@drawable/anim_2"
     android:duration="200"/>
 <item
     android:drawable="@drawable/anim_3"
     android:duration="200"/>
 <item
     android:drawable="@drawable/anim_4"
     android:duration="200"/>
 </animation-list>
布局
 <ImageView
     android:id="@+id/iv"
     android:layout_width="wrap_content"
     android:layout_height="wrap_content"
     android:background="@drawable/anim_list"/>
获取背景
 //获取背景,并将其强转成AnimationDrawable
 AnimationDrawable animationDrawable = (AnimationDrawable) iv.getBackground();
 //判断是否在运行
 if(!animationDrawable.isRunning()){
     //开启帧动画
     animationDrawable.start();
 }
以上是通过XML方式完成帧动画,下面是通过代码方式完成帧动画
-
代码方式实现
  //创建一个AnimationDrawable
  AnimationDrawable animationDrawable1 = new AnimationDrawable();
  //准备好资源图片
  int[] ids = {R.drawable.anim_1,R.drawable.anim_2,R.drawable.anim_3,R.drawable.anim_4};
  //通过for循环添加每一帧动画
  for(int i = 0 ; i < 4 ; i ++){
      Drawable frame = getResources().getDrawable(ids[i]);
  //设定时长
      animationDrawable1.addFrame(frame,200);
  }
  animationDrawable1.setOneShot(false);
  //将动画设置到背景上
  iv.setBackground(animationDrawable1);
  //开启帧动画
  animationDrawable1.start();
关于帧动画使用XML形式编写值得一提的是:<animation-list>必须是根节点,这个根节点包含一个或者多个<item>元素,<item>简单理解就是类似一帧的动画资源。item属性有:
android:oneshot属性,其中true代表只执行一次,false循环执行;android:drawable ,代表一个frame的Drawable资源;android:duration,代表一个frame显示多长时间。
值得一提的是:AnimationDrawable的start()方法不能在Activity的onCreate方法中调用,因为AnimationDrawable有可能在加载的时候还没有完全加载到window上,所以最好的使用时机是onWindowFocusChanged()方法中。
下面在给大家举个帧动画的例子,下面是4张资源图:
progress_loading_image_01.png
progress_loading_image_02.png
progress_loading_image_03.png
progress_loading_image_04.png
- 首先,在drawable文件夹下,新建一个 loading.xml ,代码如下:
<?xml version="1.0" encoding="utf-8"?>
<animation-list xmlns:android="http://schemas.android.com/apk/res/android"
    android:oneshot="false"
    >
    <item android:drawable="@drawable/progress_loading_image_01" android:duration="80"/>
    <item android:drawable="@drawable/progress_loading_image_02" android:duration="80"/>
    <item android:drawable="@drawable/progress_loading_image_03" android:duration="80"/>
    <item android:drawable="@drawable/progress_loading_image_04" android:duration="80"/>
</animation-list>
- 接着,布局XML文件中引用该 loading.xml
<?xml version="1.0" encoding="utf-8"?>
<LinearLayout
    xmlns:android="http://schemas.android.com/apk/res/android"
    android:layout_width="match_parent"
    android:layout_height="match_parent"
    android:background="#ffffff"
    android:orientation="vertical" >

    <ImageView
        android:layout_gravity="center"
        android:id="@+id/iv"
        android:layout_width="wrap_content"
        android:layout_height="wrap_content"
        android:background="@drawable/loading"/>

    <Button
        android:layout_marginTop="20dp"
        android:layout_marginRight="80dp"
        android:layout_marginLeft="80dp"
        android:text="跑跑更健康"
        android:layout_width="match_parent"
        android:layout_height="50dp" />

</LinearLayout>
public class AnimActivity extends BaseActivity{
    @Override
    public void onCreate(@Nullable Bundle savedInstanceState) {
        super.onCreate(savedInstanceState);
        setContentView(R.layout.activity_anim);

        ImageView iv = findViewById(R.id.iv);

        //获取背景,并将其强转成AnimationDrawable
        AnimationDrawable animationDrawable = (AnimationDrawable) iv.getBackground();
        //判断是否在运行
        if(!animationDrawable.isRunning()){
            //开启帧动画
            animationDrawable.start();
        }
    }
}
关于帧动画的基本介绍和两种使用就介绍完毕了。
如果这篇文章对你有帮助,希望各位看官留下宝贵的star,谢谢。
Ps:著作权归作者所有,转载请注明作者, 商业转载请联系作者获得授权,非商业转载请注明出处(开头或结尾请添加转载出处,添加原文url地址),文章请勿滥用,也希望大家尊重笔者的劳动成果