1). 简介
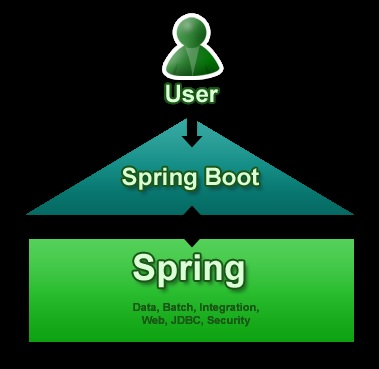
Spring Boot 是由 Pivotal 团队提供的全新框架,其设计目的是用来简化新 Spring 应用的初始搭建以及开发过程。该框架使用了特定的方式来进行配置,从而使开发人员不再需要定义样板化的配置。
2). 好处
(1)它是Spring的升级版,Spring容器能做到的事情,它都能做到,而且更简便,从配置形式上来说,SpringBoot完全抛弃了繁琐的XML文件配置方式,而是替代性地用注解方式来实现,虽然本质来说,是差不多的(类似包扫描,注解扫描,类加载之类)。
(2)SpringBoot集成的插件更多,从而使用很多服务,都只是引入一个依赖,几个注解和Java类就可以用了,具体的参考相关手册。
(3)在Web应用开发这一块,之前的应用一般来说是打包成war包,再发布到相关服务器容器下(例如Tomcat),虽然SpringBoot也可以这么做,但在SpringBoot下更常见的形式是将SpringBoot应用打包成可执行jar包文件。之所以这么做,源于你可以直接将SpringBoot应用看成是一个Java Application,其Web应用可以没有webapp目录(更不用说web.xml了),它推荐使用html页面,并将其作为静态资源使用。
3). Spring Boot是什么
Spring Boot不是一个框架,它是一种用来轻松创建具有最小或零配置的独立应用程序的方式。这是方法用来开发基于Spring的应用,但只需非常少的配置。它提供了默认的代码和注释配置,快速启动新的Spring项目而不需要太多时间。它利用现有的Spring项目以及第三方项目来开发生产就绪(投入生产)的应用程序。它提供了一组pom或gradle构建文件,可以使用它们添加所需的依赖项,并且还便于自动配置。
Spring Boot根据其类路径上的库自动配置所需的类。假设应用程序想要与数据库交互,如果在类路径上有Spring数据库,那么它会自动建立与数据源类的连接。
4). 主要目标
- 为所有Spring开发提供一个基本的,更快,更广泛的入门体验。
- 开箱即用,但随着需求开始偏离默认值,快速启动。
- 提供大型项目(例如嵌入式服务器,安全性,度量,运行状况检查,外部化配置)常见的一系列非功能特性。
- 绝对没有代码生成以及不需要XML配置,完全避免XML配置。
- 为了避免定义更多的注释配置(它将一些现有的 Spring Framework 注释组合成一个简单的单一注释)
- 避免编写大量import语句。
- 提供一些默认值,以便在短时间内快速启动新项目。
5). 新项目使用Spring Boot
- 简化基于Java的应用程序开发,单元测试和集成测试过程。
- 通过提供一些默认值来减少开发,单元测试和集成测试时间。
- 提高生产力。
- 当使用默认值时,Spring Boot有自己的看法。如果不指定详细信息,它将使用其自己的默认配置。如果想要持久化,但是没有在POM文件中指定任何东西,那么Spring Boot会- 将Hibernate带有HSQLDB数据库的配置作为JPA提供者。
- 为大型项目(例如嵌入式服务器,安全性,度量,健康检查,外部化配置)提供许多非常常见的非功能特性/解决方案。
6). 优缺点
Spring Boot的优点:
- 使用Java或Groovy开发基于Spring的应用程序非常容易。
- 它减少了大量的开发时间并提高了生产力。
- 它避免了编写大量的样板代码,注释和XML配置。
- Spring Boot应用程序与其Spring生态系统(如Spring JDBC,Spring ORM,Spring Data,Spring Security等)集成非常容易。
- 它遵循“自用默认配置”方法,以减少开发工作量。
- 它提供嵌入式HTTP服务器,如Tomcat,Jetty等,以开发和测试Web应用程序非常容易。
- 它提供CLI(命令行界面)工具从命令提示符,非常容易和快速地开发和测试Spring Boot(Java或Groovy)应用程序。
- 它提供了许多插件来开发和测试Spring启动应用程序非常容易使用构建工具,如Maven和Gradle。
- 它提供了许多插件,以便与嵌入式和内存数据库工作非常容易。
Spring Boot的限制:
- 将现有或传统的Spring Framework项目转换为Spring Boot应用程序是一个非常困难和耗时的过程。它仅适用于全新Spring项目。
2. Spring Boot
1). 入门
Spring Boot项目归根只是一个常规的Spring项目,只是利用了Spring Boot启动程序和自动配置。要创建Spring Boot应用程序的方法,Spring团队(The Pivotal Team)提供了以下三种方法。
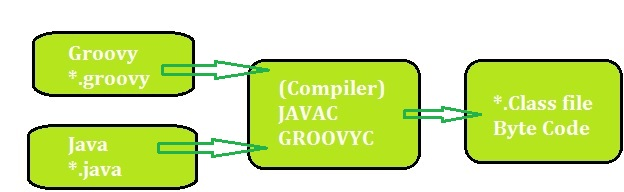
可以使用Spring Boot开发两种基于Spring的应用程序:
- 基于Java的应用程序
- 基于Groovy的应用程序
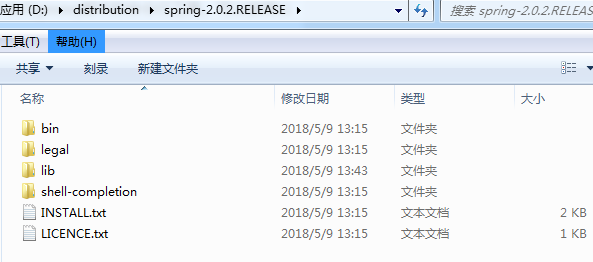
I. 下载并解压
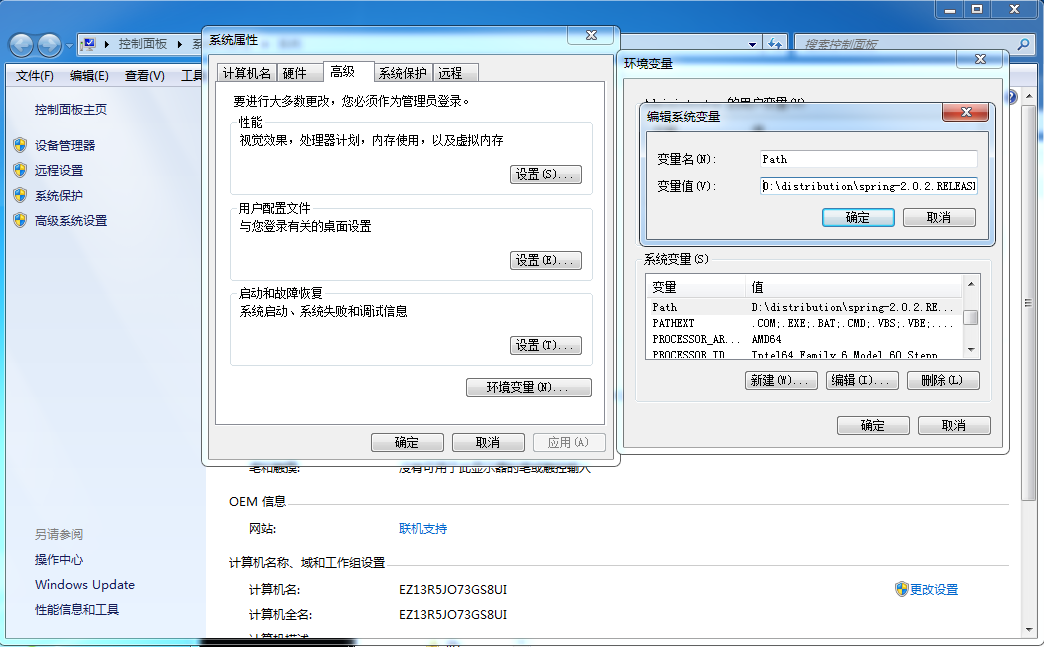
在Windows系统中命令提示符中设置Spring Boot CLI环境变量:
右键“我的电脑”->”高级系统设置”->”高级”->”环境变量”->选择”PATH”并新建并加上面的路径
D:\distribution\spring-2.0.2.RELEASE\bin;
验证:
spring --version
II. spring 命令语法查看spring --help
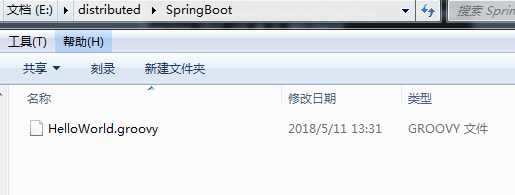
III. 创建HelloWorld.groovy文件
@RestController
class HelloWorld {
    @RequestMapping("/")
    String hello() {
        "Hello mazaiting."
    }
}
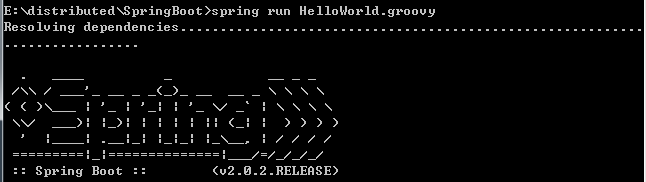
IV. 运行
spring run HelloWorld.groovy
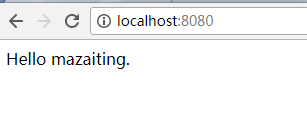
V. 测试
在浏览器输入http://localhost:8080/即可访问
3). Maven 安装Spring Boot
    <!-- Inherit defaults from Spring Boot -->
    <parent>
        <groupId>org.springframework.boot</groupId>
        <artifactId>spring-boot-starter-parent</artifactId>
        <version>2.0.2.RELEASE</version>
    </parent>

    <!-- Add typical dependencies for a web application -->
    <dependencies>
        <dependency>
            <groupId>org.springframework.boot</groupId>
            <artifactId>spring-boot-starter-web</artifactId>
        </dependency>
    </dependencies>
4). Eclipse 使用 Spring Boot
I. 在pom.xml文件中添加SpringBoot的依赖
<project xmlns="http://maven.apache.org/POM/4.0.0" xmlns:xsi="http://www.w3.org/2001/XMLSchema-instance"
    xsi:schemaLocation="http://maven.apache.org/POM/4.0.0 http://maven.apache.org/xsd/maven-4.0.0.xsd">
    <modelVersion>4.0.0</modelVersion>

    <groupId>com.mazaiting</groupId>
    <artifactId>SpringBootTest</artifactId>
    <version>0.0.1-SNAPSHOT</version>
    <packaging>jar</packaging>

    <name>SpringBootTest</name>
    <url>http://maven.apache.org</url>

    <properties>
        <project.build.sourceEncoding>UTF-8</project.build.sourceEncoding>
    </properties>
    <!-- Spring-Boot -->
    <parent>
        <groupId>org.springframework.boot</groupId>
        <artifactId>spring-boot-starter-parent</artifactId>
        <version>2.0.2.RELEASE</version>
    </parent>
    <dependencies>
        <dependency>
            <groupId>junit</groupId>
            <artifactId>junit</artifactId>
            <scope>test</scope>
        </dependency>
        <!-- Spring-Boot -->
        <dependency>
            <groupId>org.springframework.boot</groupId>
            <artifactId>spring-boot-starter-web</artifactId>
        </dependency>
    </dependencies>
</project>
II. 创建HelloWorld类
@RestController
@EnableAutoConfiguration
public class HelloWorld {

    @RequestMapping("/")
    String home() {
        return "Hello mazaiting";
    }

    public static void main(String[] args) {
        SpringApplication.run(HelloWorld.class, args);
    }
}
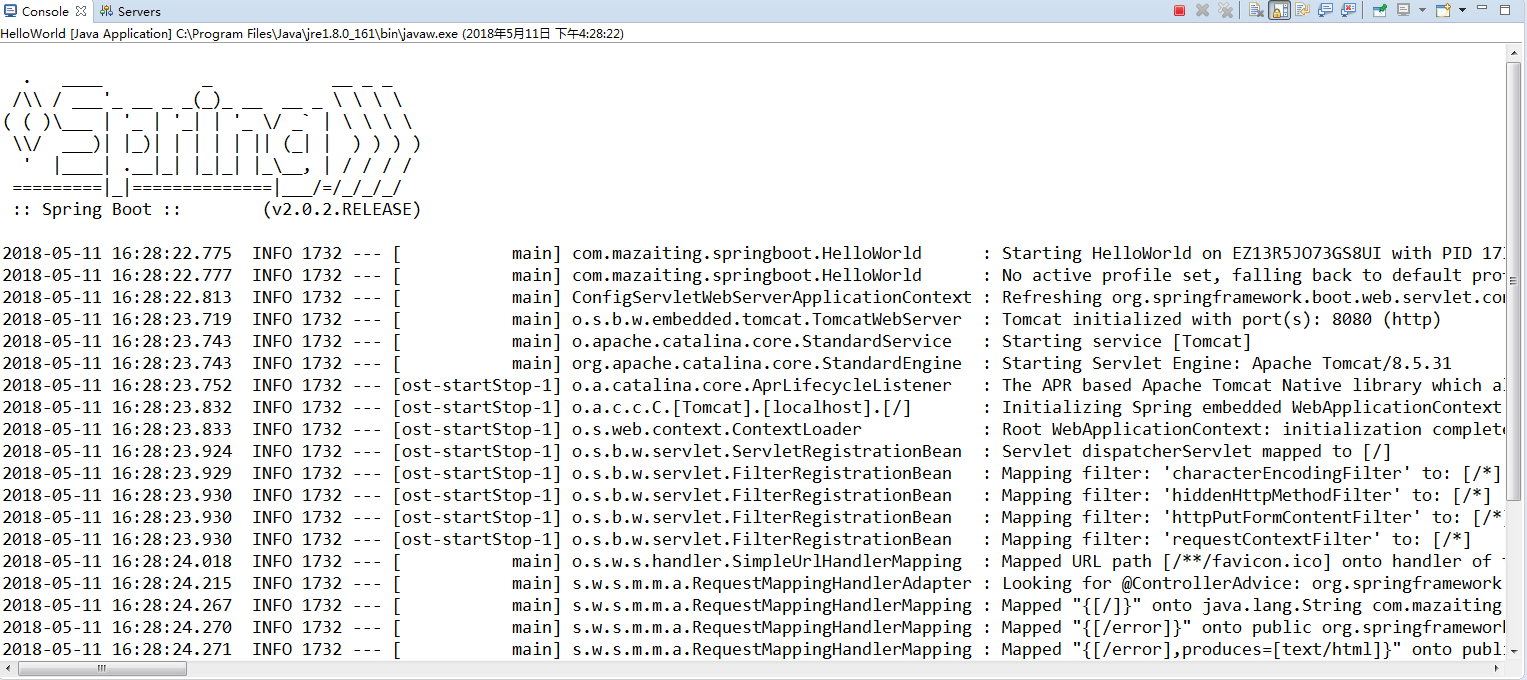
III. 执行结果
在浏览器输入
http://localhost:8080/
IV. 注解解释
- @RestController: 构造型注释, 指定控制器,Spring会在处理传入的Web请求时考虑它.
- @RequestMapping:注解提供了“路由”信息。它告诉Spring任何带有路径“
/”的HTTP请求应该映射到home方法。[@RestController](https://github.com/RestController "@RestController")注解告诉Spring将生成的字符串直接返回给调用者。
- @EnableAutoConfiguration: 允许自动配置
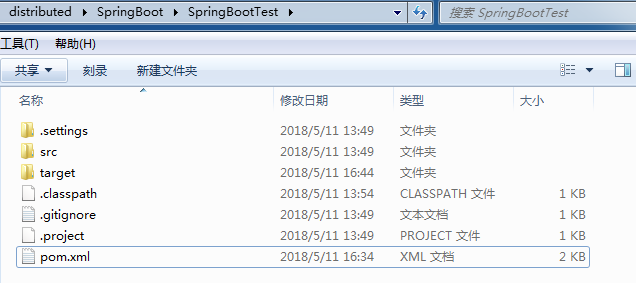
V. 创建可执行的jar包
    <build>
        <plugins>
            <!-- 用于创建可执行jar -->
            <plugin>
                <groupId>org.springframework.boot</groupId>
                <artifactId>spring-boot-maven-plugin</artifactId>
            </plugin>
        </plugins>
    </build>
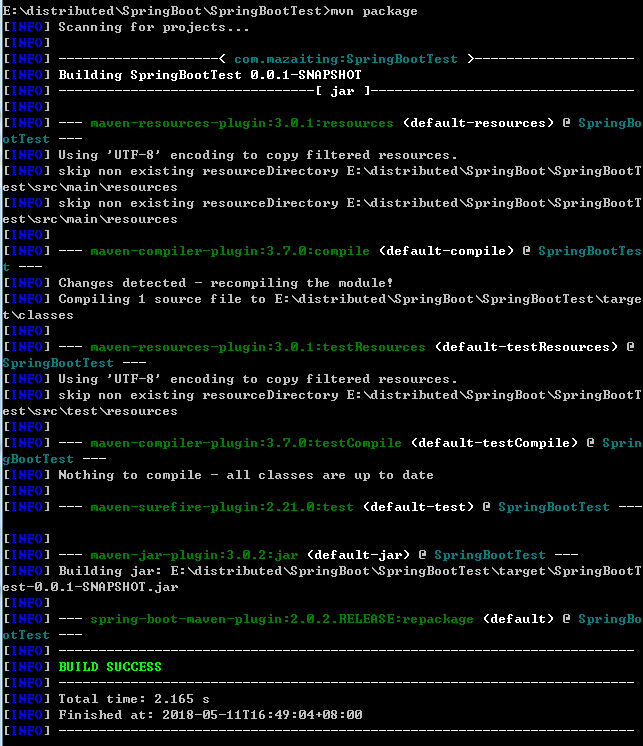
- 在项目的根目录下执行dos命令
mvn package
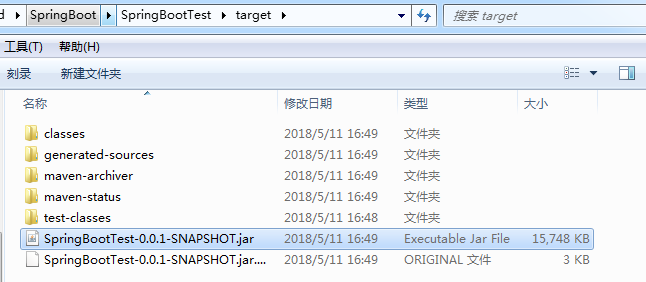
- 执行完成后
\SpringBootTest\target\目录下生成SpringBootTest-0.0.1-SNAPSHOT.jar文件
- 执行
java -jar target/SpringBootTest-0.0.1-SNAPSHOT.jar命令运行,并在浏览器输入http://localhost:8080/,同样可看到执行效果.
5). Spring Boot JSP 实例
I. 创建Maven Web项目
II. 在pom文件中添加依赖
<project xmlns="http://maven.apache.org/POM/4.0.0"
xmlns:xsi="http://www.w3.org/2001/XMLSchema-instance"
    xsi:schemaLocation="http://maven.apache.org/POM/4.0.0
    http://maven.apache.org/maven-v4_0_0.xsd">
    <modelVersion>4.0.0</modelVersion>
    <groupId>com.mazaiting</groupId>
    <artifactId>SpringBoot-JSP</artifactId>
    <packaging>war</packaging>
    <version>0.0.1-SNAPSHOT</version>
    <name>SpringBoot-JSP Maven Webapp</name>
    <url>http://maven.apache.org</url>
    <!-- Spring-Boot -->
    <parent>
        <groupId>org.springframework.boot</groupId>
        <artifactId>spring-boot-starter-parent</artifactId>
        <version>2.0.2.RELEASE</version>
    </parent>
    <!-- 配置Java版本 -->
    <properties>
        <java.version>1.8</java.version>
    </properties>
    <dependencies>
        <dependency>
            <groupId>junit</groupId>
            <artifactId>junit</artifactId>
            <scope>test</scope>
        </dependency>
        <!-- Spring-Boot: This is a web application  -->
        <dependency>
            <groupId>org.springframework.boot</groupId>
            <artifactId>spring-boot-starter-web</artifactId>
        </dependency>
        <!-- Tomcat embedded container-->
        <dependency>
            <groupId>org.springframework.boot</groupId>
            <artifactId>spring-boot-starter-tomcat</artifactId>
            <scope>provided</scope>
        </dependency>
        <!-- Need this to compile JSP -->
        <dependency>
            <groupId>org.apache.tomcat.embed</groupId>
            <artifactId>tomcat-embed-jasper</artifactId>
            <scope>provided</scope>
        </dependency>
         <!-- JSTL for JSP -->
        <!-- https://mvnrepository.com/artifact/javax.servlet/jstl -->
        <dependency>
            <groupId>javax.servlet</groupId>
            <artifactId>jstl</artifactId>
        </dependency>
        <!-- https://mvnrepository.com/artifact/taglibs/standard -->
        <dependency>
            <groupId>taglibs</groupId>
            <artifactId>standard</artifactId>
            <version>1.1.2</version>
        </dependency>

        <!-- Optional, test for static content, bootstrap CSS-->
        <dependency>
            <groupId>org.webjars</groupId>
            <artifactId>bootstrap</artifactId>
            <version>3.3.7</version>
        </dependency>
    </dependencies>

    <build>
        <finalName>SpringBoot-JSP</finalName>
        <plugins>
            <!-- Package as an executable jar/war -->
            <plugin>
                <groupId>org.springframework.boot</groupId>
                <artifactId>spring-boot-maven-plugin</artifactId>
            </plugin>
        </plugins>
    </build>
</project>
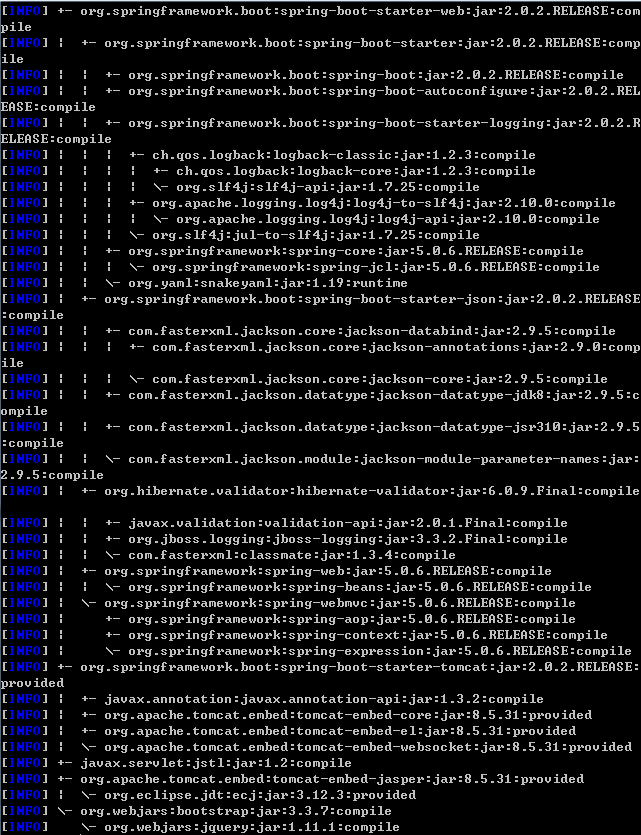
实现依赖关系:mvn dependency:tree
III. SpringBootServletInitializer执行传统的WAR部署运行SpringApplication
// 注解为SpringBoot应用
@SpringBootApplication
public class SpringBootWebApplication extends SpringBootServletInitializer{

    @Override
    protected SpringApplicationBuilder configure(SpringApplicationBuilder builder) {
        return builder.sources(SpringBootWebApplication.class);
    }

    public static void main(String[] args) {
        SpringApplication.run(SpringBootWebApplication.class, args);
    }

}
IV. 创建控制器
@Controller
public class WelcomeController {

    // 注入应用配置 application.properties
    @Value("${welcome.message}")
    private String message = "Hello World";

    @RequestMapping("/")
    public String welcome(Map<String, Object> model) {
        model.put("message", this.message);
        return "welcome";
    }
}
V. welcome.jsp页面
<%@ page language="java" contentType="text/html; charset=UTF-8"
pageEncoding="UTF-8" isELIgnored="false"%>
<%@ taglib prefix="spring" uri="http://www.springframework.org/tags"%>
<%@ taglib prefix="c" uri="http://java.sun.com/jsp/jstl/core"%>
<!DOCTYPE html>
<html lang="en">
<head>
<meta http-equiv="Content-Type" content="text/html; charset=UTF-8">
<!-- 链接bootstrap -->
<!--
href中的内容写为:webjars/bootstrap/3.3.7/css/bootstrap.css
加载地址为:http://localhost:8080/SpringBoot-JSP/webjars/bootstrap/3.3.7/css/bootstrap.css
href中的内容写为:/webjars/bootstrap/3.3.7/css/bootstrap.css
加载地址为:http://localhost:8080/webjars/bootstrap/3.3.7/css/bootstrap.css
使用中建议写为webjars/bootstrap/3.3.7/css/bootstrap.css
-->
<link rel="stylesheet" type="text/css" href="webjars/bootstrap/3.3.7/css/bootstrap.css"/>
<%-- <spring:url value="/css/main.css" var="springCss"/>
<link href="${springCss}" rel="stylesheet"/> --%>
<script type="text/javascript" src="webjars/jquery/1.11.1/jquery.min.js"></script>
<c:url value="/css/main.css" var="jstlCss"></c:url>
<link href="${jstlCss }" rel="stylesheet"/>
<title>SpringBootTest</title>
</head>
<body>
<nav class="navbar navbar-inverse">
<div class="container">
<div class="navbar-header">
<a class="navbar-brand" href="#">Spring Boot</a>
</div>
</div>
<div id="navbar" class="collapse navbar-collapse">
<ul class="nav nav-bar-nav">
<li class="active"><a href="#">Home</a></li>
<li><a href="#about">About</a></li>
</ul>
</div>
</nav>
<div class="container">
<div class="starter-template">
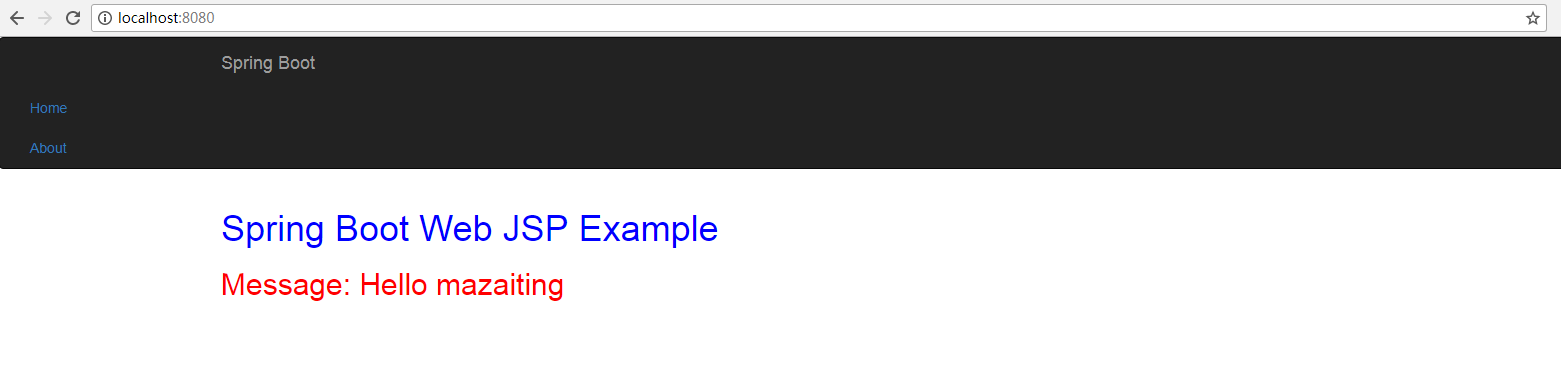
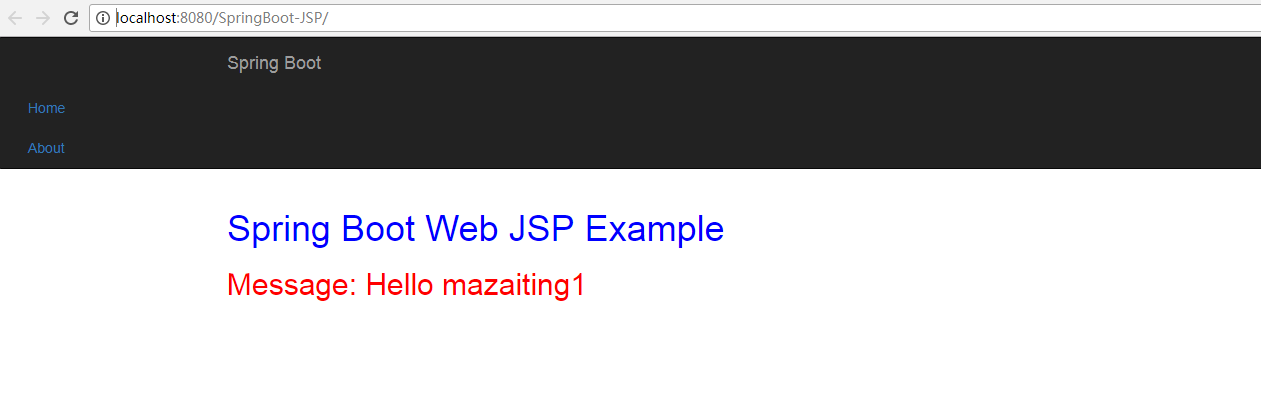
<h1>Spring Boot Web JSP Example</h1>
<h2>Message: ${message }</h2>
</div>
</div>
<script type="text/javascript" src="webjars/bootstrap/3.3.7/js/bootstrap.min.js"></script>
</body>
</html>
注
href中的内容写为:webjars/bootstrap/3.3.7/css/bootstrap.css
加载地址为:http://localhost:8080/SpringBoot-JSP/webjars/bootstrap/3.3.7/css/bootstrap.css

href中的内容写为:/webjars/bootstrap/3.3.7/css/bootstrap.css
加载地址为:http://localhost:8080/webjars/bootstrap/3.3.7/css/bootstrap.css

使用中建议写为webjars/bootstrap/3.3.7/css/bootstrap.css
main.css
h1 {
    color: #00F;
}
h2 {
    color: #F00;
}
VI. 在/src/main/resources/目录下创建application.properties及application-dev.properties、application-prod.properties、application-test.properties。
- application-dev.properties:用于开发环境
- application-test.properties:用于测试环境
- application-prod.properties:用于生产环境
在application.properties文件中配置使用哪一类型的配置文件, prefix和suffix配置视图层的前后缀。
spring.mvc.view.prefix: /jsp/
spring.mvc.view.suffix: .jsp
spring.profiles.active= dev
application-dev.properties
welcome.message: Hello mazaiting1
application-test.properties
welcome.message: Hello mazaiting2
application-prod.properties
welcome.message: Hello mazaiting3
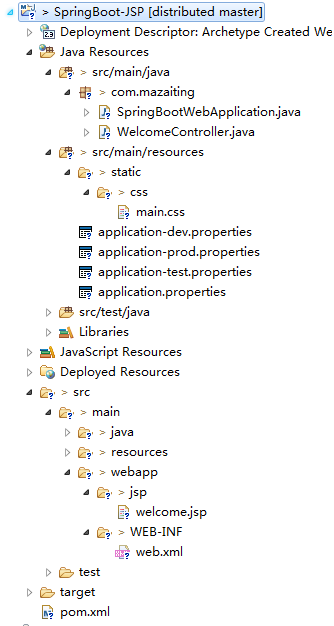
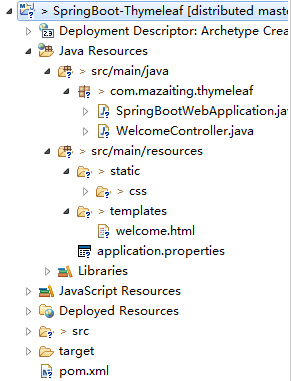
VII. 代码结构
VIII. 运行测试一:在SpringBootWebApplication类上右键Run As -> Java Application, 在浏览器中输入http://localhost:8080/
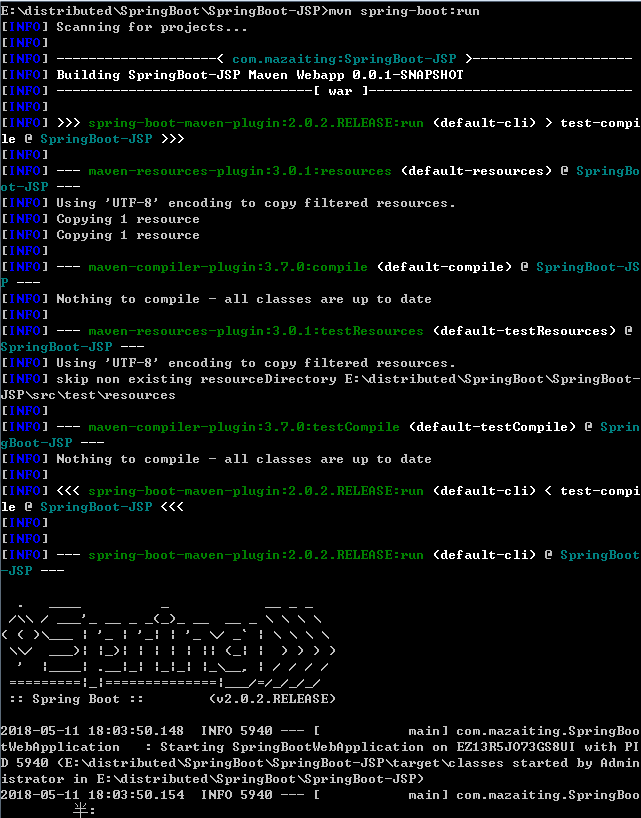
IX.. 运行测试二:在项目的根目录下,在命令提示符输入mvn spring-boot:run,然后在浏览器输入http://localhost:8080/也可呈现效果
X. 运行测试三:在工程右键-> Run As -> Run on Server部署在Tomcat容器中, 然后再浏览器中输入http://localhost:8080/SpringBoot-JSP/即可访问
XI. JSP限制
不能创建可执行jar来运行这个嵌入式Tomcat + JSP Web示例,因为Tomcat中有一个硬编码文件模式。
6). Spring Boot创建war包,并部署在Tomcat
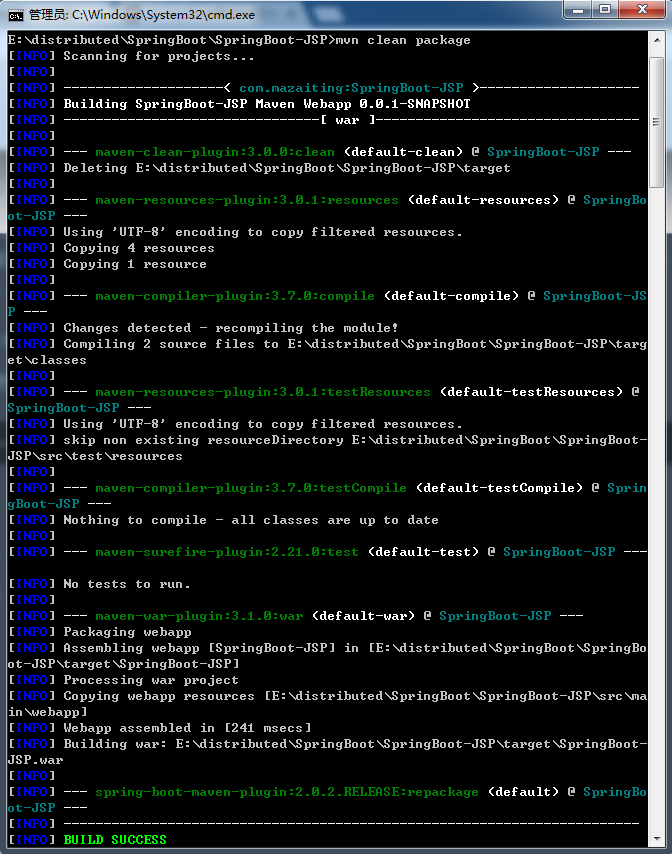
I. 使用命令提示符进入项目根目录
mvn clean package
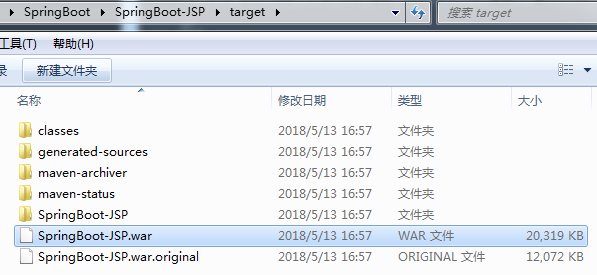
II. 执行成功后,项目的\SpringBoot-JSP\target\目录下出现SpringBoot-JSP.war
7). Spring Boot + Thymeleaf 模板引擎 -- 可执行JAR文件
I. 引入依赖
<project xmlns="http://maven.apache.org/POM/4.0.0" xmlns:xsi="http://www.w3.org/2001/XMLSchema-instance"
    xsi:schemaLocation="http://maven.apache.org/POM/4.0.0 http://maven.apache.org/maven-v4_0_0.xsd">
    <modelVersion>4.0.0</modelVersion>
    <groupId>com.mazaiting</groupId>
    <artifactId>SpringBoot-Thymeleaf</artifactId>
    <version>0.0.1-SNAPSHOT</version>
    <name>SpringBoot-Thymeleaf Maven Webapp</name>
    <url>http://maven.apache.org</url>

    <parent>
        <groupId>org.springframework.boot</groupId>
        <artifactId>spring-boot-starter-parent</artifactId>
        <version>1.4.2.RELEASE</version>
    </parent>
    <!-- Java版本 -->
    <properties>
        <java.version>1.8</java.version>
    </properties>

    <dependencies>
        <dependency>
            <groupId>junit</groupId>
            <artifactId>junit</artifactId>
            <scope>test</scope>
        </dependency>
        <dependency>
            <groupId>org.springframework.boot</groupId>
            <artifactId>spring-boot-starter-thymeleaf</artifactId>
        </dependency>

        <!-- hot swapping, disable cache for template, enable live reload -->
        <dependency>
            <groupId>org.springframework.boot</groupId>
            <artifactId>spring-boot-devtools</artifactId>
            <optional>true</optional>
        </dependency>

        <!-- Optional, for bootstrap -->
        <dependency>
            <groupId>org.webjars</groupId>
            <artifactId>bootstrap</artifactId>
            <version>3.3.7</version>
        </dependency>
    </dependencies>
    <build>
        <finalName>SpringBoot-Thymeleaf</finalName>
        <plugins>
            <!-- Package as an executable jar/war -->
            <plugin>
                <groupId>org.springframework.boot</groupId>
                <artifactId>spring-boot-maven-plugin</artifactId>
            </plugin>
        </plugins>
    </build>
</project>
spring-boot-devtools有助于禁用缓存并启用热插拔,以便开发人员总是看到最后的更改。尝试修改Thymeleaf模板或属性文件,刷新浏览器以查看更改立即生效。
II. 创建SpringBootWebApplication
@SpringBootApplication
public class SpringBootWebApplication {
    public static void main(String[] args) {
        SpringApplication.run(SpringBootWebApplication.class, args);
    }
}
III. 创建WelcomeController
@Controller
public class WelcomeController {
    @Value("${welcome.message}")
    private String message= "Hello World";

    @RequestMapping("/")
    public String welcome(Map<String, Object> model){
        model.put("message", this.message);
        return "welcome";
    }
}
IV. Thymeleaf +资源+静态文件
<!DOCTYPE html>
<html xmlns:th="http://www.thymeleaf.org">
    <head>
        <meta http-equiv="Content-Type" content="text/html; charset=UTF-8"/>
        <title>Spring Boot Thymeleaf Hello World 示例</title>
        <link rel="stylesheet" type="text/css" href="webjars/bootstrap/3.3.7/css/bootstrap.css"/>
        <link rel="stylesheet" th:href="@{/css/main.css}" href="../../css/main.css"/>
        <script type="text/javascript" src="webjars/jquery/1.11.1/jquery.min.js"></script>
    </head>
    <body>
        <nav class="navbar navbar-inverse">
            <div class="container">
                <div class="navbar-header">
                    <a class="navbar-brand" href="#">Spring Boot</a>
                </div>
                <div id="navbar" class="collapse navbar-collapse">
                    <ul class="nav navbar-nav">
                        <li class="avtive"><a href="#">首页</a></li>
                        <li><a href="#about">关于</a></li>
                    </ul>
                </div>
            </div>
        </nav>
        <div class="container">
            <div class="starter-template">
                <h1>Spring Boot Web Thymeleaf 示例</h1>
                <h2>
                    <span th:text="'Message: ' + ${message}"></span>
                </h2>
            </div>
        </div>
        <script type="text/javascript" src="webjars/bootstrap/3.3.7/js/bootstrap.min.js"></script>
    </body>
</html>
h1 {
    font-size: 20pt;
}
h2 {
    font-size: 16pt;
}
welcome.message: Hello, mazaiting
V. 运行方式一:运行SpringBootWebApplication,浏览器输入http://localhost:8080/
VI. 运行方式二:在命令提示符的项目根目录下执行mvn spring-boot:run,浏览器输入http://localhost:8080/即可显示效果
VII. 运行方式三:在命令提示符的项目根目录下执行mvn clean package,创建可执行jar包,运行jar包,浏览器输入http://localhost:8080/即可显示效果。想要生成jar包,在pom.xml文件中,一定有此行<packaging>war</packaging>
8). Spring Boot 非Web应用--命令行应用
I. 创建Maven的普通Java工程,并在pom.xml文件中添加依赖
<project xmlns="http://maven.apache.org/POM/4.0.0" xmlns:xsi="http://www.w3.org/2001/XMLSchema-instance"
    xsi:schemaLocation="http://maven.apache.org/POM/4.0.0 http://maven.apache.org/xsd/maven-4.0.0.xsd">
    <modelVersion>4.0.0</modelVersion>

    <groupId>com.mazaiting</groupId>
    <artifactId>SpringBoot-Console</artifactId>
    <version>0.0.1-SNAPSHOT</version>
    <packaging>jar</packaging>

    <name>SpringBoot-Console</name>
    <url>http://maven.apache.org</url>
    <!-- Spring-Boot -->
    <parent>
        <groupId>org.springframework.boot</groupId>
        <artifactId>spring-boot-starter-parent</artifactId>
        <version>2.0.2.RELEASE</version>
    </parent>
    <properties>
        <project.build.sourceEncoding>UTF-8</project.build.sourceEncoding>
    </properties>

    <dependencies>
        <dependency>
            <groupId>junit</groupId>
            <artifactId>junit</artifactId>
            <scope>test</scope>
        </dependency>
        <dependency>
            <groupId>org.springframework.boot</groupId>
            <artifactId>spring-boot-starter</artifactId>
        </dependency>
    </dependencies>

    <build>
        <plugins>
            <!-- Package as an executable jar/war -->
            <plugin>
                <groupId>org.springframework.boot</groupId>
                <artifactId>spring-boot-maven-plugin</artifactId>
            </plugin>
        </plugins>
    </build>
</project>
II. 创建HelloService服务
@Service
public class HelloMessageService {

    @Value("${name}")
    private String name;

    public String getMessage() {
        return getMessage(name);
    }

    public String getMessage(String name) {
        return "Hello " + name;
    }

}
III. application.properties内容
name=mazaiting
IV. SpringBootConsoleApplication应用
@SpringBootApplication
public class SpringBootConsoleApplication implements CommandLineRunner{

    @Autowired
    private HelloMessageService helloService;

    public static void main(String[] args) {
        SpringApplication application = new SpringApplication(SpringBootConsoleApplication.class);
        application.setBannerMode(Banner.Mode.OFF);
        application.run(args);
    }

    @Override
    public void run(String... args) throws Exception {
        if (args.length > 0) {
            System.out.println(helloService.getMessage(args[0].toString()));
        } else {
            System.out.println(helloService.getMessage());
        }
    }

}
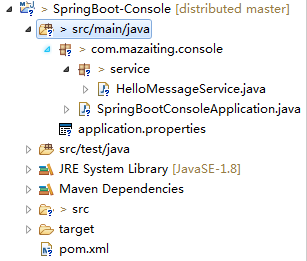
V. 目录结构
VI. 运行
mvn package
java -jar target/SpringBoot-Console-0.0.1-SNAPSHOT.jar
结果:Hello mazaiting
java -jar target/SpringBoot-Console-0.0.1-SNAPSHOT.jar spring-boot
结果:Hello spring-boot
9). Spring Boot 属性配置
I. pom.xml文件
<project xmlns="http://maven.apache.org/POM/4.0.0" xmlns:xsi="http://www.w3.org/2001/XMLSchema-instance"
    xsi:schemaLocation="http://maven.apache.org/POM/4.0.0 http://maven.apache.org/xsd/maven-4.0.0.xsd">
    <modelVersion>4.0.0</modelVersion>

    <groupId>com.mazaiting</groupId>
    <artifactId>SpringBoot-Config</artifactId>
    <version>0.0.1-SNAPSHOT</version>
    <packaging>jar</packaging>

    <name>SpringBoot-Config</name>
    <url>http://maven.apache.org</url>
    <!-- Spring-Boot -->
    <parent>
        <groupId>org.springframework.boot</groupId>
        <artifactId>spring-boot-starter-parent</artifactId>
        <version>2.0.2.RELEASE</version>
    </parent>

    <properties>
        <project.build.sourceEncoding>UTF-8</project.build.sourceEncoding>
    </properties>

    <dependencies>
        <dependency>
            <groupId>junit</groupId>
            <artifactId>junit</artifactId>
            <scope>test</scope>
        </dependency>
        <dependency>
            <groupId>org.springframework.boot</groupId>
            <artifactId>spring-boot-starter</artifactId>
        </dependency>
        <!-- Spring-Boot: This is a web application  -->
        <dependency>
            <groupId>org.springframework.boot</groupId>
            <artifactId>spring-boot-starter-web</artifactId>
        </dependency>
    </dependencies>

    <build>
        <plugins>
            <!-- Package as an executable jar/war -->
            <plugin>
                <groupId>org.springframework.boot</groupId>
                <artifactId>spring-boot-maven-plugin</artifactId>
            </plugin>
        </plugins>
    </build>
</project>
II. @Value使用
@Component
@PropertySource("classpath:global.properties")
public class GlobalProperties {

    @Value("${thread-pool}")
    private int threadPool;

    @Value("${email}")
    private String email;

    //getters and setters

}
III. ConfigurationProperties
@Component
@PropertySource("classpath:global.properties")
@ConfigurationProperties
public class GlobalProperties {

    private int threadPool;
    private String email;

    //getters and setters

}
IV. 配置文件
global.properties文件
email=zaitingma@foxmail.com
thread-pool=12
application.properties文件
#Logging
logging.level.org.springframework.web=ERROR
logging.level.com.mazaiting=DEBUG

#Global
email=1425941077@qq.com
thread-pool=10

#App
app.menus[0].title=Home
app.menus[0].name=Home
app.menus[0].path=/
app.menus[1].title=Login
app.menus[1].name=Login
app.menus[1].path=/login

app.compiler.timeout=5
app.compiler.output-folder=/temp/

app.error=/error/
注: 如果在application.properties文件中有与global.properties中有相同的属性,取值时则取application.properties中的配置
V. 对应的java文件
AppProperties.java
@Component
//prefix app, find app.* values
@ConfigurationProperties("app")
public class AppProperties {
    private String error;
    private List<Menu> menus = new ArrayList<>();
    private Compiler compiler = new Compiler();

    public String getError() {
        return error;
    }

    public void setError(String error) {
        this.error = error;
    }

    public List<Menu> getMenus() {
        return menus;
    }

    public void setMenus(List<Menu> menus) {
        this.menus = menus;
    }

    public Compiler getCompiler() {
        return compiler;
    }

    public void setCompiler(Compiler compiler) {
        this.compiler = compiler;
    }

    public static class Menu {
        private String name;
        private String path;
        private String title;

        public String getName() {
            return name;
        }

        public void setName(String name) {
            this.name = name;
        }

        public String getPath() {
            return path;
        }

        public void setPath(String path) {
            this.path = path;
        }

        public String getTitle() {
            return title;
        }

        public void setTitle(String title) {
            this.title = title;
        }

        @Override
        public String toString() {
            return "Menu [name=" + name + ", path=" + path + ", title=" + title + "]";
        }
    }

    public static class Compiler {
        private String timeout;
        private String outputFolder;
        public String getTimeout() {
            return timeout;
        }
        public void setTimeout(String timeout) {
            this.timeout = timeout;
        }
        public String getOutputFolder() {
            return outputFolder;
        }
        public void setOutputFolder(String outputFolder) {
            this.outputFolder = outputFolder;
        }
        @Override
        public String toString() {
            return "Compiler [timeout=" + timeout + ", outputFolder=" + outputFolder + "]";
        }
    }

    @Override
    public String toString() {
        return "AppProperties [error=" + error + ", menus=" + menus + ", compiler=" + compiler + "]";
    }
}
GlobalProperties.java
@Component
@PropertySource("classpath:global.properties")
public class GlobalProperties {
    @Value("${thread-pool}")
    private int threadPool;
    @Value("${email}")
    private String email;
    public int getThreadPool() {
        return threadPool;
    }
    public void setThreadPool(int threadPool) {
        this.threadPool = threadPool;
    }
    public String getEmail() {
        return email;
    }
    public void setEmail(String email) {
        this.email = email;
    }
    @Override
    public String toString() {
        return "GlobalProperties [threadPool=" + threadPool + ", email=" + email + "]";
    }
}
VI. 应用入口SpringBootWebApplication
@SpringBootApplication
public class SpringBootWebApplication {
    public static void main(String[] args) {
        SpringApplication.run(SpringBootWebApplication.class, args);
    }
}
VII. 控制器
@Controller
public class WelcomeController {
    private static final Logger LOGGER = LoggerFactory.getLogger(WelcomeController.class);
    private GlobalProperties global;
    private AppProperties app;

    @Autowired
    public void setApp(AppProperties app) {
        this.app = app;
    }

    @Autowired
    public void setGlobalProperties(GlobalProperties global) {
        this.global = global;
    }

    @RequestMapping("/")
    public String welcome(Map<String, Object> model) {
        String globalProperties = global.toString();
        String appProperties = app.toString();

        LOGGER.debug("Welcome {}, {}", app, global);

        model.put("message", appProperties + globalProperties);
        return "welcome";
    }

}
VIII. 运行SpringBootWebApplication,浏览器输入http://localhost:8080/,查看控制台
2018-05-14 13:07:22.056 DEBUG 4228 --- [nio-8080-exec-3] com.mazaiting.config.WelcomeController   :
Welcome AppProperties [error=/error/, menus=[Menu [name=Home, path=/, title=Home],
Menu [name=Login, path=/login, title=Login]], compiler=Compiler [timeout=5, outputFolder=/temp/]],
 GlobalProperties [threadPool=10, email=1425941077@qq.com]
IX. 验证
@Component
@ConfigurationProperties
public class GlobalProperties {

    @Max(5)
    @Min(0)
    private int threadPool;

    @NotEmpty
    private String email;

    //getters and setters
}
10). 配置文件中配置logging
#Logging
# log level 日志等级
logging.level.org.springframework.web=ERROR
logging.level.com.mazaiting=DEBUG
# log file 日志文件存放路径
#logging.file=${java.io.tmpdir}/application.log
# output to a file 存放路径
logging.file=C:/Users/Administrator/Desktop/mylog.log
# pattern 格式化文件内容
logging.pattern.file="%d{yyyy-MM-dd HH:mm:ss} [%thread] %-5level %logger{36} - %msg%n"