using System;
using System.Collections.Generic;
using System.ComponentModel;
using System.Data;
using System.Drawing;
using System.IO;
using System.Linq;
using System.Runtime.InteropServices;
using System.Text;
using System.Threading.Tasks;
using System.Windows.Forms;
namespace FileExplorer
{
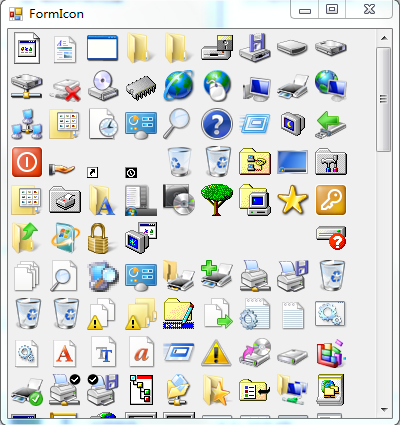
/// <summary>
/// 系统Icon
/// 1、Get() 获取指定索引对应的系统icon
/// 2、Save() 保存所有系统图像
/// 3、Show() 显示所有系统Icon图像
/// </summary>
public partial class SystemIcon : Form
{
public SystemIcon()
{
InitializeComponent();
Show(this);
Save();
}
/// <summary>
/// 在form上显示所有系统icon图像
/// </summary>
public static void Show(Form form)
{
LoadSystemIcon();
FlowLayoutPanel flowLayout = new FlowLayoutPanel();
flowLayout.Dock = System.Windows.Forms.DockStyle.Fill;
flowLayout.AutoScroll = true;
for (int i = 0; i < SystemIconList.Count; i++)
{
PictureBox pic = new PictureBox();
pic.Size = new System.Drawing.Size(32, 32);
flowLayout.Controls.Add(pic);
Bitmap p = SystemIconList[i].ToBitmap();
pic.Image = p;
}
form.Controls.Add(flowLayout);
}
/// <summary>
/// 保存所有系统图像
/// </summary>
public static void Save()
{
LoadSystemIcon();
for (int i = 0; i < SystemIconList.Count; i++)
{
Bitmap p = SystemIconList[i].ToBitmap();
// 保存图像
string path = AppDomain.CurrentDomain.BaseDirectory + "系统图标\\";
string filepath = path + (i + ".png");
if (!Directory.Exists(path)) Directory.CreateDirectory(path);
if (!File.Exists(filepath)) p.Save(filepath);
}
}
/// <summary>
/// 获取指定索引对应的系统icon
/// </summary>
public static Icon Get(int index)
{
LoadSystemIcon();
return index < SystemIconList.Count ? SystemIconList[index] : null;
}
private static List<Icon> SystemIconList = new List<Icon>(); // 记录系统图标
//[DllImport("user32.dll", CharSet = CharSet.Auto)]
//private static extern bool MessageBeep(uint type);
[DllImport("Shell32.dll")]
public extern static int ExtractIconEx(string libName, int iconIndex, IntPtr[] largeIcon, IntPtr[] smallIcon, int nIcons);
private static IntPtr[] largeIcon;
private static IntPtr[] smallIcon;
/// <summary>
/// 获取所有系统icon图像
/// </summary>
private static void LoadSystemIcon()
{
if (SystemIconList.Count > 0) return;
largeIcon = new IntPtr[1000];
smallIcon = new IntPtr[1000];
ExtractIconEx("shell32.dll", 0, largeIcon, smallIcon, 1000);
SystemIconList.Clear();
for (int i = 0; i < largeIcon.Length; i++)
{
try
{
Icon ic = Icon.FromHandle(largeIcon[i]);
SystemIconList.Add(ic);
}
catch (Exception ex)
{
break;
}
}
}
//private void LoadSystemIcon()
//{
// largeIcon = new IntPtr[1000];
// smallIcon = new IntPtr[1000];
// ExtractIconEx("shell32.dll", 0, largeIcon, smallIcon, 1000);
// FlowLayoutPanel flowLayout = new FlowLayoutPanel();
// flowLayout.Dock = System.Windows.Forms.DockStyle.Fill;
// flowLayout.AutoScroll = true;
// for (int i = 0; i < largeIcon.Length; i++)
// {
// try
// {
// PictureBox pic = new PictureBox();
// pic.Size = new System.Drawing.Size(32, 32);
// flowLayout.Controls.Add(pic);
// Icon ic = Icon.FromHandle(largeIcon[i]);
// SystemIcon.Add(ic);
// Bitmap p = ic.ToBitmap();
// pic.Image = p;
// // 保存图像
// string path = AppDomain.CurrentDomain.BaseDirectory + "系统图标\\";
// string filepath = path + (i + ".png");
// if (!Directory.Exists(path)) Directory.CreateDirectory(path);
// if (!File.Exists(filepath)) p.Save(filepath);
// }
// catch (Exception ex)
// {
// break;
// }
// }
// this.Controls.Add(flowLayout);
//}
}
}
using System;
using System.Collections.Generic;
using System.Linq;
using System.Text;
using System.Runtime.InteropServices;
using System.Windows.Forms;
using System.IO;
using System.Drawing;
using Microsoft.Win32;

namespace FileExplorer
{
    /// <summary>
    /// 获取指定文件的Icon图像getIcon()、getIcon2()
    /// </summary>
    class FileIcon
    {
        private const uint SHGFI_ICON = 0x100;
        private const uint SHGFI_LARGEICON = 0x0;  //大图标
        private const uint SHGFI_SMALLICON = 0x1;  //小图标

        [StructLayout(LayoutKind.Sequential)]
        public struct SHFILEINFO
        {
            public IntPtr hIcon;        //文件的图标句柄

            public IntPtr iIcon;        //图标的系统索引号

            public uint dwAttributes;   //文件的属性值

            [MarshalAs(UnmanagedType.ByValTStr, SizeConst = 260)]
            public string szDisplayName;//文件的显示名


            [MarshalAs(UnmanagedType.ByValTStr, SizeConst = 80)]
            public string szTypeName;   //文件的类型名
        };

        [DllImport("shell32.dll")]
        private static extern IntPtr SHGetFileInfo(string pszPath, uint dwFileAttributes, ref SHFILEINFO psfi, uint cbSizeFileInfo, uint uFlags);

        /// <summary>
        /// 获取文件FilePath对应的Icon
        /// </summary>
        public static Icon getIcon(string FilePath)
        {
            SHFILEINFO shinfo = new SHFILEINFO();
            //FileInfo info = new FileInfo(FileName);

            //大图标
            SHGetFileInfo(FilePath, 0, ref shinfo, (uint)Marshal.SizeOf(shinfo), SHGFI_ICON | SHGFI_LARGEICON);
            Icon largeIcon = Icon.FromHandle(shinfo.hIcon);

            //Icon.ExtractAssociatedIcon(FileName);
            return largeIcon;
        }

        /// <summary>
        /// 获取文件FilePath对应的Icon
        /// </summary>
        public static Icon getIcon2(string FilePath)
        {
            return Icon.ExtractAssociatedIcon(FilePath);
        }
    }
}