在iOS10中,苹果为UICollectionViewCell引入了Pre-Fetching预加载机制用于提升它的性能。主要引入了一个新的数据源协议UICollectionViewDataSourcePrefetching,包含两个方法:
@protocol UICollectionViewDataSourcePrefetching <NSObject>
@required
// 预加载数据
- (void)collectionView:(UICollectionView *)collectionView prefetchItemsAtIndexPaths:(NSArray<NSIndexPath *> *)indexPaths NS_AVAILABLE_IOS(10_0);
@optional
// 取消提前加载数据
- (void)collectionView:(UICollectionView *)collectionView cancelPrefetchingForItemsAtIndexPaths:(NSArray<NSIndexPath *> *)indexPaths  NS_AVAILABLE_IOS(10_0);
@end
网上搜了一大圈,讲述原理的(翻译文档)的文章很多,有干货的Demo很少,于是乎自己摸索了一下,写了一个简单的案例,在此记录并分享一下。
运行环境:Xcode 8.2.1 + iOS 10.2
核心步骤:
1、遵从 UICollectionViewDataSourcePrefetching 协议
2、实现 collectionView:prefetchItemsAtIndexPaths 方法和collectionView:cancelPrefetchItemsAtIndexPaths 方法(可选)
3、将第1步中遵从协议的类设置为 UICollectionView 的 prefetchDataSource 属性
实现
一、创建UICollectionViewFlowLayout
自己写一个类继承自UICollectionViewFlowLayout
@implementation MyCollectionViewFlowLayout

-(void)prepareLayout{

    self.minimumLineSpacing = 1;//垂直间距
    self.minimumInteritemSpacing = 0;//水平间距
    self.sectionInset = UIEdgeInsetsMake(0, 0, 8, 0);//分组间距

}
@end
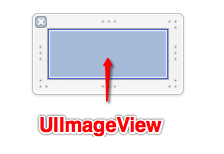
二、用XIB定义一个
里面就一个UIImageView,然后拽线设置一个IBOutlet
@property (weak, nonatomic) IBOutlet UIImageView *imgView;
三、控制器
注释很详细
#import "ViewController.h"
#import "MyCollectionViewFlowLayout.h"
#import "ImgCollectionViewCell.h"

#define ScreenW [UIScreen mainScreen].bounds.size.width
//重用标识
static NSString *cellId = @"imgCell";
//遵守协议
@interface ViewController ()<UICollectionViewDelegate, UICollectionViewDataSource, UICollectionViewDataSourcePrefetching>

//下载图片任务
@property(nonatomic, strong) NSMutableDictionary<NSURL *, dispatch_queue_t> *tasks;
//图片地址
@property(nonatomic, copy) NSMutableArray<NSURL *> *imgURLArray;
//下载的图片
@property(nonatomic, copy) NSMutableDictionary<NSURL *, UIImage *> *imgs;
//UICollectionView
@property(nonatomic, weak) UICollectionView *collectionView;

@end

@implementation ViewController

//懒加载imgURLArray
-(NSMutableArray<NSURL *> *)imgURLArray{

    if (_imgURLArray == nil) {
        _imgURLArray = [NSMutableArray array];
        for (int i = 0; i < 30; i++) {
            NSURL *imgURL = [NSURL URLWithString:@"https://timgsa.baidu.com/timg?image&quality=80&size=b9999_10000&sec=1494499175005&di=1d8d40ac84f4a71cb26d7bf4a5a845ec&imgtype=0&src=http%3A%2F%2Fimg10.360buyimg.com%2Fyixun_zdm%2Fjfs%2Ft2830%2F11%2F2310606472%2F165925%2F962fa94a%2F575f7664Nfd743845.jpg"];
            [_imgURLArray addObject:imgURL];
        }
    }

    return _imgURLArray;
}

//懒加载imgs
-(NSMutableDictionary<NSURL *,UIImage *> *)imgs{
    if (_imgs == nil) {
        _imgs = [NSMutableDictionary dictionary];
    }
    return _imgs;
}

//懒加载tasks
-(NSMutableDictionary<NSURL *,dispatch_queue_t> *)tasks{
    if (_tasks == nil) {
        _tasks = [NSMutableDictionary dictionary];
    }
    return _tasks;
}


- (void)viewDidLoad {
    [super viewDidLoad];

    //创建UICollectionView
    //创建布局
    UICollectionViewLayout *layout = [[MyCollectionViewFlowLayout alloc]init];
    //初始化一个UICollectionView
    UICollectionView *collection = [[UICollectionView alloc]initWithFrame:[UIScreen mainScreen].bounds collectionViewLayout:layout];
    //设置背景色
    collection.backgroundColor = [UIColor groupTableViewBackgroundColor];
    //设置代理
    collection.dataSource = self;
    collection.delegate = self;
    collection.prefetchDataSource = self;
    //注册Cell
    UINib *nib = [UINib nibWithNibName:@"ImgCollectionViewCell" bundle:nil];
    [collection registerNib:nib forCellWithReuseIdentifier:cellId];

    [self.view addSubview:collection];

    self.collectionView = collection;

}


-(void)loadImage:(NSIndexPath *)indexPath{

    NSURL *currentURL = [self.imgURLArray objectAtIndex:indexPath.row];
    dispatch_queue_t queue = dispatch_get_global_queue(DISPATCH_QUEUE_PRIORITY_DEFAULT, 0);
    __weak typeof(self) weakSelf = self;

    //异步下载图片
    dispatch_async(queue, ^{

        NSData *imageData = [NSData dataWithContentsOfURL:currentURL];
        UIImage *image = [UIImage imageWithData:imageData];
        weakSelf.imgs[currentURL] = image;

        //更新UI
         dispatch_async(dispatch_get_main_queue(), ^{

            ImgCollectionViewCell *cell = (ImgCollectionViewCell *)[weakSelf.collectionView cellForItemAtIndexPath:indexPath];
            cell.imgView.image = image;
        });
    });

    //为了取消任务
    self.tasks[currentURL] = queue;

}

#pragma mark <UICollectionViewDataSource>
- (NSInteger)collectionView:(UICollectionView *)collectionView numberOfItemsInSection:(NSInteger)section{

    return self.imgURLArray.count;
}

- (UICollectionViewCell *)collectionView:(UICollectionView *)collectionView cellForItemAtIndexPath:(NSIndexPath *)indexPath{

    ImgCollectionViewCell * cell = [collectionView dequeueReusableCellWithReuseIdentifier:cellId forIndexPath:indexPath];

    // 获取URL
    NSURL *imgURL = self.imgURLArray[indexPath.row];

    //对应的URL的图片已经存在
    if (self.imgs[imgURL]) {
        cell.imgView.image = self.imgs[imgURL];
    }
    //不存在
    else{

        [self loadImage:indexPath];
    }

    return cell;

}


#pragma mark <UICollectionViewDelegate>
//定义每个Item 的大小
- (CGSize)collectionView:(UICollectionView *)collectionView layout:(UICollectionViewLayout*)collectionViewLayout sizeForItemAtIndexPath:(NSIndexPath *)indexPath {
    CGFloat W = (ScreenW - 1) / 2;
    return CGSizeMake(W, 100);

}

#pragma mark <UICollectionViewDataSourcePrefetching>
- (void)collectionView:(UICollectionView *)collectionView prefetchItemsAtIndexPaths:(NSArray<NSIndexPath *> *)indexPaths {

    for (NSIndexPath * indexPath in indexPaths) {

        NSURL *currentURL = [self.imgURLArray objectAtIndex:indexPath.row];
        //不存在就请求
        if (!self.imgs[currentURL]) {
            [self loadImage:indexPath];
        }
    }

}


- (void)collectionView:(UICollectionView *)collectionView cancelPrefetchingForItemsAtIndexPaths:(NSArray<NSIndexPath *> *)indexPaths {

    for (NSIndexPath * indexPath in indexPaths){

        NSURL *currentURL = [self.imgURLArray objectAtIndex:indexPath.row];
        //当前任务存在
        if (self.tasks[currentURL]) {
            dispatch_queue_t queue = self.tasks[currentURL];
            dispatch_suspend(queue);
            self.tasks[currentURL] = nil;
        }
    }

}

@end
效果
写在后面的话
1、这个新特性仍然需要探究
2、遇到的一个坑:细心看的话可以发现我的字典是懒加载的,如果直接在viewDidLoad中初始化会在 weakSelf.imgs[currentURL] = image; 一行报错,why?烦请知道的告知。