和尚继续补充日常学习中遇到的很实用的技术点;
LayoutBuilder
和尚在一些场景下需要根据父类布局大小不同展示不同的子类 Widget,例如和尚在适配大尺寸平板或横竖屏切换等场景时,此时需要用到 LayoutBuilder 和尚理解为尺寸布局构造器;
源码分析
简单分析源码可得,LayoutBuilder 是一个继承自 ConstrainedLayoutBuilder 的构造器;通过 builder 获取一个 BoxConstraints 对象,之后通过检查 constraints 来确定要展示的内容;
class LayoutBuilder extends ConstrainedLayoutBuilder<BoxConstraints> {
  const LayoutBuilder({
    Key key,
    LayoutWidgetBuilder builder,
  }) : super(key: key, builder: builder);
}
案例尝试
和尚通过 GridView 默认展示一行的图标,预期是在大部分设备上展示 4个 item,随着屏幕的变大尽可能多的展示 item,当屏幕允许展示所有 item 时为上限;于是和尚设定了单个 item 宽基础为 90,根据 size.maxWidth 进行判断;
LayoutBuilder(builder: (context, size) {
  if (size.maxWidth ~/ 90 >= 4 &&
      size.maxWidth ~/ 90 <= _dataList.length) {
    _length = size.maxWidth ~/ 90;
  } else if (size.maxWidth ~/ 90 > _dataList.length) {
    _length = _dataList.length;
  } else {
    _length = 4;
  }
  return _gridWid();
}

_gridWid() {
  return GridView.builder(
      physics: ScrollPhysics(),
      primary: false, shrinkWrap: true,
      gridDelegate: SliverGridDelegateWithFixedCrossAxisCount(
          crossAxisCount: _length, mainAxisSpacing: 8.0,
          crossAxisSpacing: 8.0, childAspectRatio: 1),
      itemCount: _showMore ? _dataList.length : _length,
      itemBuilder: (context, index) {
        var dataItem = _dataList[index];
        if (index < _length - 1 || _showMore) {
          dataItem = _dataList[index];
        } else {
          dataItem = _dataList[_dataList.length - 1];
        }
        return GestureDetector(
            child: Container( color: Colors.white70,
                child: Column(mainAxisAlignment: MainAxisAlignment.center,
                    children: <Widget>[
                      Icon(dataItem.icon),
                      SizedBox(height: 4),
                      Text(dataItem.text)
                    ])),
            onTap: () {
              if (_length < _dataList.length && dataItem.text == '更多') {
                _showMore = !_showMore; setState(() {});
              }
              Toast.show(dataItem.text == '更多' ? '更多' : _dataList[index].text, context, duration: Toast.LENGTH_SHORT, gravity: Toast.BOTTOM);
            });
      });
}
![]()
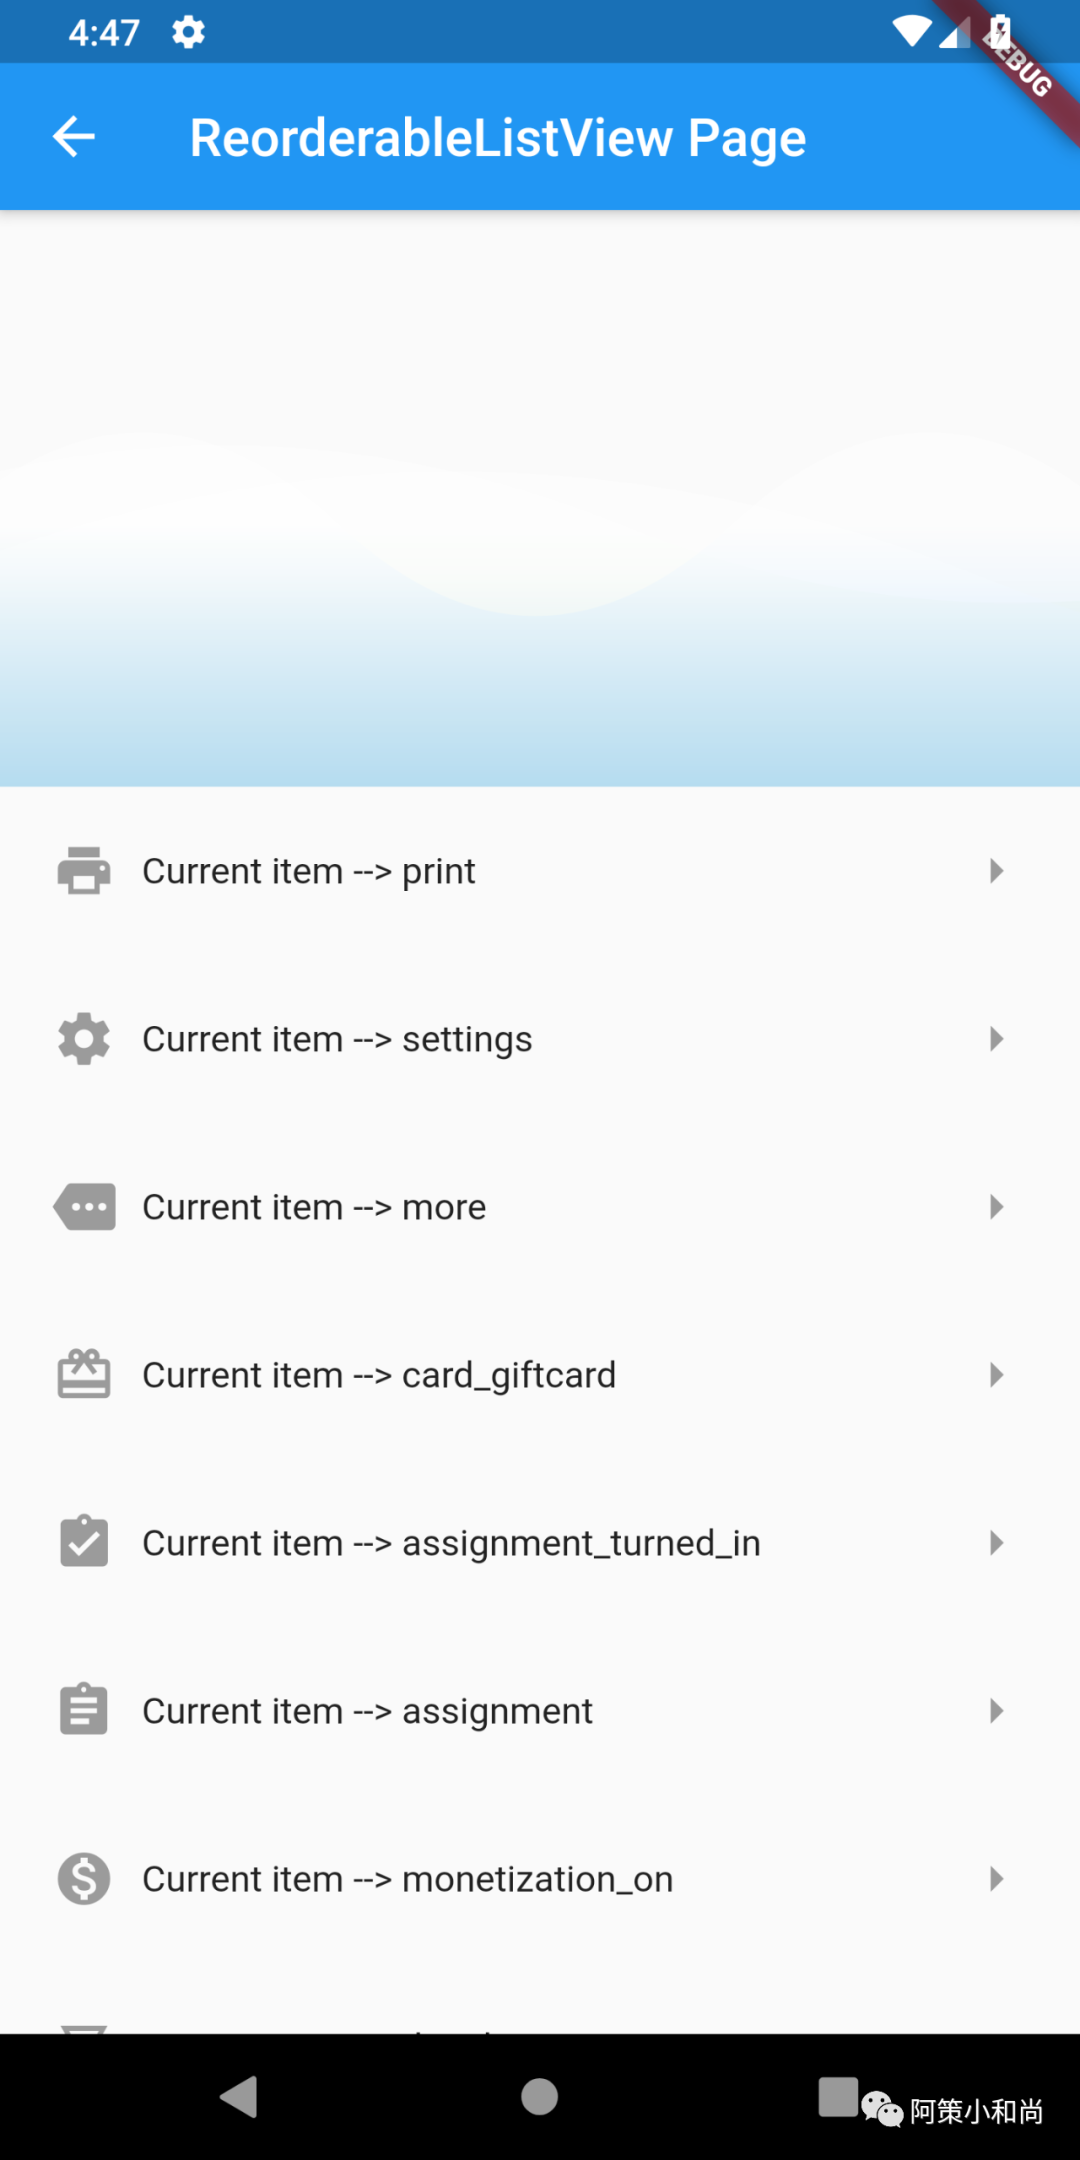
ReorderableListView
和尚刚尝试了 Draggable + DragTarget 实现的基本的拖拽 GridView,今天尝试一下系统提供的 ReorderableListView 拖拽列表;
源码分析
简单分析源码可得 ReorderableListView 主要实现 children 子类 item 加载与 onReorder 拖拽子 item 到新的位置时回调;
ReorderableListView({
  Key key,
  this.header,              // 列表头部标题
  @required this.children,  // 列表子类 item
  @required this.onReorder, // 拖拽到新位置时回调
  this.scrollDirection = Axis.vertical, // 滑动方向,水平或竖直
  this.padding,             // 内边距,仅用于 children
  this.reverse = false,     // 是否反转
})
案例尝试
1. onReorder
onReorder 是当 item 拖拽到新的位置时 ReorderCallback 回调,其中回调中返回新旧两个数组下标用于标记;
@override
Widget build(BuildContext context) {
  return Scaffold(
      appBar: AppBar(title: Text('ReorderableListView Page')),
      body: ReorderableListView(
          header: Container(height: 200.0,
              child: ACEWave(waveWidth, waveHeight, 200.0,
                  startOffsetXList: startOffsetX, startOffsetYList: startOffsetY,
                  durationList: duration, waveColorList: colorList)),
          reverse: false,
          children: _listWid(),
          onReorder: (oldIndex, newIndex) {
            if (newIndex == _dataList.length) --newIndex;
            final temp = _dataList.removeAt(oldIndex);
            _dataList.insert(newIndex, temp);
            setState(() {});
          }));
}

_listData(index) {
  return Padding(
      key: ValueKey(_dataList[index]),
      padding: EdgeInsets.all(20.0),
      child: Row(children: <Widget>[
        Icon(_dataList[index].icon, color: Colors.black38),
        SizedBox(width: 10.0),
        Expanded(child: Text(_dataList[index].text)),
        Icon(Icons.arrow_right, color: Colors.black38)
      ]));
}

_listWid() => <Widget>[for (int i = 0; i < _dataList.length; i++) _listData(i)];
![]()
2. scrollDirection
scrollDirection 为列表滑动方向,与普通 ListView 一致,分为 Axis.horizontal 横行和 Axis.vertical 纵向两种;
scrollDirection: Axis.horizontal,
![]()
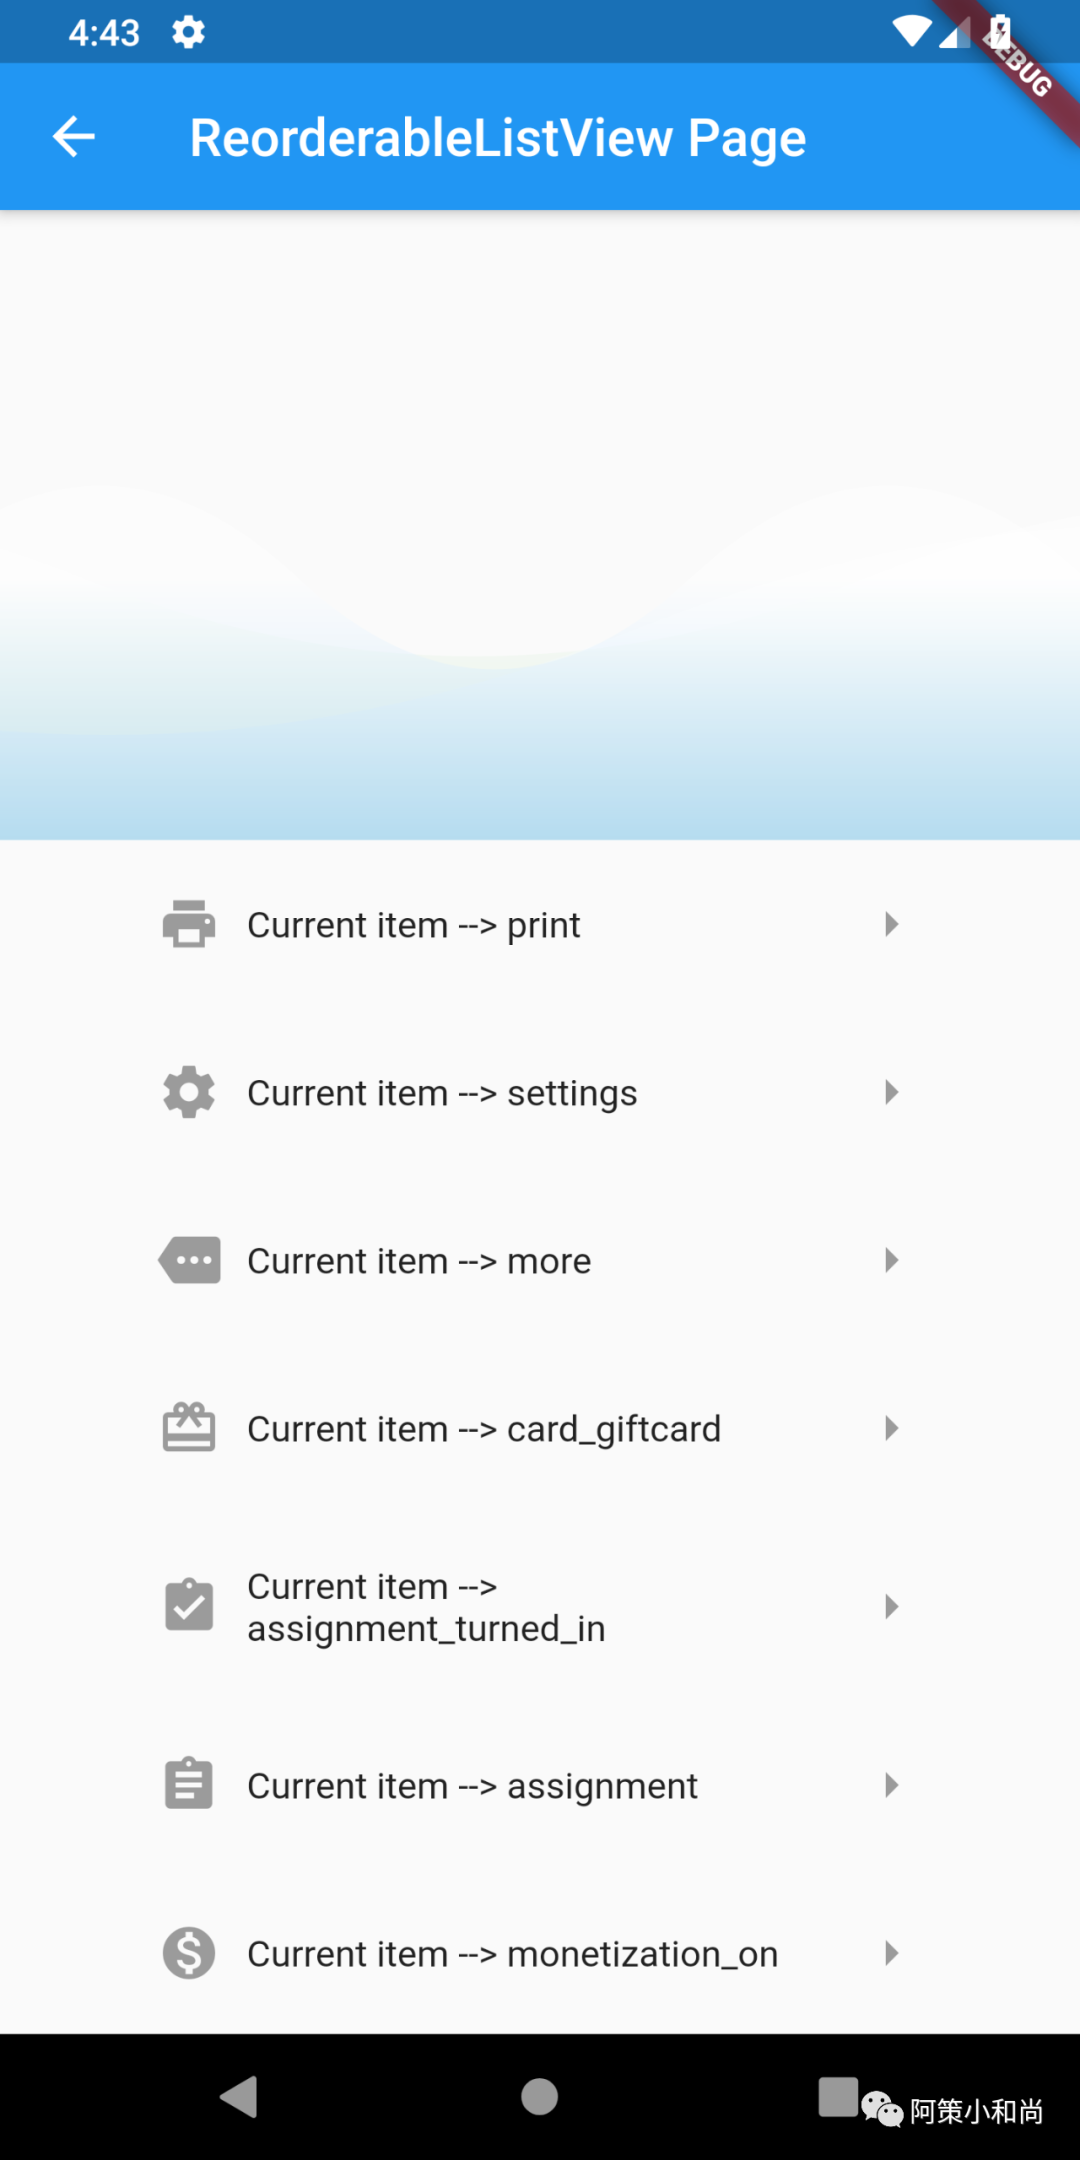
3. header
header 为当前列表标题头部;
_headerWid(horizontal) {
  return horizontal
      ? Container()
      : Container(height: 200.0,
          child: ACEWave(waveWidth, waveHeight, 200.0,
              startOffsetXList: startOffsetX,
              startOffsetYList: startOffsetY,
              durationList: duration,
              waveColorList: colorList));
}
![]()
4. reverse
reverse 为是否反转,即初始时是否是从最后开始;
reverse: true,
![]()
5. padding
padding 为内边距,但仅针对列表 children 部分,对于头部 header 并不起效果;
padding: EdgeInsets.all(40.0),
![]()
注意事项
-
ReorderableListView 没有类似于 ListView.builder 等构造方法,需要把 List 中所有 item 一次性加载完;
-
ReorderableListView 中所有 children item 最外层必须要有唯一的 Key;
-
和尚测试过程中,当拖拽到最后一个时,因为先 remove 掉这个 item 再 insert 添加 item 时,此时 dataList 数量已经减少,newIndex 需要减一处理;
LayoutBuilder 案例尝试 + ReorderableListView 案例尝试
和尚还会继续对日常应用的小知识点进行学习和尝试;对于底层的研究还不够深入,如有错误,请多多指导!
来源:阿策小和尚
![]()