公有仓库和私有仓库:
速度:公有仓库走的公网,速度较慢;私有仓库走的是内网,即局域网;
安全性:公有仓库存放在公共硬盘上;私有仓库存在自己服务器硬盘上。
公有仓:
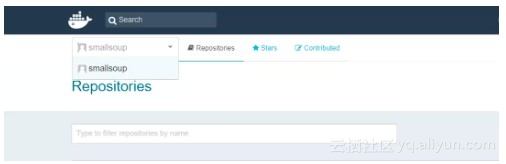
最权威的,但速度比较慢:
https://hub.docker.com/
![ca071e65c3a79eea3e2e50f820953a5e1eb36201]()
首先登陆:
$ docker login -usmallsoup
Password:
WARNING! Your password will be stored unencrypted in /root/.docker/config.json.
Configure a credential helper to remove this warning. See
https://docs.docker.com/engine/reference/commandline/login/#credentials-store

Login Succeeded
打标签,push镜像到hub仓库:
docker tag zookeeper:3.5 smallsoup/zookeeper:3.5
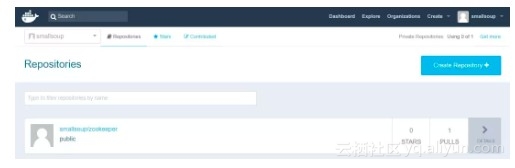
docker push smallsoup/zookeeper:3.5
已push成功,可以在hub上看到:
![0a3e9ee43dc1ad04a1f955b2686415c28fc58b58]()
私有仓:
用docker提供的registry在本地搭建私有仓:
docker pull registry:2.5.2
docker run -d -p 5000:5000 registry:2.5.2
docker tag zookeeper:3.5 localhost:5000/zookeeper:3.5
docker push zookeeper:3.5 localhost:5000/zookeeper:3.5
因没有设置安全性,所以直接可以push上去。
由于是本地仓库,所以pull的速度很快。
[root@localhost micro-service]# docker pull localhost:5000/zookeeper:3.5
3.5: Pulling from zookeeper
Digest: sha256:3474ec46da9db9dc27a431f9645a2df9c91d5b969f591fe0ccd4c40f2bfd1579
Status: Image is up to date for localhost:5000/zookeeper:3.5
但是这个私有仓不能满足我们的需求,生产线上万一该私有仓服务器故障,其他服务器也无法接管。再者,也没有页面可以便于管理。
业内出现的harbor,主要提供 Dcoker Registry 管理UI,可基于角色访问控制, AD/LDAP 集成,日志审核等功能,完全的支持中文,非常适用于生产环境。
harbor私有仓库搭建
github地址:
https://github.com/goharbor/harbor/releases
下载地址:
https://storage.googleapis.com/harbor-releases/harbor-offline-installer-v1.5.3.tgz
这个链接速度太慢,可以在这里下载:
http://harbor.orientsoft.cn/
以下使用的harbor版本是harbor-offline-installer-v1.5.0.tgz
首先解压:
tar -zxf harbor-offline-installer-v1.5.0.tgz
然后运行./install脚本进行安装,如果需要特殊设置,可以先修改harbor.cfg和docker-compose.yml后在进行./install安装操作
[Step 4]: starting Harbor ...
Creating network "harbor_harbor" with the default driver
Creating harbor-log ... done
Creating harbor-adminserver ...
Creating redis              ... error
Creating harbor-db          ...
Creating registry           ...
Creating harbor-adminserver ... done
ERROR: for redis  Cannot create container for service redis: b'Conflict. The container name "/redis" is already in use
Creating harbor-db          ... done
Creating registry           ... done
Creating harbor-ui          ... done
Creating nginx              ... done

ERROR: for redis  Cannot create container for service redis: b'Conflict. The container name "/redis" is already in use by container "c3813d66ccad284d3529227fabf3d5c19cb991237de8d3e72fc470ffd2cbfa99". You have to remove (or rename) that container to be able to reuse that name.'
ERROR: Encountered errors while bringing up the project.
安装过程中报以上错误,是因为服务器上已经有了名为redis的容器名,和harbor将要安装的redis容器名重名,需要rename服务器上已有的redis容器名为micro-service-redis:
$ docker ps -a --filter name=redis
CONTAINER ID        IMAGE                              COMMAND             CREATED             STATUS              PORTS                    NAMES
c3813d66ccad        hub.c.163.com/public/redis:2.8.4   "/run.sh"           2 days ago          Up 42 hours         0.0.0.0:6379->6379/tcp   redis

$ docker rename redis micro-service-redis
$ docker ps -aq --filter name=redis
c3813d66ccad

$ docker ps -a --filter name=redis
CONTAINER ID        IMAGE                              COMMAND             CREATED             STATUS              PORTS                    NAMES
c3813d66ccad        hub.c.163.com/public/redis:2.8.4   "/run.sh"           2 days ago          Up 42 hours         0.0.0.0:6379->6379/tcp   micro-service-redis
然后重新执行./install
[Step 4]: starting Harbor ...
Creating network "harbor_harbor" with the default driver
Creating harbor-log ... done
Creating redis              ... done
Creating harbor-db          ... done
Creating harbor-adminserver ... done
Creating registry           ... done
Creating harbor-ui          ... done
Creating harbor-jobservice  ...
Creating nginx              ...

ERROR: for harbor-jobservice  UnixHTTPConnectionPool(host='localhost', port=None): Read timed out. (read timeout=60)

ERROR: for nginx  UnixHTTPConnectionPool(host='localhost', port=None): Read timed out. (read timeout=60)

ERROR: for jobservice  UnixHTTPConnectionPool(host='localhost', port=None): Read timed out. (read timeout=60)

ERROR: for proxy  UnixHTTPConnectionPool(host='localhost', port=None): Read timed out. (read timeout=60)
ERROR: An HTTP request took too long to complete. Retry with --verbose to obtain debug information.
If you encounter this issue regularly because of slow network conditions, consider setting COMPOSE_HTTP_TIMEOUT to a higher value (current value: 60).
又报以上的错,可能是由于网络问题,导致失败,重新./install试试:
[Step 4]: starting Harbor ...
Creating network "harbor_harbor" with the default driver
Creating harbor-log ... done
Creating redis              ... done
Creating harbor-db          ... done
Creating harbor-adminserver ... done
Creating registry           ... done
Creating harbor-ui          ... done
Creating nginx              ... done
Creating harbor-jobservice  ... done

 ----Harbor has been installed and started successfully.----

Now you should be able to visit the admin portal at http://hub.smallsoup.com.
For more details, please visit https://github.com/vmware/harbor .
成功了。
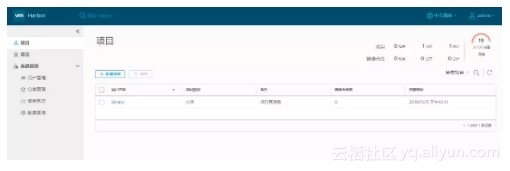
可以访问harbor部署服务器IP:docker-compose.yml中80映射到宿主机上的端口;
用户名是admin,密码是harbor.cfg中harbor_admin_password的值访问管理页面:
![98773cfbf569bbd695b9cae3af68db7f6baa97fa]()
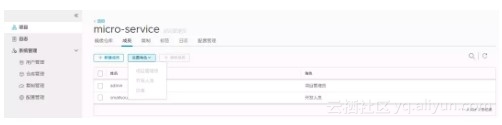
可以创建一个私有仓库micro-service:
![dc404abd30d1829ed3158485cc73790efb334089]()
在系统管理->用户管理中添加用户,然后点开上一步创建的项目-->>成员-->>新建成员,并设置权限。
项目管理员:有pull和push以及项目其他管理权限;
开发人员:有pull和push权限;
访客:只有pull权限。
![fb7fc0d062a6ccfc00f55b367fc21359e1baecf7]()
将该项目的各个微服务image push到harbor的micro-service项目里:
$ docker images |grep -v "vmware"
REPOSITORY                      TAG                 IMAGE ID            CREATED             SIZE
api-gateway-zuul                latest              8a814cf9bb65        23 hours ago        476MB
course-service                  latest              673d4501353e        23 hours ago        462MB
course-edge-service             latest              854d5d8bddaa        23 hours ago        484MB
message-thrift-python-service   latest              4317a76b387e        24 hours ago        926MB
user-edge-service               latest              ff07d54a02ba        25 hours ago        469MB
user-thrift-service             latest              02dd6fd0f239        26 hours ago        456MB
python-base                     latest              81ad8926a9d9        26 hours ago        926MB
zookeeper                       3.5                 c41e1dcd86e4        2 weeks ago         128MB
smallsoup/zookeeper             3.5                 c41e1dcd86e4        2 weeks ago         128MB
localhost:5000/zookeeper        3.5                 c41e1dcd86e4        2 weeks ago         128MB
elasticsearch                   latest              5acf0e8da90b        2 weeks ago         486MB
registry                        2.5.2               96ca477b7e56        3 weeks ago         37.8MB
registry                        2                   2e2f252f3c88        3 weeks ago         33.3MB
python                          3.6                 4f13b7f2138e        4 weeks ago         918MB
openjdk                         8-jre               66bf39162ea7        4 weeks ago         443MB
mysql                           latest              6a834f03bd02        4 weeks ago         484MB
hub.c.163.com/public/redis      2.8.4               4888527e1254        2 years ago         190MB
打标签:
docker tag openjdk:8-jre 192.168.1.103:80/micro-service/openjdk:8-jre
查看镜像:
$ docker images |grep -v "vmware" | grep open
openjdk                                    7-jre               e4c851ec3393        4 weeks ago         329MB
192.168.1.103:80/micro-service/openjdk   8-jre               66bf39162ea7        4 weeks ago         443MB
openjdk                                    8-jre               66bf39162ea7        4 weeks ago         443MB
push镜像:
$ docker push 192.168.1.103:80/micro-service/openjdk:8-jre
The push refers to repository [192.168.1.103:80/micro-service/openjdk]
Get https://192.168.1.103:80/v2/: http: server gave HTTP response to HTTPS client
push报错。由于默认采用的是http协议,即harbor.cfg中的ui_url_protocol值。https的比较麻烦,需要生成证书等步骤,可以参考:
为Harbor设置Https
http://gapme.cn/2017/10/25/harbor-ui-https/
这里暂且用http的方式。
以上报错解决办法:
在”/etc/docker/“目录下,创建”daemon.json“文件。在文件中写入:
{
  "insecure-registries": [
        "hub.smallsoup.com:80",
        "192.168.1.103:80"
  ]
}
重启docker:
systemctl restart docker
docker重启后,./install或者docker-compose down;docker-compose up -d重启harbor即可。
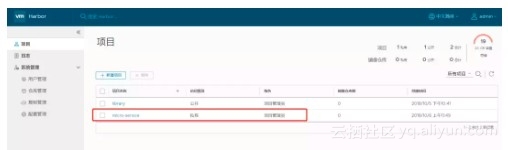
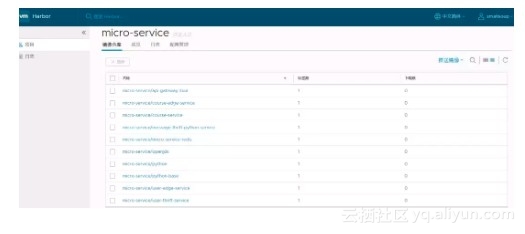
将基础镜像和各个服务镜像push到库上:
![dc1a3aaeef66cf7fc0bf3eefe85e1e7fc663071f]()
题外话:
在安装过程中,将80端口映射到宿主机的8081端口,push的时候遇到很多问题(报错80端口连接拒绝,大概就是这个issue
https://github.com/goharbor/harbor/issues/192),查找了很多资料,还是放弃了,最后映射到宿主机80端口,push一切ok。
由于用域名的方式push得设置hosts以及端口转发,比较麻烦,以上采用了IP:PORT方式:
删除用域名打的标签:
docker rmi -f hub.smallsoup.com:80/micro-service/openjdk:8-jre
原文发布时间为:2018-10-06
本文作者: 小碗汤
本文来自云栖社区合作伙伴“我的小碗汤”,了解相关信息可以关注“我的小碗汤"