第一部份
创建部署工作目录
$ mkdir ~/pittadev && cd ~/pittadev
$ cat >aliyuncs_env <<-EOF
> export ECS_ACCESS_KEY_ID=<your_access_key_id >
> export ECS_ACCESS_KEY_SECRET=<your_access_key_secret >
> export ECS_INSTANCE_TYPE=ecs.s1.small
> export ECS_REGION=cn-hangzhou
> export ECS_SSH_PASSWORD=<your_ssh_password >
> export MACHINE_DOCKER_INSTALL_URL=http://acs-public-mirror.oss-cn-hangzhou.aliyuncs.com/docker-engine/internet
> EOF
$ eval `cat aliyuncs_env`
创建 Docker Machine 实例
创建前请确认 ecs driver 存在 /usr/local/bin/docker-machine-driver-aliyunecs , 并且当前 PATH (echo $PATH) 环境变量包容/usr/local/bin
$ docker-machine create --driver aliyunecs shellpays-inst1
Running pre-create checks...
Creating machine...
(shellpays-inst1) shellpays-inst1 | Creating key pair for instance ...
(shellpays-inst1) shellpays-inst1 | Configuring security groups instance ...
(shellpays-inst1) shellpays-inst1 | Creating instance with image ubuntu1404_64_20G_aliaegis_20150325.vhd ...
(shellpays-inst1) shellpays-inst1 | Create instance i-23wmxqp9t successfully
...
(shellpays-inst1) shellpays-inst1 | Uploading SSH keypair to 120.55.85.38:22 ...
(shellpays-inst1) shellpays-inst1 | Created instance i-23wmxqp9t successfully with public IP address
...
Docker is up and running!
![ecs_launching_illustration ecs_launching_illustration]()
查看 Docker Machine 实例
$ docker-machine ls
NAME              ACTIVE   DRIVER       STATE     URL                        SWARM   DOCKER    ERRORS
default           -        virtualbox   Stopped                                      Unknown
shellpays-inst1   -        aliyunecs    Running   tcp://120.55.85.38:2376            v1.10.3
激活控制并查看ACTIVE
eval `docker-machine env shellpays-inst1`
docker-machine ls
NAME              ACTIVE   DRIVER       STATE     URL                        SWARM   DOCKER    ERRORS
default           -        virtualbox   Stopped                                      Unknown
shellpays-inst1   *        aliyunecs    Running   tcp://120.55.85.38:2376            v1.10.3
准备编排文件
version: '2'

services:
  mysqld:
    image: registry.aliyuncs.com/aves/pitta.mysqld
    volumes:
      - lv_mysql:/var/lib/mysql
    expose:
      - "3306"
  redisd:
    image: redis
    command: redis-server --appendonly yes
    volumes:
      - lv_redis:/data
    expose:
      - "6379"
  backend:
    image: registry.aliyuncs.com/aves/pitta.backend.mysql:latest
    volumes:
      - lv_filestore:/var/aves
      - lv_mvn:/var/mvn
    links:
      - mysqld:aves.dc.mysql
      - redisd:aves.dc.redis
    environment:
      - MYSQL_HOST=aves.dc.mysql
      - MYSQL_USER=root
      - MYSQL_PASSWORD=pass4pass
      - MYSQL_DB_NAME=pitta
      - PITTA_WXPAY_SPBIP=127.0.0.1
      - PITTA_CALLBACK_HOST=127.0.0.1
      - PITTA_ABAPAY_SRVURL=http://localhost/sei/v10/svc
    expose:
      - "8181"
      - "8101"
    ports:
      - "9669:9669"
  frontend:
    image: registry.aliyuncs.com/aves/pitta.frontend:latest
    volumes:
      - lv_filestore:/var/aves
    links:
      - backend:dc.pitta.backend
    environment:
      - PITTA_SERVER_NAME=127.0.0.1
    ports:
      - "443:443"
      - "80:80"
volumes:
  lv_filestore:
    external: false
  lv_mysql:
    external: false
  lv_redis:
    external: false
  lv_mvn:
    external: false
将以上内容存入~/pittadev/docker-compose.yml文件中
启动容器
$ docker-compose up -d
Creating network "pittadev_default" with the default driver
Pulling redisd (redis:latest)...
latest: Pulling from library/redis
fdd5d7827f33: Downloading [==>                                                ] 2.621 MB/51.37 MB
...
Creating pittadev_mysqld_1
Pulling backend (registry.aliyuncs.com/aves/pitta.backend.mysql:latest)...
...
Creating pittadev_backend_1
...
Creating pittadev_frontend_1
查看容器运行
$ docker-compose ps
       Name                      Command               State                     Ports
---------------------------------------------------------------------------------------------------------
pittadev_backend_1    /bin/sh -c exec karaf server     Up      8101/tcp, 8181/tcp, 0.0.0.0:9669->9669/tcp
pittadev_frontend_1   /run.sh                          Up      0.0.0.0:443->443/tcp, 0.0.0.0:80->80/tcp
pittadev_mysqld_1     /entrypoint.sh mysqld            Up      3306/tcp
pittadev_redisd_1     /entrypoint.sh redis-serve ...   Up      6379/tcp
初始化数据库 (有待自动化)
$ docker exec pittadev_mysqld_1 /pitta_import.sh
=>Waiting for confirmation of MySQL service startup
=>Executing SQL file
安装业务处理 bundles (有待自动化)
$ docker exec pittadev_backend_1 client install-pitta 1.4.0
Adding feature url mvn:org.aves.pitta/pittase/1.4.0/xml/features
查看业务处理 bundles 安装 (有待自动化)
$ docker exec pittadev_backend_1 client list | grep -i pitta
218 | Active |  80 | 0.0.0              | bundle_pitta_mysql.xml
222 | Active |  80 | 1.4.0              | Pitta :: Barcode Pay :: Alipay
223 | Active |  80 | 1.4.0              | Pitta :: API
224 | Active |  80 | 1.4.0              | Pitta :: Authentication
225 | Active |  80 | 1.4.0              | Pitta :: Barcode Pay :: BestPay
226 | Active |  80 | 1.4.0              | Pitta :: Broker
227 | Active |  80 | 1.4.0              | Pitta :: Console :: Tools
228 | Active |  80 | 1.4.0              | Pitta :: Persistence Repository
229 | Active |  80 | 1.4.0              | Pitta :: Portal
230 | Active |  80 | 1.4.0              | Pitta :: Suning Pay
231 | Active |  80 | 1.4.0              | Pitta :: Barcode Pay :: UpCard
232 | Active |  80 | 1.4.0              | Pitta :: Retail Card :: UpCard
233 | Active |  80 | 1.4.0              | Pitta :: SVC :: Abacus V10
234 | Active |  80 | 1.4.0              | Pitta :: Barcode Pay :: Weixin
也可登录 console, 操作命令请参考 Karaf's command
docker exec -it pittadev_backend_1 client
查看 IP
$ docker-machine ip shellpays-inst1
120.55.85.38
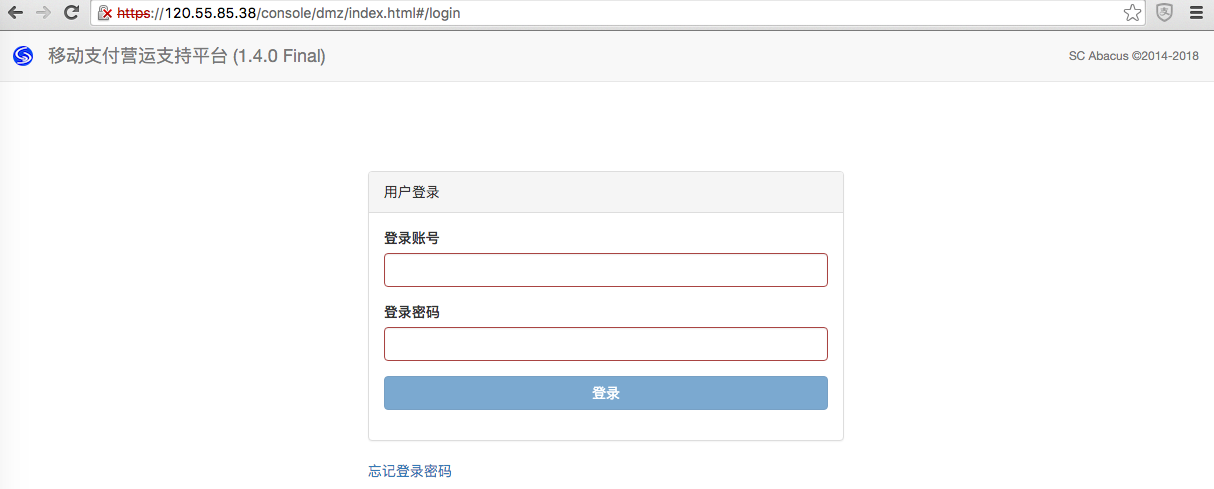
进入 Web 控制台
https://120.55.85.38/console/
![pitta_web_illustration_01 pitta_web_illustration_01]()
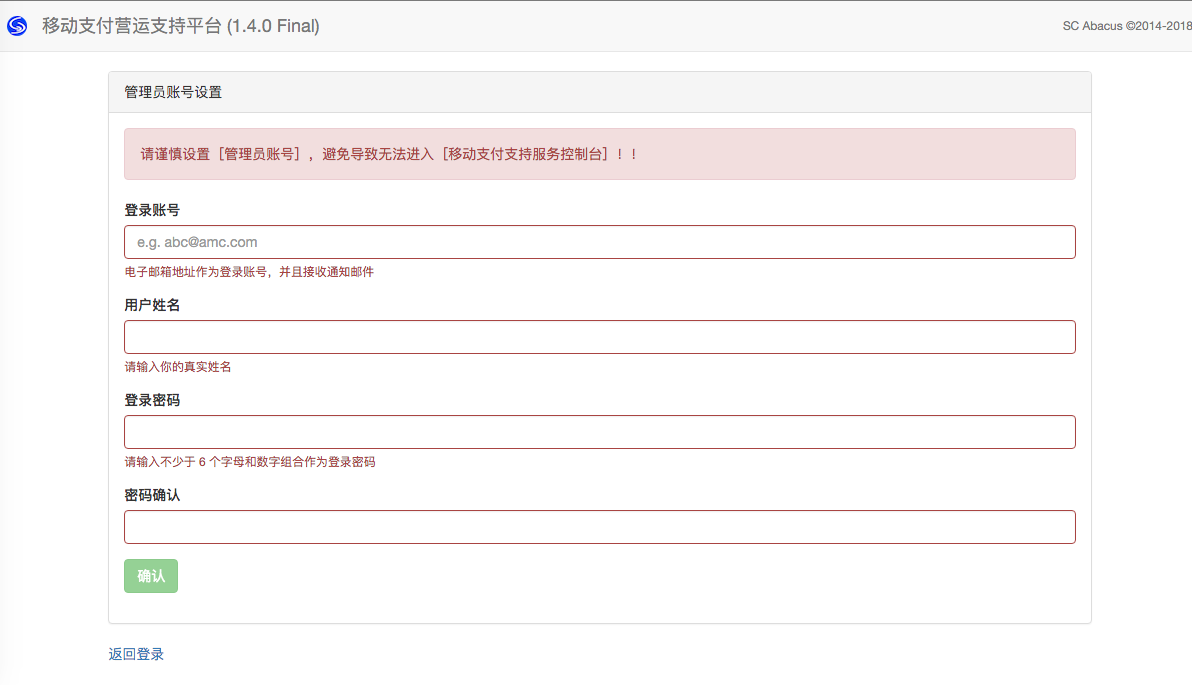
设置管理员
https://120.55.85.38/console/dmz/index.html#/sasetup
![pitta_web_illustration_02 pitta_web_illustration_02]()
(Options)
查看 Docker Network
$ docker network ls
NETWORK ID          NAME                DRIVER
22d38ba8d8a4        host                host
e5f99855dbd2        pittadev_default    bridge
6f2eeb53654e        bridge              bridge
3335901abb8b        none                null

$ docker network inspect pittadev_default
[
    {
        "Name": "pittadev_default",
        "Id": "e5f99855dbd2b51a0523a4e673a5b126fff4b3725352d038dd481e8c2394a33a",
        "Scope": "local",
        "Driver": "bridge",
        "IPAM": {
            "Driver": "default",
            "Options": null,
            "Config": [
                {
                    "Subnet": "172.18.0.0/16",
                    "Gateway": "172.18.0.1/16"
                }
            ]
        },
        "Containers": {
            "0058ff9512a5735dd980185819c878072f7d7de5b0535a56a629b533f8337332": {
                "Name": "pittadev_frontend_1",
                "EndpointID": "cd12fd0111ca2928ab52b70d5bc294998c820300eff302c4aef530284c158078",
                "MacAddress": "02:42:ac:12:00:05",
                "IPv4Address": "172.18.0.5/16",
                "IPv6Address": ""
            },
            "3efa5c2921c9cb61b21a47ed9b1a03639f450736ffa6b4364848e7362151dc1b": {
                "Name": "pittadev_redisd_1",
                "EndpointID": "e0fcd561e9a180b7f48da5b3a90c2af6dc86bf168b1ebb603fe55274b0686d8f",
                "MacAddress": "02:42:ac:12:00:02",
                "IPv4Address": "172.18.0.2/16",
                "IPv6Address": ""
            },
            "a0b4f253f4585d034e8044c07bf7001383be1c713df689653d0487c3fd5f5374": {
                "Name": "pittadev_mysqld_1",
                "EndpointID": "5b6417f405628706a0a387a271b7974f0e81083f990ecc24503119907db4f00e",
                "MacAddress": "02:42:ac:12:00:03",
                "IPv4Address": "172.18.0.3/16",
                "IPv6Address": ""
            },
            "fba40a562f2e1e8b40726369a6160f4e2d02fe0e887f15c1fa0bff8c706279de": {
                "Name": "pittadev_backend_1",
                "EndpointID": "deda3d045b605758f9e8cb4d116f52b598fae6b022976ec4590a53b49cfc6e86",
                "MacAddress": "02:42:ac:12:00:04",
                "IPv4Address": "172.18.0.4/16",
                "IPv6Address": ""
            }
        },
        "Options": {}
    }
]
查看 Docker Volume
$ docker volume ls
DRIVER              VOLUME NAME
local               pittadev_lv_mysql
local               pittadev_lv_redis
local               pittadev_lv_mvn
local               pittadev_lv_filestore

$ docker volume inspect pittadev_lv_mysql # 或其它卷名
阿里云容器服务体验: 部署 ShellPays 条码支付整合服务平台 -- (三)容器编排分解


